MailChimp is one of the premier email marketing platforms that offers unmatched control and flexibility, along with exceptionally robust automation and reporting toolsets.
The automation feature of MailChimp provides a simple, yet astronomically powerful system for sending welcome and follow up emails to customers after they complete a purchase on your website.
Before diving into the specifics of MailChimp’s automation suite, let’s look at a few example use cases where you may want to utilize automatic emails after purchase:
- Special care or usage instructions for the purchased product
- Setup documentation and FAQs for a product
- Instructions for activating a license key
- Coupon codes or special offers for follow up purchases
- Just to say “Hello!”
These are all good examples of automatic emails that could benefit you and your store. The good news is that setting up these kinds of emails takes only a few minutes and is really, really simple.
First, if you don’t have one, sign up for a free MailChimp account. You can subscribe up to 2,000 email addresses before every paying a dime, letting you discover if MailChimp is the right platform for you.
Once you have a MailChimp account set up, you will need to obtain a copy of our extension that lets you connect your Easy Digital Downloads store to MailChimp. If you need assistance with setting up our MailChimp extension, see our documentation portal.
Anytime a customer makes a purchase and is subscribed to an email list, or subscribes during purchase, Easy Digital Downloads will send the purchase data to MailChimp through their eCommerce360 API. This will allow you to send unique emails based on the item or items purchased.
Let’s now walk through the basic process for creating an automation routine that sends a welcome email to all customers that purchase a specific product. To do this, first click on the Automation link in the top menu:
From here, click on the Create Automation Workflow button:
You will now be prompted to select the email list you want to use. Pick a list and then you will be shown a screen with a number of options. From this screen click on Specific Product Purchase:
At this point you will be asked to configure the workflow. This entails setting the workflow name, a from name and email address, and a few other options. Configure this to your liking and then click Next in the bottom right corner.
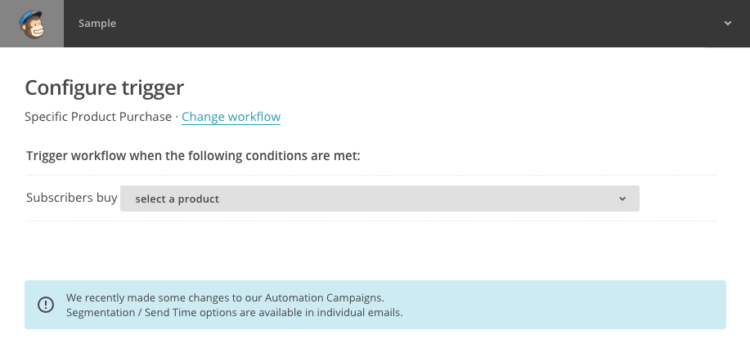
Now you are asked to choose the product that needs to be purchased to send this email. Choose your product from the drop down menu and then click Next step: Emails.
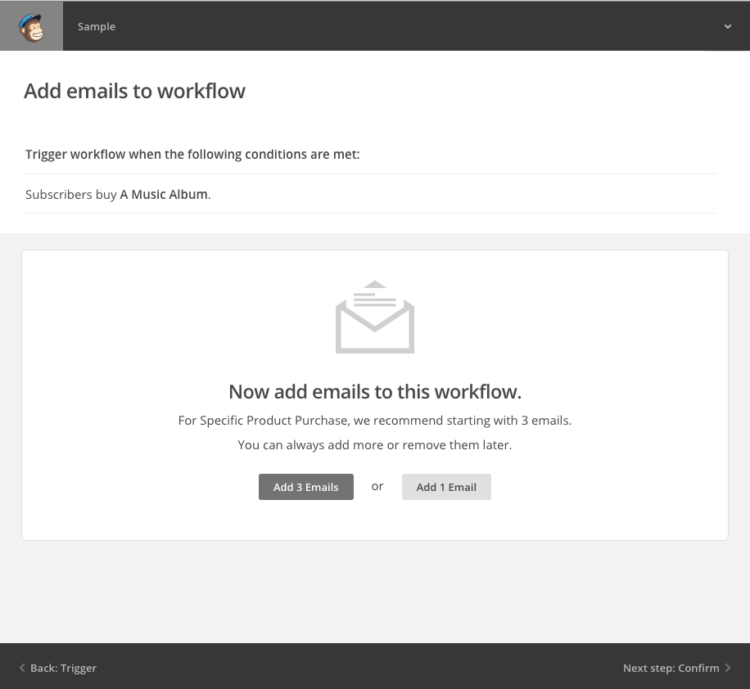
You can now create one or more emails that you want to send to customers after they purchase your product.
For this example, we will just create a single email but you can create any number you wish. You may, for example, want to create a series of emails and set it up so that the customer receives one email immediately after making the purchase, a second email a week later, and then a third email at one month.
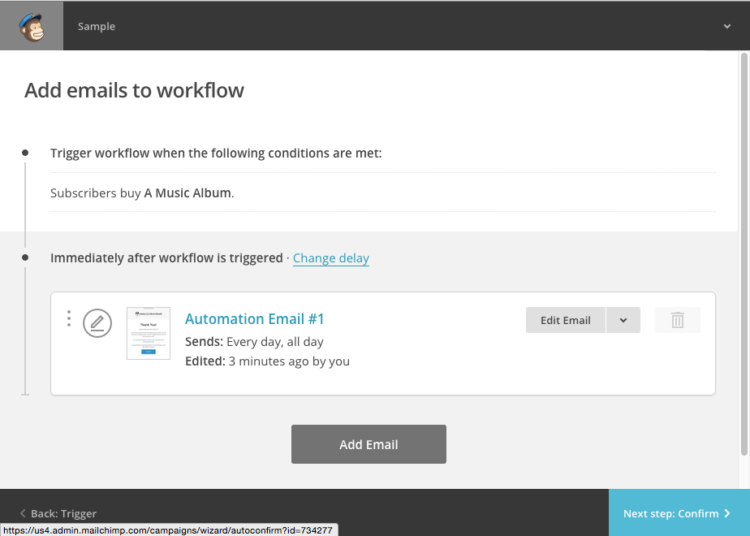
The screenshot below shows an email that is delivered immediately after the purchase is made.
Go ahead and click on the Design Email button to configure and build the email.
At this point, you will be placed into MailChimp’s standard campaign email editor. You will first be asked to name your email, give it a subject, and set the from name and email. Once you have done that, you can continue to the next step where you get to select the template for your email.
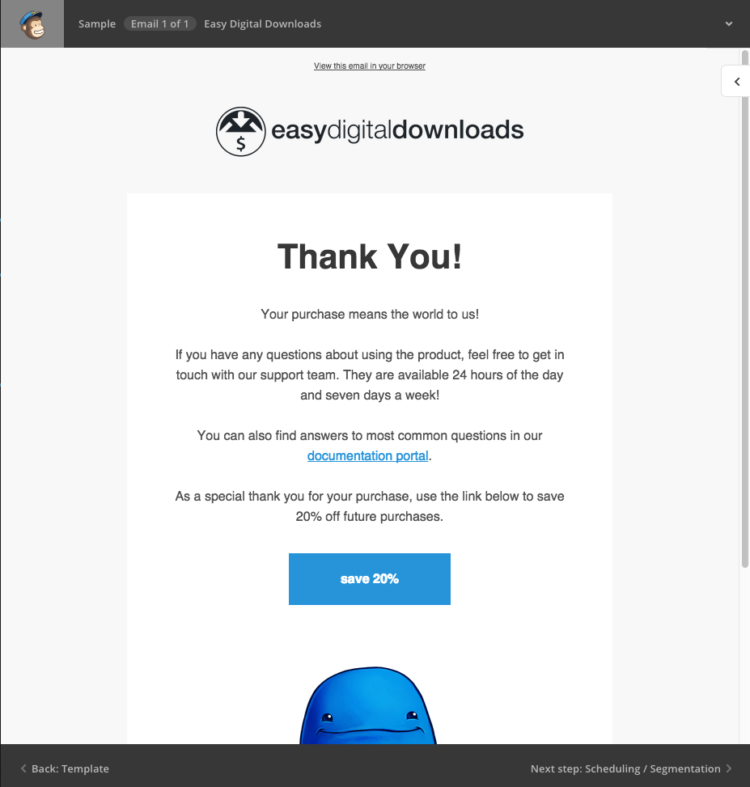
Here is an example of a nice follow up email that helps to reassure customers they can contact you if they have questions. It also includes a link to a documentation site in case they want to look up frequently asked questions. And at the bottom, a 20% discount is provided for any future purchases to help incentivize the customer to returning to your site.
Once you have finished designing your email, click on to the next section for Scheduling / Segmentation.
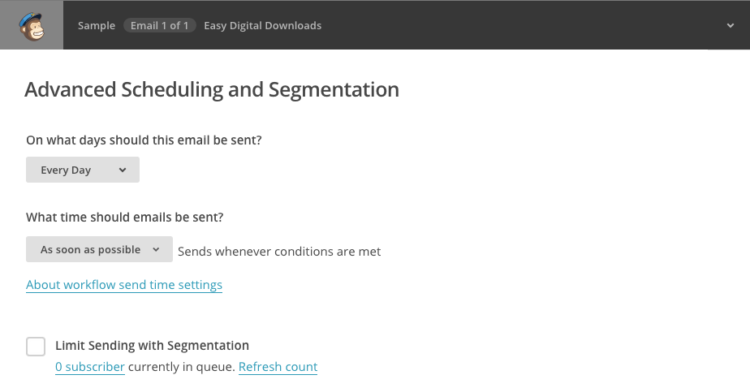
On this screen, you will be able to configure the days of the week you want your emails to be delivered. You can also control the time of day that the emails are delivered, and even restrict sending to specific segments in your MailChimp list.
You are now done with your first email! If you want, you can now return to the workflow overview and setup additional emails.
If you’re ready, go ahead and click Confirm and then you can start the workflow!
After your workflow has been started and customers have made purchases on your website, you will be able to visit the Reports section of Automation to see how well your emails are performing.
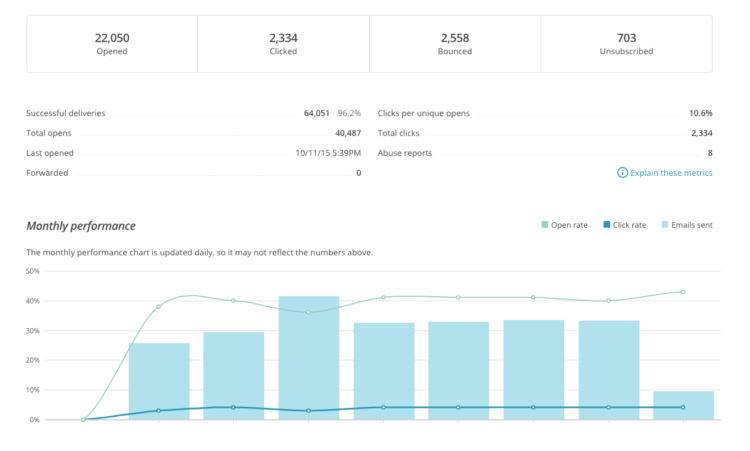
The reports section shows detailed information about your emails, including how many emails are being sent, how many are opened, how many customers have unsubscribed, and more.
You will even be able to drill down into the report to view data about specific emails, which is great if your workflow includes multiple emails of a period of a few weeks or months.
One of the most important details in the reports section is the eCommerce360 tab. This tab will show you how much additional revenue the automatic emails in your workflow have generated:
MailChimp’s automation tools are exceptionally powerful and a huge asset to any business owner. If you’re not sending automated welcome and follow up emails, my only question to you is: why not?
