
Mailchimp can be an extremely powerful tool for communicating with and retaining your customers. The EDD Mailchimp email marketing extension allows you to subscribe customers to specific lists for later communication.
If installing on an existing EDD store, the Mailchimp extension will not add existing customers to Mailchimp. To do so, you will need to export customers from EDD and import to Mailchimp. These email addresses should be imported as Transactional users since they have not opted in as a subscriber.
Configuring the Mailchimp Extension
To configure the Mailchimp extension you will need to configure its settings.
- Log into the WordPress Admin area
- Navigate to Downloads → Settings → Marketing→ Mailchimp
- Fill out the appropriate fields
- The Mailchimp API Key must be acquired from Mailchimp.com
- Log into the Mailchimp account you want to connect to this extension
- Navigate to Account | Extras | API Keys & Authorized Apps
- Click the “Add A Key” button
- (Optional) Edit the “Label” to something relevant such as “EDD Store”
- Copy the API Key.
- Return to the Mailchimp Settings in your WordPress dashboard and paste/enter the Mailchimp API key into the Mailchimp API Key field.
- Click the “Save Changes” button at the bottom of the page. This will allow the Mailchimp extension to retrieve the mailing lists (Audiences) from Mailchimp.

- Choose whether or not to “Show Signup On Checkout.” When selected, this option outputs a checkbox on the checkout page, giving the customer the option to sign up to the mailing list selected in step 13 (below).
- Add a short, appropriate description of the checkbox in the “Checkout Label” field. If left blank, the buyer will see “Signup for the newsletter”.
- Select “Double Opt-In” if you would like customers to receive a verification email before being subscribed to your mailing list.
- Select “Replace Interests” if you’d like your customer’s interest groups to be replaced in Mailchimp when they make a purchase. Interest Groups in Mailchimp are one way you can choose to target emails to specific customers. For example, using interest groups, you could send emails only to customers who are interested in “Product A”. The way this extension works is that if a customer purchases “Product A” from your store, their interest groups will include “Product A” alongside any other products they have purchased. But if you select the “Replace Interests” option, any other products they’ve purchased will be removed from their interest groups, as opposed to simply adding “Product A” alongside those other interests.
- If you want to send test (as well as non-test) purchase information to Mailchimp, check the option called “Record eCommerce Data in Test Mode”. Note that by default, purchase information is sent to Mailchimp so that you can send emails to specific customers. For example, you could send emails to “First-time purchasers” only within your Mailchimp dashboard.
- Connect a list (Audience)
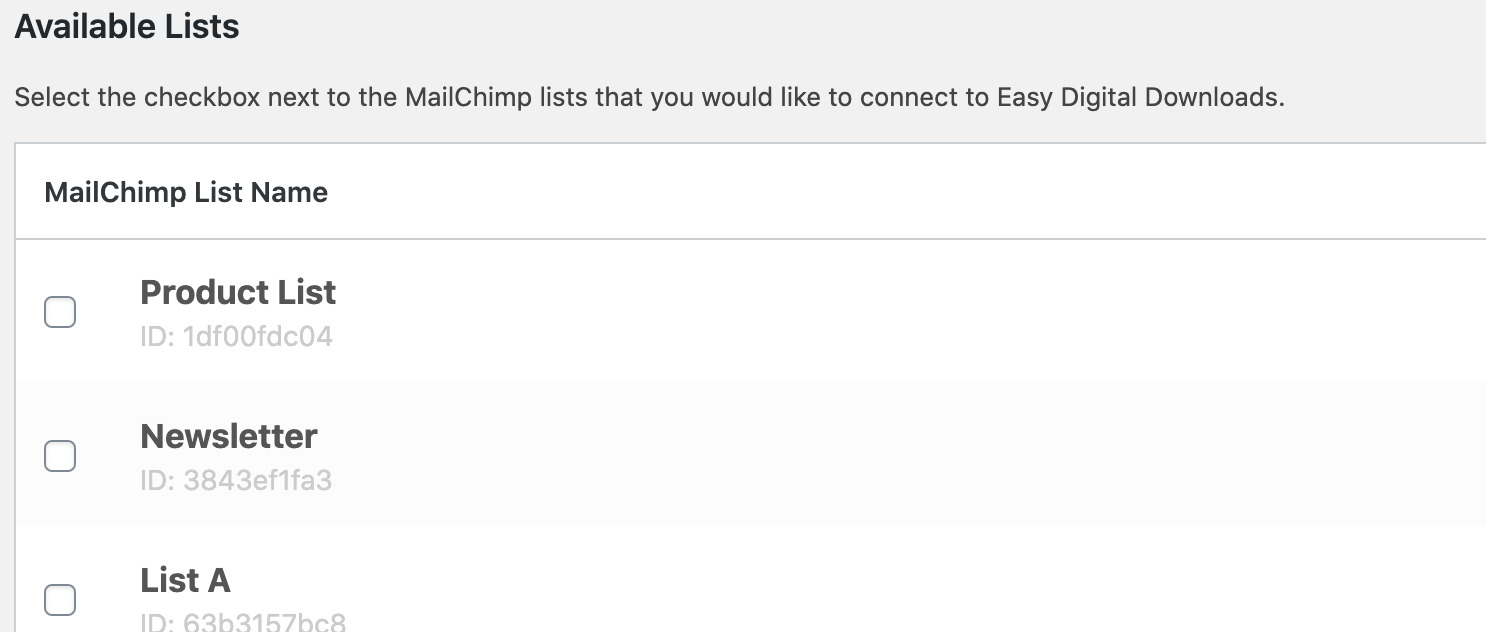
- Under “Available Lists” choose which lists you’d like to connect. Only lists that have been connected can be used with Easy Digital Downloads. Click the checkbox next to each list you’d like to connect.
- Click “Save Changes” at the bottom of the screen. This will connect those lists from Mailchimp to your store.
- When the page reloads, you’ll see the lists you chose to connect listed under “Connected Lists”.
- Note: if you do not see any lists here, it’s possible that you haven’t created a list in Mailchimp yet. Create a list / audience there first.

- Choose a default list. Under “Connected Lists” the first column shows which list is the default list. This list is the one that will be used at checkout when customers choose to join the list.
Best Practices
The Mailchimp extension contains a number of options. Below are the recommended best practices for most stores. The EDD Mailchimp extension allows you to offer a Newsletter signup upon checkout as well as add customers to a List and/or Interest Group based on what product is purchased. Although you can connect multiple lists, for best practices it’s recommended that you only connect one list to the Mailchimp extension. Mailchimp counts the same email address added to two separate lists as two email addresses so it’s in your best interest to use a single list (in most cases).
Default List / Newsletter Signup
The default list selected in the Mailchimp settings has two purposes.
- It is the list that stores all transactional data from the purchase which is used for Mailchimp’s ecommence features (ie Sending Receipts via Mailchimp) and segmenting lists.
- The default list is the list that is used for the Newsletter signup of customer’s opt-in upon checkout. A customer will not be added to this list as a Subscriber unless they opt-in upon checkout.
Segmenting Customers
Most stores are interested in segmenting customers based on purchases. Since the transactional data is sent to Mailchimp, it’s recommended that you segment your lists from Mailchimp and not EDD’s Per-Product list settings. See https://mailchimp.com/help/segment-a-list-by-purchase-activity/ for details. This ensures a customer is never added to your list without opting in.
Automatically Adding Customers based on purchase
In some cases, stores may want to add customers to a list without requiring the customer opt-in. Please be aware that this can be illegal and/or violate GDPR, so use with caution. To avoid this, segment via Mailchimp (see above). If you require this ability, this can be done by using the Per-Product mailing list settings. These settings allow you to add customers to lists and/or Interest Groups based on the purchase of a product. It would be recommended that you use a separate list for Per-Product subscribers, separate from the Default list for your newsletter, otherwise, customers will get subscribed to your Newsletter whether they opt-in or not. See Per-product Mailing List Settings below for details on how this works.
Per-product Mailing List Settings
Note regarding opt-in:
Per-product lists do not support opt-in. This means the customer will be subscribed whether they opt-in to the default list or not. Additionally, if you use the same list for your newsletter and per product list, a customer will be Subscribed even when not opting in. If this goes against your country’s GDPR practices or this is not the behavior you want, it’s recommended you segment lists via Mailchimp and not EDD or use a separate list for your download selected lists.
You can also choose one or more Mailchimp mailing lists you’d like a customer to be subscribed to when they purchase a specific product. Do this by going to the product’s edit screen and selecting the list(s) you wish customers to be added to in the “Mailchimp” box. In this section, you can also select whether to subscribe customers to specific groups within the list. If a list has one or more groups, the group(s) will be shown as an additional checkbox that is indented below the main list name, like this:
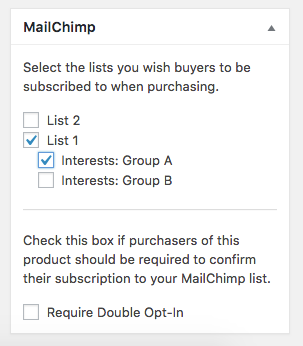
The per-product mailing list settings are separate from the default list setting you configured previously. The per-product mailing list settings require that the customer opt into the mailing lists during checkout by checking the signup box that you configured previously in order to add customer’s to the selected list/group.
Note that the groups under the lists come from the groups you create for the list in your Mailchimp account. Learn more in Mailchimp’s documentation on list groups. Once you create groups, click Save Changes in the EDD Mailchimp settings to make new group data accessible to EDD.
Add / Removing Groups
If you add or remove groups via MailChimp, you can update the groups that appear in the per-products settings by clicking Sync Groups for the list you updated in your Mailchimp settings: Downloads → Settings → Marketing→ Mailchimp
Syncing Ecommerce Data
If you install this extension when you already have customers, and you’d like to get past data into your Mailchimp lists, you can use the Sync Ecommerce Data option. Go to Downloads → Settings → Marketing→ Mailchimp → Connected Lists and find the list you wish to sync.
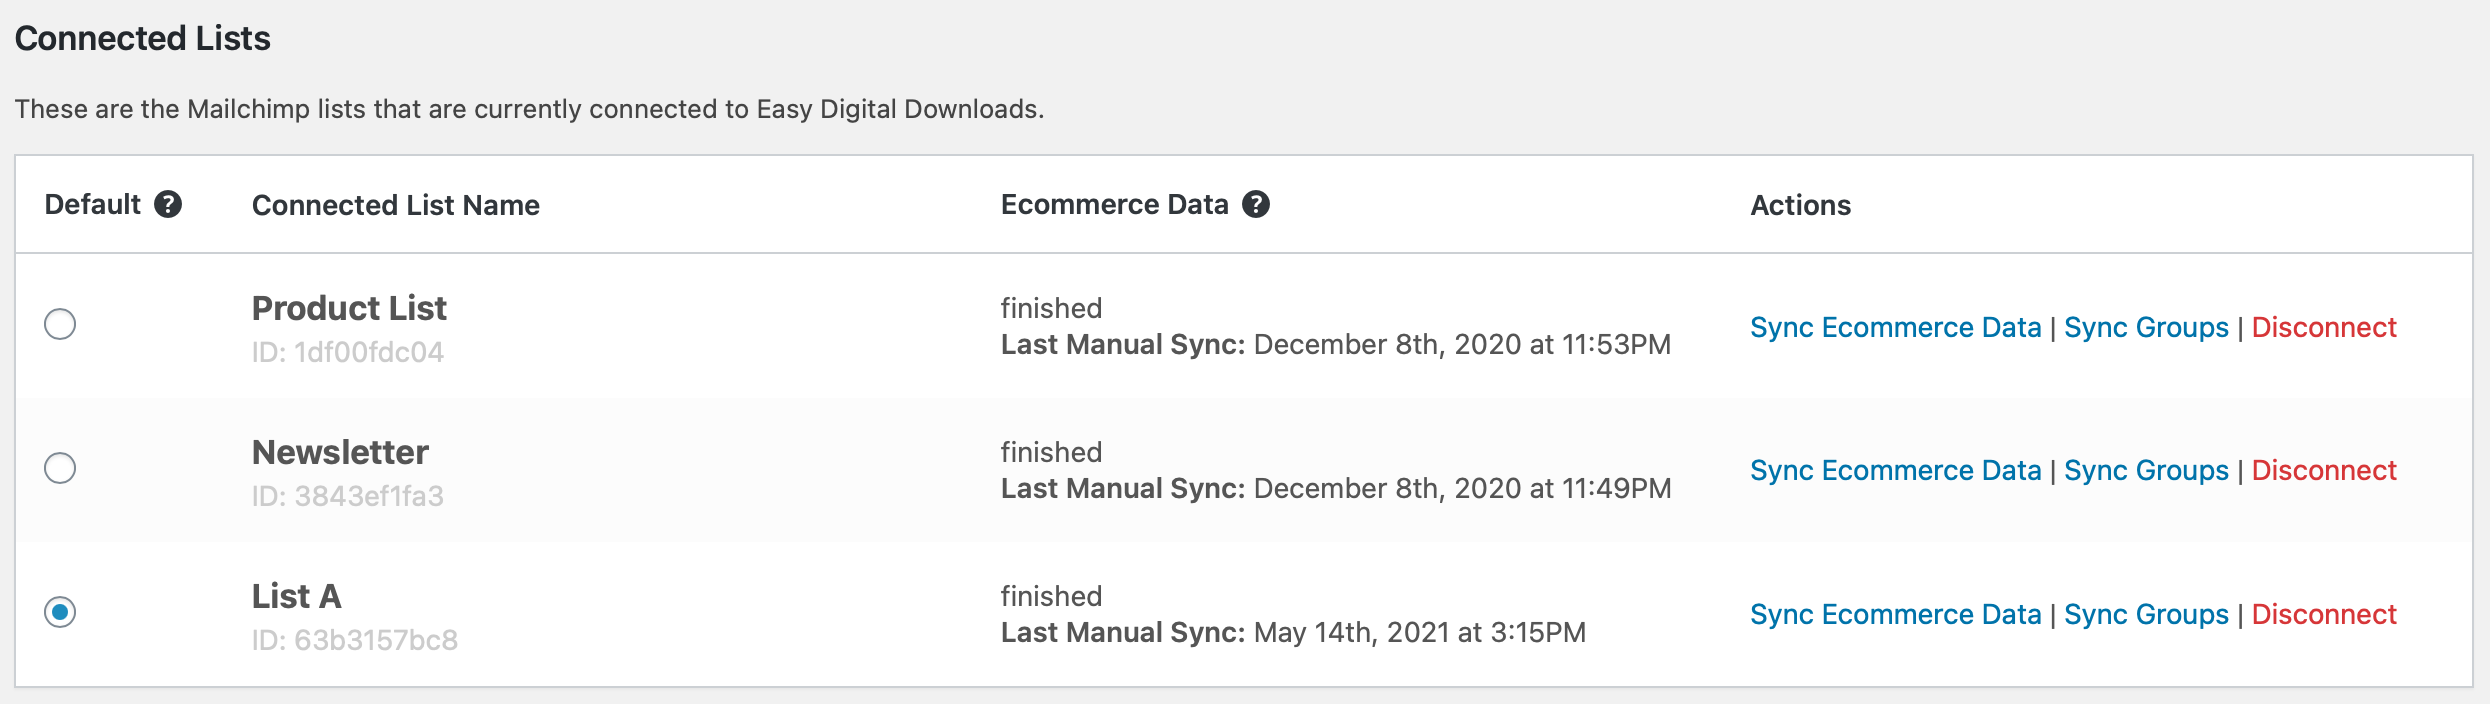
Clicking “Sync Ecommerce Data” will sync all of your store’s purchase data into your Mailchimp account so that you can send targeted campaigns out to specific types of customers in your shop – right from within your Mailchimp Dashboard. To learn more about Mailchimp’s targeting options based on sales data, see this document.
Note on Syncing Ecommerce Data
This does not import customers to Mailchimp from your EDD store; it only adds sales data to customer email addresses that already exist. For example, if User A is already on your list in Mailchimp and then makes a purchase from your store, Mailchimp will learn that User A made a purchase. This way you can target emails to “First-time purchasers” for example.
Syncing Groups Data
Why can’t I see my new Mailchimp lists in WordPress?
The extension only retrieves lists from Mailchimp every 4 hours (approximately). This is to prevent your site from contacting Mailchimp too often. To force refresh your lists, go to Downloads > Settings > Marketing > Mailchimp and click Save Changes.
FAQs
Why are emails added as non-subscribed?
When using the Mailchimp integration with EDD, your customer’s email address is added to all connected lists. It’s subscribed to the intended list and added as non-subscribed to the others, for e-commerce data tracking. Mailchimp explains more here. If you don’t want the non-subscribed emails, you can archive them from your account.
Can I send abandoned cart emails via Mailchimp?
No. The only emails that can be sent via Mailchimp in place of EDD is email receipts.
Why aren’t users being signed-up at checkout?
The most likely cause is the customer did not opt in via checkout. If they did not opt in, they will not be added to your list. Make sure “Show Signup on Checkout” is enabled via the EDD Mailchimp extension settings.
If you have set up anything that causes the customer to bypass the “normal” checkout screen, they won’t be added to the ‘Checkout’ Mailchimp list based on your default Mailchimp settings. A few examples of this would be ” Buy Now” buttons via Stripe Standard, Stripe Pro, PayPal, or any other checkout-bypassing setup.
If you are using the Free Downloads extension and you want your users to be subscribed to Mailchimp when downloading, make sure to check the “Display Opt-In” setting under Downloads → Settings → Marketing → Free Downloads.
If my store is set to bypass the checkout screen, will customers be subscribed to the Mailchimp per-product mailing lists?
No. A customer has to opt-in upon checkout or via Free Downloads to be added to your Mailchimp list as a Subscriber.
Why didn’t a purchase get logged in Mailchimp?
Usually, if one of your Mailchimp campaigns caused a user to purchase a product from your digital shop, the purchase will be logged in your Mailchimp campaign report letting you know. However, if the customer does not have the Mailchimp browser “cookie”, the purchase will not be logged in Mailchimp. Here are a few possible reasons this could happen:
- The customer has cookies blocked in their browser
- The customer cleared their cookies after clicking the link in your campaign
- The customer clicked the link in your campaign but closed their browser and purchased using a direct link later
- The customer used a different computer or browser to complete their purchase
- Any other reason the cookie might not exist will cause the purchase to not be logged in Mailchimp.


