ConvertKit Setup Documentation
The
ConvertKit email marketing extension adds an option for your customers to join your ConvertKit email list during checkout.
Configuration Instructions for ConvertKit
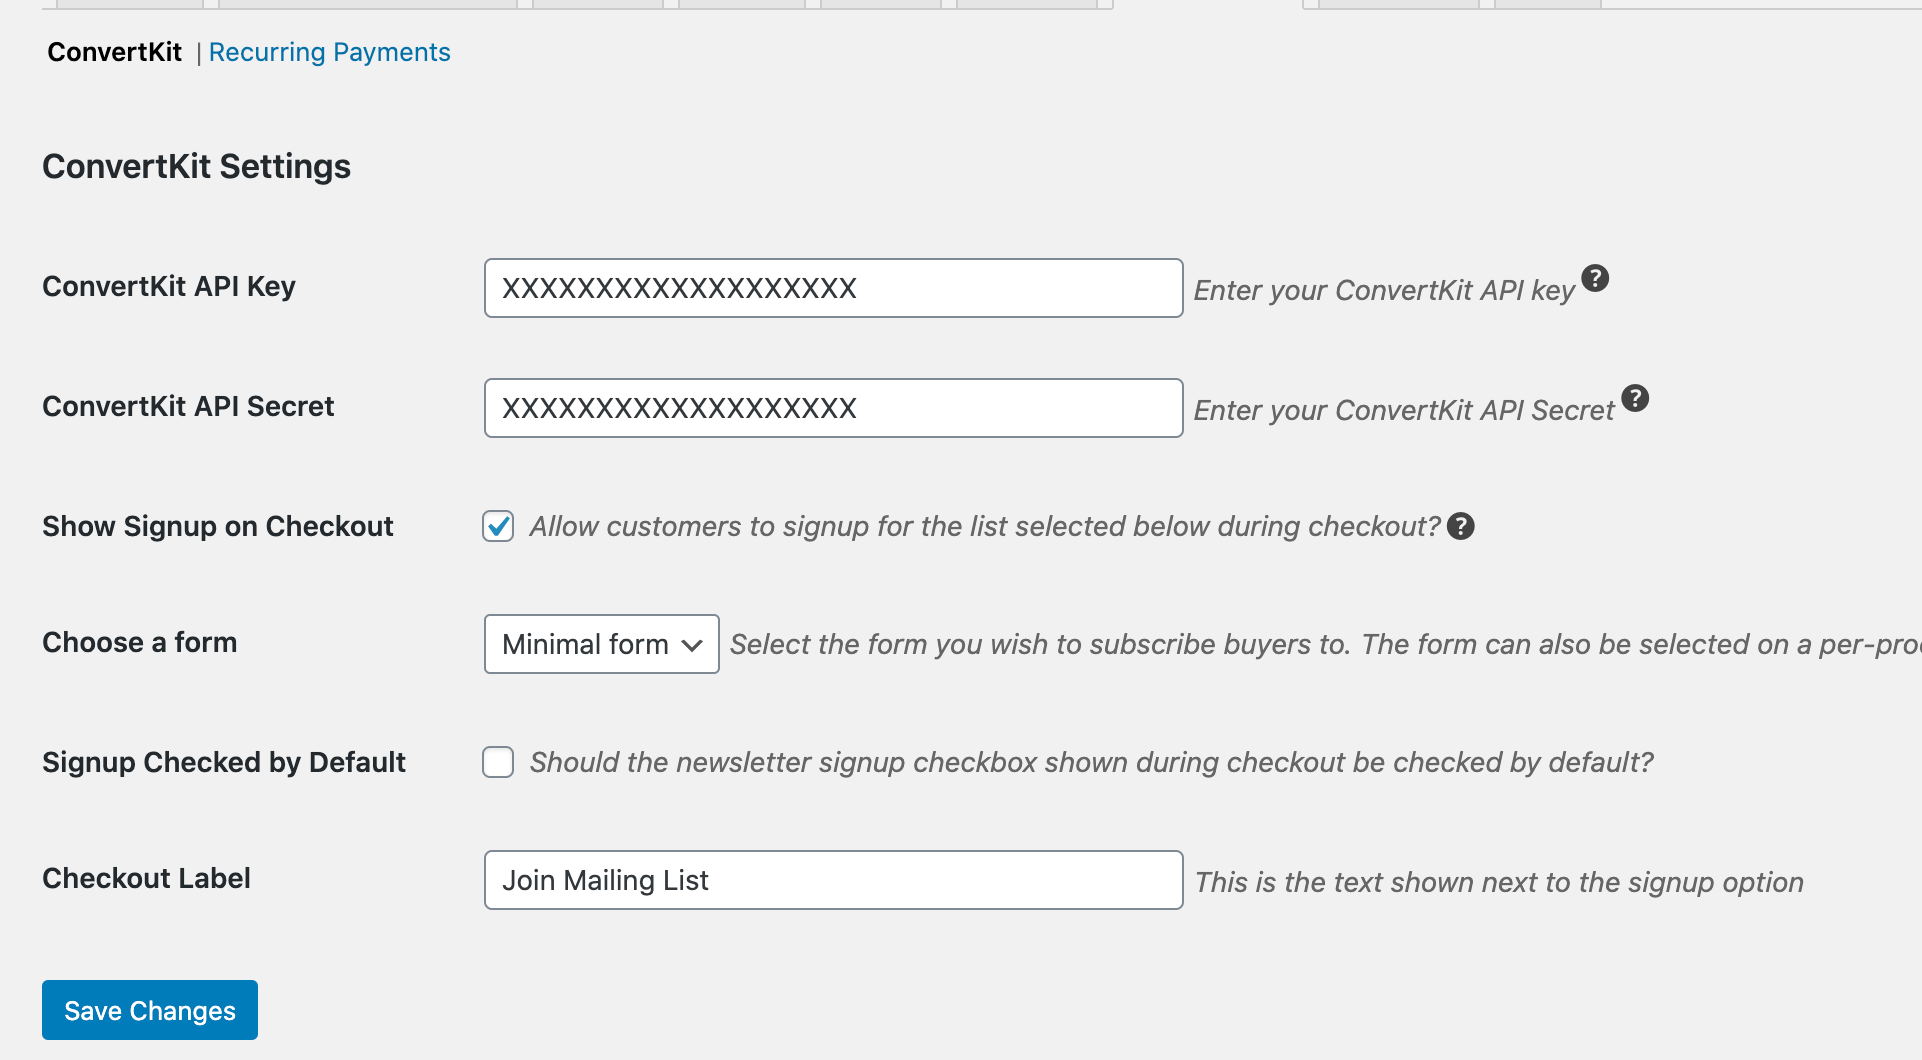
- Once installed, locate the settings for this extension via WordPress admin > Downloads > Settings > Marketing > ConvertKIt.
- Enter your API Key and Secret Key found in your ConvertKit account settings page.
- Return to the ConvertKit Settings section on your website under Downloads > Settings > Marketing > ConvertKIt and paste/enter the API and Secret Key into their fields on the page.
- Click the “Save Changes” button at the bottom of the page. This will allow the ConvertKit extension to retrieve the list of forms from your ConvertKit account.
- Choose the form you wish to subscribe customers to from the drop down box beside “Choose a form”
- Add a short, appropriate description in the “Checkout Label” field. By default, “Signup for the newsletter” will be displayed on the checkout page if you don’t enter your own text.

Product Specific Lists and Tags
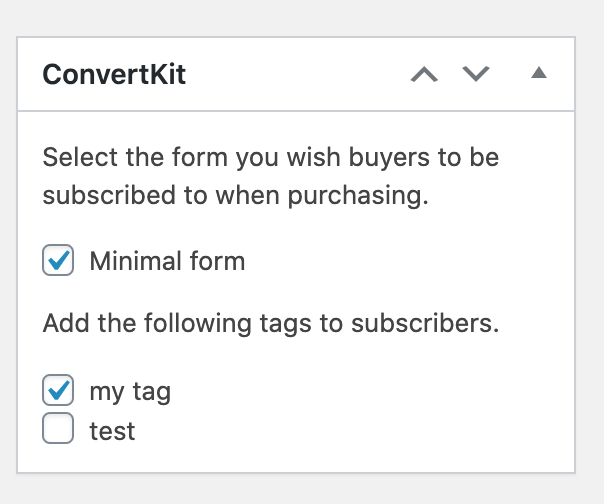
You can subscribe customers of specific products to one or more ConvertKit forms by going to the product edit screen and selecting the form(s) you wish customers to be added to in the “ConvertKit” box.
In this section, you can also select whether to add tags to customers when they purchase that specific product. This can be useful for making use of the
automation features in ConvertKit. Tags need to be created inside your ConvertKit account which is retrieved by the extension.

Troubleshooting
Why can’t I see my new ConvertKit forms or tags in WordPress?
The extension only retrieves forms and lists from ConvertKit every 4 hours (approximately). This is to prevent your site from contacting ConvertKit too often. To force refresh your lists, go to
Downloads > Settings > Marketing > ConvertKit and click Save Changes.