

The ConvertKit feature connects Easy Digital Downloads (EDD) to your ConvertKit account, so you can grow your email list and tag customers based on what they buy.
There are two separate ways people get subscribed, and they work differently:
- Global form (opt-in required): Customers only join your default ConvertKit form if they check the opt-in box at checkout.
- Per-product forms and tags (automatic): If you assign a form or tag to a specific product, everyone who buys that product is subscribed or tagged automatically. The checkout opt-in box has no effect on this.
Understanding this difference matters before you set anything up, especially if you sell to customers in regions with email consent laws, like the GDPR in Europe. The rest of this guide walks you through setup, where each type of subscription applies, and how to troubleshoot common issues.
Setting Up ConvertKit
Before configuring the feature, ensure ConvertKit is enabled under Downloads » Extensions. Search for the feature, then click Install. In a separate tab, log into your ConvertKit account.
Step 1: Enter Your ConvertKit API Credentials
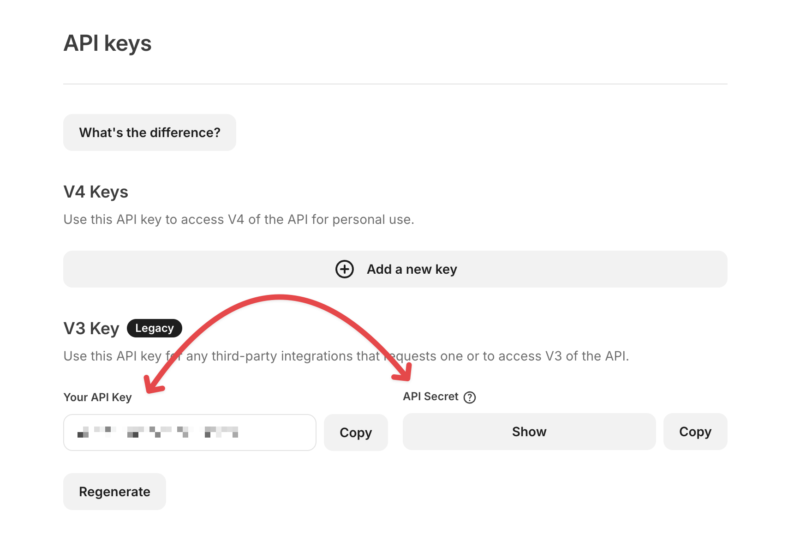
In your ConvertKit account, go to Settings » Developer » API to find your API Key and API Secret.
In your WordPress admin, go to Downloads » Settings » Marketing » ConvertKit. Paste your API Key and API Secret into the matching fields.
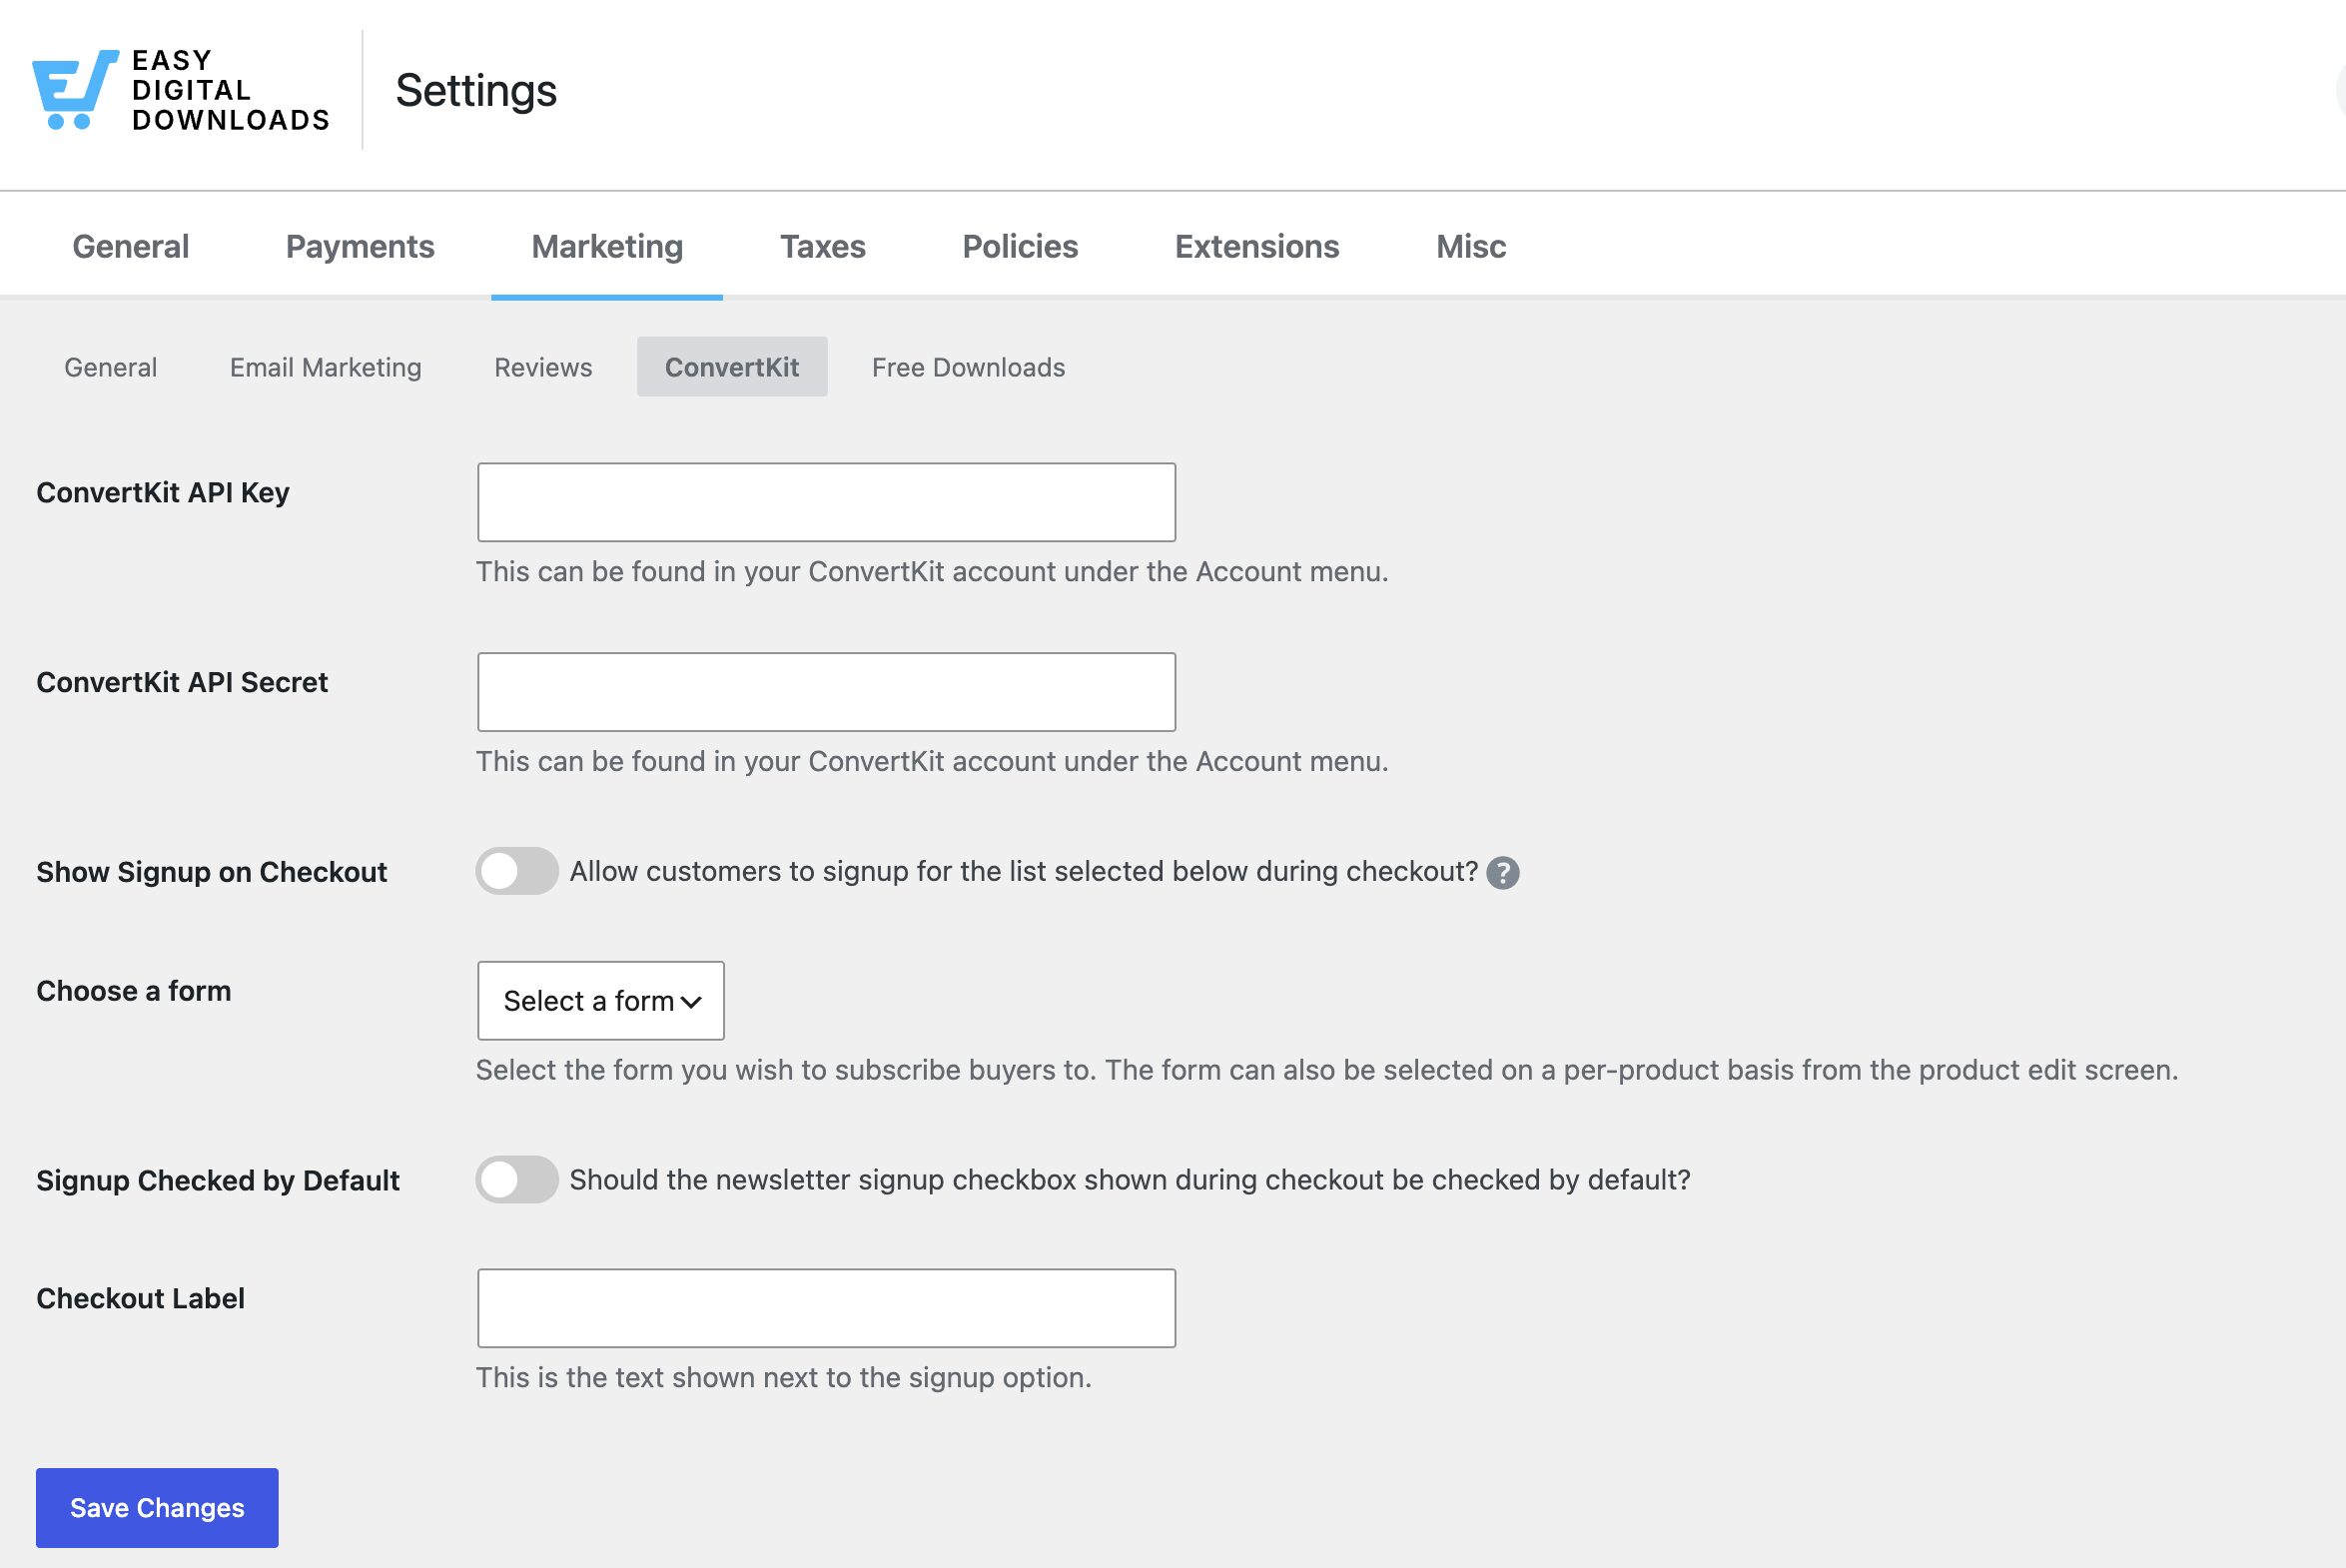
When you’re done, click Save Changes. This connects the extension to your ConvertKit account and loads your forms and tags so you can select them in the next steps.
Step 2: Configure the Signup Form
Next, select the form you want customers to join from the Choose a Form dropdown. This is the form used for the checkout opt-in checkbox.
Toggle to enable Show Signup on Checkout. This setting is off by default. If you skip it, no opt-in checkbox will appear at checkout, no matter what else you’ve configured.
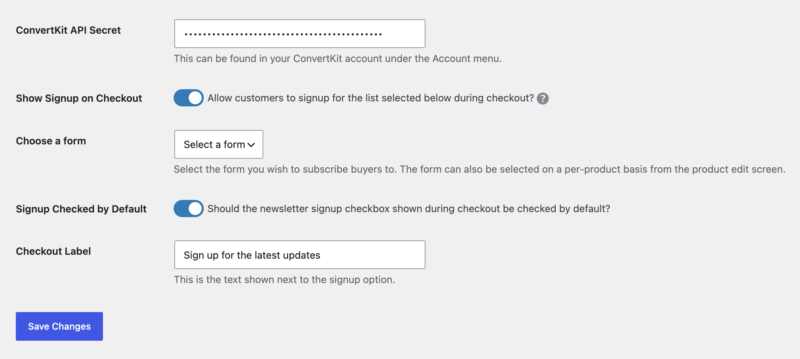
Enable Signup Checked by Default if you want the checkbox pre-ticked for customers by default.
Pre-checked opt-in boxes may not meet email consent requirements in some countries, including under the GDPR in Europe. Check your local requirements before enabling this setting.
Enter the text you want shown next to the opt-in checkbox in the Checkout Label field. The default text is “Sign up for the newsletter.”
Assigning Forms and Tags to Individual Products
Beyond the global form, you can assign a specific ConvertKit form or tag to any individual product from that product’s edit screen.
Important: Forms and tags assigned to individual products apply to every customer who buys that product, automatically. The checkout opt-in checkbox only controls the global form from the setup steps above. It doesn’t affect per-product forms or tags.
Tags must already exist in your ConvertKit account before you can apply them to a product here. Once applied, ConvertKit’s automation features can use these tags to trigger follow-up sequences, segment your audience, or see which products are driving new subscribers.
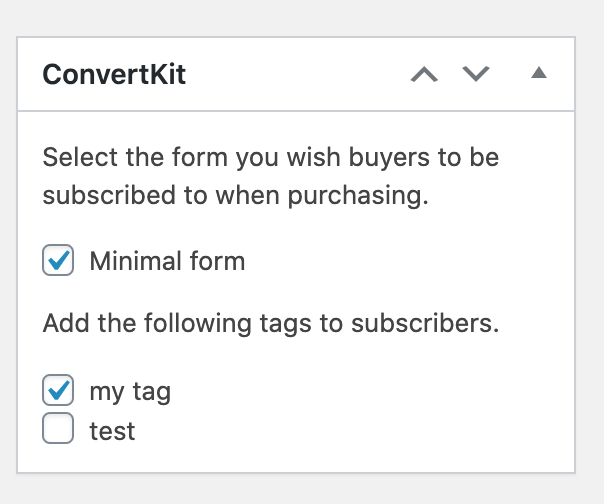
[Screenshot: product edit screen showing the ConvertKit form and tag fields]
Purchase Tracking and Revenue Attribution
Every time a subscribed customer completes a purchase, the extension automatically sends the transaction details to ConvertKit, including the products purchased, order total, discount, tax, and currency.
You don’t need to set anything up for this. It happens automatically for every purchase where the customer was subscribed. This data powers ConvertKit’s built-in revenue attribution reports, so you can see how your email subscribers translate into sales directly inside ConvertKit.
Troubleshooting
The opt-in checkbox isn’t showing at checkout
Go to Downloads » Settings » Marketing » ConvertKit and make sure Show Signup on Checkout is enabled. Save the settings page after enabling it.
A customer was subscribed or tagged, but they never opted in
This is expected behavior. If a form or tag is assigned to the product they purchased, they’re subscribed or tagged automatically. Per-product forms and tags apply to every buyer, regardless of the checkout opt-in checkbox.
A new form or tag I created in ConvertKit isn’t showing up in the dropdown
The extension caches your forms and tags for up to 4 hours, to avoid contacting ConvertKit’s servers too often. To refresh immediately, go to Downloads » Settings » Marketing » ConvertKit and click Save Changes. This clears the cache and pulls your latest forms and tags right away.
Subscribers aren’t showing up in ConvertKit
Check your EDD Debug Log at Downloads » Tools » Debug Log for error messages. Common causes include an incorrect API Key or API Secret, or a ConvertKit form that’s been deleted or archived.