With Frontend Submissions, if you wish to allow vendors to register accounts, you will have to enable the functionality from the settings page. The option to enable or disable vendor registrations can be found by navigating to Downloads > Settings > FES > Permissions.

If Vendor registration is open to all then the end user may go to your Vendor Registration Page to sign up. When someone signs up as a Vendor, they will be assigned the user role of Subscriber unless they already had a WordPress user account with a different user role.
Registration
If the end user is not signed in as a WordPress user, this is the form they will see:

If the end user is already signed in as a WordPress user, this is the form they will see. This form is much simpler because it’s taking existing information from the WordPress user:
After Registration
After completion of the registration form, the new Vendor will see one of two things:
- If you have auto-approval turned on then they are sent directly to the Seller Dashboard where they can begin adding products
- If you have auto-approval turned off then they will see a message that says “Your application is pending”. The store administration will receive an email alerting them to the fact that a new Vendor registration requires approval.
Manually Grant Vendor Status
To manually make any WordPress user into an FES Vendor, browse to their WordPress profile page. Find the section titled “Easy Digital Downloads Frontend Submissions.” In that section there is a link titled Make Vendor. Simply clicking that link will make that user a Vendor.
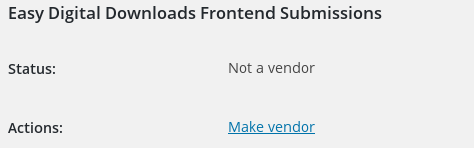
This same area can be used to see that a user is a Pending Vendor, and link to the Vendor Profile. In the Vendor Profile a user can be Approved as a Vendor.

Vendor Management
You may manage Vendors by navigating to Downloads > Vendors. Note, this title may be different if you’ve changed the “Vendors” text to something else.
Here you’ll see a list of all Vendors currently on the website. Hovering over a Vendor name will allow you to View, Approve, or Reject the application as well as options to Suspend or Delete active Vendors.
If you click the View link then you’ll be taken to the Vendor Details page. The Vendor information area uses a tabbed interface, with the tabs along the left side.
Vendor Status
Pending: While in pending status a vendor cannot submit products to the marketplace.
Approved: An Approved vendor can submit products to the marketplace.
Suspended: A Suspended vendor cannot submit products. Any of their products that are Live will be set to Draft when their role is set to Suspended. Vendors can be set back to Approved at any time by the store admin. Any of their products that were previously live will get set back to Live.
Vendor Overview
The first tab is the Vendor Overview.
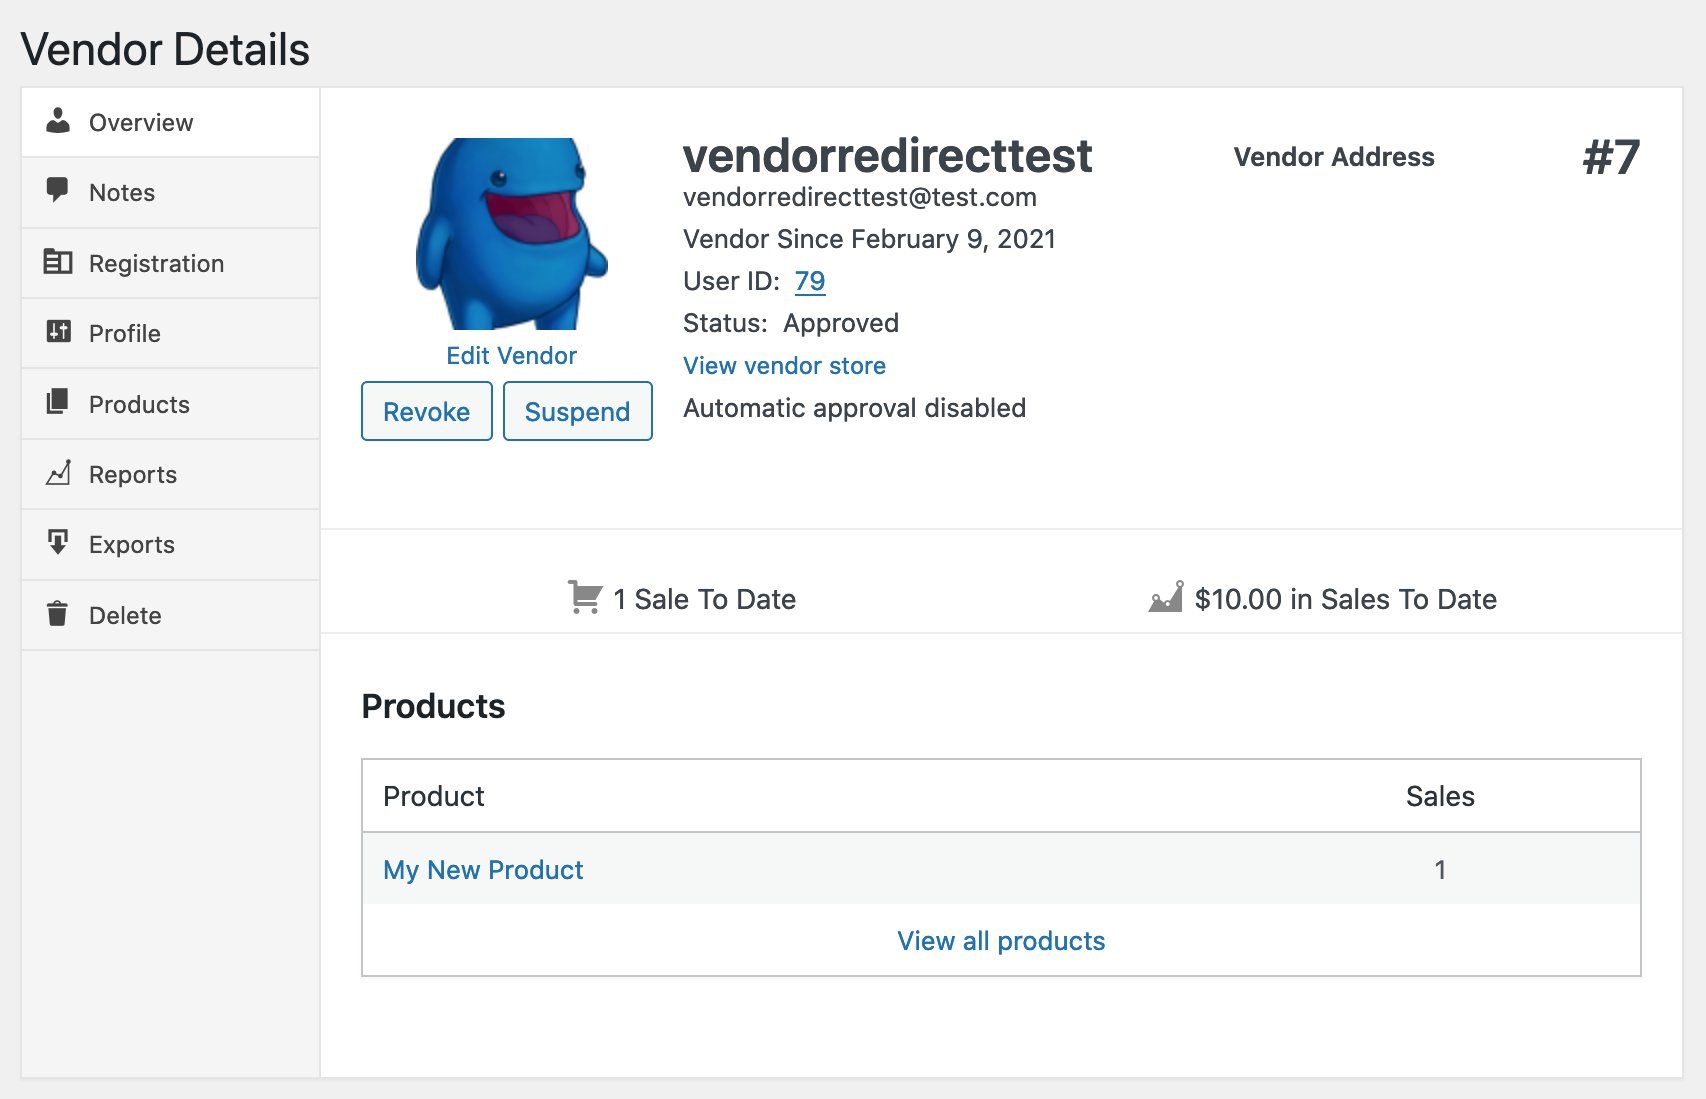
The Vendor Overview tab contains:
- Vendor name
- Vendor email
- Vendor sign-up date
- WordPress User ID
- Vendor status
- Vendor mailing address (if applicable)
- Number of sales
- A list of products
- A button to Delete this Vendor
- A button to Suspend this Vendor
- A link to edit the information on this panel
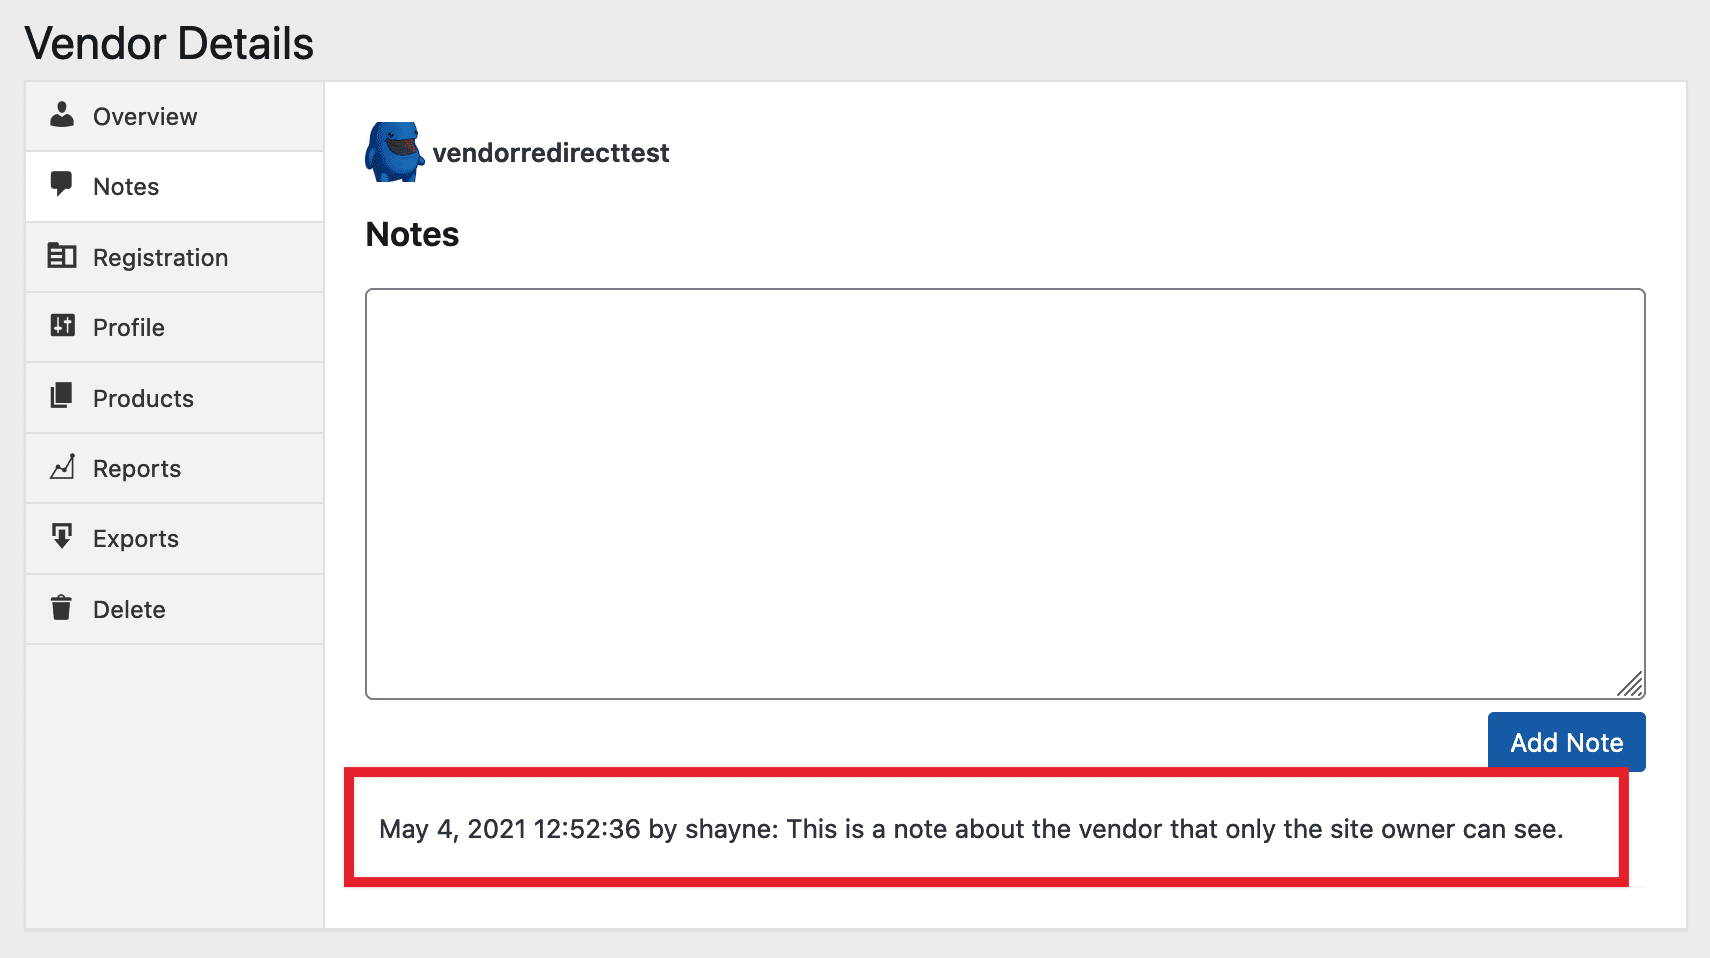
Vendor Notes
The Vendor Notes tab is designed for site administrators to make private notes about Vendors. These notes are visible ONLY to site administrators. Below is an example with one note.
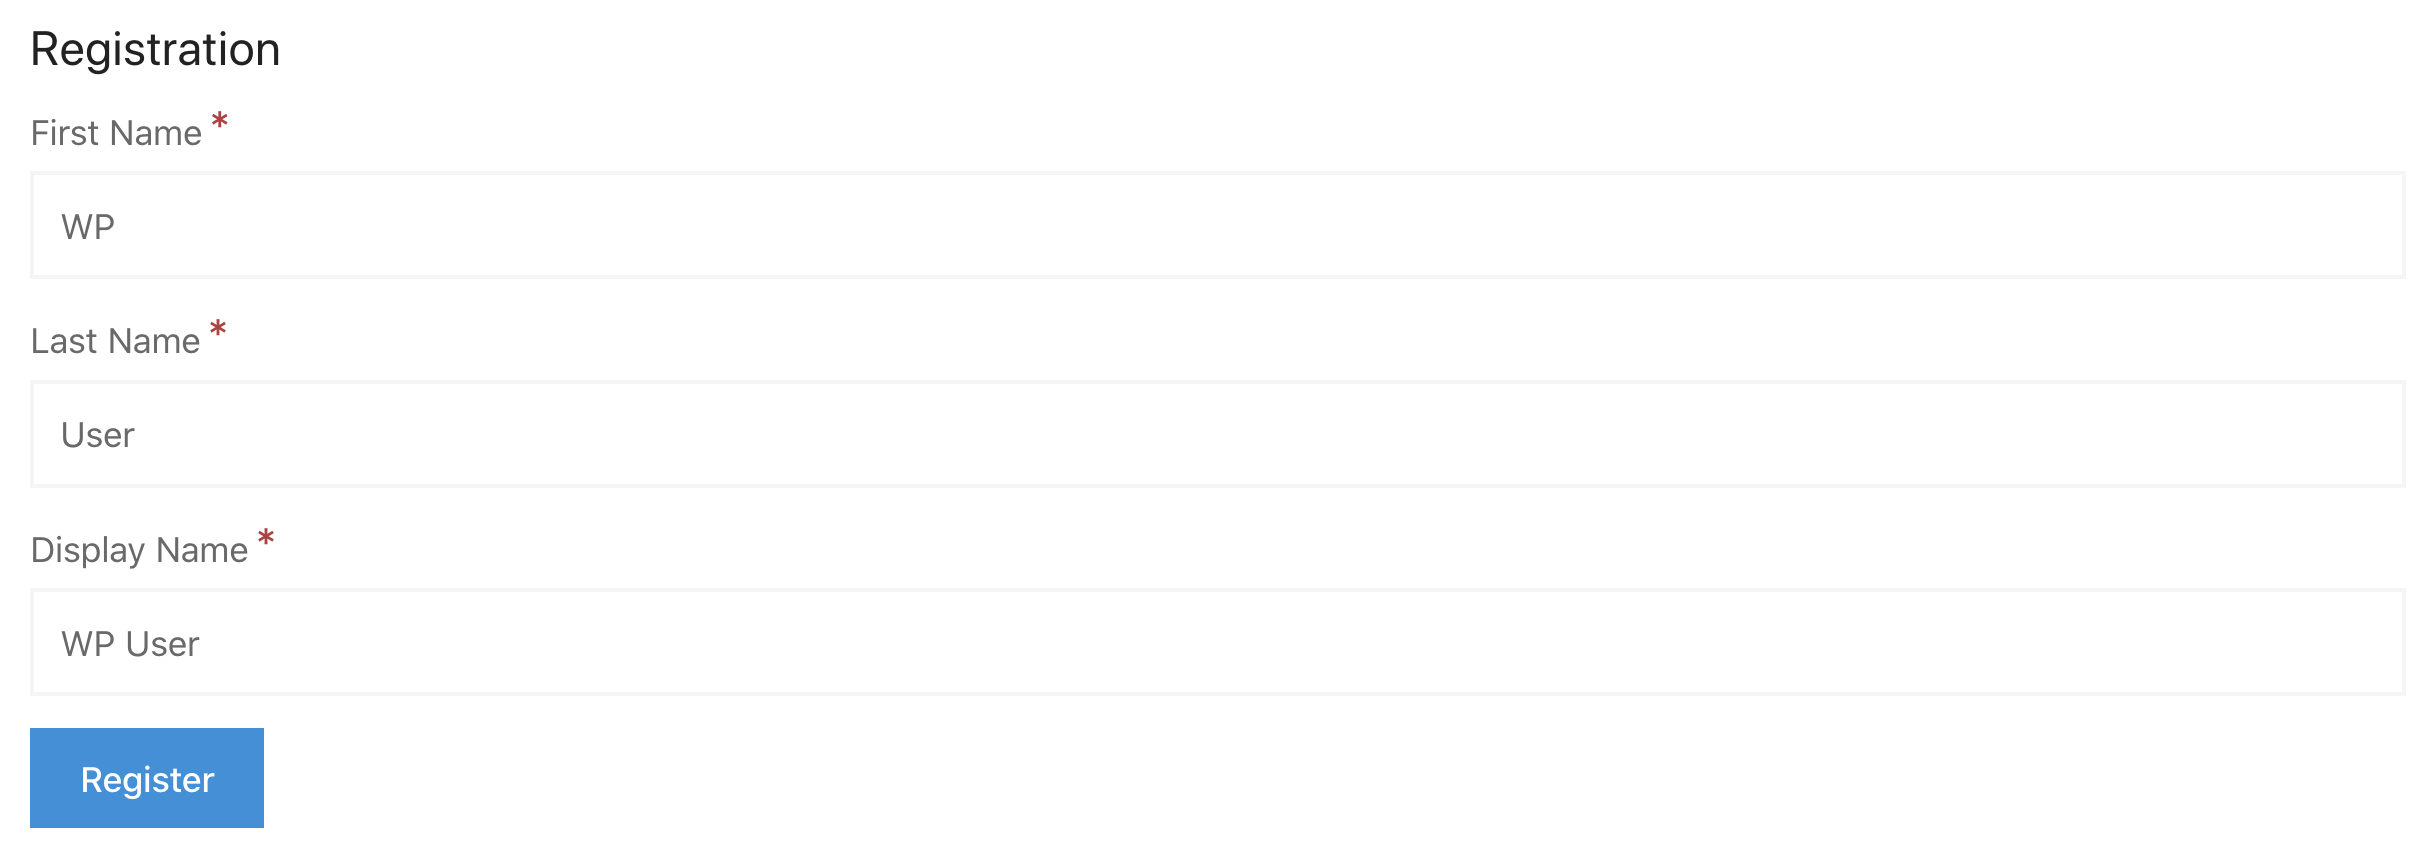
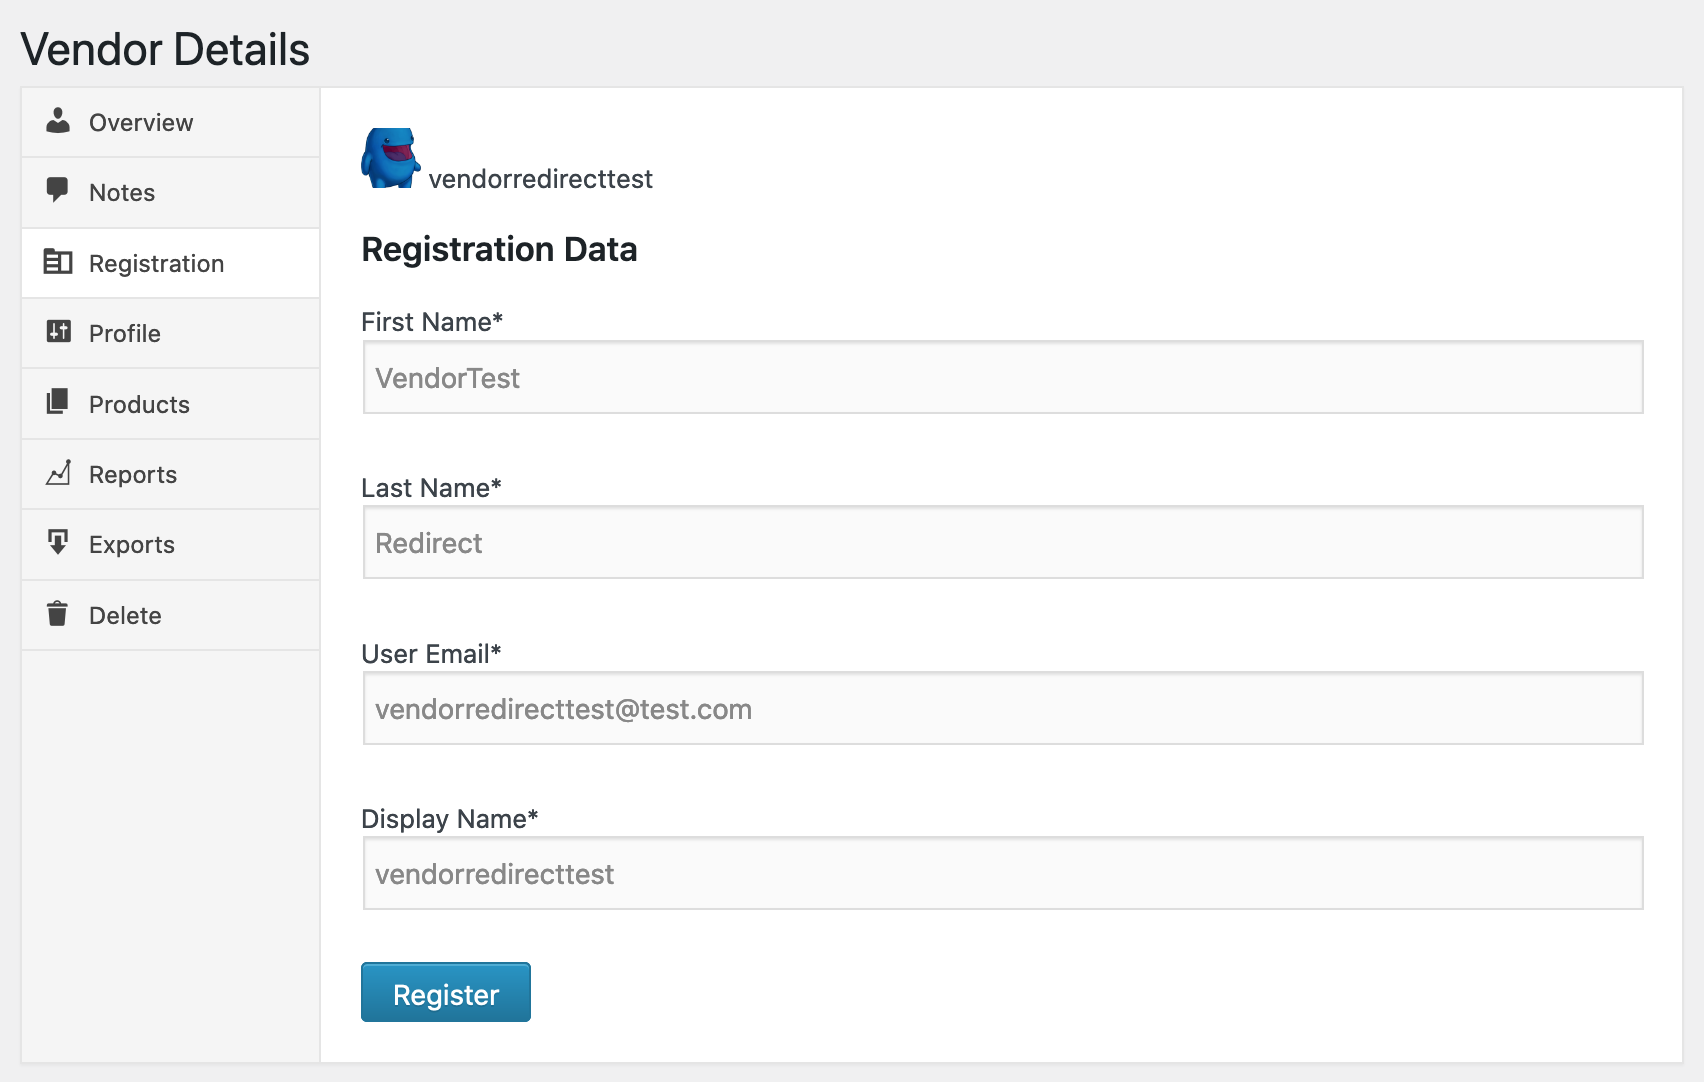
Vendor Registration
This tab allows site administrators to change the Vendor’s information including the following:
- First Name
- Last Name
- Email Address
- Display Name
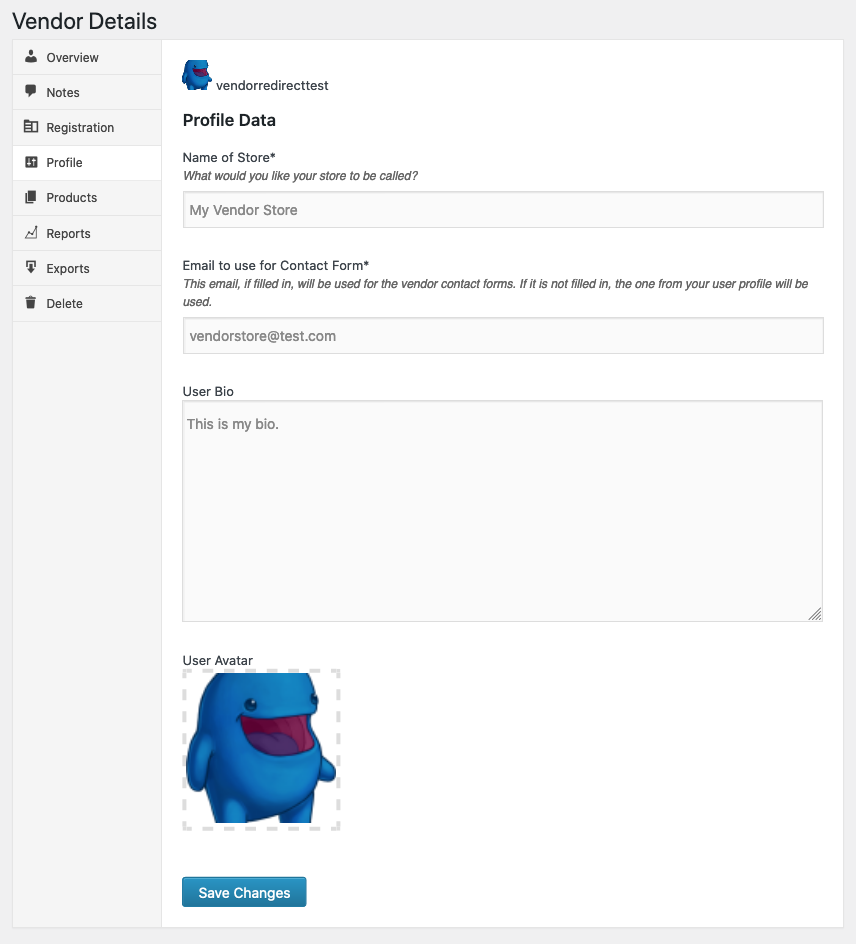
Vendor Profile
This tab sets the name of the Vendor’s store as well as allowing for a custom email address for the Vendor contact form. If no email address is provided, the address from the WordPress user profile will be used. Other fields available in the Profile form are editable in this area as well.
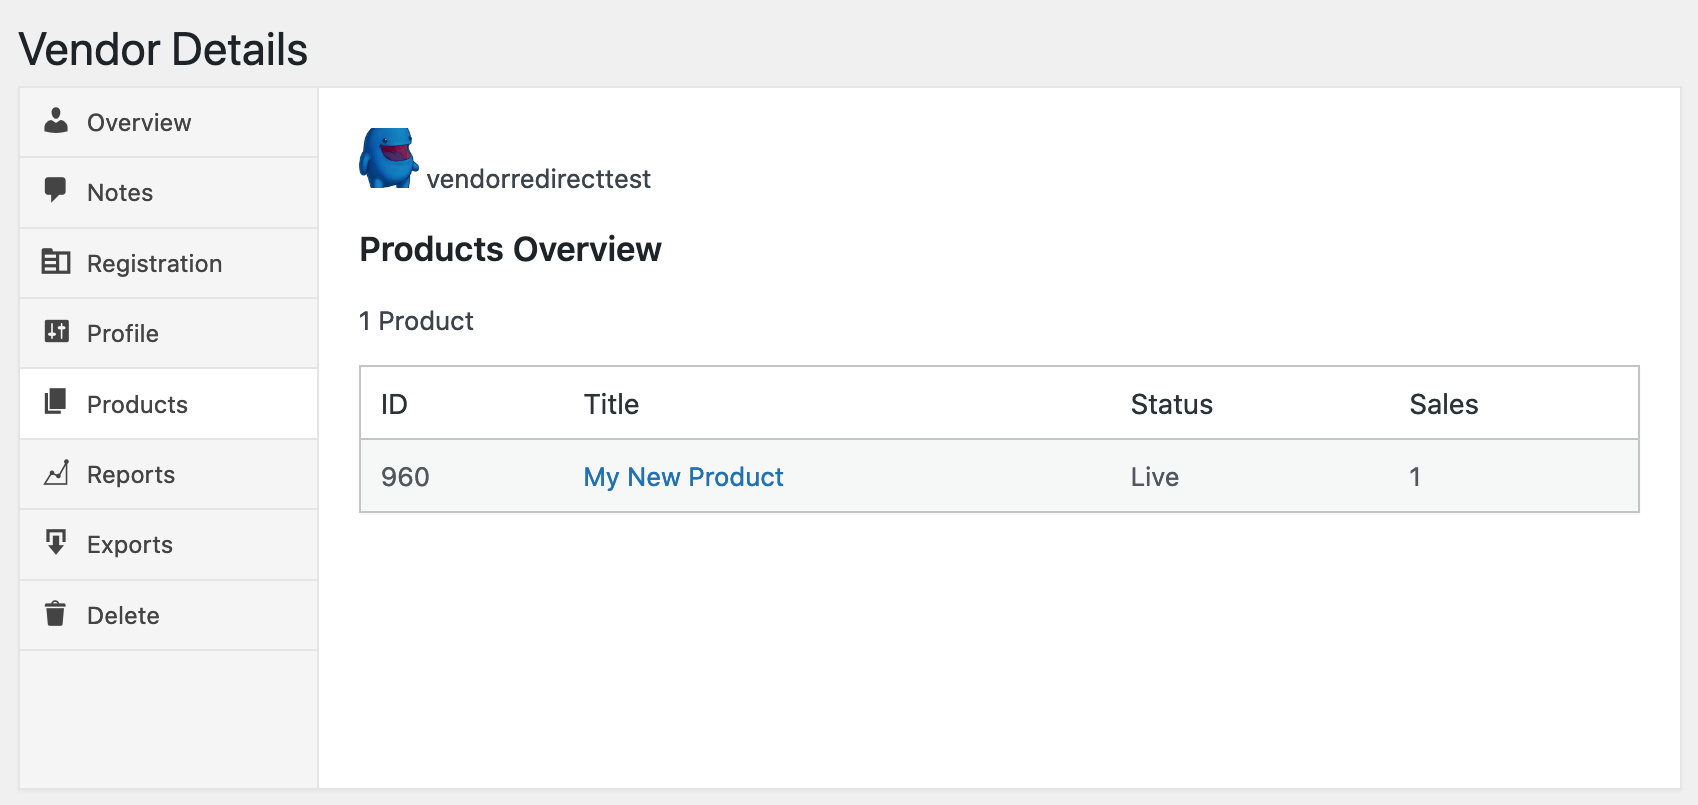
Vendor Products
This tab lists all of the Vendor’s products, showing ID, Title, Status, and number of sales. Titles are links to the product admin pages. There’s also a sum of the number of sales if more than one.
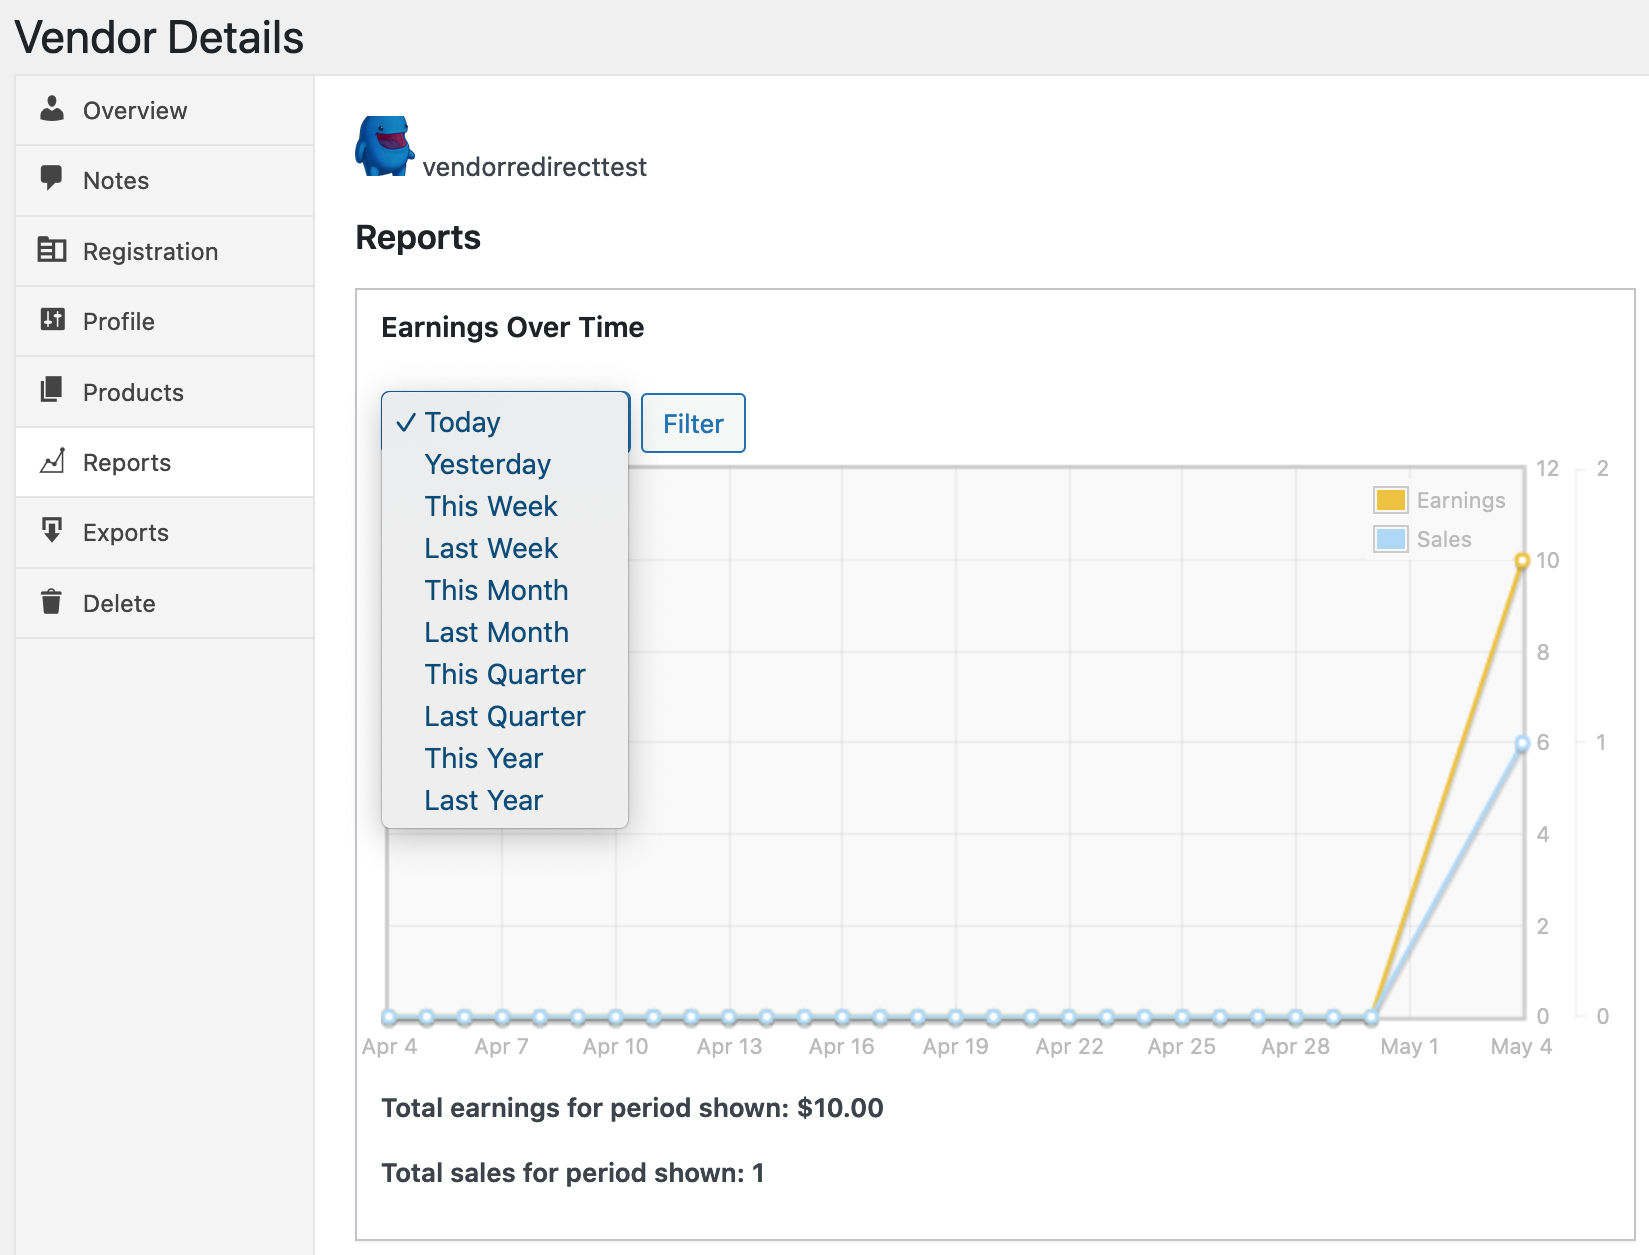
Vendor Reports
This tab can show both earnings and sales over time. It can be filtered to show
- Today
- Yesterday
- This Week
- Last Week
- This Month
- Last Month
- This Quarter
- Last Quarter
- This Year
- Last Year
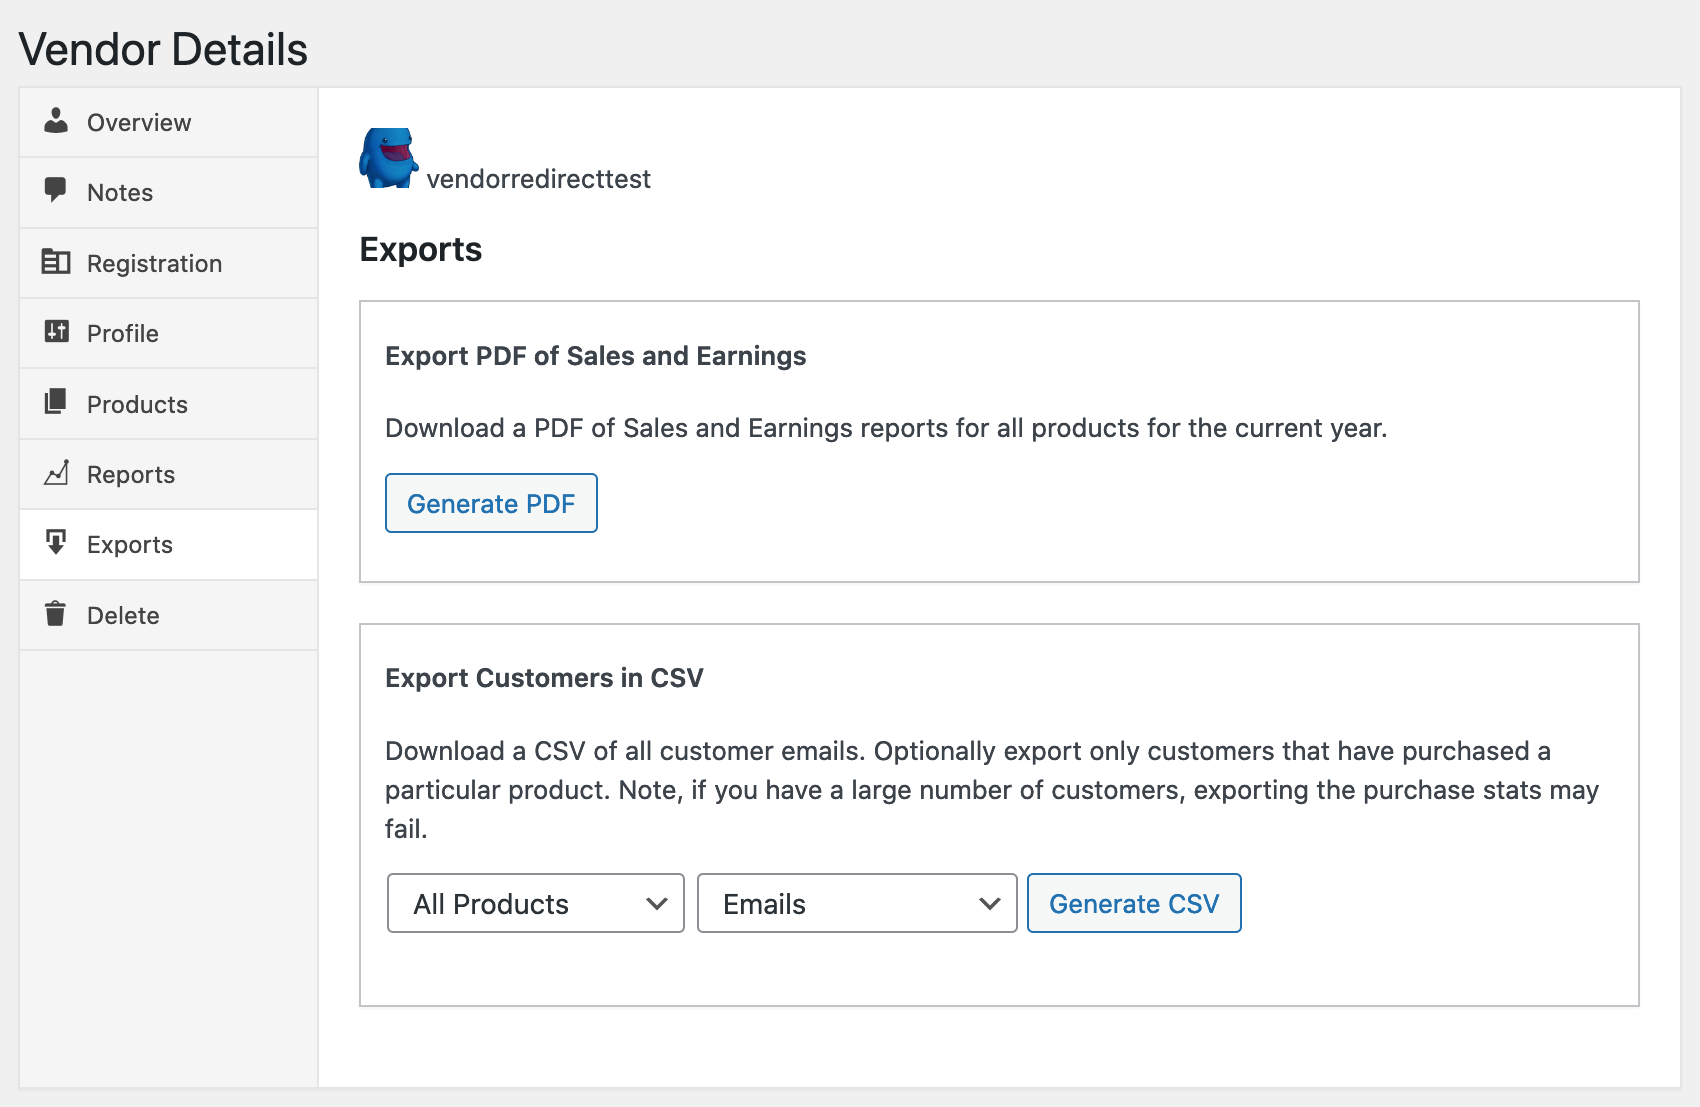
Vendor Exports
This tab allows the site administrator to download a PDF with Sales and Earnings for the current year as well as a Customer list for any given product or all products. The customer list could be emails only or emails and names. The customer list is delivered in CSV format.
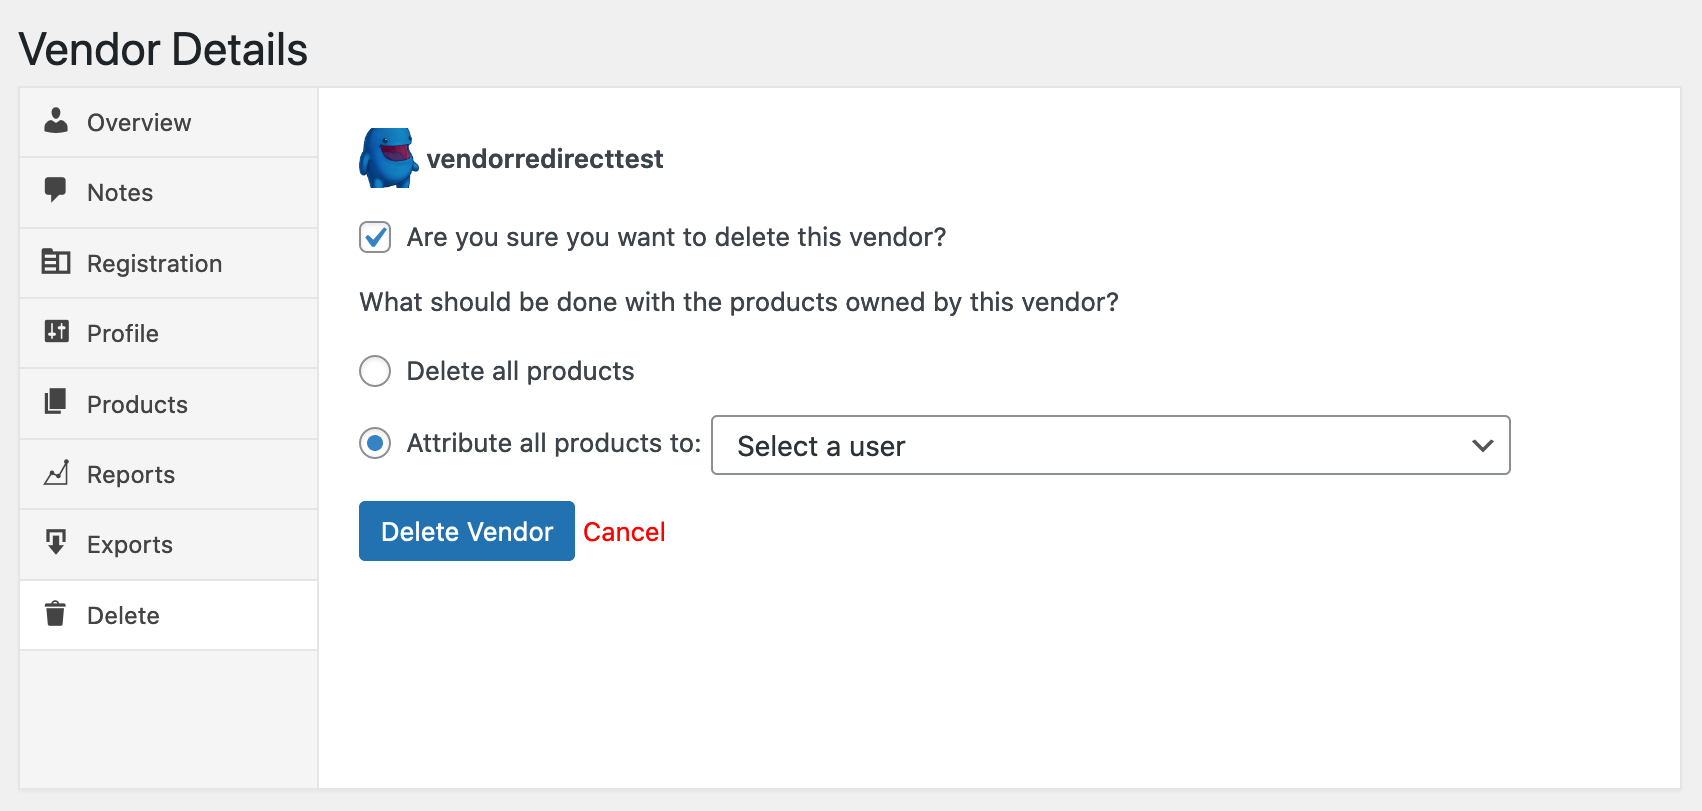
Vendor Deletion
The Delete tab allows a site owner to delete a Vendor as well as choose to delete their products or attribute them to another user.