Dropbox File Store Setup Documentation
The
EDD Dropbox File Store extension allows you to store download files in your Dropbox account. Once installed and activated, you will need to authorize the EDD Dropbox File Store app to access your Dropbox account on the Downloads → Settings → Extensions page in your WordPress dashboard. To start, click the Get Code button.
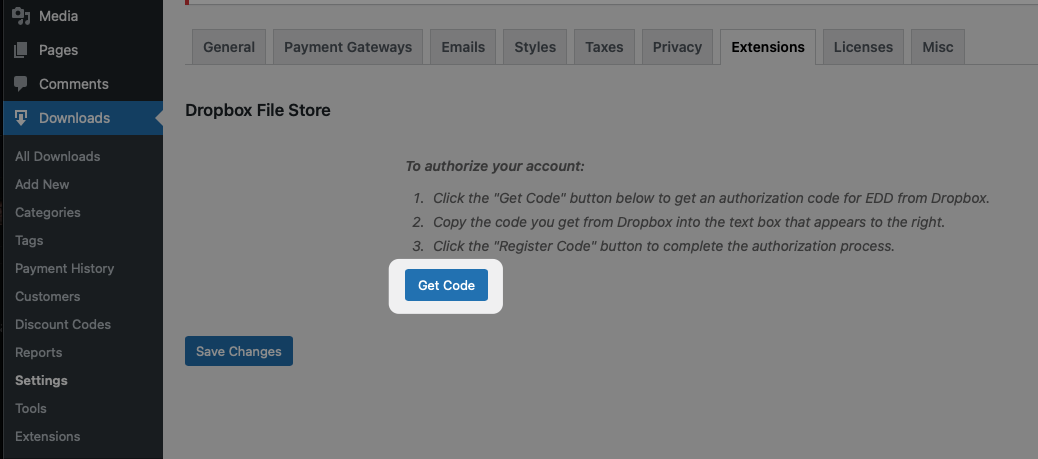
A new window / tab will open on a Dropbox page that will prompt you to log in and authorize Easy Digital Downloads – File Store to access the files and folders in your Dropbox account.
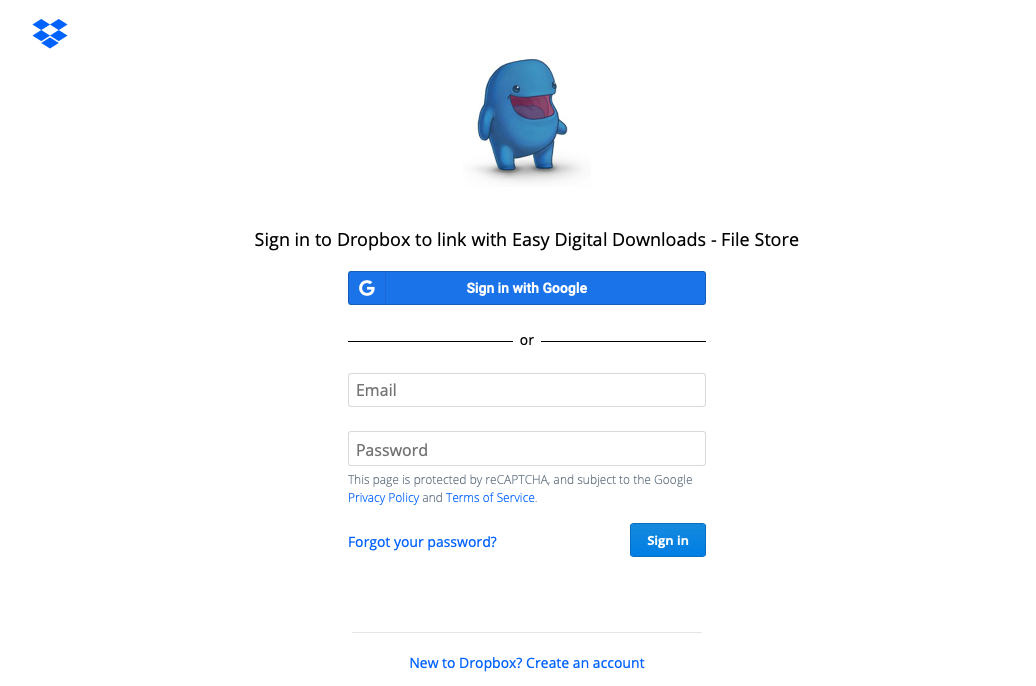
Click
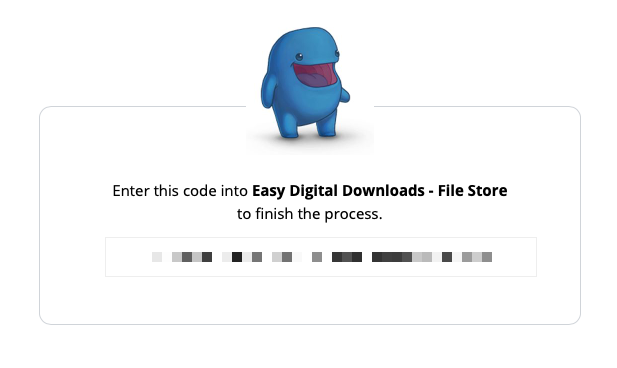
Allow and you will be provided with a code. Copy the code to your clipboard.
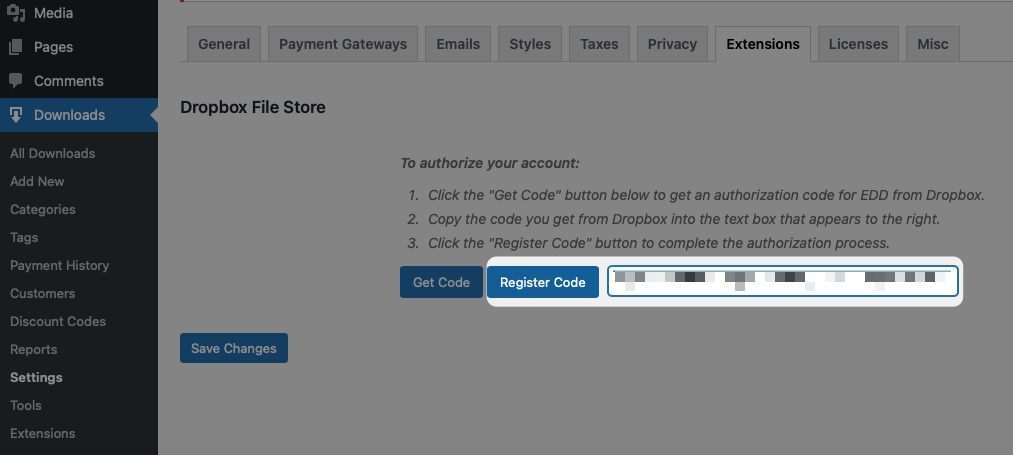
Back on your WordPress site, copy the code into the text box that now appears to the right of the
Register Code button, then click the Register Code button.
 If you would ever like to deauthorize the EDD Dropbox File Store plugin or need to reauthorize, you can do so from the same page by clicking the Remove Authorize button that will appear once you have completed the authorization process.
Using Files in Your Dropbox Folder
Once you have completed the setup steps above, setting up EDD to use a file in Dropbox is fairly straightforward. Go to the editor page of the Download you want to change and click the Upload a File link. You will now see two new options on the Upload Media pop-up:
Upload to Dropbox and Dropbox Library.
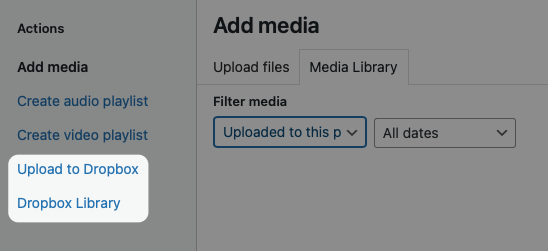
Dropbox Library
The Dropbox Library allows you to use a file that you already saved to your Dropbox folder outside of WordPress. Clicking on the Dropbox Library option on the left of the pop-up will display the contents of your Dropbox folder starting at the root folder level.
Navigate through your folders to find the file you want to use and click the Select button to the left of the file name.
Upload to Dropbox
The second option available in the Dropbox File Store extension is to upload a file from WordPress to your Dropbox account and then use that file. This option bypasses the need to put your files in your Dropbox folder outside of WordPress.
To upload a file through WordPress, click on the Upload to Dropbox option on the Upload Media pop-up in WordPress. This will display the folder structure of your Dropbox folder along with a button to select the file you want to upload.
Navigate to the folder you want the file saved to and click the Choose File button to select the file on your computer. Once you have selected the file, click Upload and wait while your file is uploaded to your Dropbox folder. When it is finished uploading, the pop-up will display a success message and a new Use File button.
Click
Use File to select the file you just uploaded as the file to use on your download.
Please note: If there is already a file located in the folder you selected with the same name as the file you are uploading, the new file will have a number appended to it to make the filename unique. This will take the form of filename(1).ext. If you don’t wish to share the file with this name, you will need to first remove the duplicate or upload it to a different folder.
Using Your File
With either option, once the Upload Media pop-up closes, the details for your file will be saved as a file on your download. Click Update when you are done with your changes and your users will now download this file from your Dropbox folder.
Downloading Dropbox Files
The link provided to users to download their file from will expire after a period of time defined by Dropbox, currently four (4) hours. This is to prevent users from being able to share the download link with others with the intent to download the file without purchasing the download from your site first.
Troubleshooting
64-Bit Requirements
The Dropbox API requires a 64-bit version of PHP running on a 64-bit server. While this requirement has been relaxed in Dropbox File Store so that you may still use the extension on a 32-bit machine, please be aware that you will receive errors if you attempt to use larger files (over 2 GB in size) if your site is not running on a 64-bit install. In addition, because of a Windows limitation, if your site is running on a Windows server, you will not be able to support file sizes over 2GB even with a 64-bit install.
Maximum Upload Size
WordPress and your website will have a maximum upload size, typically between 2MB and 8MB. If your files are larger than this, you will either need to change your site’s setting that controls this (typically in the php.ini file) or use the Dropbox Library option to configure your download.
Image Upload Errors
There are sometimes issues with uploading images to WordPress, in part due to file size constraints. Please see
Troubleshooting Images on the WordPress Support site for further details. Saving files to your Dropbox folder outside of WordPress and using the Dropbox Library option is a workaround for issues related to image uploads.
Registration Code Expiration
The code provided by Dropbox during the authorization process expires after a short period of time and is only good for one authorization. If you receive an error when registering the code, you may want to try again with a new code before any further troubleshooting steps.
Blank Screen When Getting Code
This indicates a problem with cURL on your own server. Often cURL not installed or configured. You can test this by installing the
Error Log Monitor plugin and looking at the log in your Dashboard after trying. Inform your system administrator or hosting provider of the problem and include the error logs you’ve saved.