Amazon Payments Overview
Amazon Payments is no longer an available payment gateway on new Easy Digital Download installs.
Overview
Amazon Payments allows your customers to make purchases using their Amazon account, and most importantly, never have their payment information enter your server.
When the customer clicks the Pay With Amazon button it will either ask them to log into Amazon or if they’re already logged in it will offer them all the payment options their Amazon account has.
This includes all credit cards and shipping addresses, as well as allowing them to create new ones. When the customer clicks the final purchase button the transaction takes place on the Amazon servers without the end user ever leaving your own site.
A general overview of the setup is that
- You’ll create a Seller account with Amazon
- They’ll give you a set of keys
- You put them into your EDD settings
- Profit!
There are different keys for Live and Sandbox, and there’s also a mechanism for creating Test Users on Amazon. It’s strongly recommended that you do your testing using a Test User you create on Amazon, it keeps your live personal data out of a potentially unstable test environment.
Live Setup
To begin using Amazon Payments, first go to Downloads → Settings → Payment Gateways, check that gateway, and press Save Changes at the bottom of the page.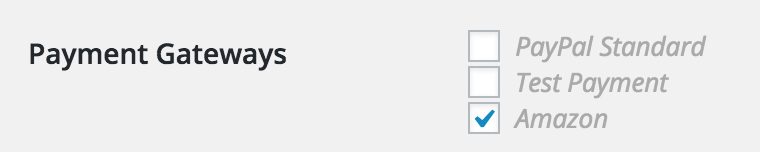
Once the page reloads you’ll find a new set of fields related specifically to Amazon.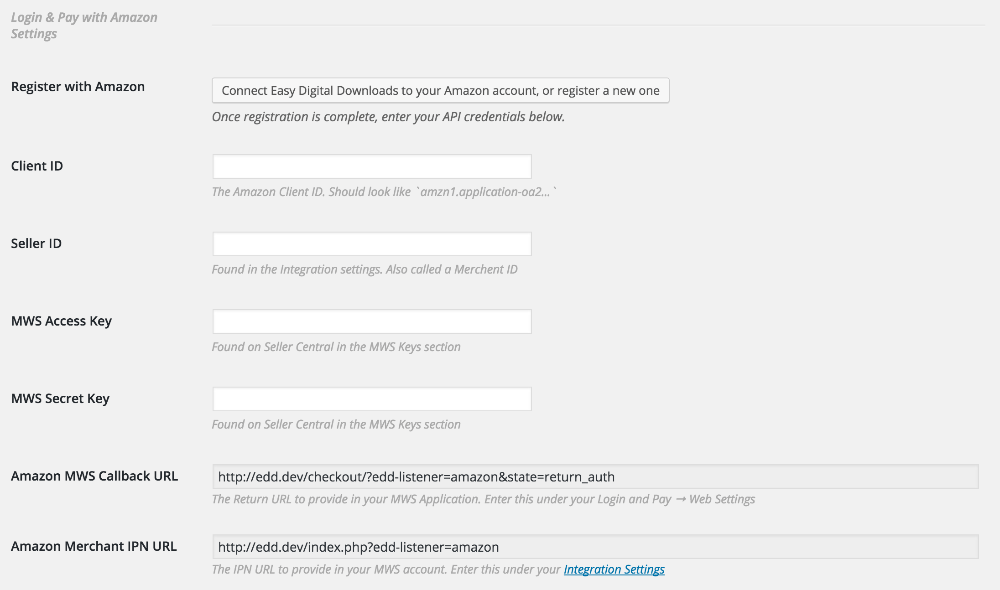
At the top of this area is a Button labelled “Connect Easy Digital Downloads to your Amazon account, or register a new one”. This button will take you to Amazon.com where you’ll see a screen like this: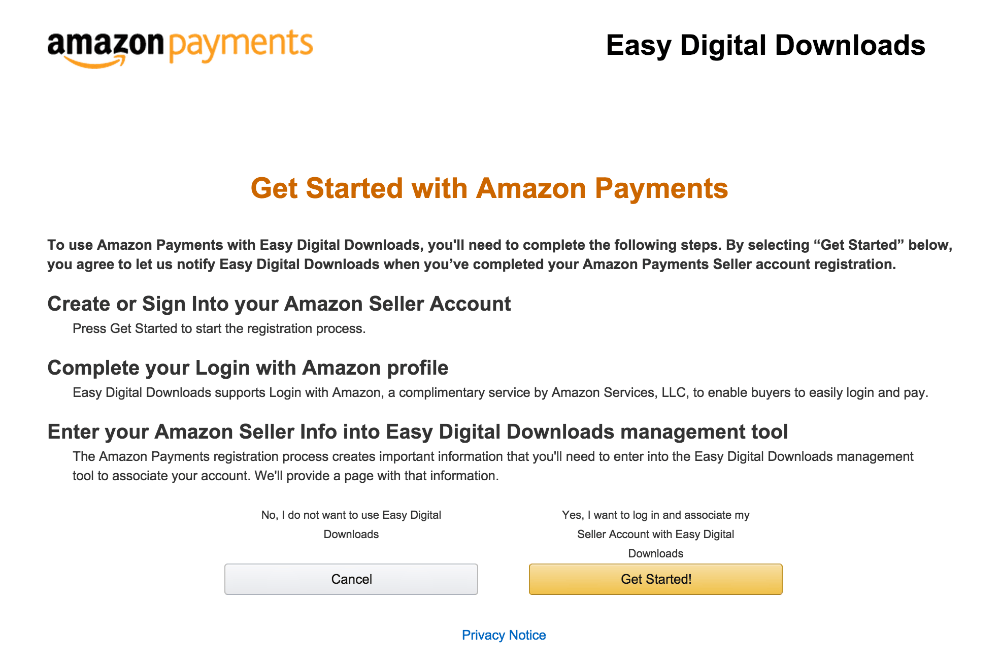
Clicking Cancel will simply end the entire process. To continue the process, press “Get Started!”. At that point, if you are NOT yet logged into Amazon, it’ll ask you to do so.
If you do NOT have an Amazon account, or want to make a new one
You’ll see the regular Amazon login form, but instead of saying you have a password, choose that you wish to make a new account.
The registration form asks for your name, email address, and password.
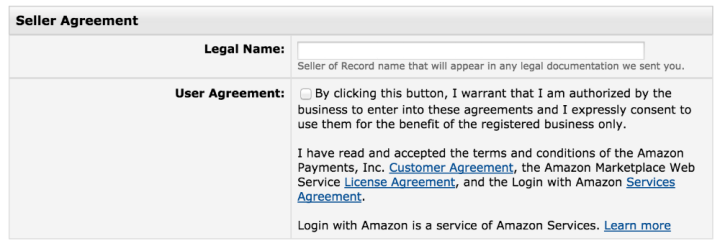
Then you’ll be asked to agree to the Seller Agreement, as seen below:

Once you’ve agree to the Seller Agreement you’ll be asked to associate a Credit Card with your account. You may
- Skip this step
- Put in a real credit card
Once you fill out the Credit Card form you’ll be asked to create a Display Name. This can be anything you’d like, assuming it’s unique in Amazon’s system.
Once you’ve created a Display Name you’ll need to verify your phone number. This can be done either via a regular phone call, or an SMS message.
Pick whichever one you wish and follow the instructions on the screen.
Once you’ve verified yourself, you’ll be asked to fill in some information about your site:
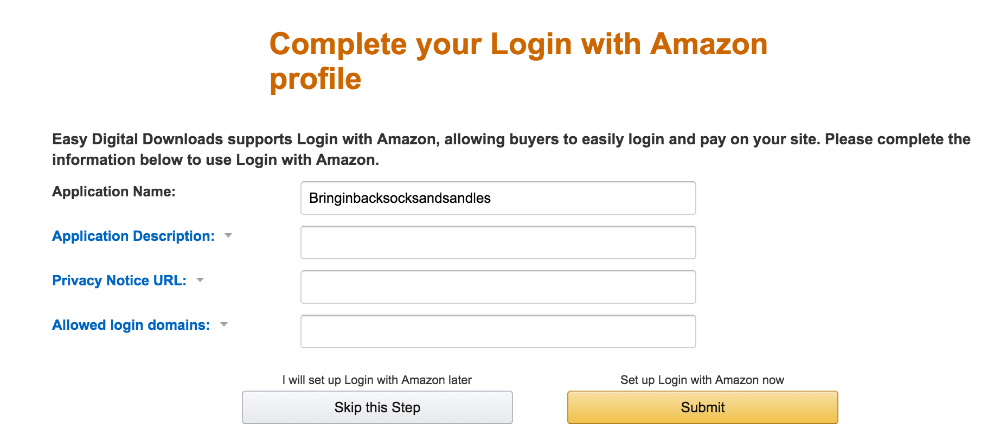 The Application Description is simply that, a short description of your site and store.
The
Privacy Notice URL can be any url on YOUR site that has your privacy statement. It can be as simple as making a Page called Privacy with a URL like https://yoursite.com/privacy/ . Remember to use the URL with SSL.
The
Allowed login domains should be your main URL. Remember to use the URL with SSL.
Once the above information is filled in, you’ll be presented with information like this:
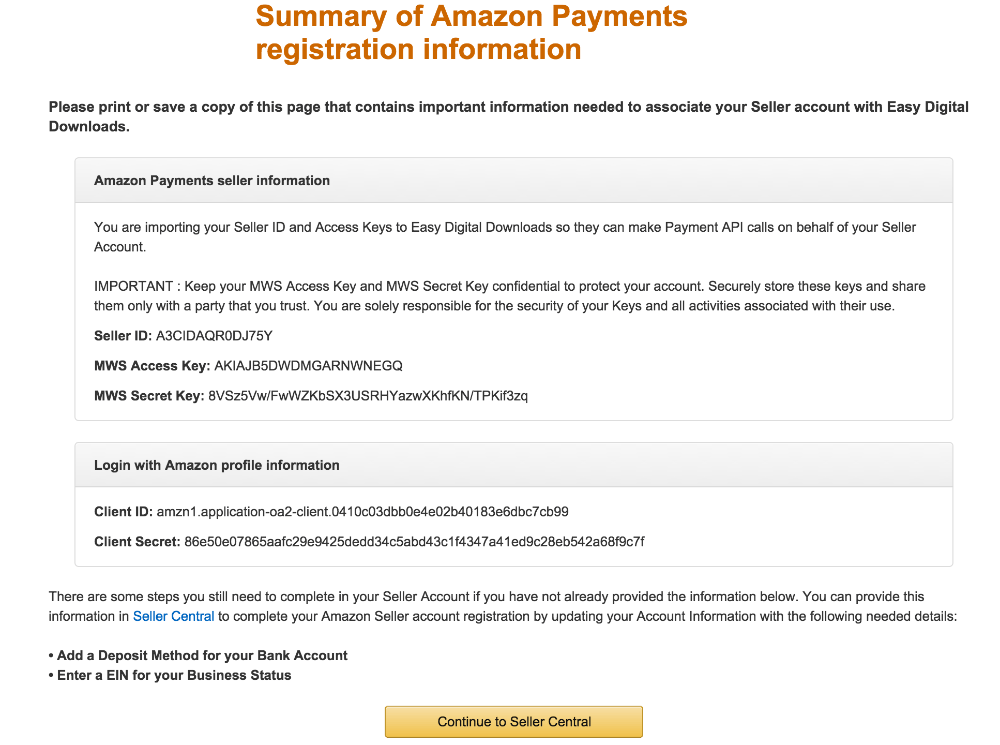
In the above screen you’ll find all of the information that EDD wants on it’s configuration screen, seen at the top of this document. Once it’s filled out and saved then your seller account is set up.
If you DO have an Amazon account
You must use your real Amazon account, you’ll be able to create test accounts later.
Once you’re logged in you’ll want to have this information at hand:
- Your business name, address, and contact information
- A U.S.-based credit card and billing address
- A U.S.-based phone number where you can be reached during this registration process
Then they’ll ask you to fill out the form below. If you want to make a test store you can make a fake name.
After the above box you’ll be presented with a screen like the one below.
The Application Description is simply that, a short description of your site and store.
The
Privacy Notice URL can be any url on YOUR site that has your privacy statement. It can be as simple as making a Page called Privacy with a URL like https://yoursite.com/privacy/ . Remember to use the URL with SSL.
The
Allowed login domains should be your main URL. Remember to use the URL with SSL.
Once the above information is filled in, you’ll be presented with information like this:
In the above screen you’ll find all of the information that EDD wants on it’s configuration screen, seen at the top of this document. Once it’s filled out and saved then your seller account is set up.
Amazon Payments Sandbox Setup
If you have not yet set up your
Amazon Payments Live Setup yet, please do so before creating the Sandbox.
When logged into
Amazon Seller Central using your normal Amazon username, look in the top for a drop down next to the Search box that looks like this: 
Click the dropdown menu and choose Amazon Payments Advanced (Sandbox View), like this:

On the new page that loads you’ll see in the top left a nav item called INTEGRATION. Under there you’ll see MWS Access Key. Click on MWS Access Key.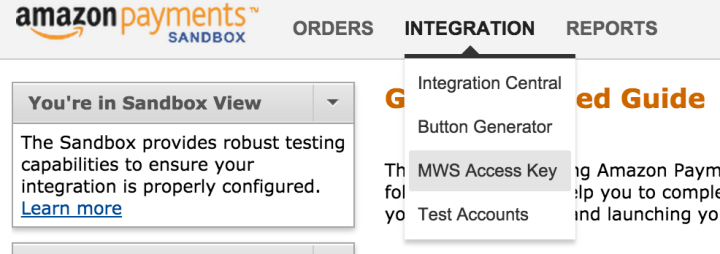
On the resulting page you’ll be presented with all of the information you need to fill out the form fields you’ll find on the Downloads → Settings → Payment Gateways for Amazon.
Once the page reloads you’ll find a new set of fields related specifically to Amazon as seen below.
Click the Save Changes button at the bottom of this page and then go to Downloads → Settings → General tab and make sure your site is in Test Mode.

Once the above items are all set up, create an
Amazon Test User and you can begin testing your store.
Amazon Test Users Setup
When testing your Amazon checkout system, you use Test Users in your production environment. This document will show you how to create those users.
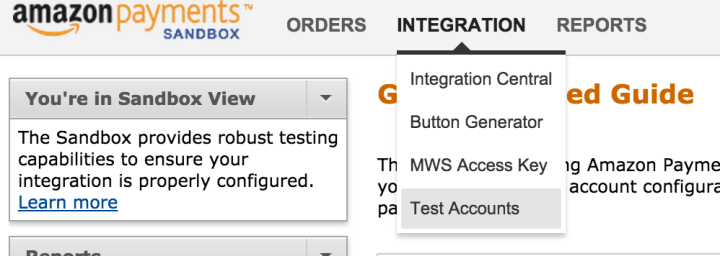
When logged into
Amazon Seller Central using your normal Amazon username, look in the top for a drop down next to the Search box that looks like this:
Click the dropdown menu and choose Amazon Payments Advanced (Sandbox View), like this:
On the new page that loads you’ll see in the top left a nav item called INTEGRATION. Under there you’ll see Test Accounts. Click Test Accounts.
 On the resulting page you’ll be offered a button to create test accounts. The text on that page says this:
You can create test buyer accounts to test your integration in Sandbox. These accounts will be pre-loaded with test payment instruments and a set of shipping addresses. You can edit the test buyer account properties (except for the payment instruments) to help simulate various purchase scenarios.
Click the button that says “Create New Test Account” and you’ll be presented with a screen like this one:
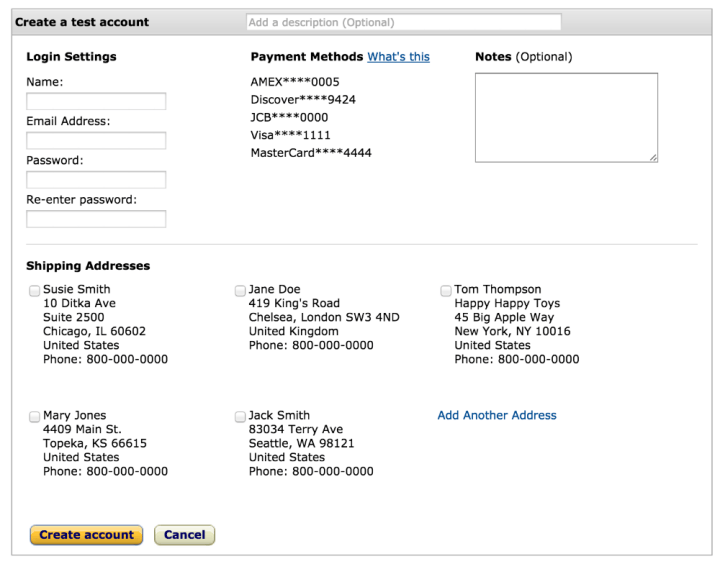
This needs a real email address and password, but your name could be fake.
Testing your Test Account
After you create this account it’s time to test it. First log out of Amazon, and then go to your store that has your Amazon Seller Account all set up.
Add something to your cart and then go to check out. You should see something like this: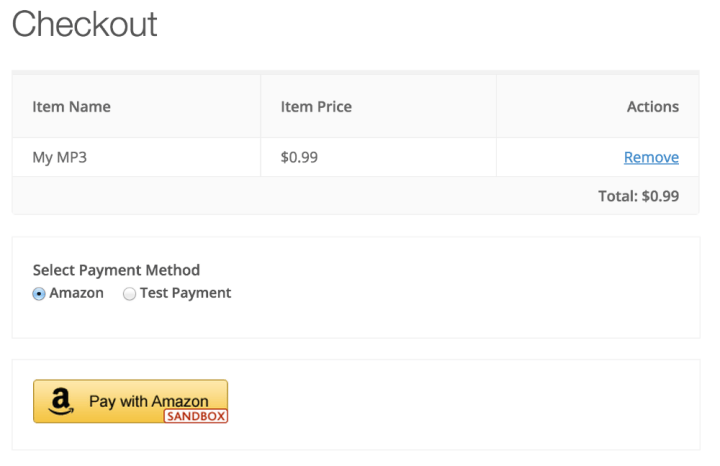
NOTE: the Pay button says Sandbox because
my local EDD store is in Test Mode. See my setting below:
Next click on the
Pay with Amazon link.
When you click Pay with Amazon it should open a pop-up window (watch out for pop-up blockers!) and ask you to log in:
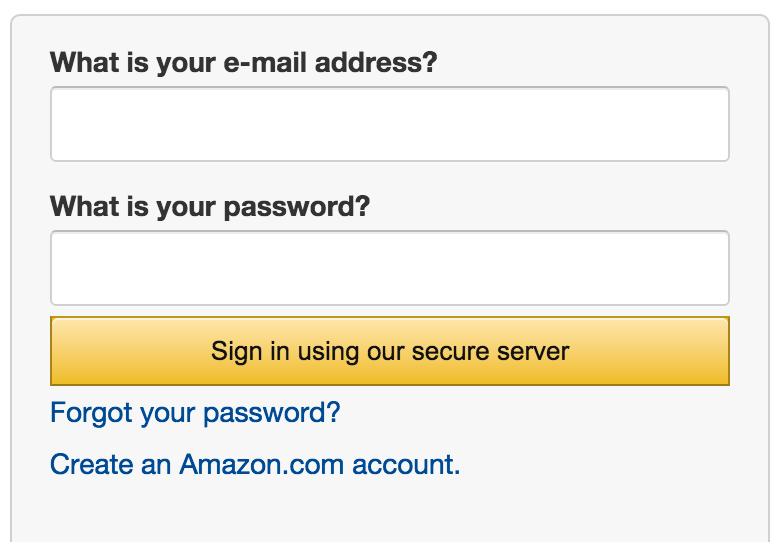
ALERT: use your Test Account, NOT your actual Amazon account.
After you log in you’ll be presented with a window like this one:
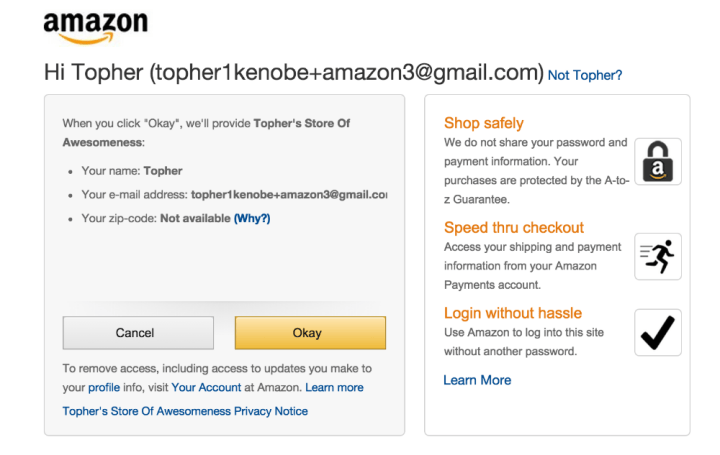
Click ok and the window will go away. At that point your main page will reload and you’ll be presented with a window like this:
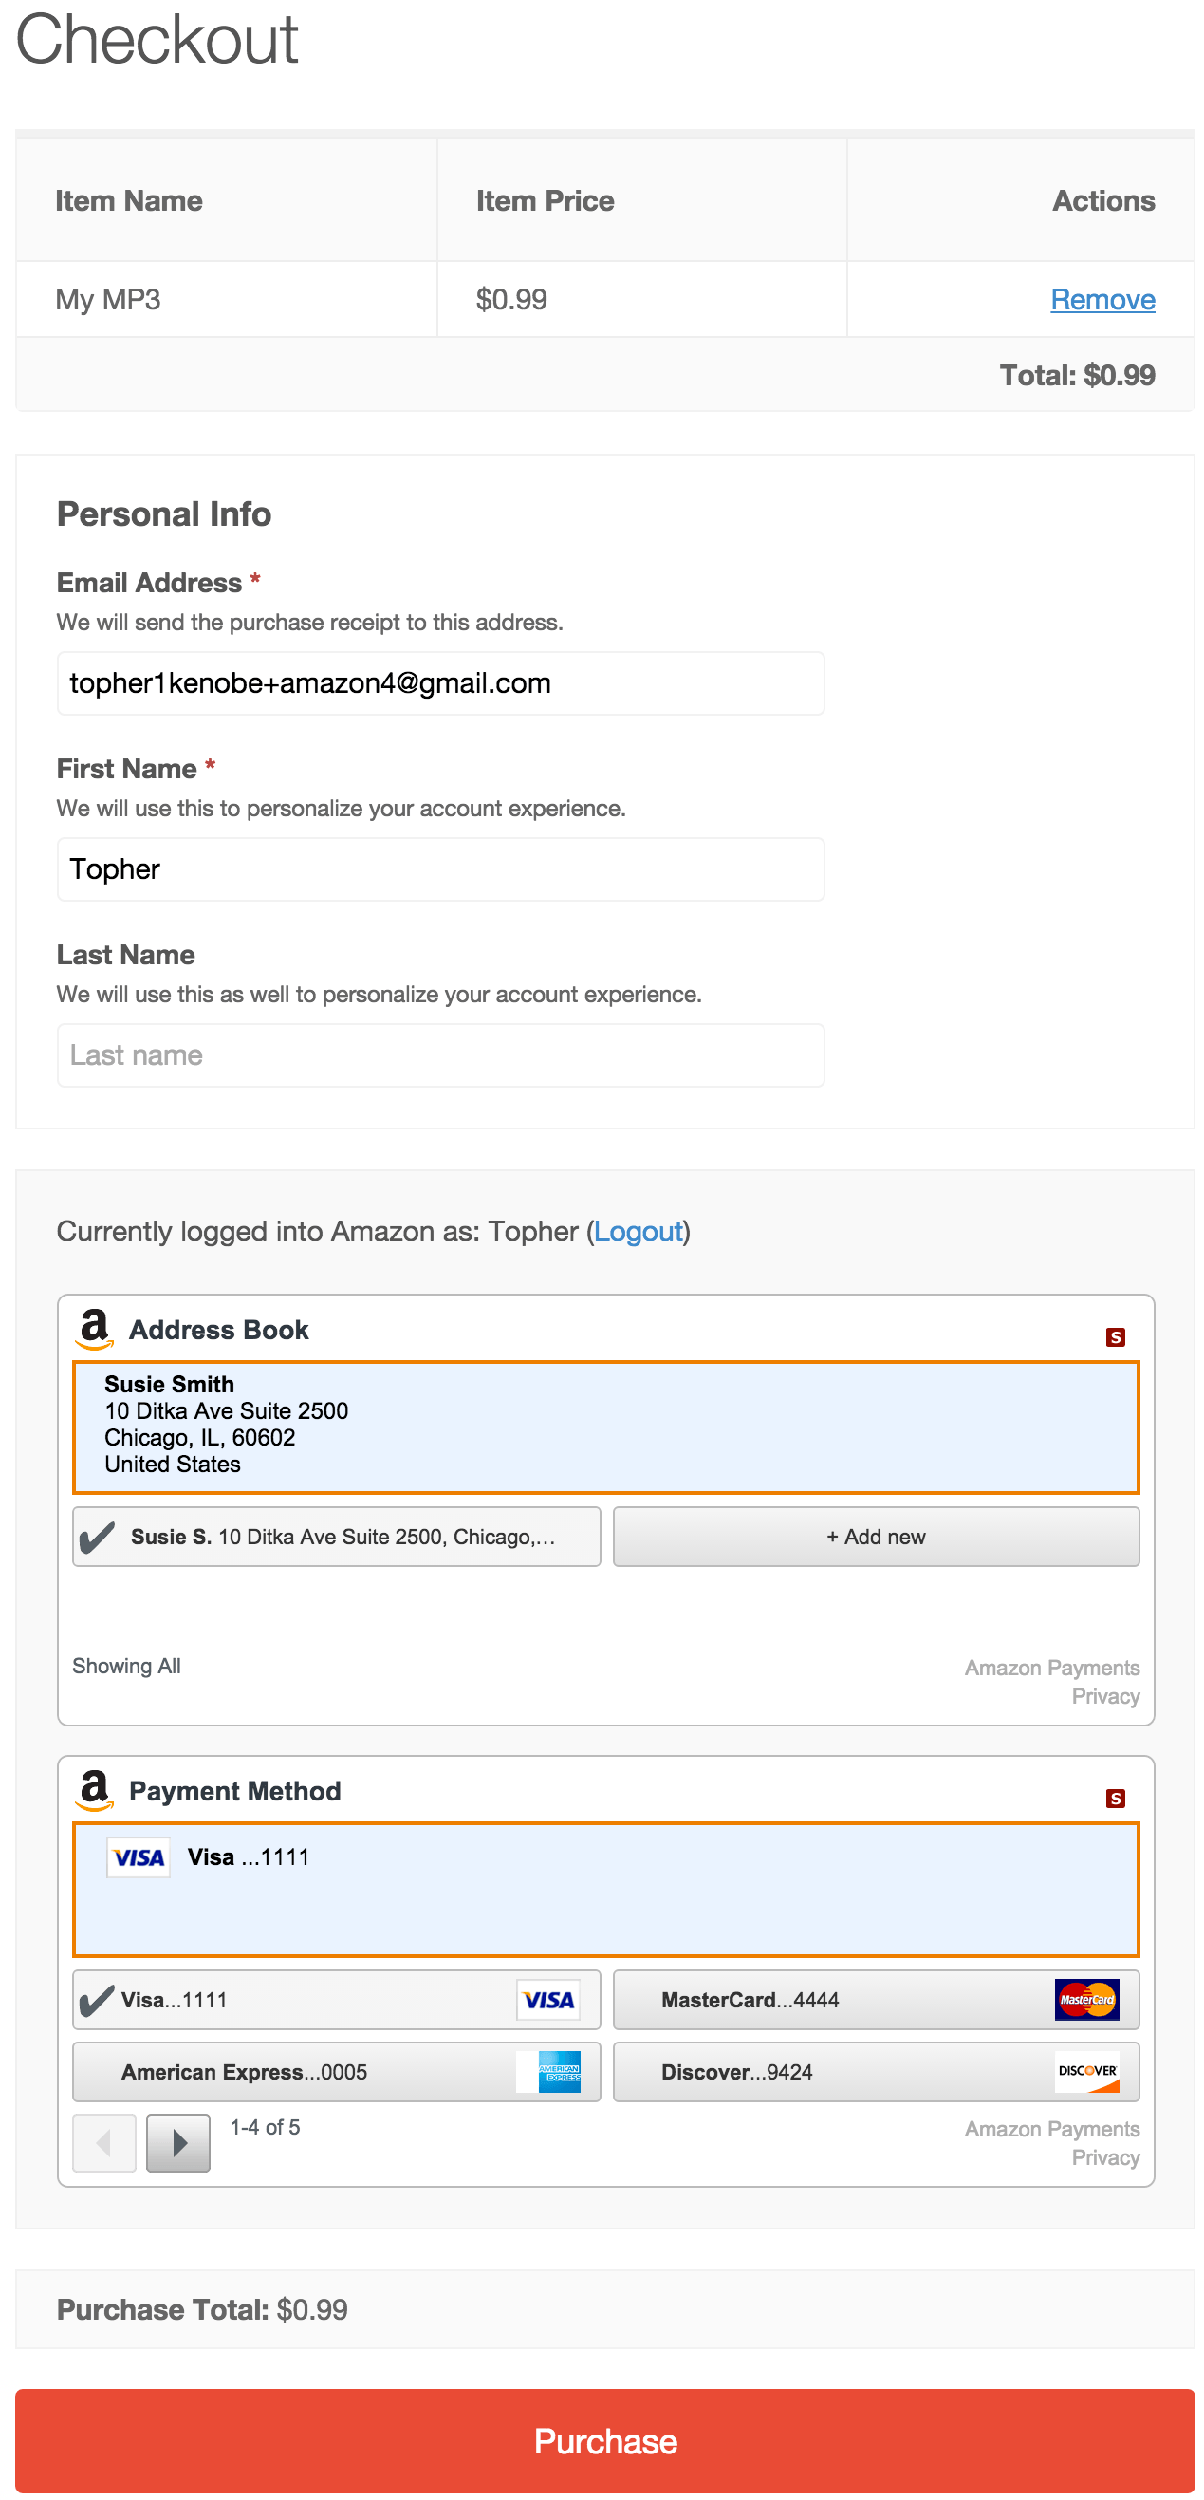
At this point you may choose any combination of the information in this window to complete the sale, but you must choose at least an address and at least a credit card.
Then click the Purchase button on the checkout page.
Amazon Payments Common Issues and FAQ
The setup for Amazon Payments can be tricky, and the error messages don’t do a very good job describing what the real problem is. Below are some known issues that we’ve run into.
Which countries support Amazon Payments?
The Amazon Payments FAQ currently says:
Amazon Pay is available for merchants with a place of establishment in the United States, United Kingdom, Austria, Belgium, Cyprus, Denmark, France, Germany, Hungary, Ireland, Italy, Luxembourg, the Netherlands, Portugal, Spain, Sweden and Switzerland.
Sender Access Denied
This one appears when trying to submit a purchase.
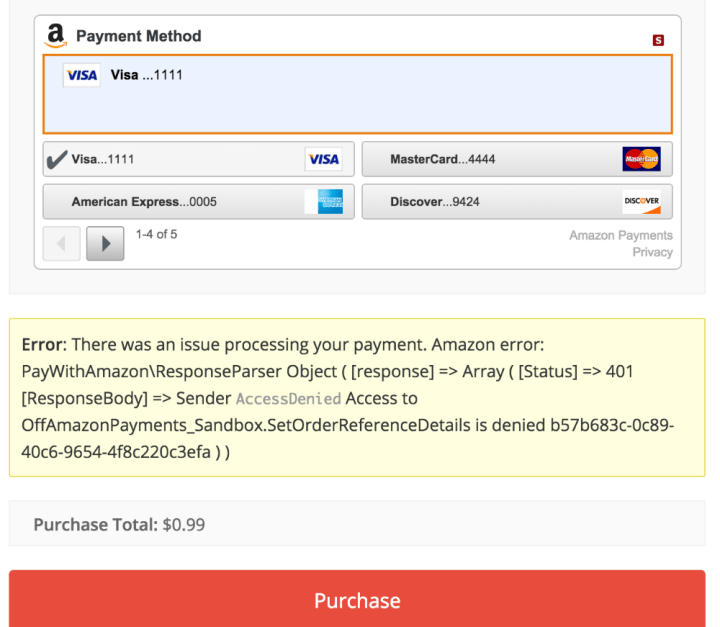
This happens when you have mismatched MWS keys, either using Sandbox keys in a live environment, or Live keys in the sandbox.
Payments Appear Processed, But No Money Transfers
This can happen when the customer has Third Party Cookies turned off in their browser.
Invalid Credit Card Information
Your live Amazon Sellers account must have a valid credit card on file. If you don’t have one then your Amazon account will put up a notice like this:

Taxpayer Identification Information
Amazon will want your Tax information before everything will work smoothly. If it’s not set up properly then your Amazon page will render this error message:

Invalid Client ID
If you receive an error that your client_id is invalid or missing, this usually means one of two things:
- You have entered your Amazon Payments credentials incorrect in Downloads > Settings > Payment Gateways. Please verify that they have been entered correctly.
- Another plugin on your site is causing a conflict that prevents the client_id from being set properly on the EDD checkout screen. Plugins that are known to cause this issue include optimization plugins (such as Autoptimize), caching plugins that concatenate or combine javascript and CSS files, and any other plugin that modifies javascript or CSS on the site.
SSL Issues
SSL is required for Amazon Payments to work. If yours isn’t working in some way you’ll see a window like this:
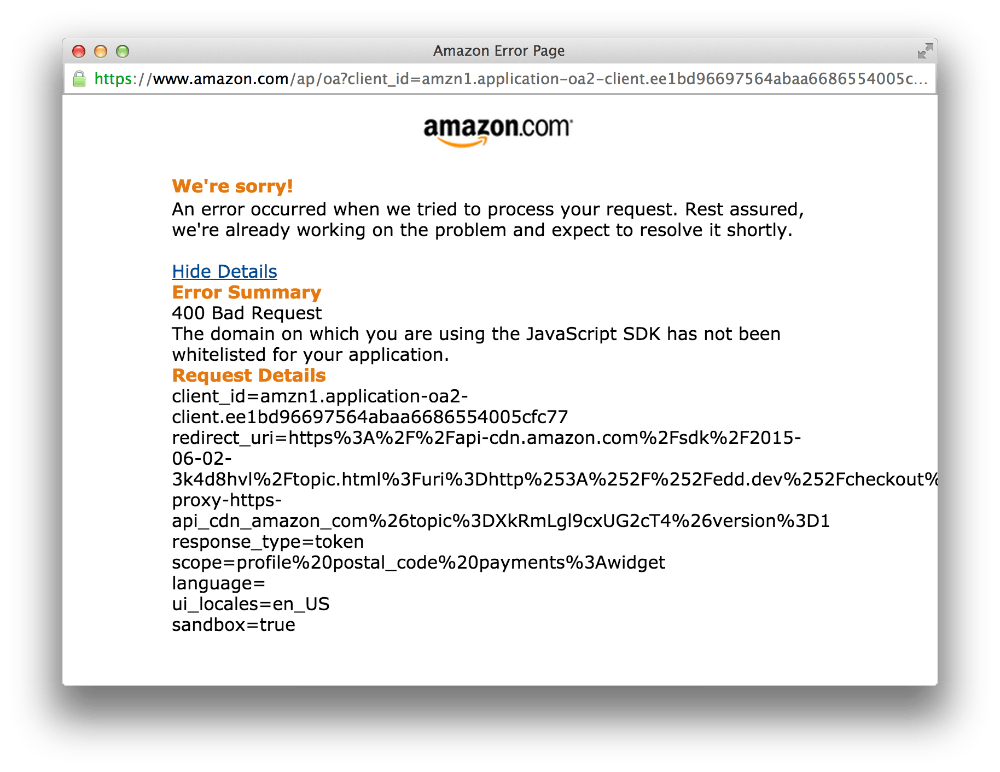
There are a variety of SSL related issues that could give this same error message. Here are some things to check:
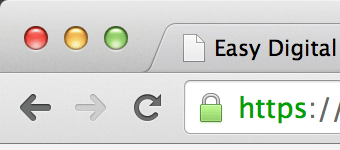
- Make sure your browser is running in SSL mode. Look for something like this in you browser’s location bar:

- Make sure you have “Enforce SSL on Checkout” turned on in the EDD Settings. Go to Downloads → Settings → Misc and you should see something like this:

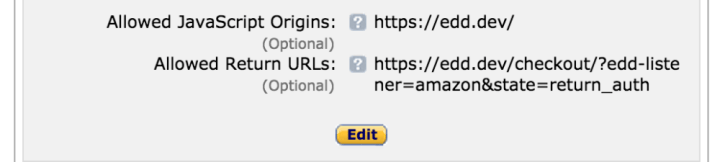
- During your initial setup of Amazon Payments for your Live system you were asked to enter two urls on your site. One was the Amazon MWS Callback URL and the other is simply Allowed JavaScript Origins. These URLs need to use SSL and they need to be in the proper place.To get them in the proper place, first log into your Amazon Seller Account. Then in the top right is a drop down list. that looks like this:
 Click that drop down list and choose Login With Amazon. At that point you’ll be presented with a page showing many things, but the important part looks like this:
Make sure you have the proper URLs in there with SSL. The “Allowed Return URLs” in the above image is called the Amazon MWS Callback URL in your EDD settings.