Check Payment Gateway Setup Documentation
To get started with Check Payment Gateway, the first thing you will want to do is install and activate it on your WordPress site. For instructions on how to install an extension, see this documentation.
Enable Checks Gateway
Once Check Payment Gateway is installed and activated, you can find the settings by going to
Downloads→Settings→Orders in your WordPress dashboard.
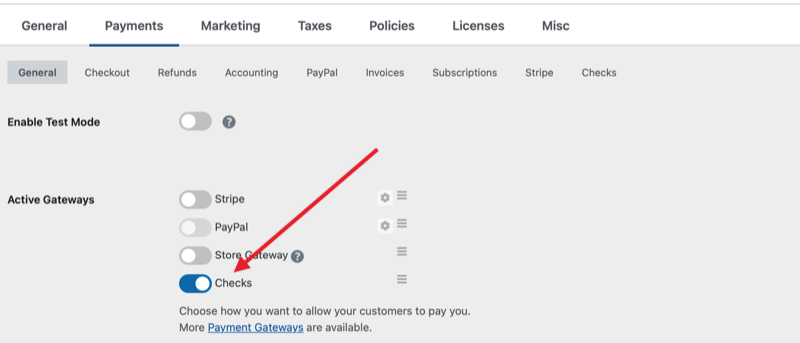
The first thing to note is that Check Payment Gateway, of course, is a payment gateway. So a new selection for “Checks” will appear on the Payment Gateways option and also in the select menu under Default Gateway.

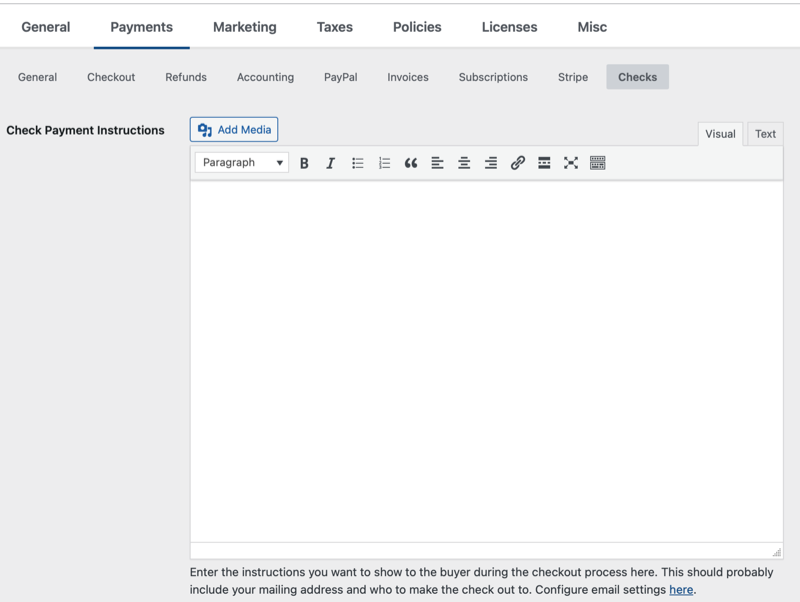
With those settings configured however you’d like, you will then click the “Checks” link toward the top of that page to enter instructions for your customers in the Check Payment Instructions field. The information you put into this field will display on the checkout page if the Checks gateway is used for payment.

You will want to input detailed instructions for where checks should be mailed to and any other important information. Please note that this is an important part of the process because Check Payment Gateway will mark the payment as Pending until you go in and mark it as complete. Typically, you will not do so until you have received the check so it is important that these instructions are clear.
Once the user completes the purchase process and has review the check payment instructions, they will redirected to a purchase receipt with a pending status. No download will be available to them until you mark the payment as completed.
Configure Check Payment Gateway Emails
Two emails send when a customer checks out using the Check Payment Gateway:
Check Payment Instructions
This email is sent to the customer when they choose to pay by check.
Check Payment Notification
This email is sent to the admin when the customer chooses to pay by check.
The emails are configured under Downloads > Emails.
Update “Checks” Term
You can read here on how to adjust the text to display something different than “Checks” on the checkout and settings pages.