
Table of Contents
Frontend Submissions (FES) is an extension for Easy Digital Downloads that allows you to create your own storefront for selling third party products.
Once FES is configured, you may allow anyone you wish to sell digital products through your store. You can also:
- moderate vendors
- moderate uploads
- optionally track commissions (with an extension)
- allow vendors to view orders
- allow vendors to create/edit/delete products
- give vendors access to their own product dashboard
- and much more
Frontend Submissions Overview
After you have installed and activated the Frontend Submissions extension, you can find the settings area by navigating to EDD FES → Settings.
Main Settings
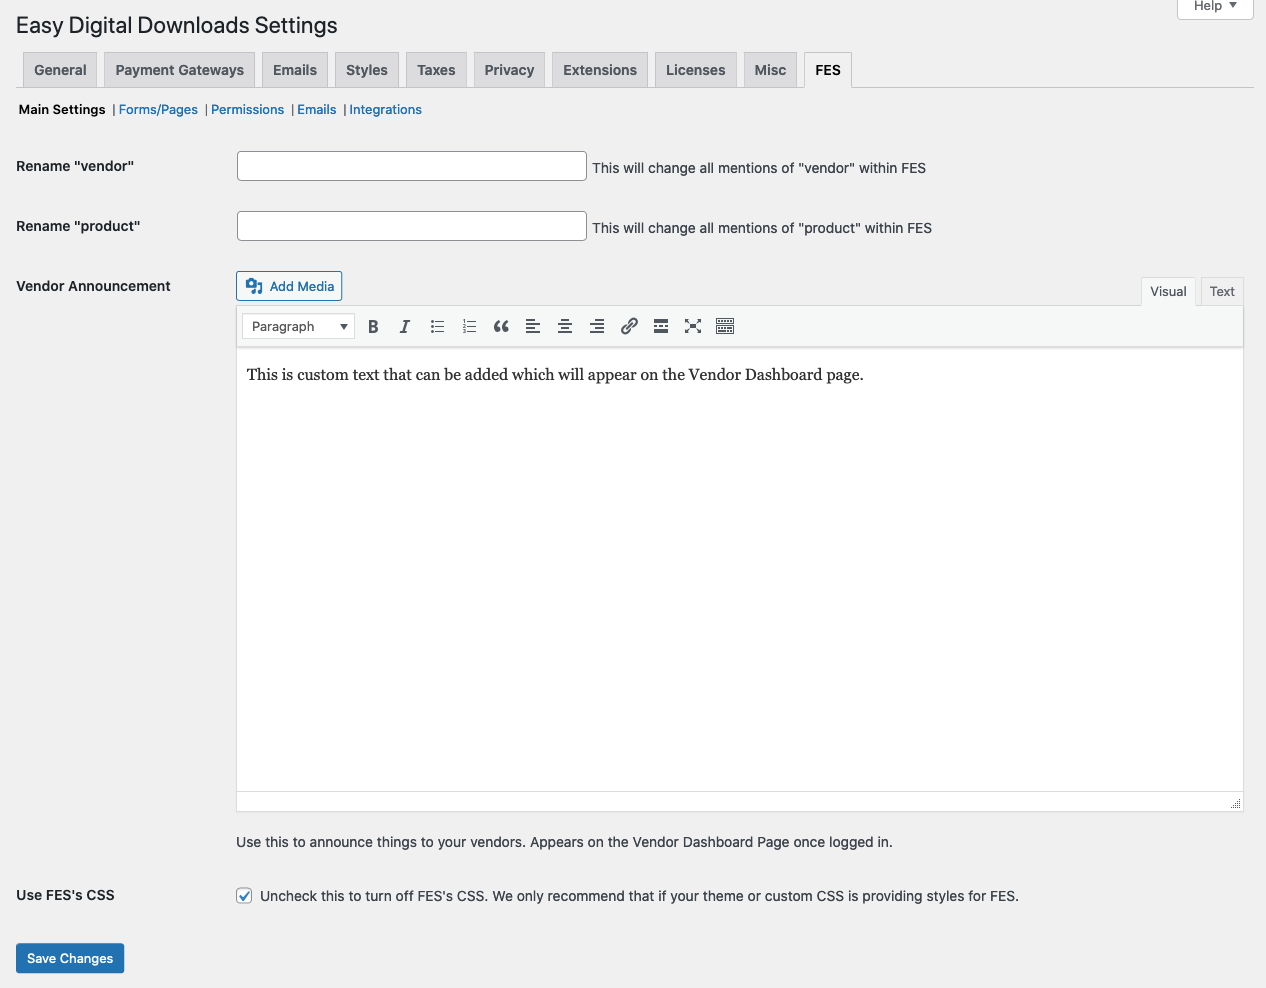
Rename Vendor: Add new text here if you’d like to change all references of “Vendor” to something else (ex: Shop Owner).
Rename Product: Add new text here if you’d to change all references of “Product” to something else (ex: Files).
Vendor Announcement: You can add text here specific to Vendors which will show on the Vendor Dashboard page.
Use FES’s CSS: You can disable styles added by Frontend Submissions if needed. Typically this would be done if there are styles already in place from your theme or if there are issues being caused by the FES CSS.
Forms/Pages
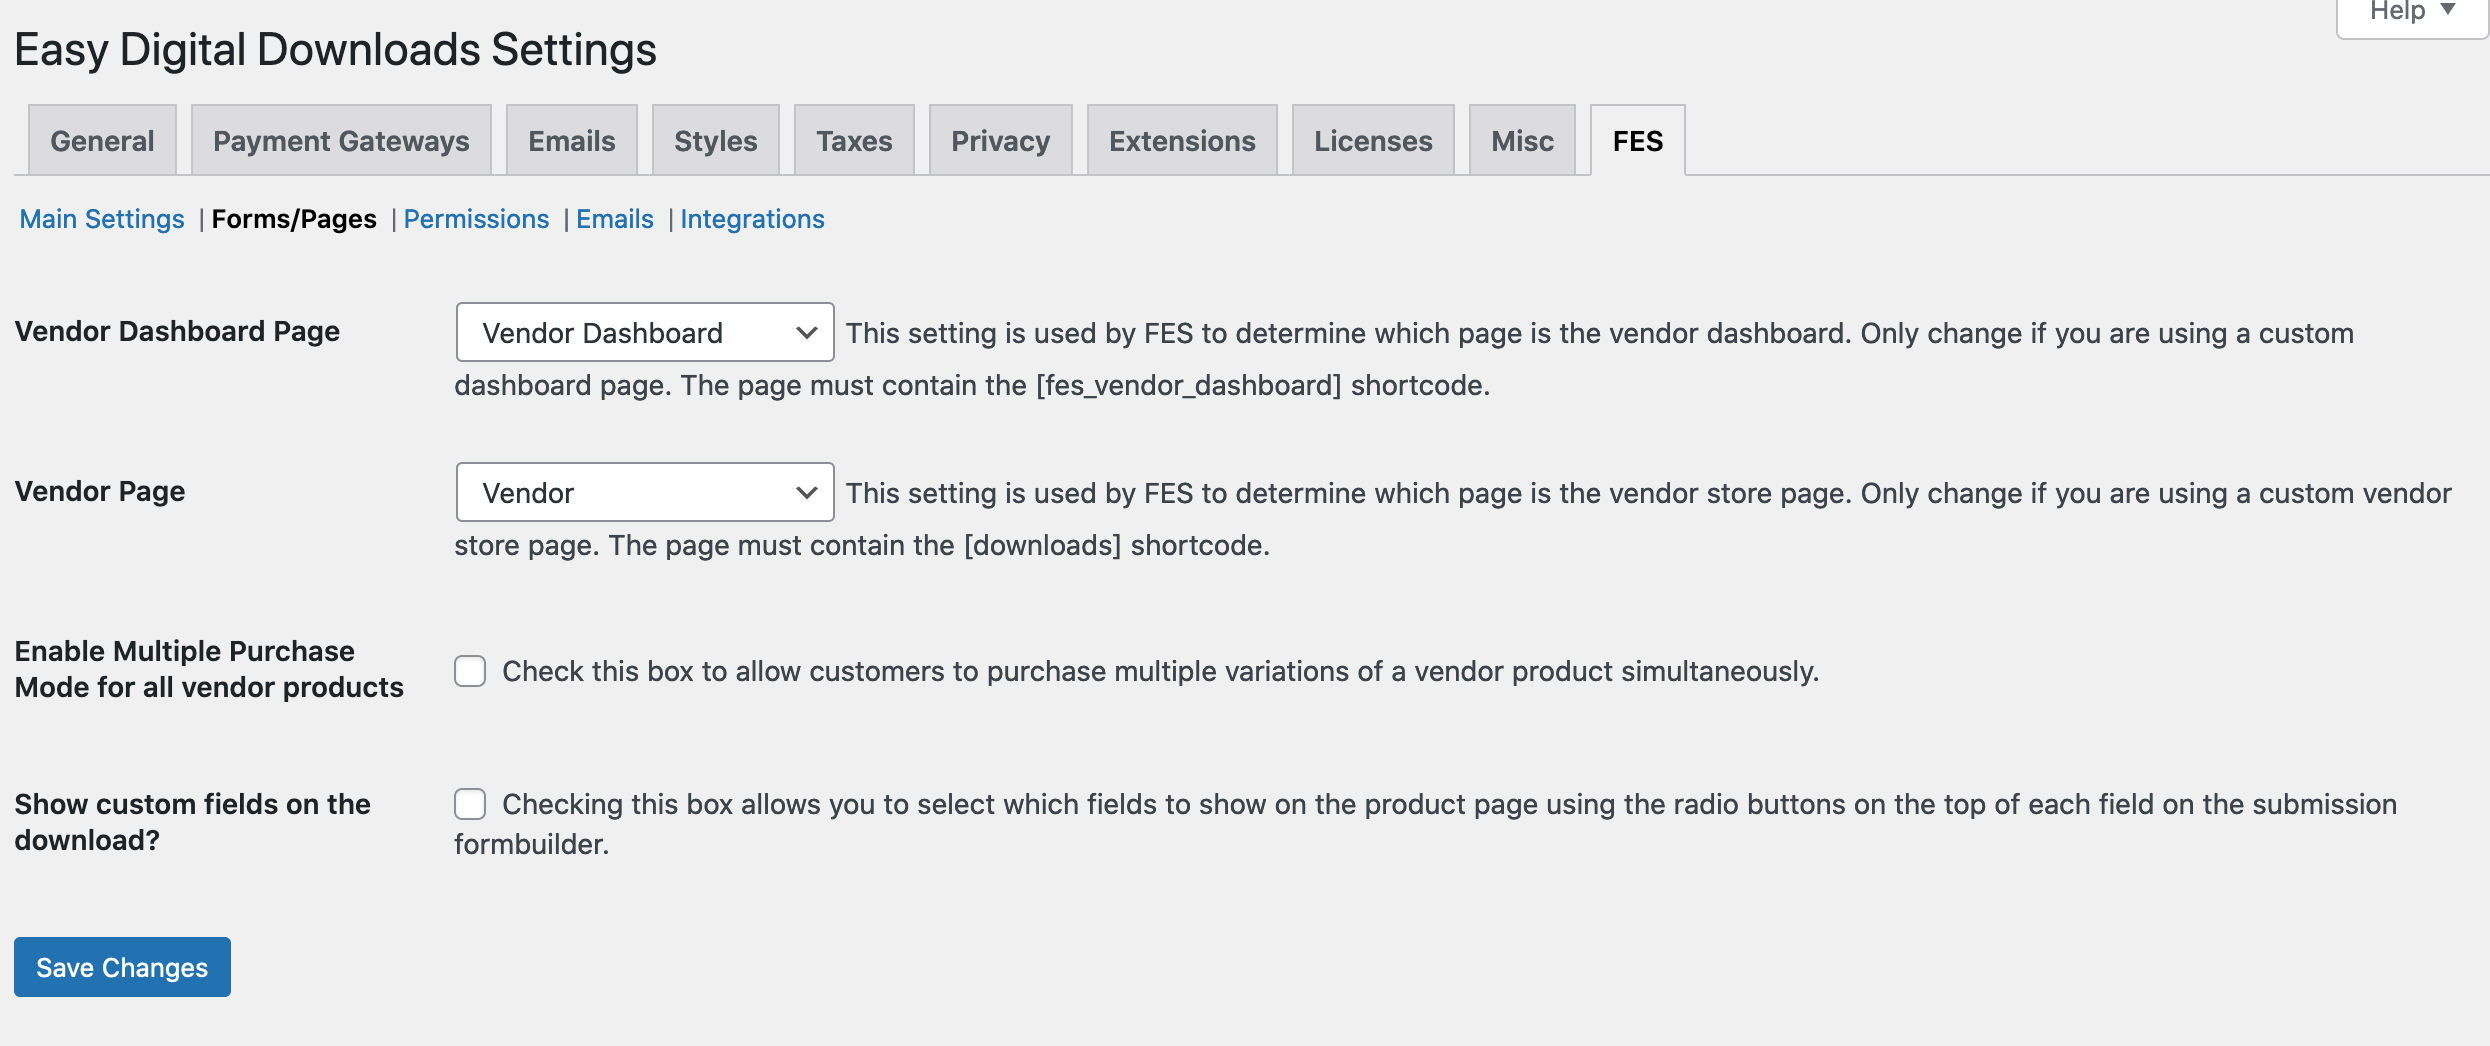
Vendor Dashboard Page – This is the page that acts as the central frontend dashboard for vendors. This page was automatically created when you activated Frontend Submissions. If you choose to change this page, please ensure that you update the select page here as well. This page must contain the [fes_vendor_dashboard] shortcode.
Vendor Page – This page is used as the base page for vendor stores. This page was created when you activated Frontend Submissions and will usually be left as is. This page must contain the [downloads] shortcode.
Enable Multiple Purchase Mode for all vendor products: Enable this option to allow customers to purchase multiple variations of a Vendor product simultaneously.
Show custom fields on the download: Enable this option if you want to select which fields to show on the product page using the radio buttons on the top of each field on the submission form builder.
Permissions

Registration: Enable this option to allow guests to apply to become a Vendor.
Applications: This option allows existing WordPress users to apply to become a Vendor.
Show the Admin Bar: This option allows the admin bar to be shown to logged in Vendors
Automatically Approve Vendors: This allows the Vendors to be automatically approved, opposed to being in moderation until the site owner approves them.
Automatically Approve Submissions: This allows Vendors to add products freely without having to wait on the site owner to approve submissions.
Automatically Approve Vendor Edits: This allows Vendors to edit their products without having to wait on the site owner to approve the change.
Allow Vendors to Create Products: This allows Vendors to create products.
Allow Vendors to Edit Products: This allows Vendors to edit products they’ve created.
Allow Vendors to Delete Products: This allows Vendors to delete products they’ve created.
Allow Vendors to View Orders: This allows Vendors to view the orders that have been made for their products.
Emails
Under the Emails section, you can configure each of the emails sent out for various events. Click here for a list of template tags available and sample emails.
Integrations
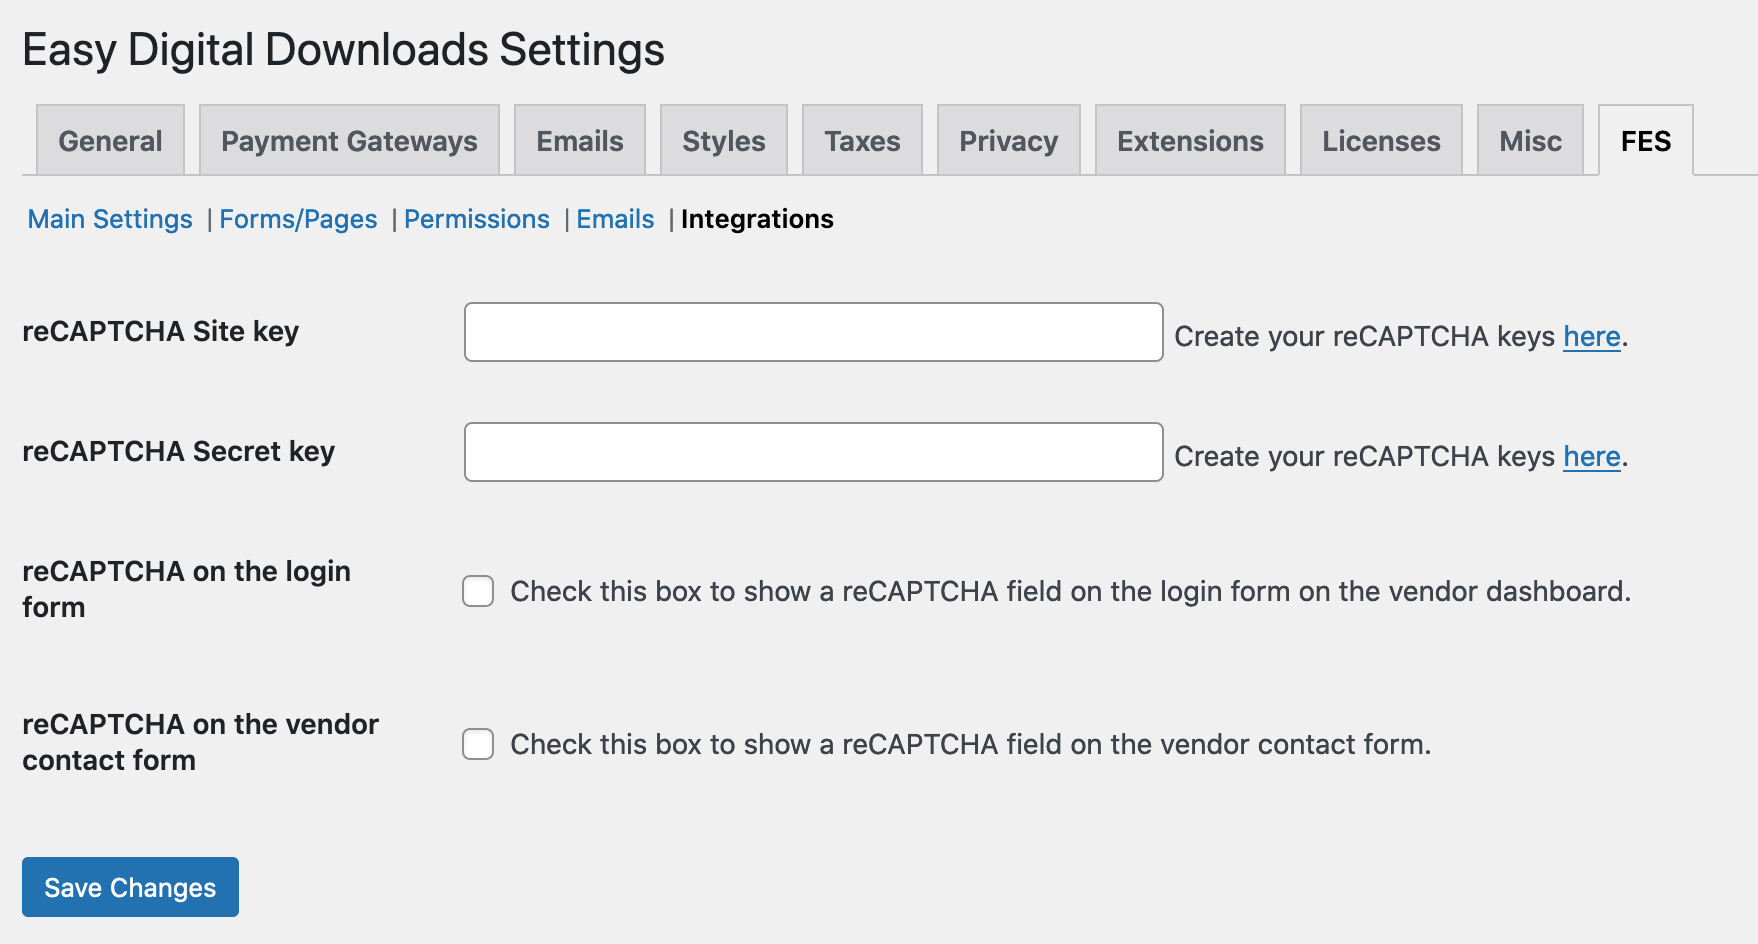
This area allows the integration with reCAPTCHA to allow it to be added to the login and contact forms for Vendors. You can read more here on how to configure reCATPCHA.
The next steps of the setup process include the Submission, Profile, and Registration forms for Vendors. You can read more about each form through the links below.


