Once the extension is installed and activated you can navigate to Downloads > Settings > Extensions > Slack and you will want to first create an Incoming Webhook for your Slack Team.
This allows EDD Slack to send Notifications on your behalf, meaning it can only send Notifications to the same Channels that you can. If you have access to a Private Channel it can send Notifications to that Private Channel, but it cannot send Notifications to Private Channels to which you do not have access.
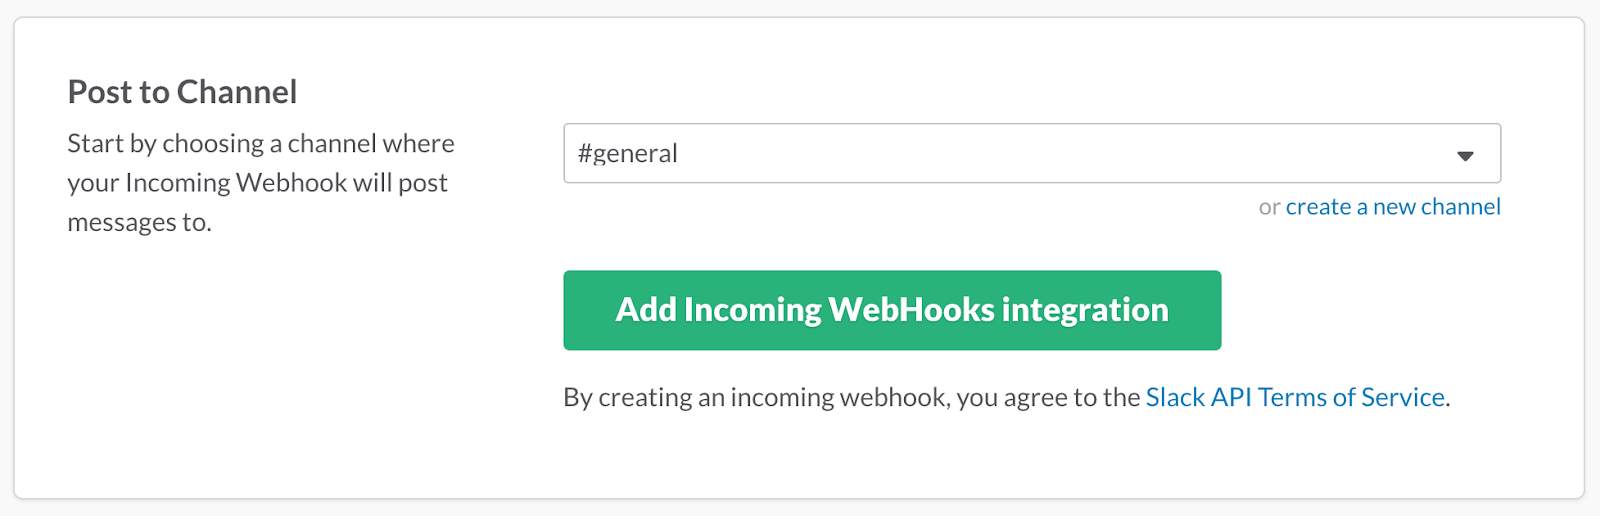
While creating an Incoming Webhook Integration Slack will ask you which Channel you would like to post to. Think of this as a “Default Channel”. For each Notification that you create in the extension, you are able to designate different Channels if needed.
Once you have generated an Incoming Webhook, enter it into the “Default Webhook URL” field and click “Save Changes”. Now you can proceed to Create Notifications!
EDD Slack allows you to configure an unlimited number of Notifications to be sent to any specified Channel in your Slack Team. Simply navigate to the settings page for the extension and click “Add Slack Notification” to bring up the configuration form. These settings can be edited later at any time.
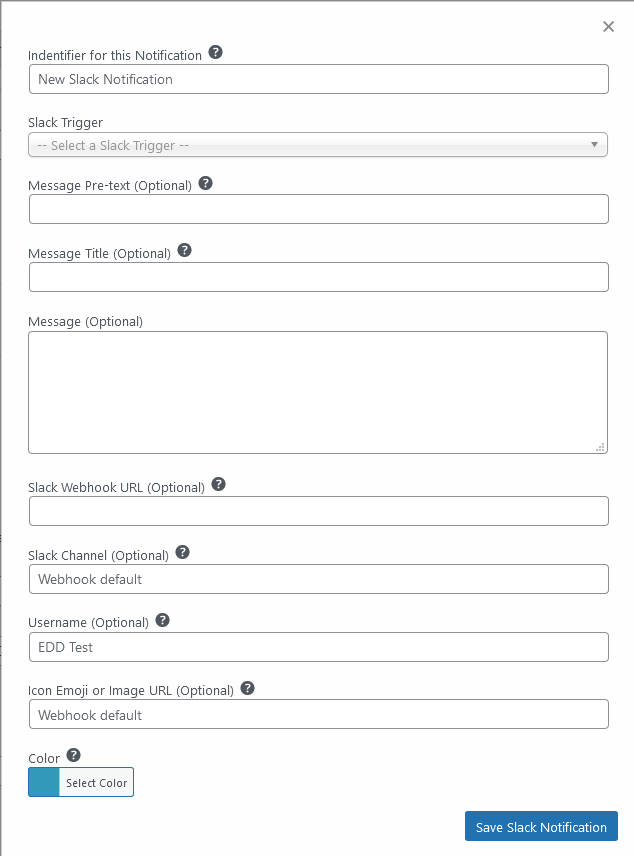
Here’s a description of what each field does:
Identifier for this Notification: This field is simply a label for you and helps you determine which saved Notification does what. You can enter whatever you’d like here. If nothing is entered, it will default to “New Slack Notification”.
Slack Trigger: Defines the Trigger which results in this notification sending a message to Slack. This can be an action within Easy Digital Downloads or another supported Easy Digital Downloads Extension. Based on the choice of Trigger, additional fields will be added to the Form and different Text Replacements for the Message Pre-text, Message Title, and Message fields will become available so that pertinent information about the Notification can be passed to Slack.
Message Pre-text: Optional text which shows above the Message Title.
Message Title: This allows you to control the Message Title. If nothing is entered, this will default to the Notification Identifier above.
Message: This is an optional field where you can enter more descriptive text within the Notification below the Pre-Text and the Title.
Slack Webhook URL: Allows for an alternate Webhook URL to be used in special cases. This can be used in an event where a Notification should be sent to a different Team than the one that is defined for the Default Webhook.
Slack Channel: This allows you to override the Slack Channel of the Webhook for this particular Notification. If you desire to send notifications to a specific Slack User in your Team, use the @username syntax. Leave blank for the Default Channel defined by the Webhook. Remember, this Channel needs to be one that the creator of the Webhook URL has access to!
Color: Messages sent to Slack will have this color appear in a bar before the message.
Username: Defines the name of the User that the message will appear to be from. The User does not need to exist in Slack and this can be set to anything you’d like. This will default to the name of your WordPress site.
Icon Emoji or Image URL: If the default image or emoji used for notifications isn’t your style, this field will allow for custom graphics to be specified. You can also set any created Custom Slack Emoji that you want for this field.
Additional fields will also appear depending on the selected Slack trigger. These allow you to specify for which Downloads a Trigger should send a Notification for example.
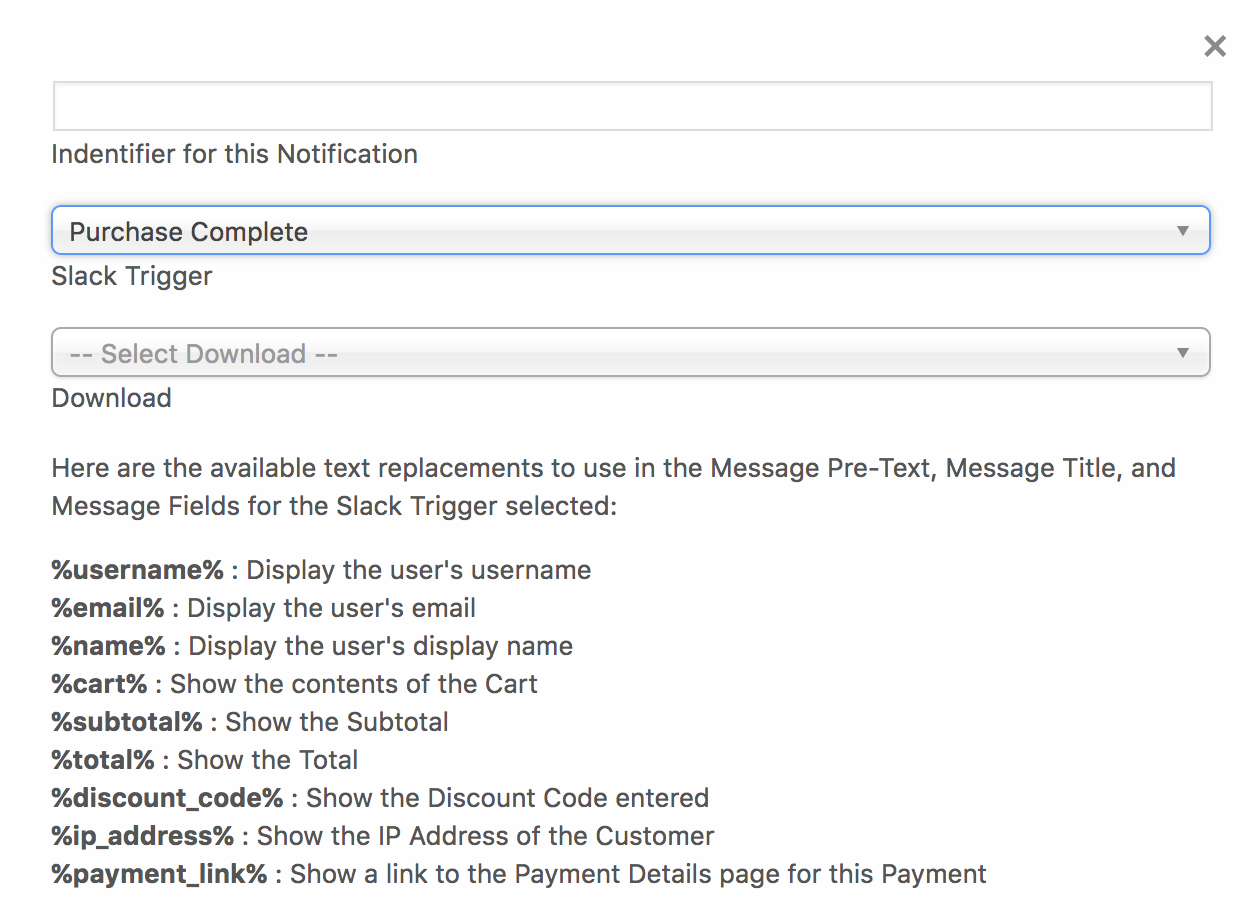
When a Slack Trigger is chosen, additional Fields and Text Replacement tags are added to the Form. For example, here’s what you will see when choosing the “Purchase Complete” Trigger:
The Text Replacement tags allow information about the Trigger to be added to the content of the Notification. This way you can see the contents of a cart for a Purchase, the Total, and other bits of information based on the chosen Trigger.
Once the Form has been filled out to your liking, click the “Save Slack Notification” button at the bottom of the form. This will close out the Form and bring you back to the screen you were at before and flash the Notification green to show that it has been Saved. The green Checkmark will show that the Notification is Active. Congratulations, you have configured your first Slack Notification!
If instead of a green Checkmark, you see a red “X”, the notification is Inactive. This can happen for one or more of the following reasons:
A Webhook URL was not set as the Default or otherwise provided as part of the Form.
The form was closed out without Saving.
A previously saved Notification was using a Trigger that is no longer available. This can happen when a plugin that integrates with EDD Slack gets disabled.
Setting up a Slack App
These steps are optional, but unlock extra functionality within EDD Slack. If you follow these steps, you will be able to perform actions on your site directly from a Slack Notification by clicking a Button within a Slack notification as well as return data from your site using Slash Commands.
Note: To proceed, your site must have SSL enabled!
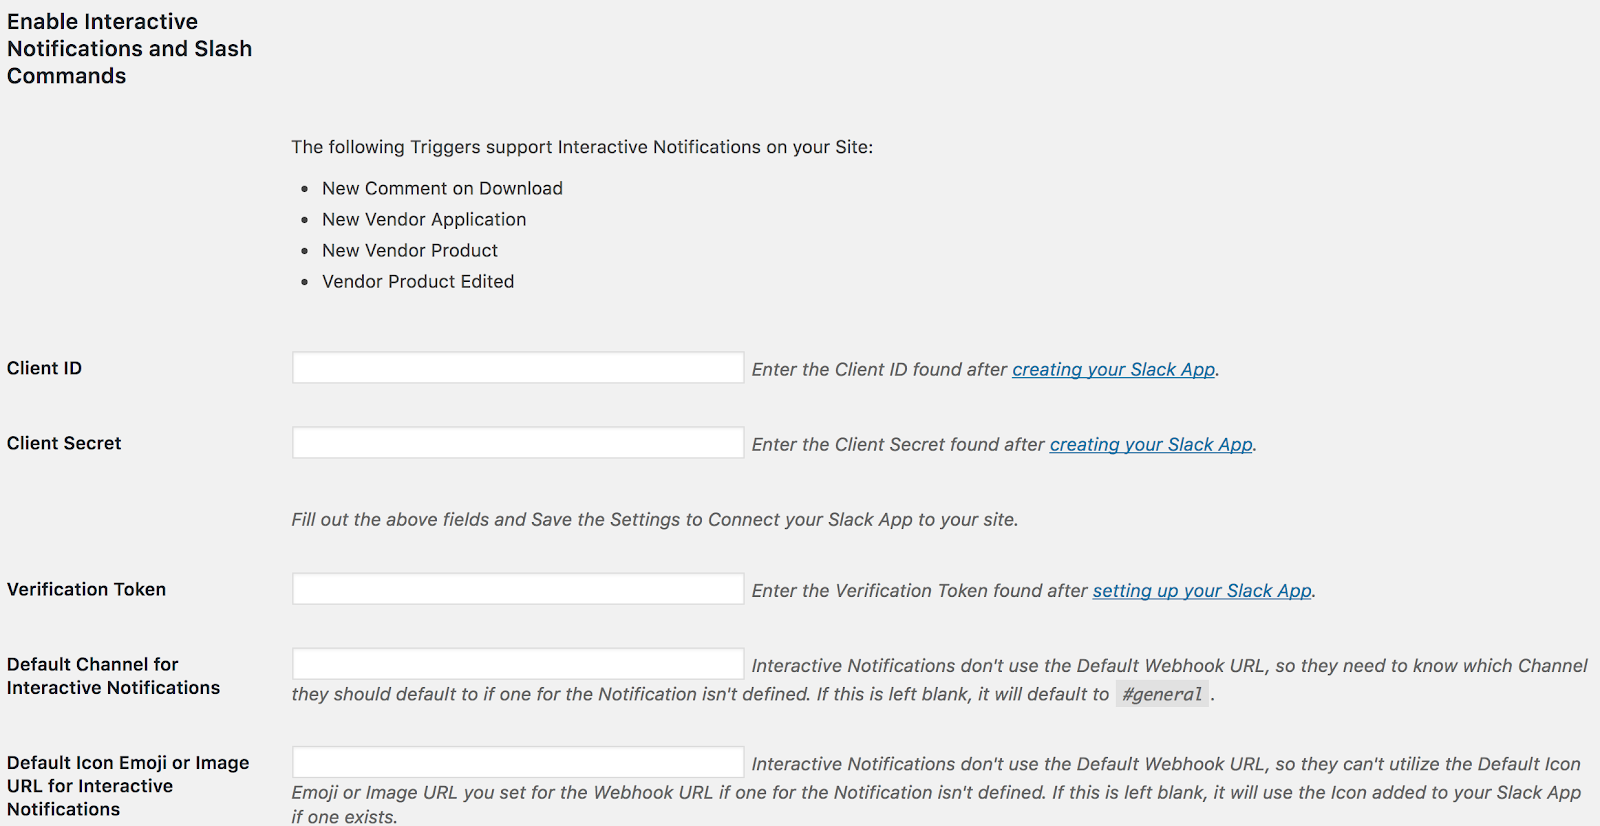
If your site has SSL enabled, you will see some additional options below the created Slack Notifications:
At the top of this section, a list of any available Triggers that support Interactive Buttons will be displayed. If none are shown, you can still benefit from setting this up to use Slash Commands!
This functionality is based on linking a Slack App to your website. Follow the link to create your own Slack App by clicking the “Create New App” button to get started.
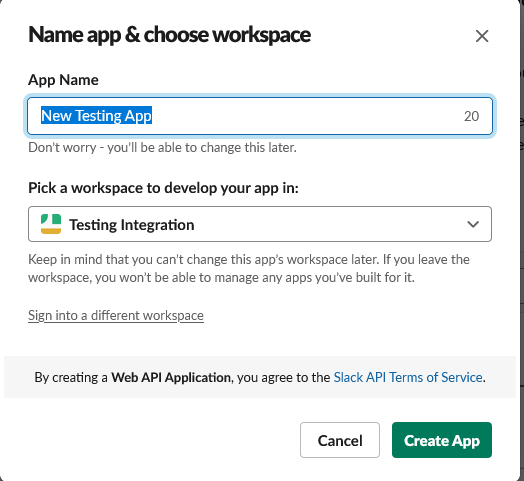
Initially Linking the Slack App:
The App Name field can be anything you want. It is used within Slash Commands as the “Username” when it returns data back to you. The Workspace field should be the Team you want to link your EDD store to. Click “Create App” to continue.
The next screen will show you your Client ID, Client Secret, and Verification Token for the Slack App in the App Credentials section lower on the page. Enter these back in the EDD Slack Settings (Downloads > Settings > Extensions > Slack)and click “Save Changes” at the bottom of the screen.
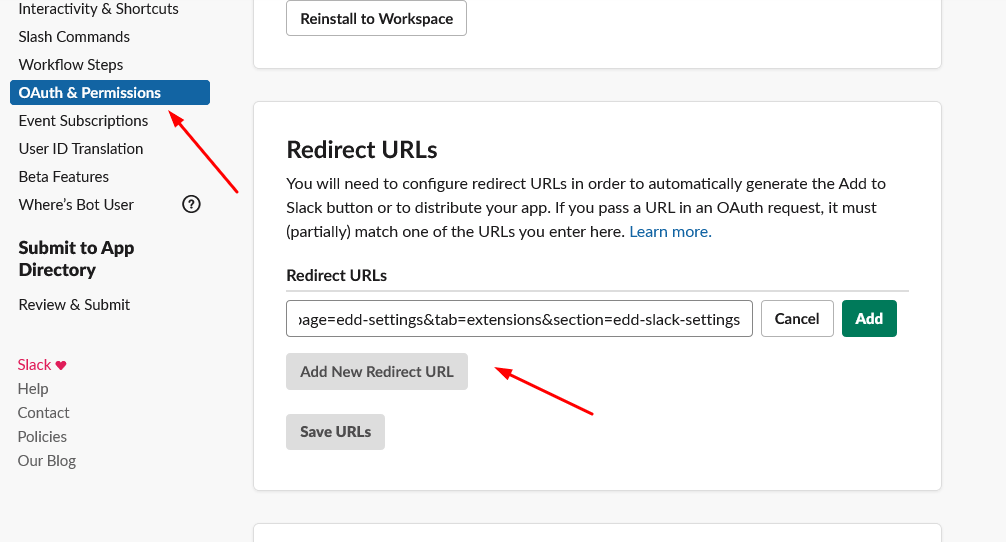
Before you can click the “Link Slack App” button that appears, you will need to define a Redirect URL for the Slack App. Back in the settings for the Slack App you created:
Click “OAuth & Permissions” on the left of the screen.
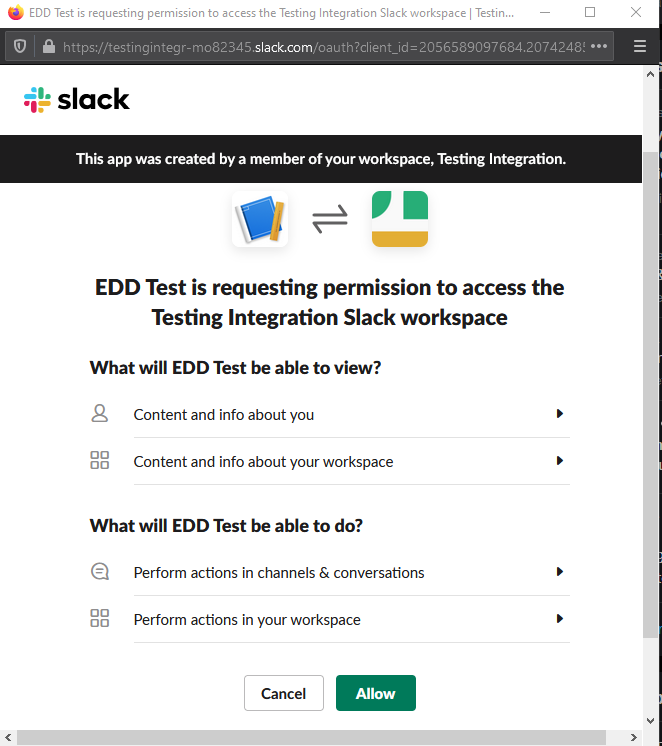
Now you can return to the EDD Slack Settings page and click the “Link Slack App” button. This will pop up a new window where you will sign in to your Team that was set before to Authorize the Slack App on your site. Similarly to the Webhook URLs before, this will mean that it is restricted to the same Channels that the Slack User who linked the Slack App to the site has access to within the chosen Team.
Once Authorized, the popup window will close on its own and the EDD Slack Settings Page will refresh, presenting you with a “Slack App Linked Successfully” message.
Now that this step has been completed, API Endpoints have opened on your site. These are used for both Interactive Notifications and Slash Commands.
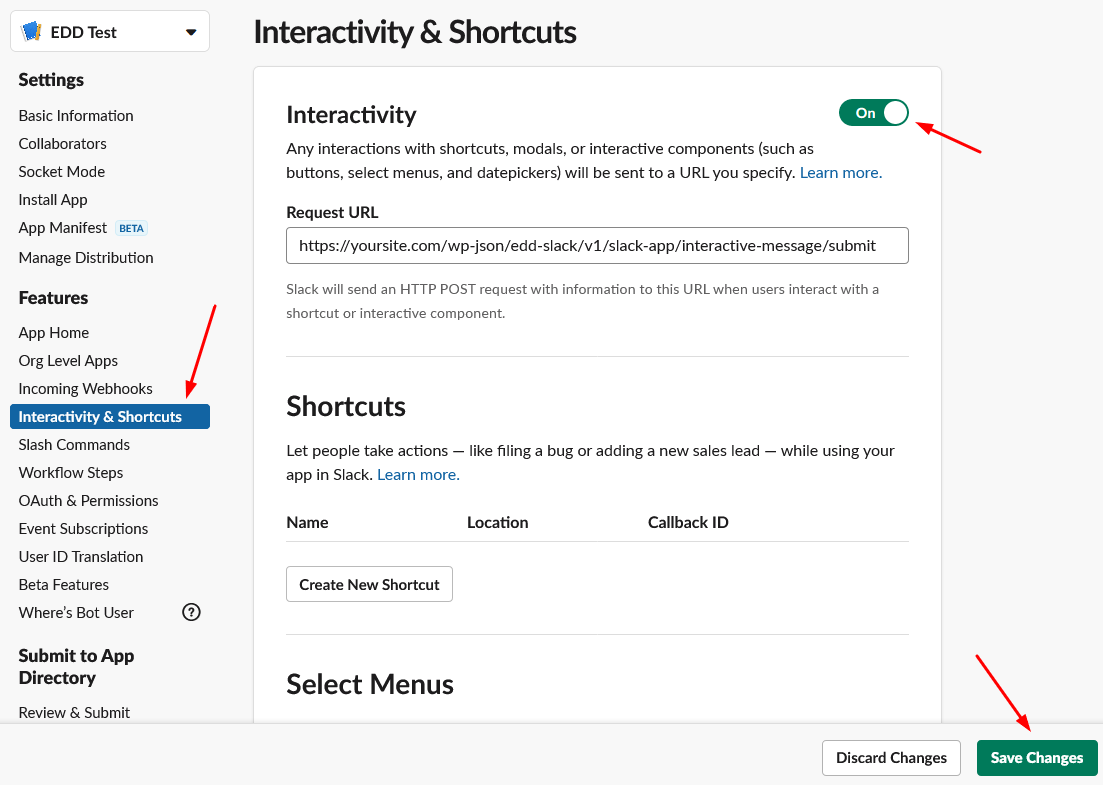
To set up Interactive Notifications for EDD Slack, return to your Slack App’s Settings and click on “Interactivity & Shortcuts” on the left side of the screen.
Slash commands act as shortcuts for specific actions in Slack that you can use to interact with your EDD store.
To set up Slash Commands, within your Slack App’s Settings, click on “Slash Commands” then click “Create New Command”. This will bring up a window where the Settings for the Slash Command will be entered.
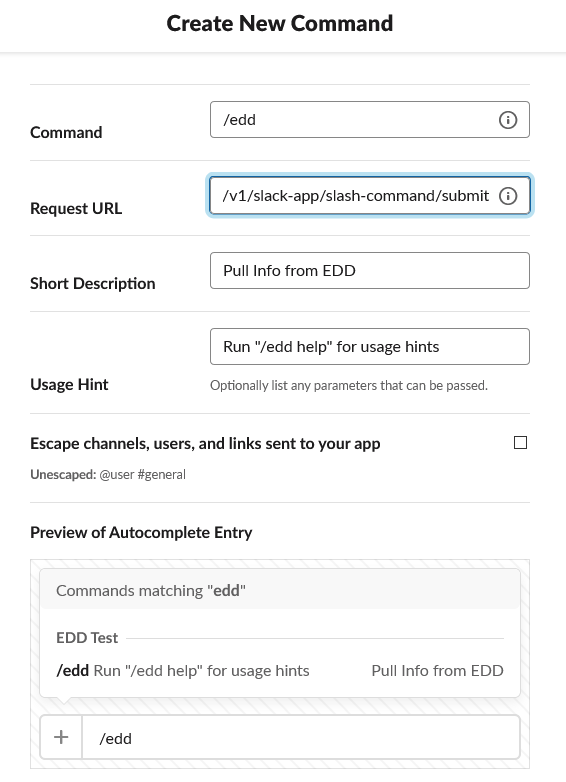
EDD Slack utilizes a single Slash Command and routes it to different functions based on a passed parameter. Here is an example of a /edd command:
Command: /edd We recommend setting the “Command” to /edd, but if you were to decide to name it /webstore or anything else that will also work.
Request URL: https://yoursite.com/wp-json/edd-slack/v1/slack-app/slash-command/submit where yoursite.com is the domain name of your website.
Short Description: Pull Info from EDD
Usage Hint: Run “/edd help” for usage hints
Escape channels/users: This can be left unchecked in most cases. Turning this on will modify the parameters sent with a command by a user. More details here
You can test Slash Commands by entering /edd help within any channel you have access to. Interactive Notifications will be used in place of regular Notifications where applicable.
The extension features several useful commands that can be run within Slack to retrieve data or create something new within your WordPress site without actually logging in to your site at all.
Slack already includes many useful slash commands which can be very helpful like the /remind command. EDD Slack introduces a few new commands that apply specifically to users of Easy Digital Downloads.
The easiest way to view all of the available slash commands included within EDD Slack is to enter /edd help into Slack. This can be done anywhere and the results will only be visible to you. They will look like this:
*/edd sales*
Description: Show an Earnings Report for the Selected Time Period
Example: `/edd sales this_month`
Option(s): `today`, `yesterday`, `this_week`, `last_week`, `this_month`, `last_month`, `this_quarter`, `last_quarter`, `this_year`, `last_year`
Default: `this_month`

*/edd version*
Description: Outputs the current version of Easy Digital Downloads.
Example: `/edd version`

*/edd discount*
Description: Outputs information about a Discount Code. This can also be used to create new Discount Codes.
Examples:
    `/edd discount DISCOUNTCODE` - Retrieve information about a Discount Code
    `/edd discount DISCOUNTCODE $3.50` - Create or Update a Discount Code with a Flat Rate Discount
    `/edd discount DISCOUNTCODE 42%` - Create or Update a Discount Code with a Percentage Discount

*/edd customer*
Description: Outputs information about a Customer. You can use either their Customer ID or their Primary Email Address for this command.
Examples:
    `/edd customer 42`
    `/edd customer [email protected]`

*/edd help*
Description: Shows this Dialog. Optionally can show the Help Dialog for a Single Command.
Example: `/edd help`
Option(s): `sales`, `version`, `discount`, `customer`
As shown above, the currently included slash commands are:
/edd help
/edd sales
/edd version
/edd discount
/edd customer
Configuring Slack Team Invites
To enable this feature, your own personal Slack User account must have the permissions necessary to Invite Users. This is normally reserved for Slack Team Admins. Similar to Interactive Messages and Webhook URLs, this inherits some capabilities of your Slack User. If you cannot Invite Users, neither can your Slack App.
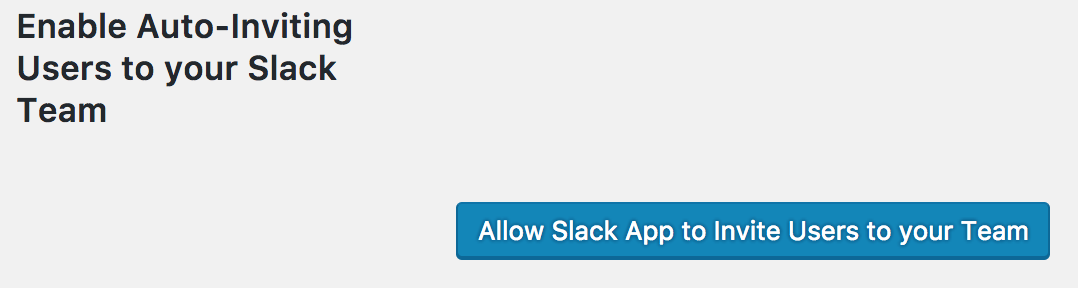
The ability to auto-invite Customers to your Slack Team exists in the extension which requires Interactive Notifications and Slash Commands to have been enabled already.
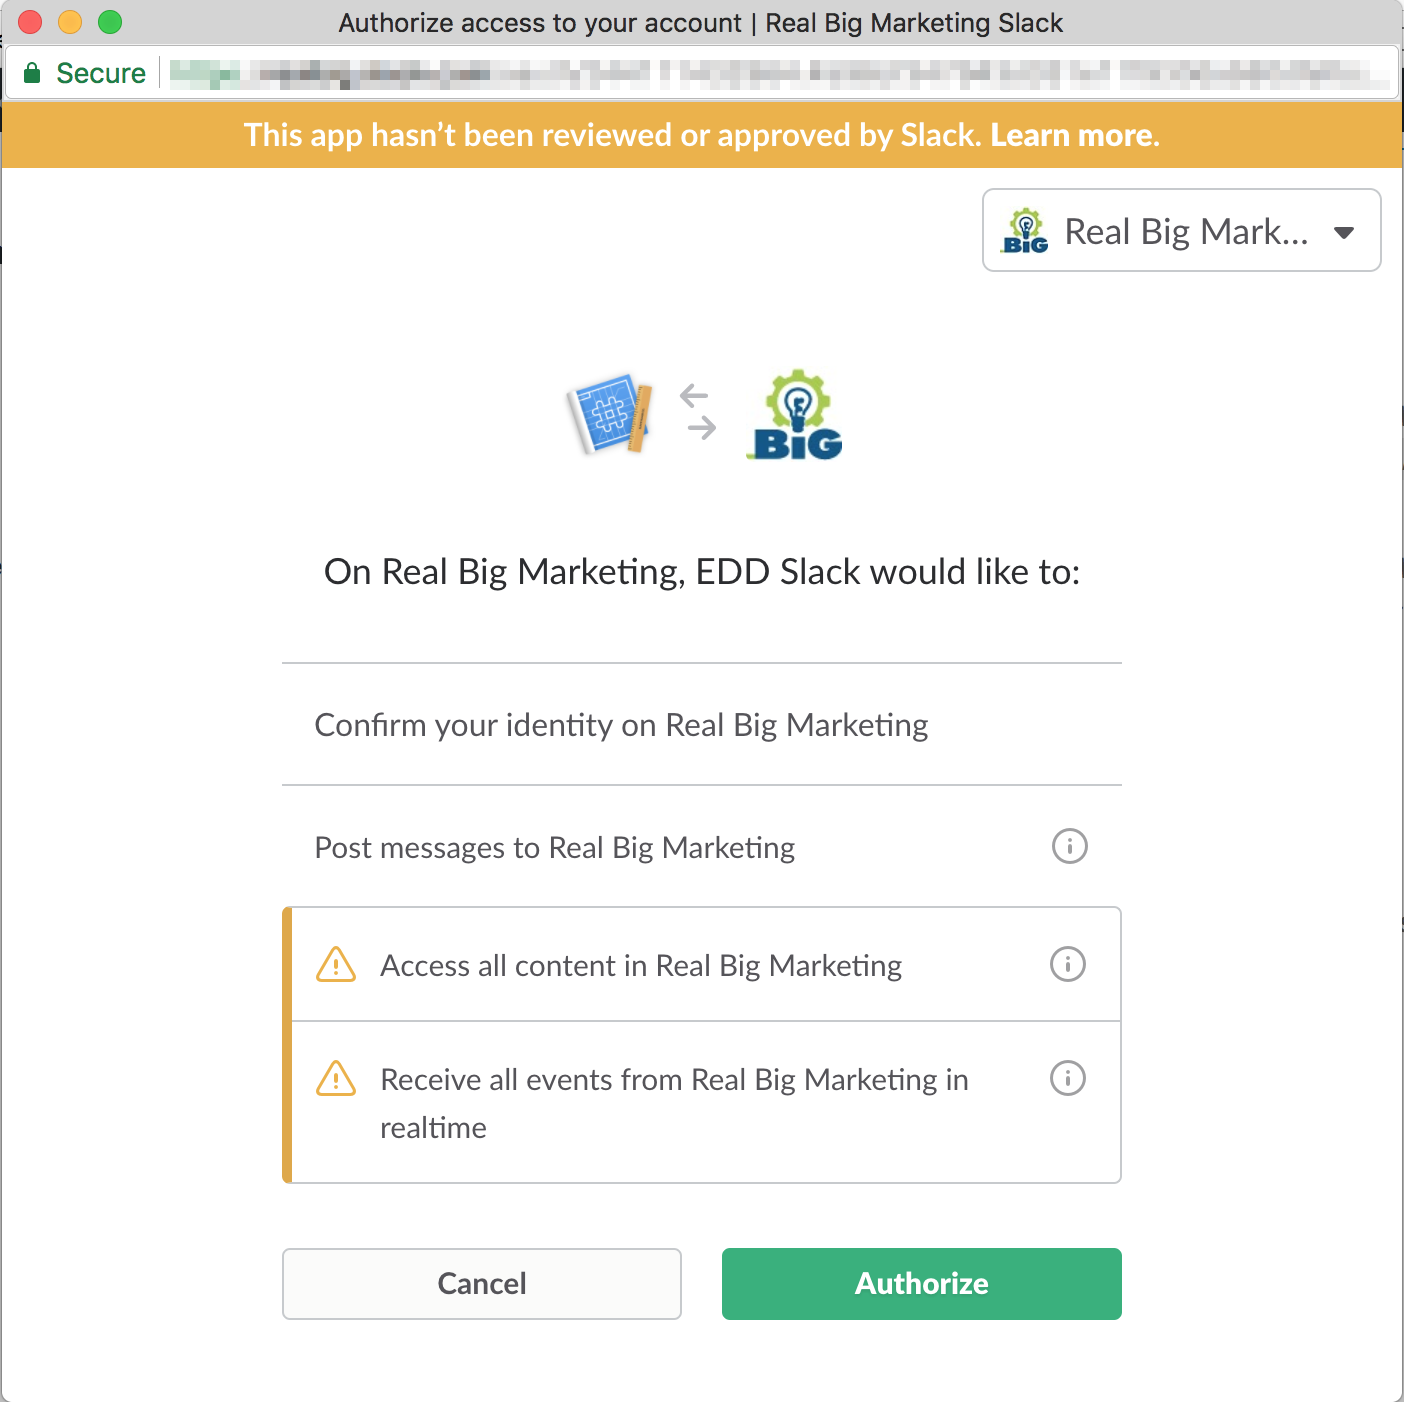
Once you click this button, a similar popup window will appear as when you previously set up Interactive Messages and Slash Commands. This is because you need to grant more permissions to your Slack App.
The window that appears will say that you are granting the Slack App the ability to access all content and all events in real-time. This is due to the fact that in order to invite Customers and Slack Users, your Slack App needs all of the permissions as a full-blown Slack Client. This is only used for inviting Customers to your Slack Team.
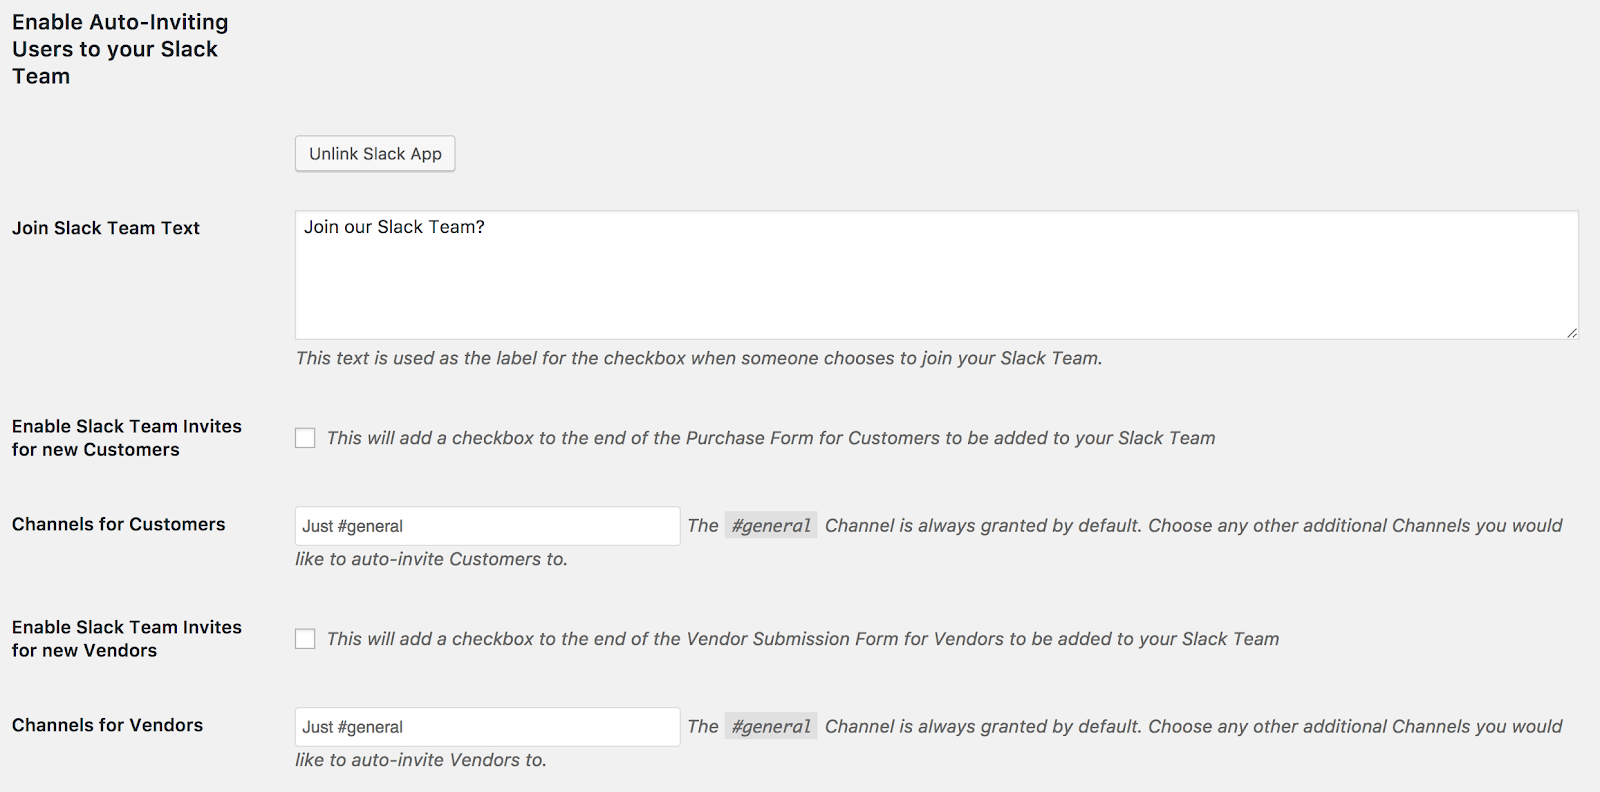
Once this is done some new options appear. This allows you to enable Slack Team Invites for Customers as well as Slack Team Invites for Vendors (If the Frontend Submissions extension is active on your site).
All newly invited Slack Users are auto-invited to your #general channel (Or whatever you have renamed it to). However, on this screen, you can define additional public channels you would like them to be invited to. It grabs all public channels from your Slack Team for you, so just choose whichever ones you’d like from the dropdown.
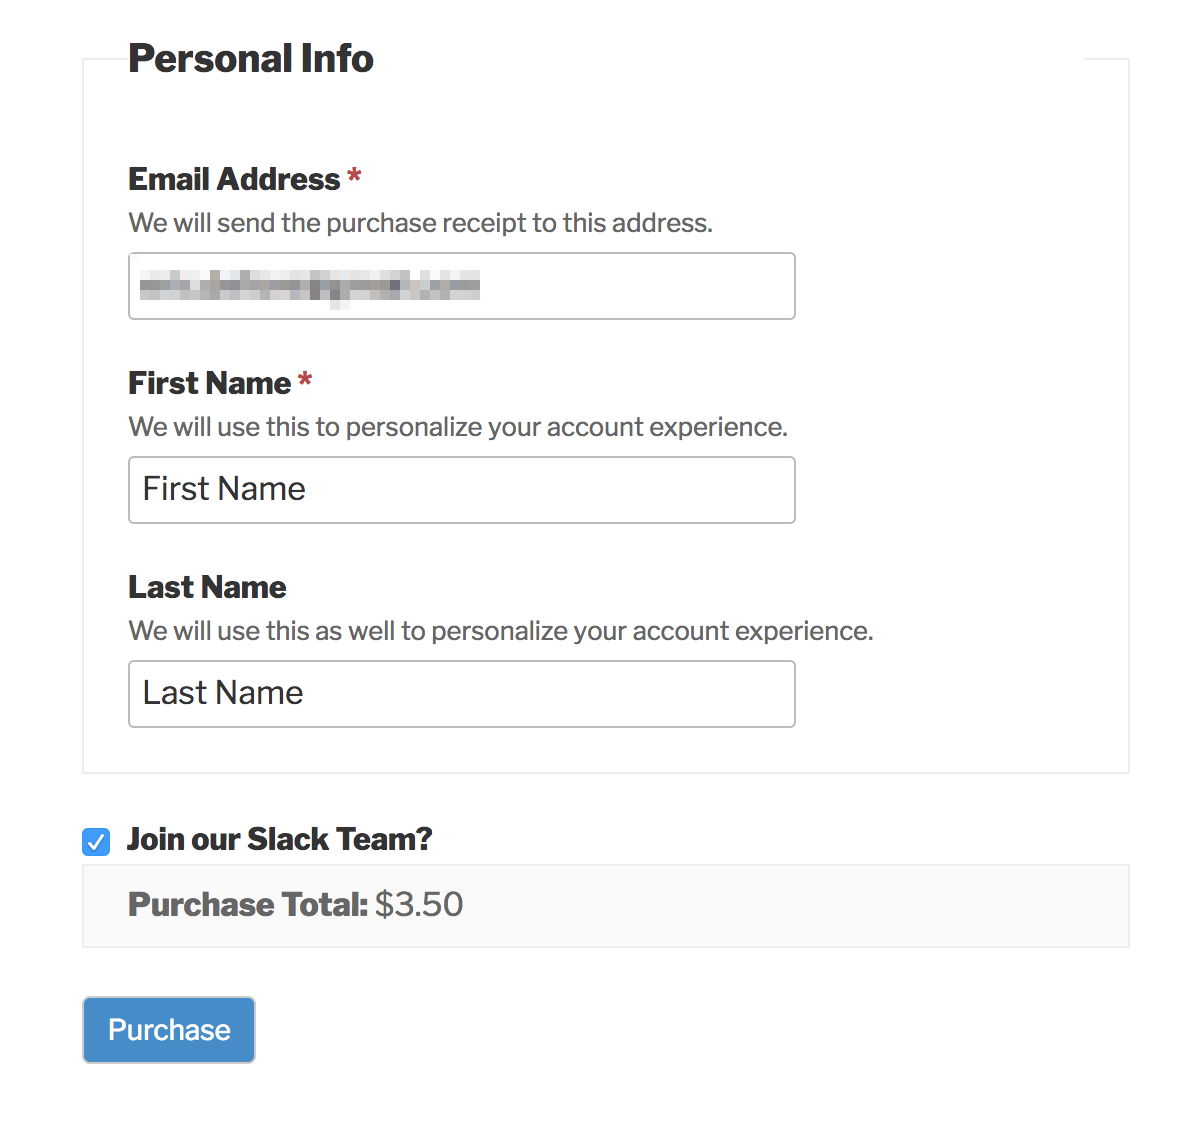
The “Join Slack Team Text” field adjusts the text shown when giving a Customer/Vendor the option to be invited to your Slack Team. For Customers, it shows on the Checkout page, and for Vendors on the Vendor registration page.
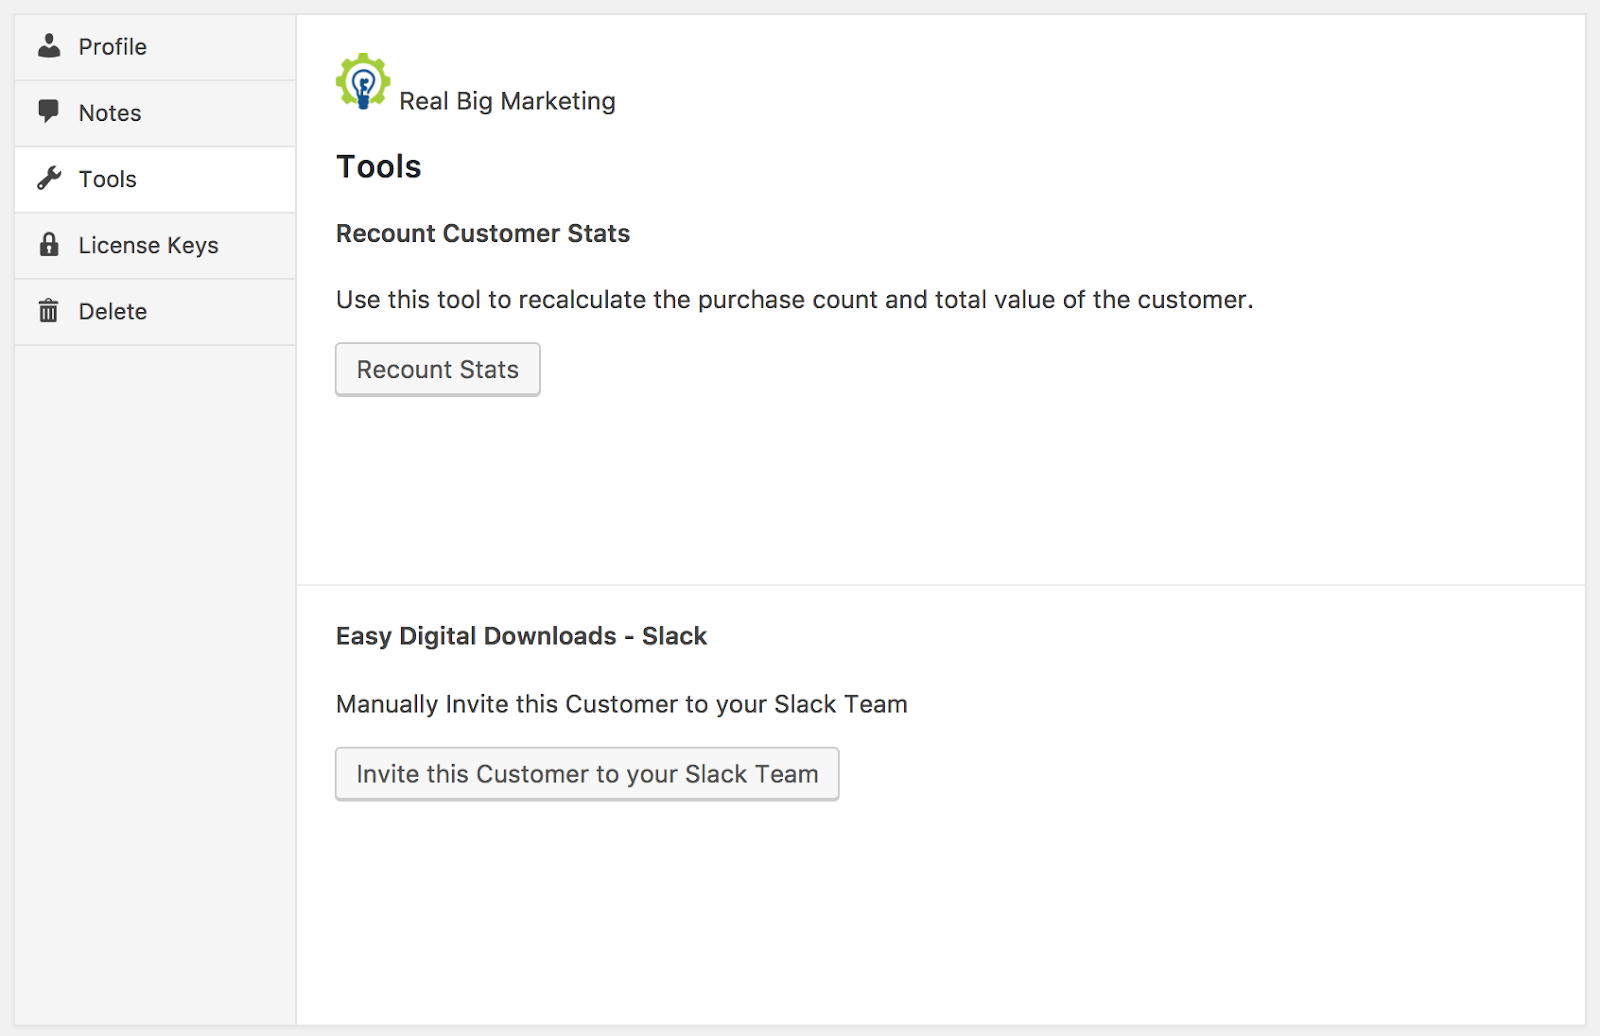
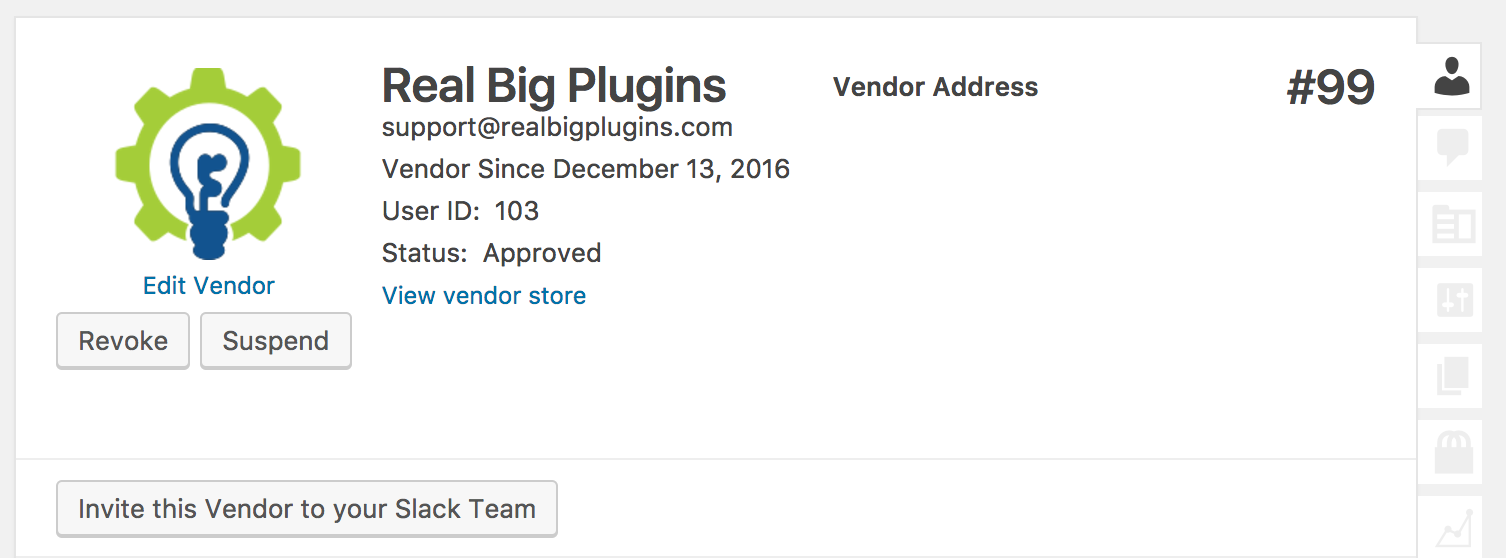
You can also manually invite Customers from their Customer Page under the “Tools” tab and, if you are using the Frontend Submissions extension, Vendors from their Vendor Page under the “Profile” tab in the WordPress Dashboard.
New Vendor Product (If Vendors are given permission to create Products)
Vendor Product Edited (If Vendors are given permission to edit their Products)
New Vendor Contact Form Submitted
New Vendor Feedback (Requires Reviews to also be active)
Interactive Notification Support
The following Frontend Submissions Triggers support Interactive Notifications, provided different conditions are met. You are able to Approve or Deny the following Vendor actions directly from Slack:
New Vendor Application (If new Vendor Applications are not set to be auto-approved)
New Vendor Product (If new Vendor Products are not set to be auto-approved)
Vendor Product Edited (If new Edits to Vendor Products are not set to be auto-approved)
Easy Digital Downloads – Software Licensing
If Software Licensing is active, the following Triggers become available:
New License Key Generated
License Key Activated
Note: Activating manually from the Licenses screen does not trigger this.
License Key Deactivated
Note: Deactivating manually from the Licenses screen does not trigger this.
License Upgraded
Easy Digital Downloads – Commissions
If Commissions is active, the following Trigger becomes available:
New Commission
Easy Digital Downloads – Purchase Limit
If Purchase Limit is active, the following Trigger becomes available:
Purchase Limit Reached
Comments on Downloads (If they’re enabled)
While not exactly an “Integration”, by default Easy Digital Downloads does not provide support for Comments on Downloads. However, if you enable it yourself or through another plugin, the following Trigger becomes available:
New Comment on Download
Interactive Notification Support
This Interactive Notification is unique in that it has two versions: One for when your site is set to manually approve Comments and one for when it is not.
If you are manually approving Comments on your site, you have the ability to Approve the Comment or mark it as Spam. Otherwise, you only have the ability to mark it as Spam.
Note about Server-side Caching:
License Activation Triggers are now specific to Activation/Deactivation via EDD’s web API.
This can cause problems in some server configurations due to server-side caching. edd_action=activate and edd_action=deactivate URL Parameters should be excluded from caching on your site’s homepage to ensure that everything works correctly.
Easy Digital Downloads – Reviews
If Reviews is active, the following Triggers become available:
New Review on Download
New Vendor Feedback (Requires Frontend Submissions to also be active)
Easy Digital Downloads – Fraud Monitor
If Fraud Monitor is active, the following Trigger becomes available:
Suspected Fraudulent Purchase
Interactive Notification Support
You can utilize Interactive Notifications to mark a Payment as Valid or mark it as Fraud from directly within Slack. When you do this, the Log attached to the Payment will state the action taken and say that it was done via EDD Slack and by which Slack User.
Easy Digital Downloads – Recurring Payments
If Recurring Payments is active, the following Triggers become available:
New Subscription Created
Subscription Cancelled
Was this article helpful?
Start selling today!
Join over 50,000 smart store owners, and start using the easiest way to sell digital products with WordPress.