
You can use Zapier to add your customer’s emails to your ActiveCampaign lists after they make a purchase on your Easy Digital Downloads shop. Here’s how:
1. Make sure you have the Zapier extension for EDD installed and activated. See primary setup documentation for instructions on how to connect Easy Digital Downloads to Zapier.
3. Click “Make a Zap” at the top of your Zapier account.
4. For the “Trigger”, search for “Easy Digital Downloads”.
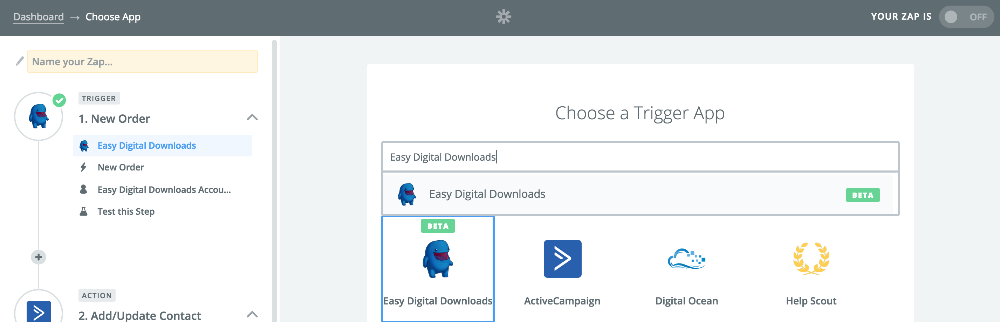
5. We will now be presented with a list of triggers. Since we want to add customers to our Active Campaign list when a new order is placed, we will select New Order.
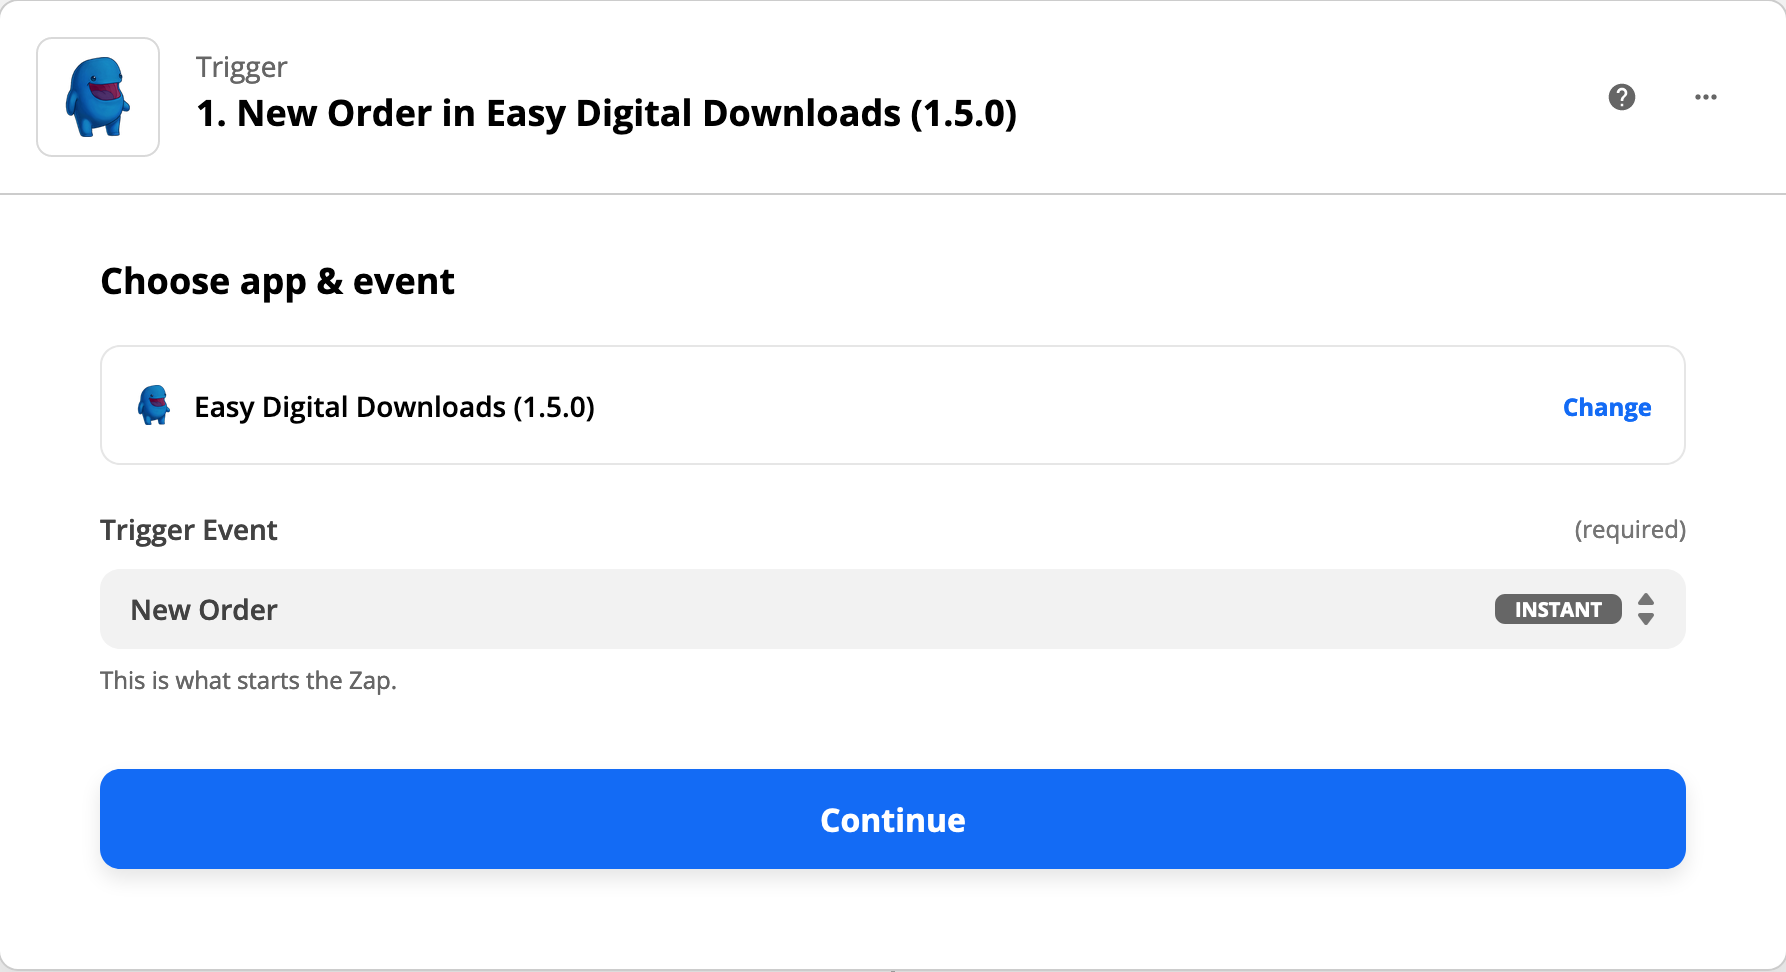
6. Click “Continue” at the bottom of the page.
7. Click “Connect a new account” to authenticate your EDD shop in your Zapier account. To do so, follow the steps outlined in this article.
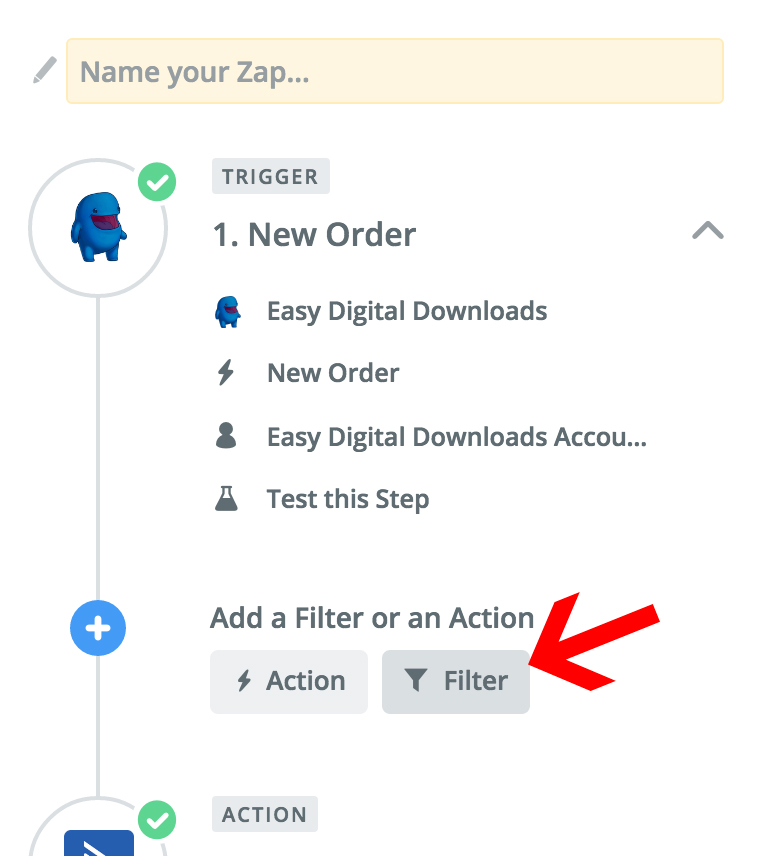
8. Click the + button on the left sidebar between steps 1 and 2. Then click “Filter”.
9. Set the Filter to “only continue if”.
– From the first field select “Products”.
– From the second field select “Contains”.
– From the third field type in the name of your product 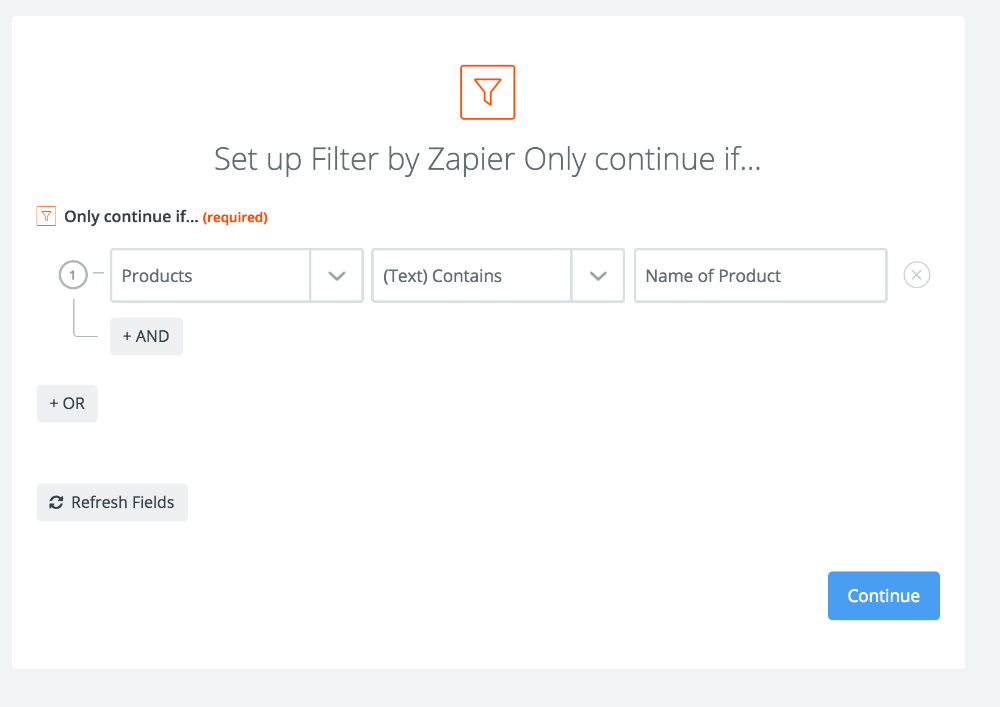
Click “Continue”.
10. Now, go to the “Action” steps (which is step 2) and under “Choose an app” search for “Active Campaign”.
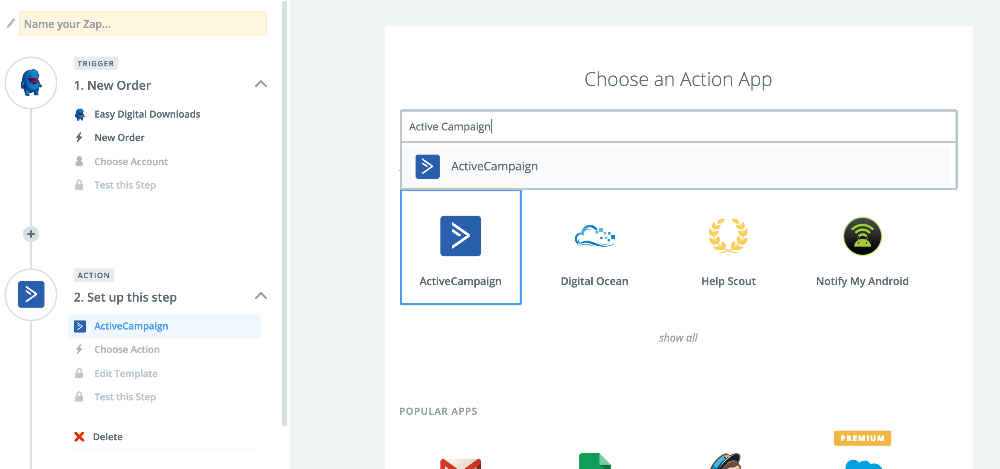
11. Choose “Add/Update Contact” as the action.

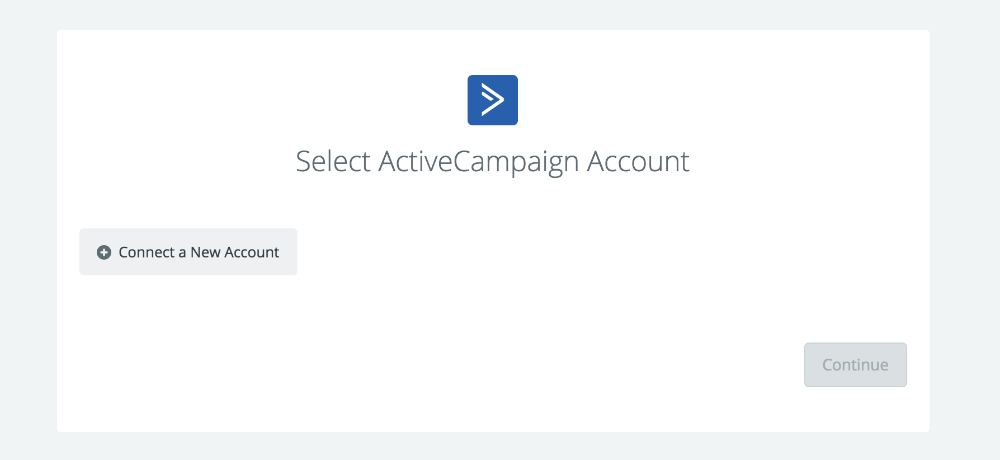
12. Click “Connect a new account” to connect your Active Campaign account:
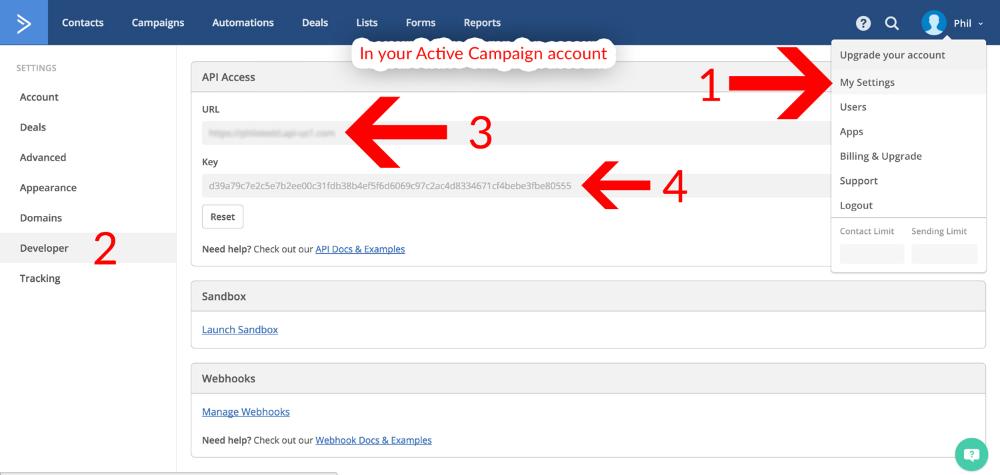
13. Enter your API URL and Key from your Active Campaign account:
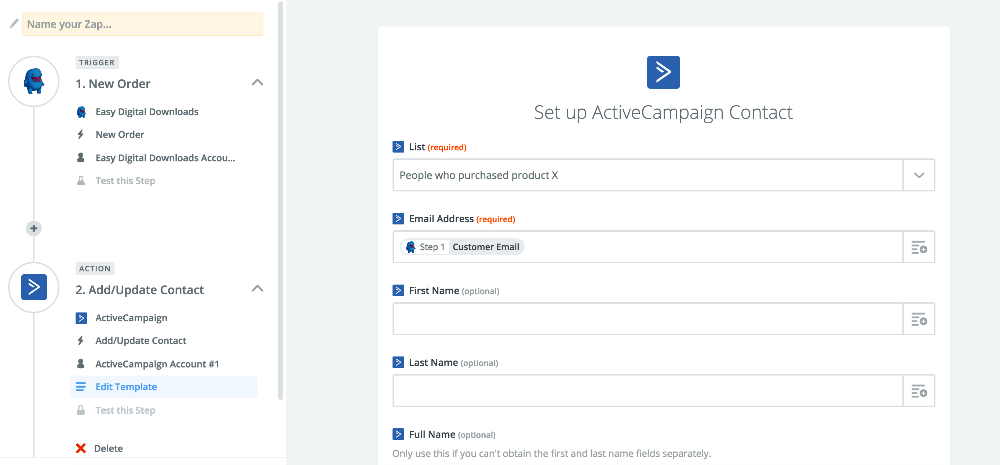
 14. After you save the API URL and Key in Zapier, it will ask you to fill out the options for the List you want to add new customers and their email addresses to. To do that, select “Customer Email” in the Email field. If you haven’t created the list you wish to utilize in Active Campaign yet, go to your active campaign account and set that up before doing this step. If you’d like, you can also set it to pull the First and Last name of the customer from EDD.
 15. Scroll to the bottom of the page and click “Continue”, run the test, and you will see a “Successful” message.
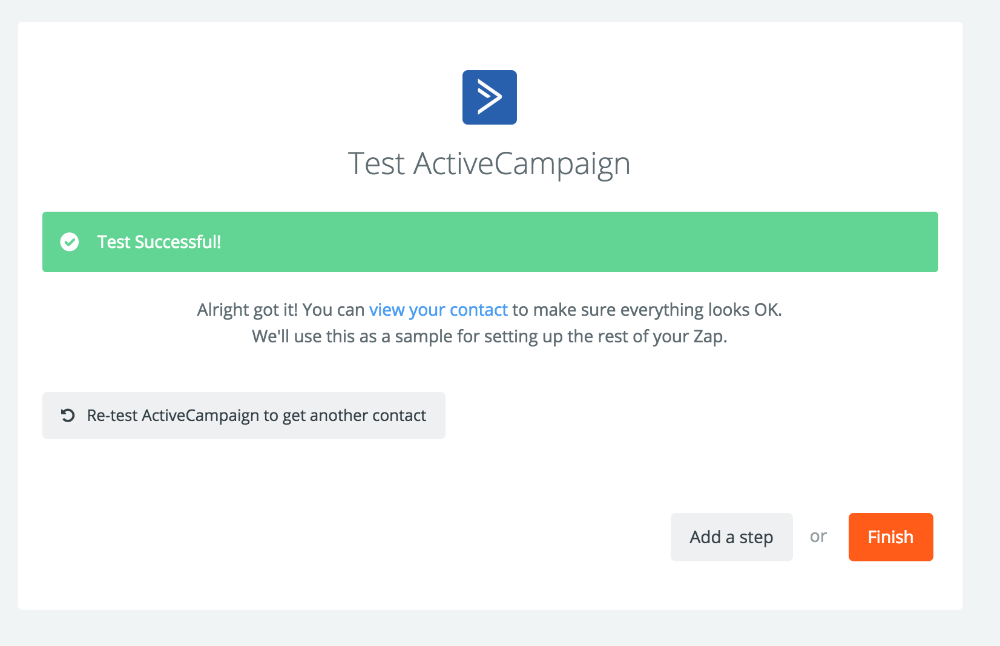
16. Click “Finish”, name your zap, and that’s it! Now, new customers in your EDD shop will automatically be added to your Active Campaign list.


