Do you want to show recently viewed products for your WordPress visitors?
Showing users items they’ve recently viewed while browsing your online store can help increase sales. It subtly reminds them of products they may have forgotten about. It can also make it easier for them to find what they’re looking for and complete the checkout process.
With Easy Digital Downloads (EDD), adding this feature to your eCommerce site is super simple.
✍🏻In this post, we’ll cover:
Why Show Recently Viewed Products to Customers?
Showing recently viewed products to customers is a great way to enhance the shopping experience. The strategy is used by eCommerce giants like Amazon.
It encourages customers to continue exploring the site and discover new items. It also can be useful for letting them add products to their cart without leaving the page:
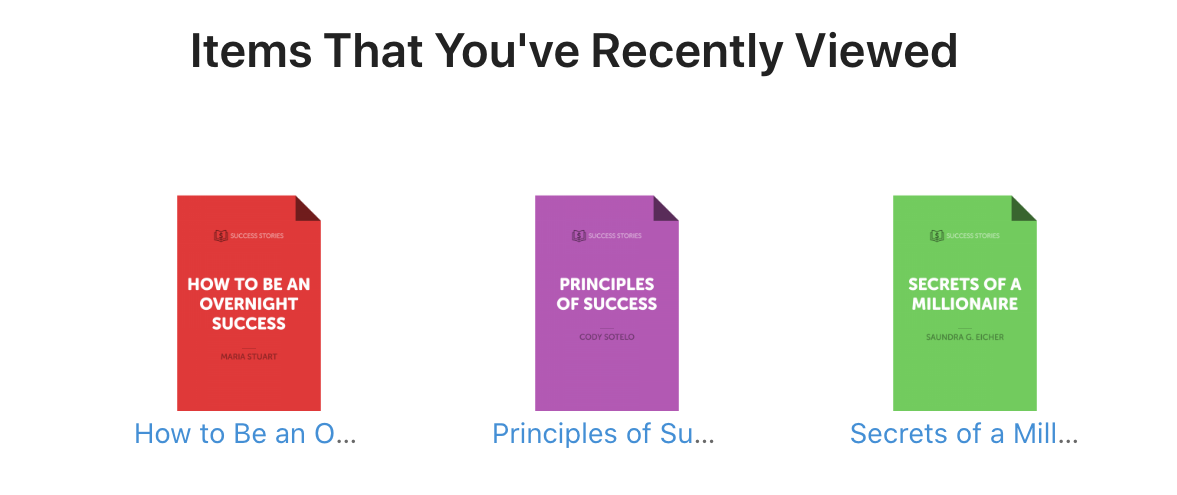
Displaying a section that shows recently viewed products helps customers quickly find the items they’ve already looked at. It allows them to do further research or make a purchase decision easily.
By presenting the most relevant product recommendations to customers based on their recent browsing history, you’re helping them save time. They can quickly find what they need and increase the chances that they’ll make a purchase. This kind of personalization can improve customer loyalty and ultimately boost website revenue.
How to Add Recently Viewed Products in WordPress
Ready to add this feature to your website? In the following step-by-step tutorial, we’ll walk you through how to show recently viewed products in WordPress:
- Install Easy Digital Downloads
- Add the Recently Viewed Items Extension
- Configure the Recently Viewed Settings
- Place the Recently Viewed Element on Your Site
💡Note: In this guide, we assume you already have a WordPress site. If you don’t and/or still need to purchase a WordPress hosting plan, we recommend SiteGround Managed EDD Hosting!
Step 1: Install Easy Digital Downloads
If you already have Easy Digital Downloads installed, feel free to jump to Step #2. Otherwise, the first step is to download and install the Easy Digital Downloads WordPress plugin:

You can grab an EDD Extended Pass or any other plan that fits your eCommerce needs. A pro version of EDD gives you the core plugin and dozens of premium extensions. This includes the Recently Viewed Items addon that we’ll use in the next step.
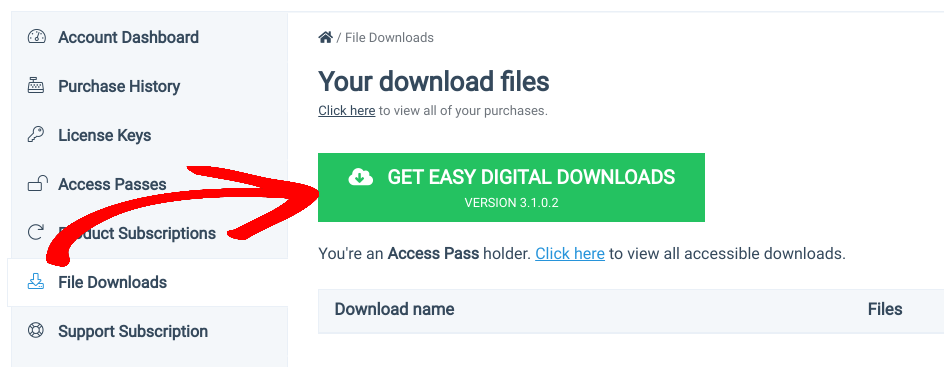
Once you buy your plan, go to File Downloads from your account dashboard. Click on Get Easy Digital Downloads to download the plugin:
You can upload it to your WordPress site by going to Plugins » Add New » Upload Plugin:
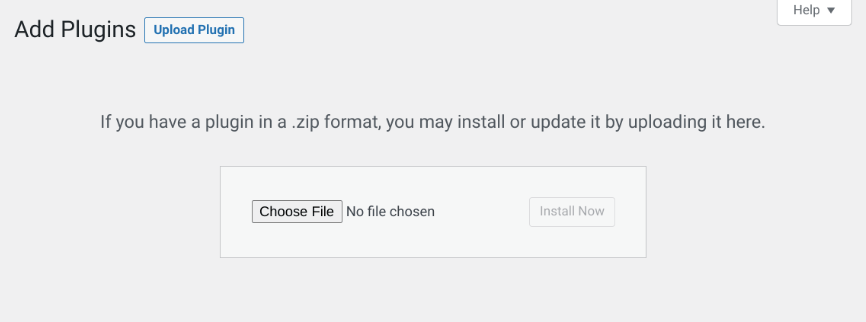
Select the file, then click on the Install Now and Activate Plugin buttons. You’ll now see a new Downloads menu item:
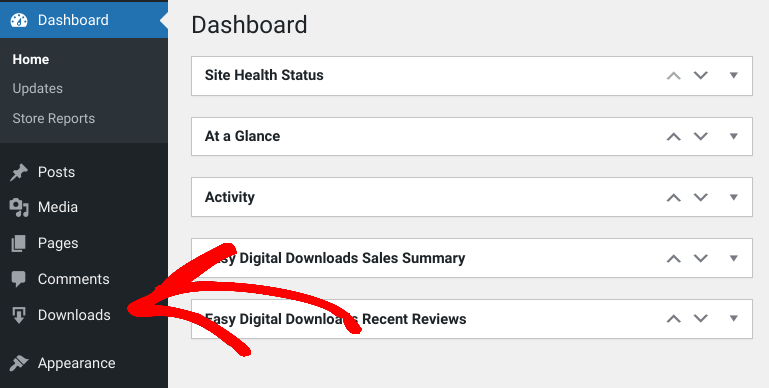
You can start setting up your online store. Under Settings, you can choose a payment gateway, enter your business details, etc.
⚙️ For detailed instructions on getting started, refer to:
- Easy Digital Downloads Introduction
- EDD Quickstart Guide
- How to Start an Online Store With WordPress
Step 2: Add the Recently Viewed Items Extension
Next, we’re going to install the Recently Viewed Items extension:

This premium EDD addon can help you boost sales by showing customers products they’ve previously viewed on your eCommerce website. It lets you show recently viewed products on single pages and the Checkout page. You can also add it to any of the widget areas on your site.
To start, navigate to Downloads » Extensions » New from your WordPress dashboard. Scroll until you find the Recently Viewed Items addon, then click on Get this Extension:
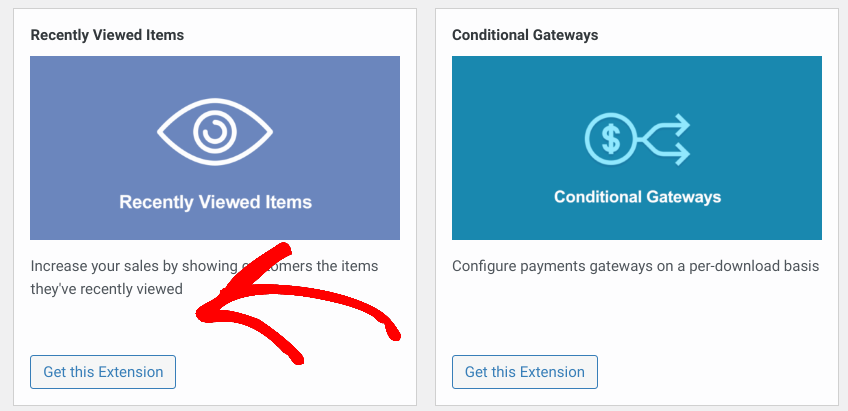
On the extensions page it brings you to, select Download Now:
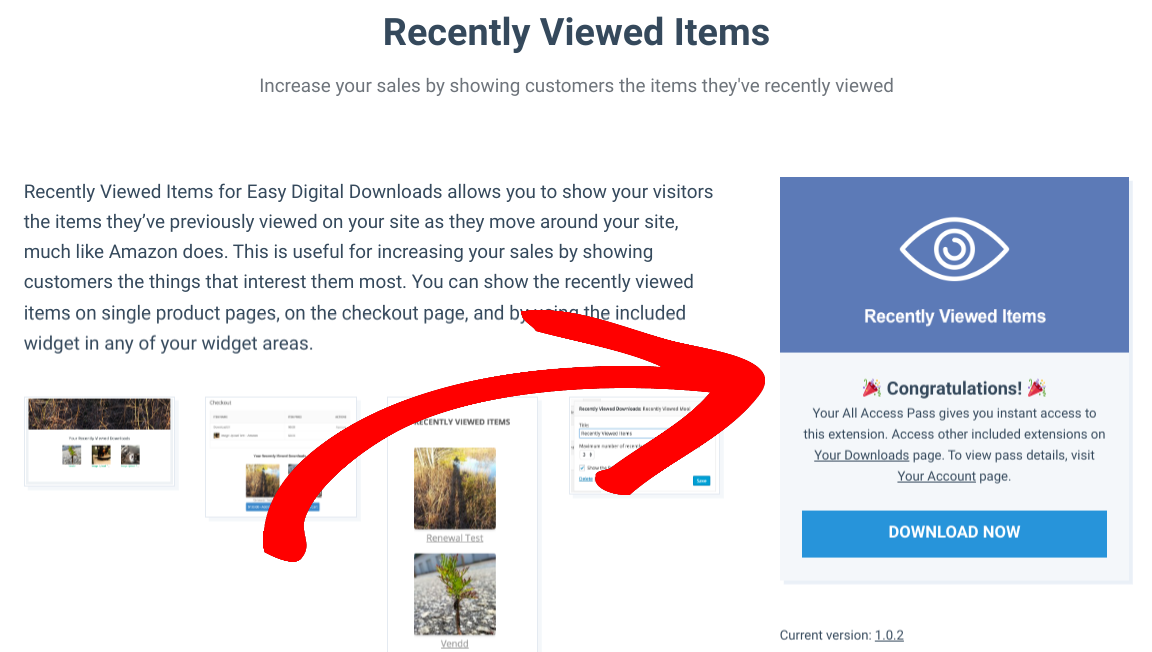
Next, return to your WordPress site to upload the plugin (Plugins » Add New). Install and activate it.
Step 3: Configure the Recently Viewed Settings
Once it’s activated, you can customize the extension’s settings. This lets you modify the text and other visible elements when you show recently viewed products to customers on your WordPress site. The addon settings also let you change where this feature is placed on your site.
Go to Downloads » Settings » Extensions:
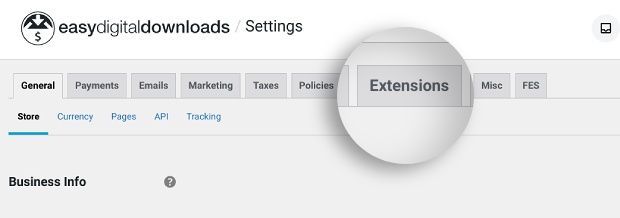
Scroll down to the Recently Viewed Items section:
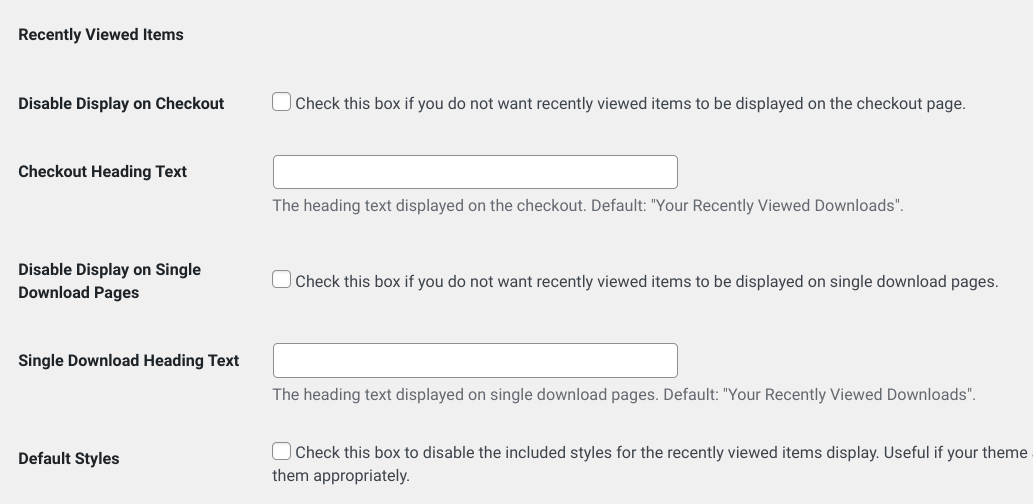
If you don’t want to show recently viewed products on the Checkout page automatically, select the first checkbox. This can be helpful if you want to create a concise, distraction-free checkout.
On the other hand, displaying the products with the default Add to Cart/Purchase buttons can help boost sales. Shoppers can easily add items to their cart without leaving the page. The default heading text is “Your Recently Viewed Downloads”. You can use the Checkout Heading Text field to change it:

For example, you could change it to “Recently Viewed Products” if you sell more than downloads.
These options are also available for single product pages. You can select Disable Display on Single Download Pages if you don’t want to show recently viewed products on individual pages by default.
If you disable this setting, you can still show recently viewed products on WordPress pages. You’ll just have to insert them manually or use the widget.
Lastly, you can check the Default Styles box to disable the default styles. This comes in handy if you want your WordPress theme’s styles to override the extension’s basic built-in styling:

When you’re done updating the settings, click Save Changes.
Step 4: Place the Recently Viewed Items on Your Site
If you leave the extension’s default settings as is, the Recently Viewed Products section automatically appears on your single product pages and the Checkout page.
Another option we mentioned that you could use is the recently viewed products widget. This lets you insert the recently viewed items anywhere on your WordPress site that supports widgets, like sidebar and footer areas.
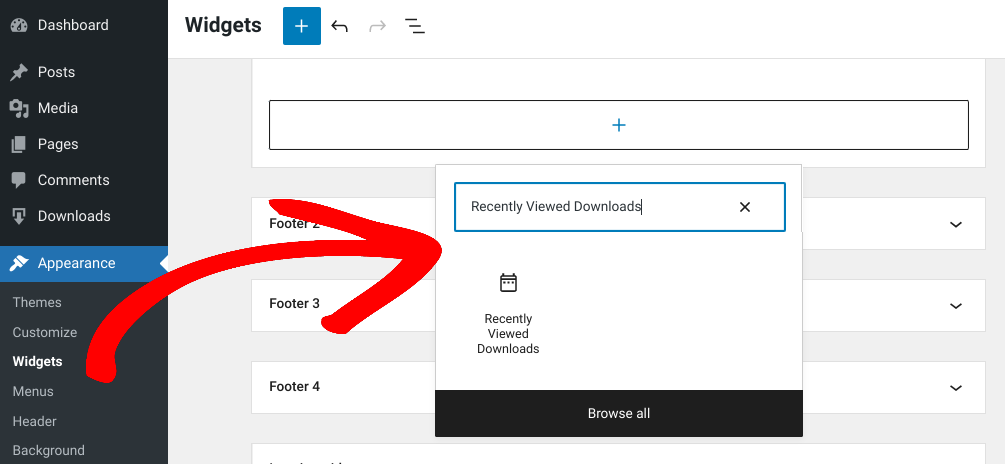
To do this, go to Appearance » Widgets from your dashboard. Then click on the + icon where you want to place the widget and search for “Recently Viewed Downloads”:
Next, you can add a custom heading, adjust the number of products to show, and hide/show the featured product images:
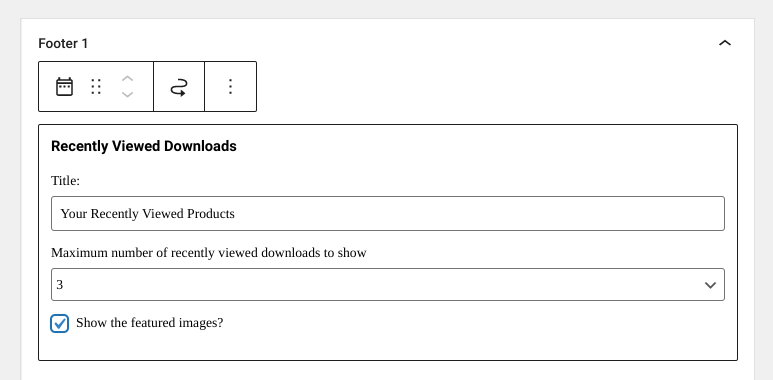
When you’re done, click on Update.
Finally, you can visit your eCommerce site from the frontend to preview what your customers will see:
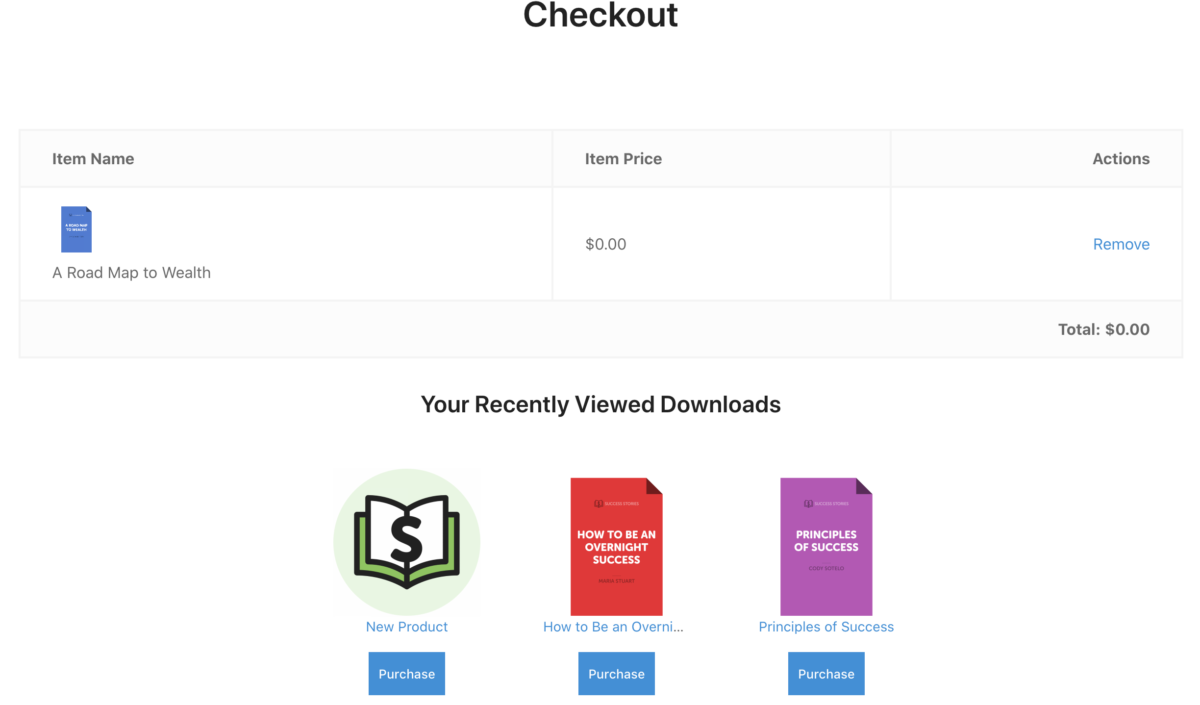
If you’re happy with how it looks, you’re all done!
🔗P.S… By default, the addon is configured to show three recently viewed products. To change this number, you can edit the template files. For guidance, feel free to check out our Recently Viewed Items Setup documentation.
Use EDD to Show Recently Viewed Products
To increase conversions and encourage shoppers to add items to their cart before checking out, it’s smart to show recently viewed products. It enhances the customer experience while also offering an unobtrusive upsell opportunity.
Ready to get started? Download Easy Digital Downloads and Recently Viewed Items to boost sales on your WordPress site! If you’re interested in more ways to optimize the eCommerce experience, check out How to Enable ‘Add to Wishlist’ in WordPress. 🎁
📍Be sure to subscribe to our newsletter and follow us on Facebook or Twitter for more WordPress resources!
Using WordPress and want to get Easy Digital Downloads for free?
Enter the URL to your WordPress website to install.
Disclosure: Our content is reader-supported. This means if you click on some of our links, then we may earn a commission. We only recommend products that we believe will add value to our readers.