To build a successful eCommerce website, it’s important to know how to create a checkout page in WordPress.
The checkout page is a crucial part of the user journey. It allows customers to complete their purchases and provides them with key information. So it’s essential to make sure it’s well-designed and user-friendly.
If you sell digital products or downloads, Easy Digital Downloads offers a complete solution. It comes with everything you need to start and manage your store. It even creates a checkout page for you!
In this step-by-step tutorial, we’ll cover:
- Why Do You Need a Checkout Page in WordPress?
- How to Create a Checkout Page in WordPress (In 3 Steps)
Why Do You Need a Checkout Page in WordPress?
A checkout page is where users go to buy products and services from websites. Typically, this page includes the user’s options for payment, as well as any other details they may need to provide to complete their transaction.
Many online sellers use checkout pages to streamline the purchasing process and minimize cart abandonment. By including all available payment methods on a single page, customers can select the option that best fits their needs and quickly place orders.
In addition, many eCommerce sites will offer special discounts or promotions on their checkout pages in an effort to upsell and increase conversion rates among visitors who are already interested in making a purchase. Overall, having a clear and simple checkout process is key for any online seller. The right checkout page can mean the difference between a high volume of sales and a lost customer.
How to Create a Checkout Page in WordPress (In 3 Steps)
Now that we understand the importance of a well-designed checkout page, let’s take a look at how you can set one up. Thanks to WordPress plugins, you don’t have to worry about adding custom code or creating a checkout template from scratch. Below is how to create a checkout in WordPress for your online store in three steps:
- Install Easy Digital Downloads
- Add the Checkout Fields Manager Extension
- Customize the Checkout Page in WordPress
Step 1: Install Easy Digital Downloads
The first step to create a checkout page in WordPress is to choose and install an eCommerce plugin that supports this functionality. If you haven’t already done so, you can download and install Easy Digital Downloads:

EDD is a powerful eCommerce plugin that lets you sell digital downloads and products, including software, audio, eBooks, templates, and more. It’s an excellent WooCommerce alternative if you don’t offer physical goods.
The EDD Core (free) plugin lets you automatically create a checkout page in WordPress. But if you want to enhance it, you can upgrade to a premium plan. This will let you install add-ons such as Checkout Fields Manager that you can use to customize your WordPress checkout page.
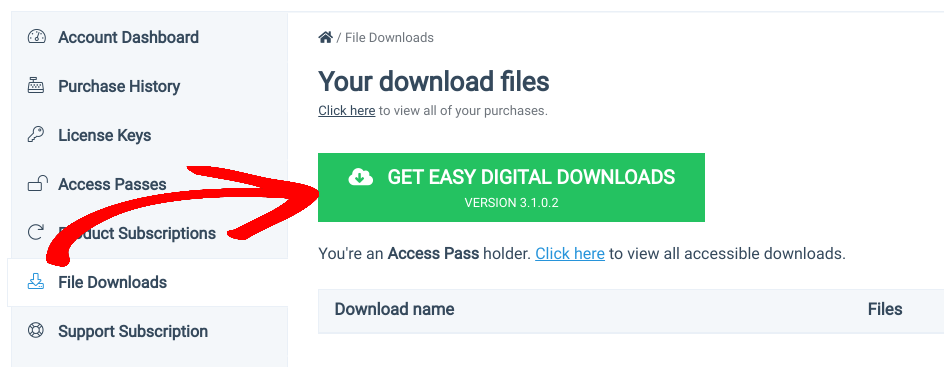
To get started, select your plan from the website and create your account. From your EDD account dashboard, you can go to File Downloads and then click on Get Easy Digital Downloads:
Once the plugin downloads, you can navigate to your WordPress website dashboard, and go to Plugins » Add New » Upload Plugin » Choose File:
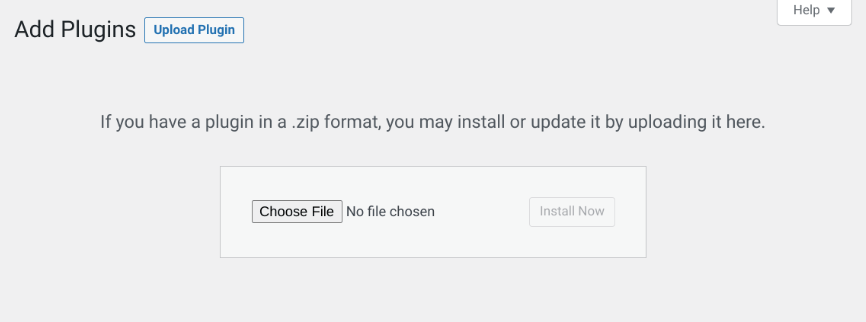
Select the EDD zip file. Next, select the Install Now and Active Plugin buttons. Once activated, the plugin automatically will create a Checkout page. (It also creates a Product page and a Cart page).
You can locate it under Downloads » Settings » Pages:
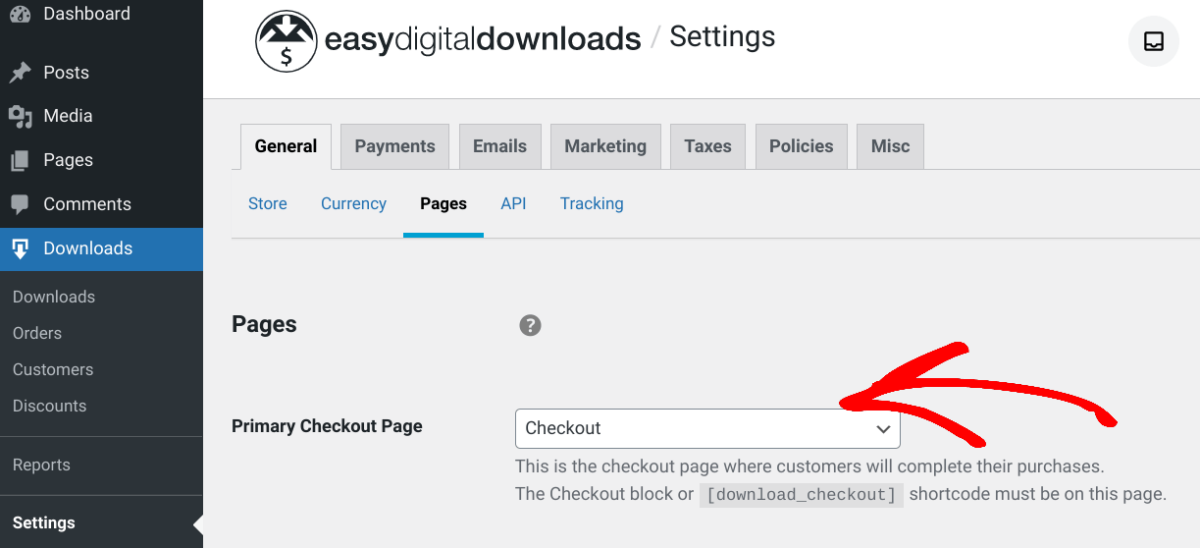
By default, the Primary Checkout Page is set as Checkout from the drop-down menu. This is where customers will be directed to complete their purchases. You can insert it anywhere on your site using the shortcode or the Checkout block.
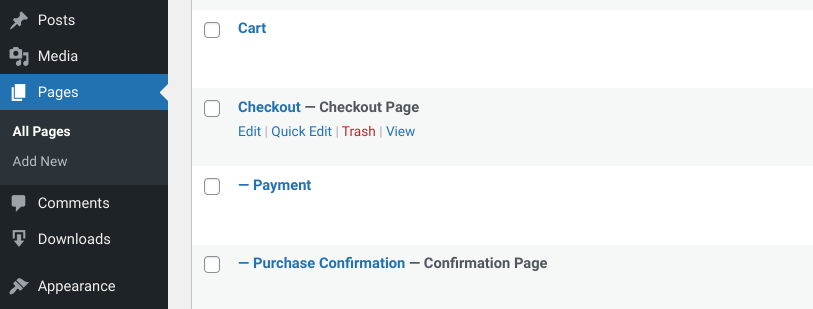
If you go to Pages, you can also look for Checkout from the list:
Configuring the Checkout Payment Gateways
The primary function of a checkout page in WordPress is to give users a place to complete their purchases. The payment options they get on this page are determined by the gateways you enable in your EDD settings.
You can configure these settings from your WordPress dashboard under Downloads » Payments:
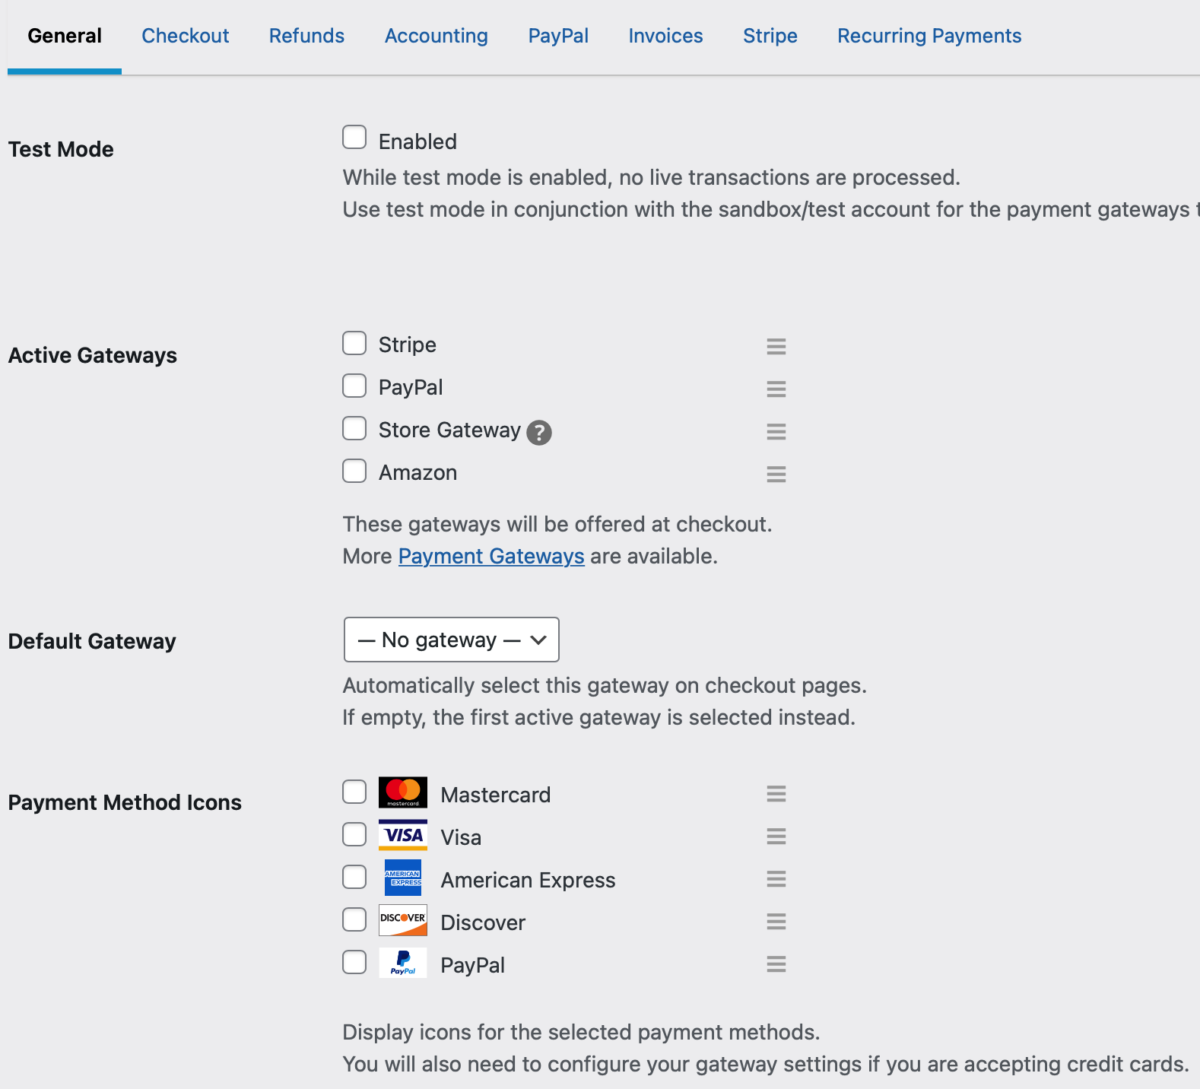
The payment gateways available vary between EDD free vs paid. The core plugin supports PayPal, Stripe, and Amazon Pay by default. But with a premium plan, you can install Authorize.net, PayPal Commerce, etc.
Once you’ve selected your gateway(s), remember to click Save Changes.
Step 2: Add the Checkout Fields Manager Extension
By default, the checkout page will look something such as the following:
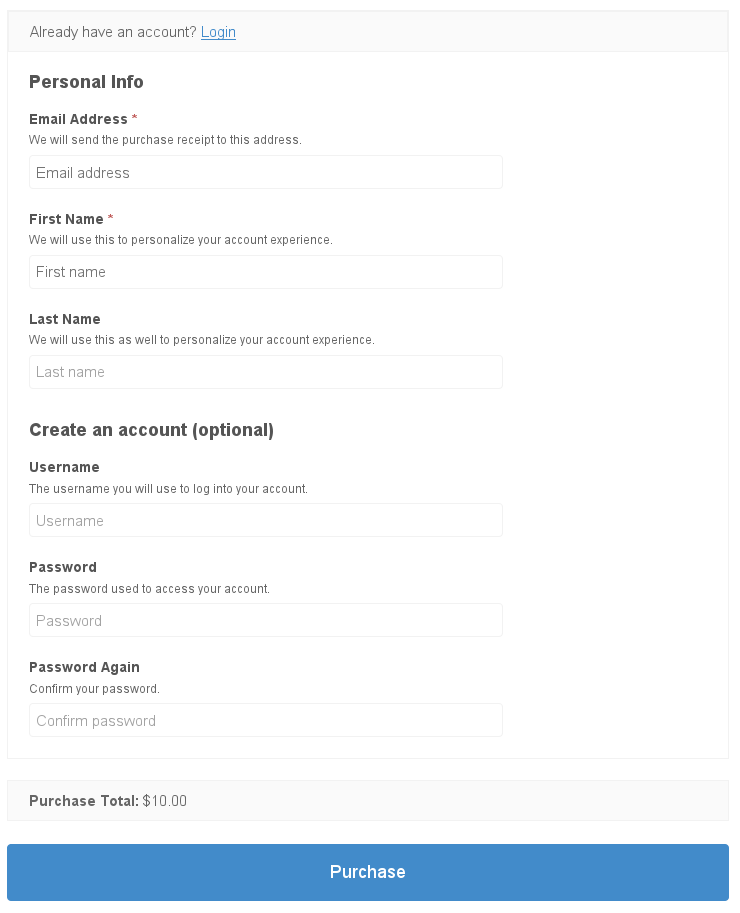
But if you want to add custom fields, you can do so with the Checkout Fields Manager extension:

This lets you collect as much information from your customers as you want. It lets you add:
- New text fields
- Drop-downs
- File upload option
- Checkboxes
- Much more
You can also add conditional logic to fields and customize the checkout form based on a variety of factors, such as user behavior or cart total.
You can also eliminate any unnecessary fields. For instance, if you sell digital products, you likely won’t need to ask for a shipping address.
If you’re using the free EDD plugin, you’ll need to either purchase this extension or upgrade to a premium plan.
Once you do, you can download the add-on from your EDD account dashboard under File Downloads, then upload it to your WordPress site as you would any other plugin.
Step 3: Customize the Checkout Page in WordPress
Once activated, a Checkout Form menu item will be added under Downloads:
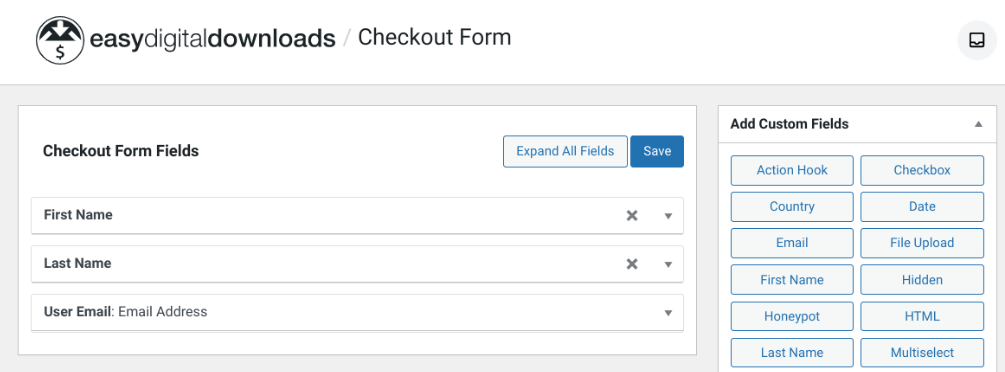
Here, you can create a checkout page in WordPress with the custom fields. In the checkout field editor, you can drag and drop the form fields that you want to include.
After you add a field, you can click to expand the settings:
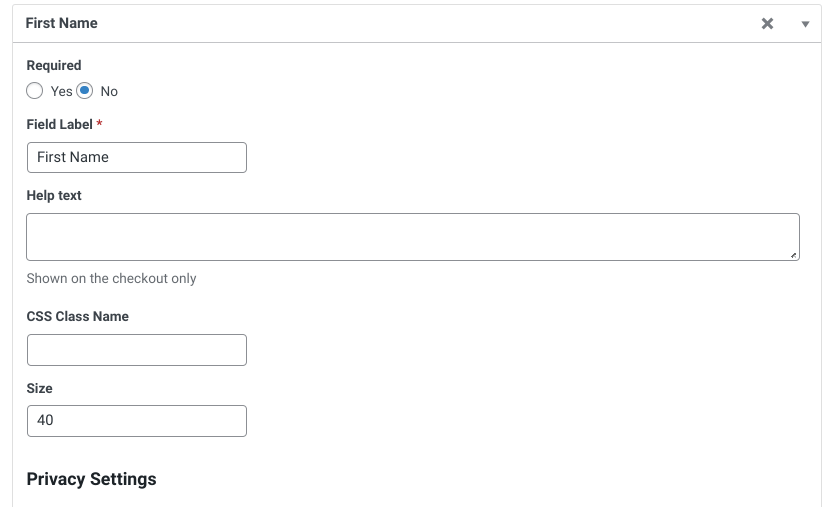
The options will vary depending on which field you’re configuring. But you’ll typically be able to change the field text, choose whether it’s a required field, add a CSS class, insert help text, and more.
When you’re done, you can click on the Save button.
For more information and guidance on how to use the Checkout Fields Manager extension, you can refer to this documentation.
Note that the overall WordPress checkout page design will depend largely on your WordPress theme. We recommend choosing one that is specifically designed for eCommerce stores, such as Themedd.
You can also optimize the design process by using a page builder plugin such as SeedProd. In addition to customizing the checkout experience, you can use it to create a landing page and much more.
Create a Checkout Page in WordPress
A smooth, seamless checkout process is critical for eCommerce sites. To drive conversions and reduce shopping cart abandonment, it’s important to know how to create a checkout page in WordPress.
Fortunately, Easy Digital Downloads makes it easy. The core plugin automatically creates the page for you. Then you can install the Checkout Fields Manager extension to add custom fields and collect as much information from your customers as needed.
Download Easy Digital Downloads today to get started! Want to further enhance the user experience? Learn How to Enable Guest Checkout in WordPress (2 Ways).
Be sure to subscribe to our newsletter and follow us on Facebook or Twitter for more WordPress resources!
Using WordPress and want to get Easy Digital Downloads for free?
Enter the URL to your WordPress website to install.
Disclosure: Our content is reader-supported. This means if you click on some of our links, then we may earn a commission. We only recommend products that we believe will add value to our readers.