

Would you like to ask your customers a question at checkout and keep the answer with their order? Checkout Fields Manager lets you add your own fields to the Easy Digital Downloads checkout. You then decide where each answer is stored, who can see it, and what happens if a customer asks you to delete it.
Before you get started, make sure Easy Digital Downloads and the Checkout Fields Manager feature are installed and activated on your WordPress site.
⚠️ Requirements: Checkout Fields Manager is an Easy Digital Downloads Pro feature and requires a Professional Pass license or higher.
- Building Your Checkout Form
- Choosing Where Field Data Is Stored
- Setting Privacy Options for Each Field
- Configuring Checkout Fields Manager Settings
- Showing Answers on the Purchase Confirmation
- Viewing and Editing Submitted Data
- Exporting and Importing Your Form
- Working With Other Features
- FAQs on Checkout Fields Manager Setup
Building Your Checkout Form
To get started, we’ll open the form builder and add a question of your own.
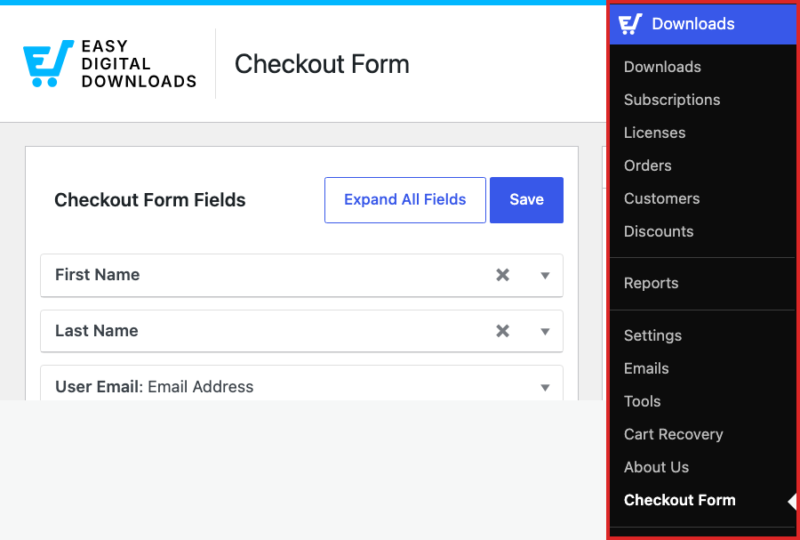
Once Checkout Fields Manager is active (Downloads » Extensions), a new Checkout Form item appears near the bottom of your Downloads menu. To open the builder, go to Downloads » Checkout Form.
The builder is split down the middle. Your current checkout fields are listed in the center column. The field types you can add sit in the Add Custom Fields panel on the right.
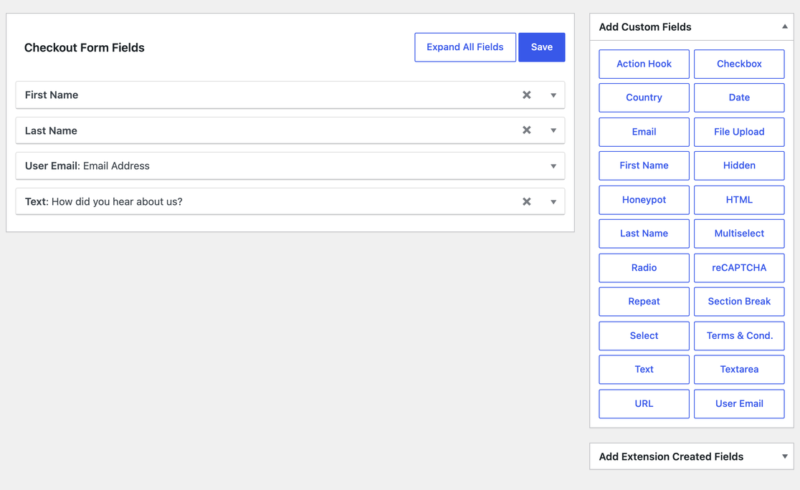
Every new store starts with 3 fields that Easy Digital Downloads needs in order to process an order: First Name, Last Name, and Email Address. You can reorder them by dragging, but you cannot remove them.
The panel on the right offers 22 field types, from plain text and dropdowns through to file uploads, reCAPTCHA, and a honeypot for catching bots.
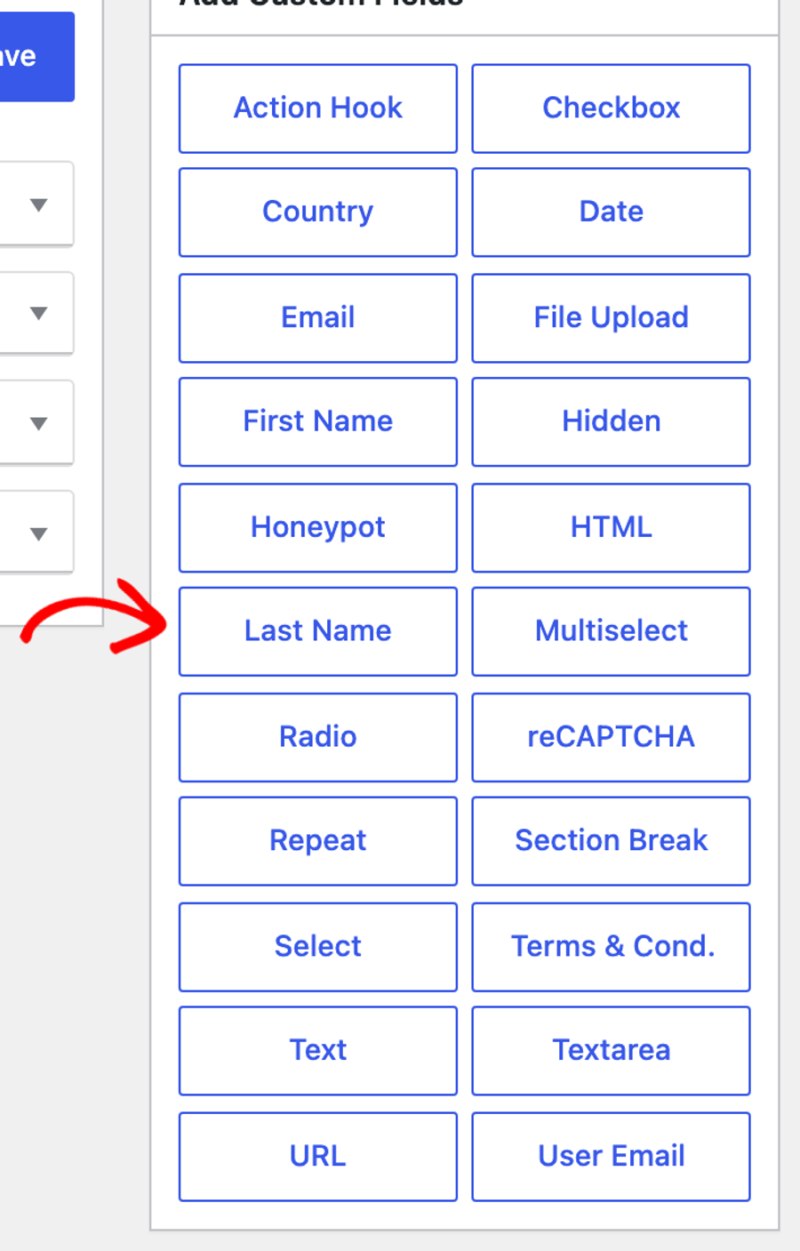
For a full description of what each type does and when to reach for it, see the Checkout Fields Manager field types doc.
Adding a Field
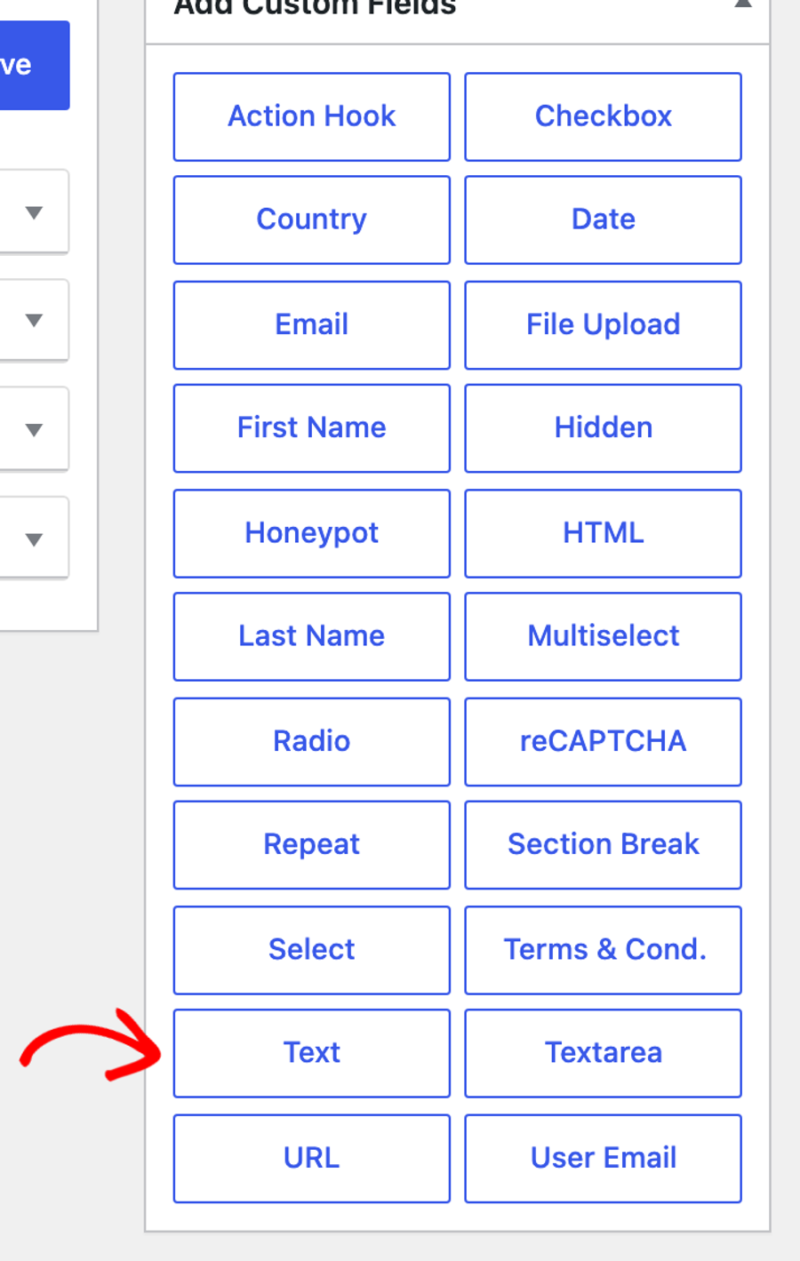
To add a field, click its type in the Add Custom Fields panel. The field is appended to the bottom of your form and opens ready to configure.
Each field has the same handful of core options. Field Label is the text your customer sees, Help text appears underneath it, and Size sets the width of the input. Switch Required to Yes if a customer cannot complete their order without answering.
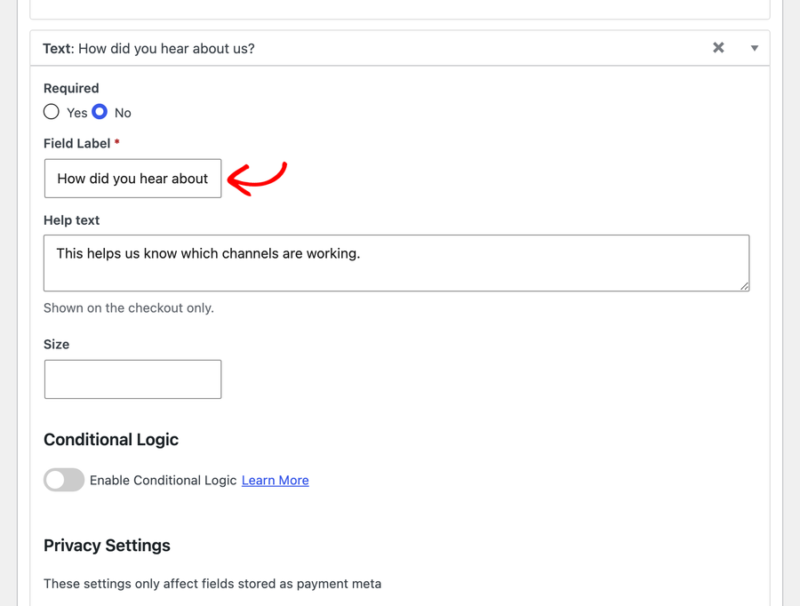
When you have added everything you need, click Save at the top of the form.

Your field is now live on the checkout. Before you leave the builder, though, there is one more decision that changes how the answer behaves for the rest of its life.
Choosing Where Field Data Is Stored
Several of the most useful field options live behind a disclosure rather than in the main panel. Inside any field, scroll to Advanced Settings and click it to expand.
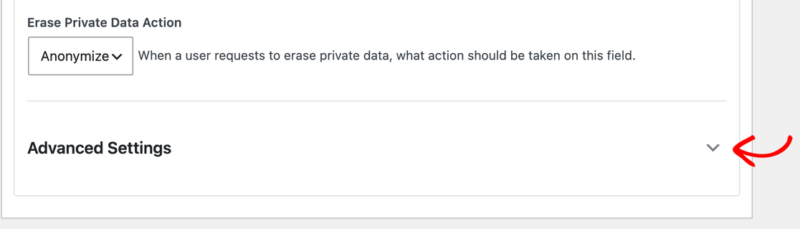
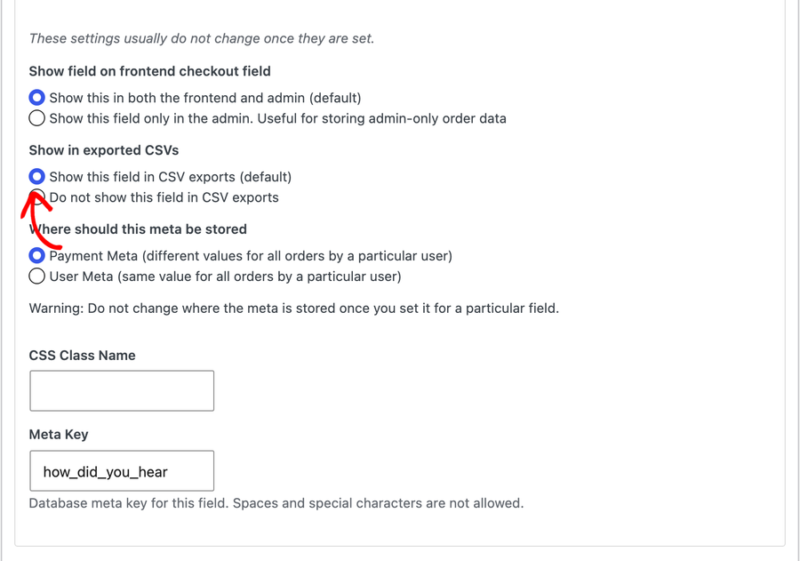
Expanding it reveals five more options. Two of them are the field’s Meta Key and CSS Class Name. The rest control whether it shows on the front end, whether it appears in exports, and where its data is stored.
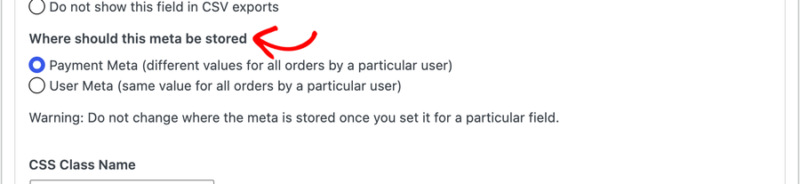
Where should this meta be stored is the option that decides how the answer behaves over time.
Payment Meta attaches the answer to a single order. This suits anything that can differ from purchase to purchase, such as a note about the product or a purchase order number. It is the default, and the right choice most of the time.
User Meta attaches the answer to the customer’s account instead. This suits details that stay the same across every order, such as a phone number or a secondary email address. Stored this way, the value appears in the customer’s record and is prefilled the next time they buy. Customers can also update it themselves through the profile editor shortcode.
Making the User Meta Option Available
If you do not see a User Meta choice at all, it is because customers on your store can check out without an account. With no account, there is nothing for the answer to attach to.
To change that, go to Downloads » Settings » Payments » Checkout. Switch Customer Registration to Customers must log in or create an account to purchase.
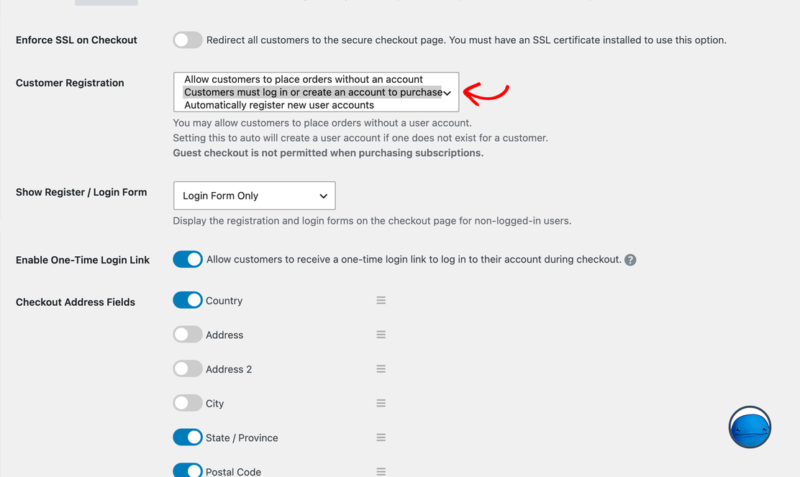
⚠️ Requirements: Only Customers must log in or create an account to purchase unlocks User Meta storage. Automatically register new user accounts creates accounts but does not make the option available.
Keeping a Field Out of Your Exports
Also inside Advanced Settings, Show in exported CSVs controls whether the field’s answers are included when you export your orders. Turning it off is useful for fields you never want in a spreadsheet, such as a honeypot or an internal note.
For more on the export itself, see the exporting payment data doc.
Setting Privacy Options for Each Field
Every field has its own Privacy Settings block. It controls how that field’s data is handled when a customer exercises their privacy rights through WordPress’s built-in tools.
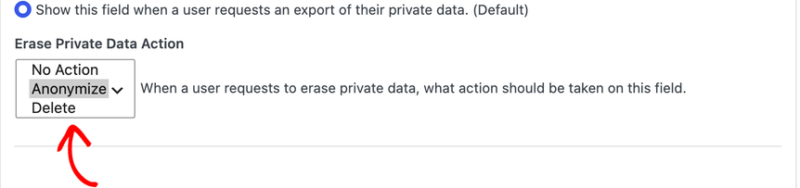
Show field in Privacy Export decides whether the answer is included when a customer requests a copy of their personal data. It is switched on by default.
Erase Private Data Action decides what happens when a customer requests deletion. Anonymize is the default and replaces the value with a scrambled equivalent, which keeps your reporting intact. Delete removes the value outright, and No Action leaves it untouched.
Some fields hold personal information, such as First Name or Email Address. On those, the controls are set for you and appear as a short explanation rather than an editable setting.
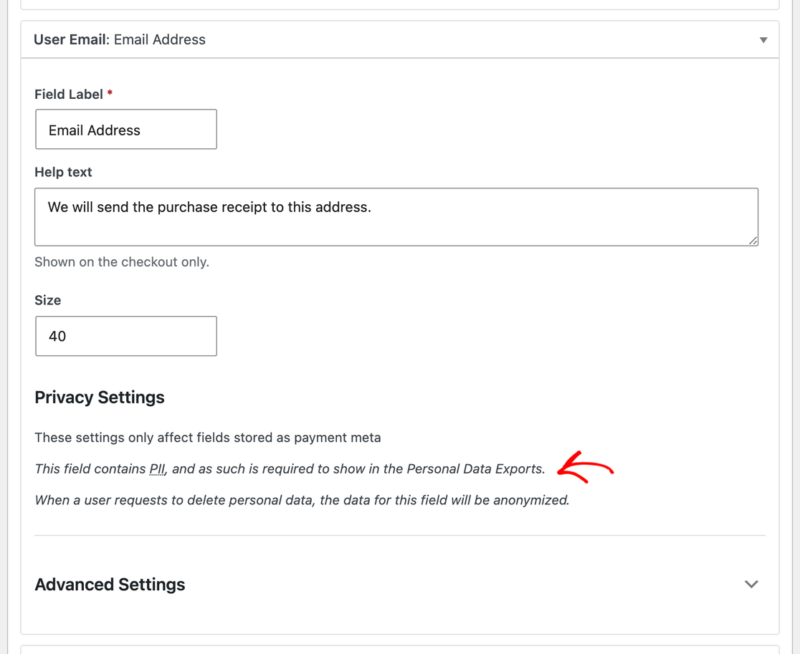
ℹ️ Note: Privacy Settings apply to fields stored as Payment Meta. Fields stored as User Meta are covered by WordPress’s own handling of user data.
Configuring Checkout Fields Manager Settings
Alongside the form builder, Checkout Fields Manager adds its own settings section. To find it, go to Downloads » Settings » Extensions and click Checkout Fields Manager.

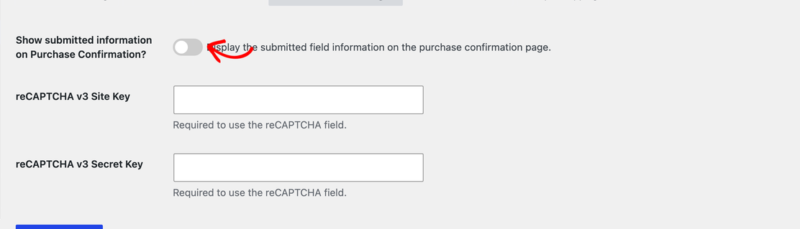
The section covers what your customers see after they buy, plus your reCAPTCHA keys.
Setting Up reCAPTCHA
The reCAPTCHA field needs a key pair before it will work. Paste yours into reCAPTCHA v3 Site Key and reCAPTCHA v3 Secret Key, then save.
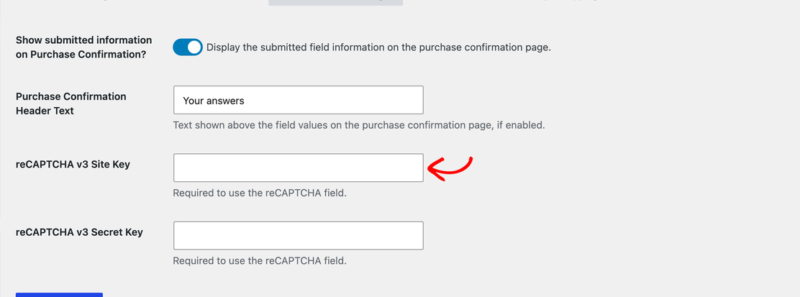
Checkout Fields Manager uses reCAPTCHA v3, so make sure you select v3 when you create your keys with Google. Version 3 scores traffic silently in the background, which means the reCAPTCHA field never appears on your checkout for real customers. It is also skipped for gateways that take payment on their own site, such as PayPal.
ℹ️ Note: If your store still has an older v2 key pair saved, those fields stay visible until you add both v3 keys. Once you save a v3 pair, the older keys are removed for you.
Showing Answers on the Purchase Confirmation
By default, your customers do not see their own answers again after they check out. To show them, switch on Show submitted information on Purchase Confirmation? in the Checkout Fields Manager settings.
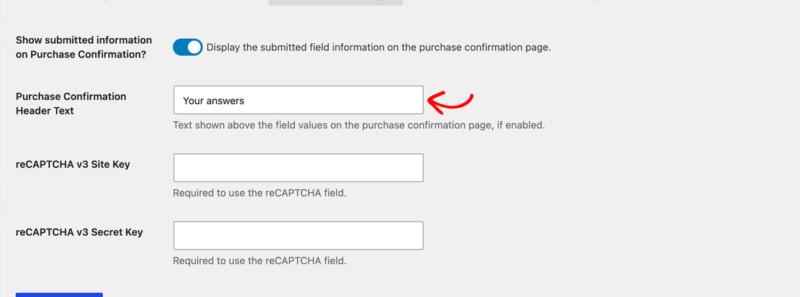
Switching it on reveals a second setting, Purchase Confirmation Header Text, which is the heading printed above the answers. It reads Information unless you change it.
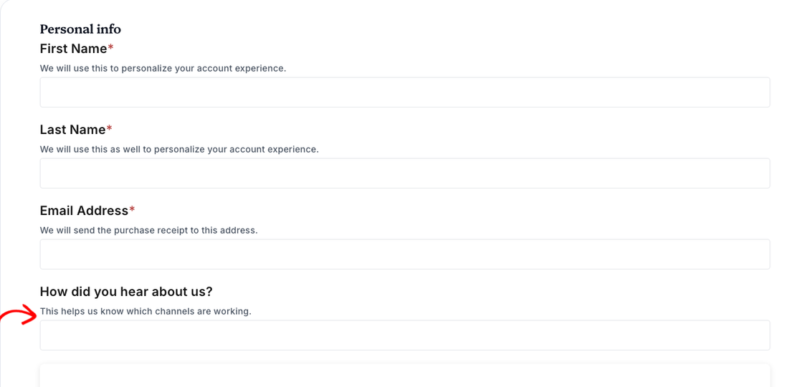
Your custom field now appears on the checkout page for customers to fill in.
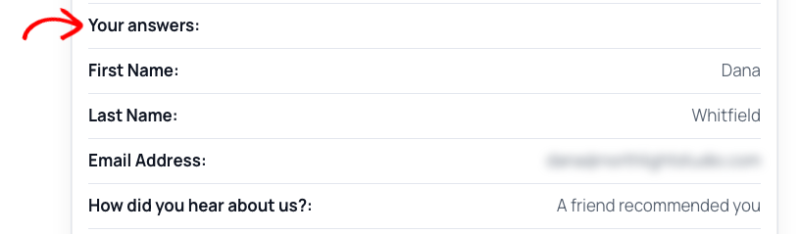
After they buy, their answers appear under your heading.
ℹ️ Note: 7 field types are left off the confirmation on purpose. They hold no answer worth showing back to a customer: hidden, HTML, section break, reCAPTCHA, action hook, honeypot, and Terms and Conditions.
Viewing and Editing Submitted Data
Answers stored as Payment Meta appear on the order itself. To find them, go to Downloads » Orders and open an order.
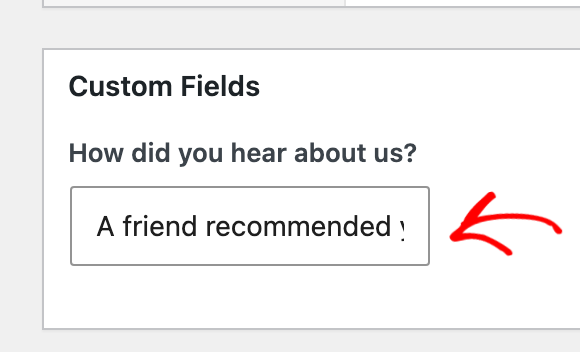
These values are editable, not just visible, so you can correct a customer’s typo without asking them to place the order again. Change the value and save the order.
Answers stored as User Meta appear on the customer instead, under Downloads » Customers, and in the profile editor your customers use themselves.
Adding Answers to Your Emails
Every field’s answer is available to your purchase receipts and admin sale notifications as a template tag. The tag is the field’s Meta Key wrapped in curly braces, so a field with a meta key of company_name becomes {company_name} .
Each field’s meta key lives inside its Advanced Settings, alongside the storage option. If you left it blank when you created the field, Checkout Fields Manager generated one from your field label.
ℹ️ Note: Avoid changing a meta key after customers have started answering the field. Answers saved under the old key will no longer be found.
Exporting and Importing Your Form
Once your form is built, you do not have to rebuild it by hand anywhere else. To move or back up a form, go to Downloads » Tools » Checkout Fields Manager.
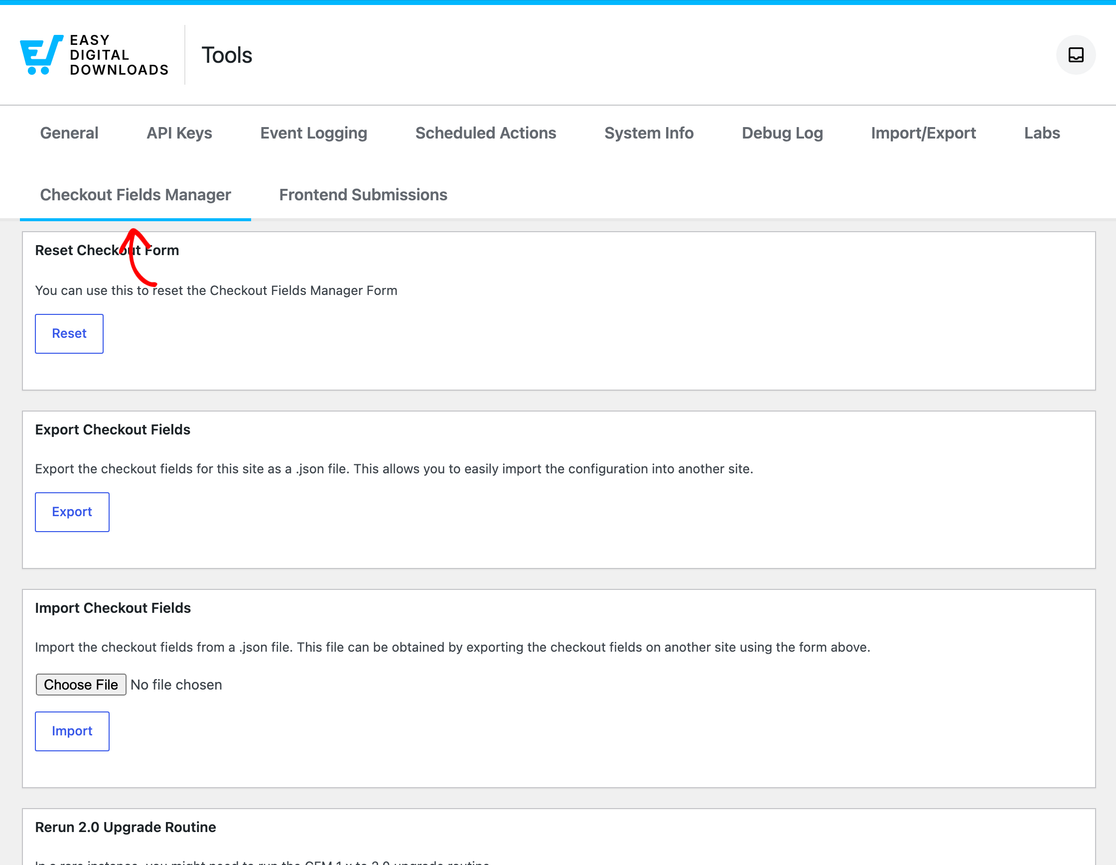
Export Checkout Fields downloads your whole form as a JSON file, and Import Checkout Fields loads one back in. Together they are the fastest way to move a finished form from a staging site to a live one. The export also doubles as a backup before you make big changes.
Reset Checkout Form returns your form to the 3 fields it started with. It also fixes the rare case where your checkout reports that no form is set.
Rerun 2.0 Upgrade Routine re-runs the upgrade that moved older Checkout Fields Manager data into its current format. You will not normally need it, and our support team will tell you if you do.
For more detail, see the importing and exporting fields doc.
Working With Other Features
The Amazon S3 feature changes where uploads go. With it active, files a customer uploads through a File Upload field are stored in a folder named cfm inside your S3 bucket.
That’s it! You can now add your own fields to checkout, choose where each answer lives, and decide who sees it. You can also show or hide a field based on what is in the cart or who is buying. For that, take a look at the Checkout Fields Manager conditional logic doc next.
Note: Checkout Fields Manager does not support the Free Downloads feature.
FAQs on Checkout Fields Manager Setup
Why is there no User Meta option on my field?
Your store lets customers check out without an account, so there is no account to store the answer against. To fix it, go to Downloads » Settings » Payments » Checkout. Switch Customer Registration to Customers must log in or create an account to purchase. Choosing Automatically register new user accounts is not enough on its own.
Where did the Meta Key setting go?
It is inside each field’s Advanced Settings, along with the CSS class name, the export option, and the storage choice. To reveal them, click Advanced Settings within the field.
Why are some of my fields missing from the purchase confirmation?
7 field types never appear there: hidden, HTML, section break, reCAPTCHA, action hook, honeypot, and Terms and Conditions. None of them hold an answer that is meaningful to show a customer.
Can I edit a customer’s answer after they have ordered?
Yes. To do this, open the order under Downloads » Orders, change the value, and save. This is the quickest way to fix a typo without asking the customer to order again.
Do I need reCAPTCHA v2 keys as well as v3?
No. Checkout Fields Manager uses v3, so a single v3 key pair is all you need. If your store has older v2 keys saved, they are removed once you save a v3 pair.
My answer did not appear right after checkout. Is it lost?
No. The confirmation page prints its heading as soon as the page loads, then fills in the answers once the order finishes processing. That can leave a brief gap. The answers also appear on the receipt and on the order in your admin.