
The Checkout Fields Manger extension for Easy Digital Downloads allows you to collect custom information from your customers while they are checking out. If you have the Zapier extension for Easy Digital Downloads as well, you can use that custom information in your Zapier account to send to hundreds of 3rd party apps. This document will describe how to set that up.
Step 1: Set up your custom checkout fields
The first thing you need to do is make sure you have your custom checkout fields set up using Checkout Fields Manager for Easy Digital Downloads. Follow the setup guide for it here.
Note: Make sure your custom fields are set to save to Payment Meta and not User Meta if you’re passing data related to payments.
You’ll also need to make sure you have installed the EDD Zapier extension.
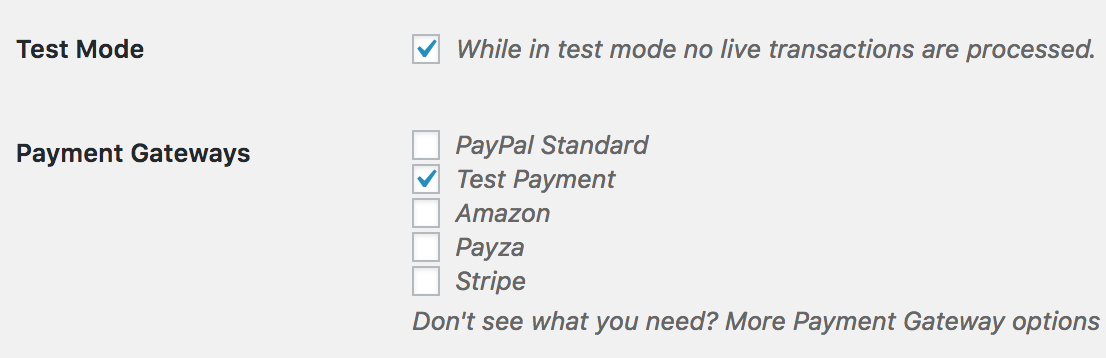
Additionally, you need to be ready to make a “test” purchase. So put your EDD store into Test Mode by navigating to Downloads → Settings → Payment Gateways, and enable Test Mode. You’ll also want to enable the Test Payment Gateway:
 Now you are ready to make a test purchase.
Step 2: Set up the “Zap” in your Zapier account.
Now that you have the custom fields created, you can set up the “Zap”, which will collect the new order information and allow you to port it to the 3rd party app of your choice.
In your Zapier account:
- Click this link to gain access to the (currently private) EDD App: https://zapier.com/developer/invite/26897/ef9fb387de3ff31c7661a7ffaa919d45.
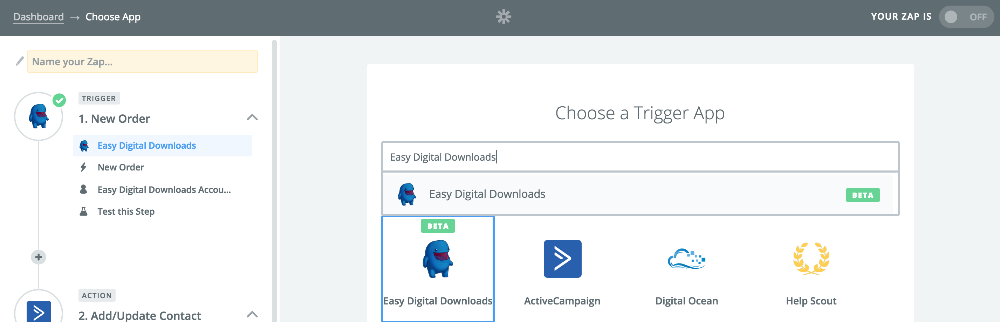
- Create a new Zap and select Easy Digital Downloads as a triggering service:

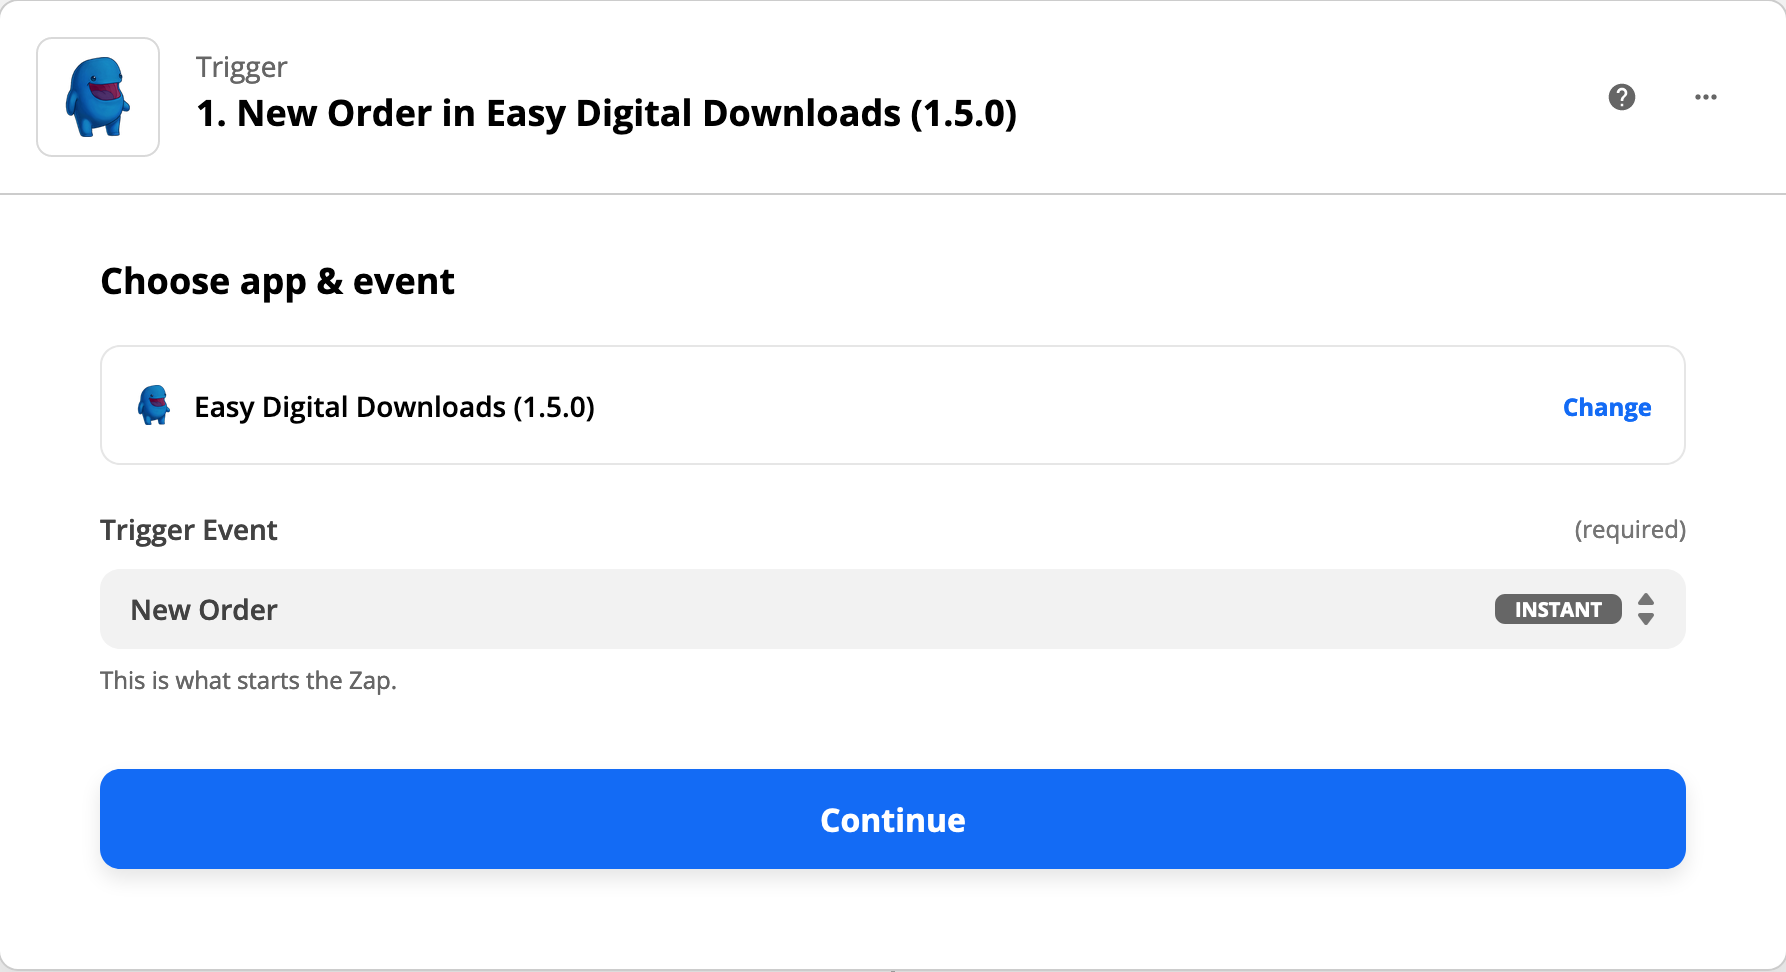
- For the trigger, choose “New Order”:

- Choose the site you are working with. If this is the first time you have created a Zap with Easy Digital Downloads, you will need to authenticate your site by providing your site URL, API Key & API Token. To find those keys, follow the steps in this article
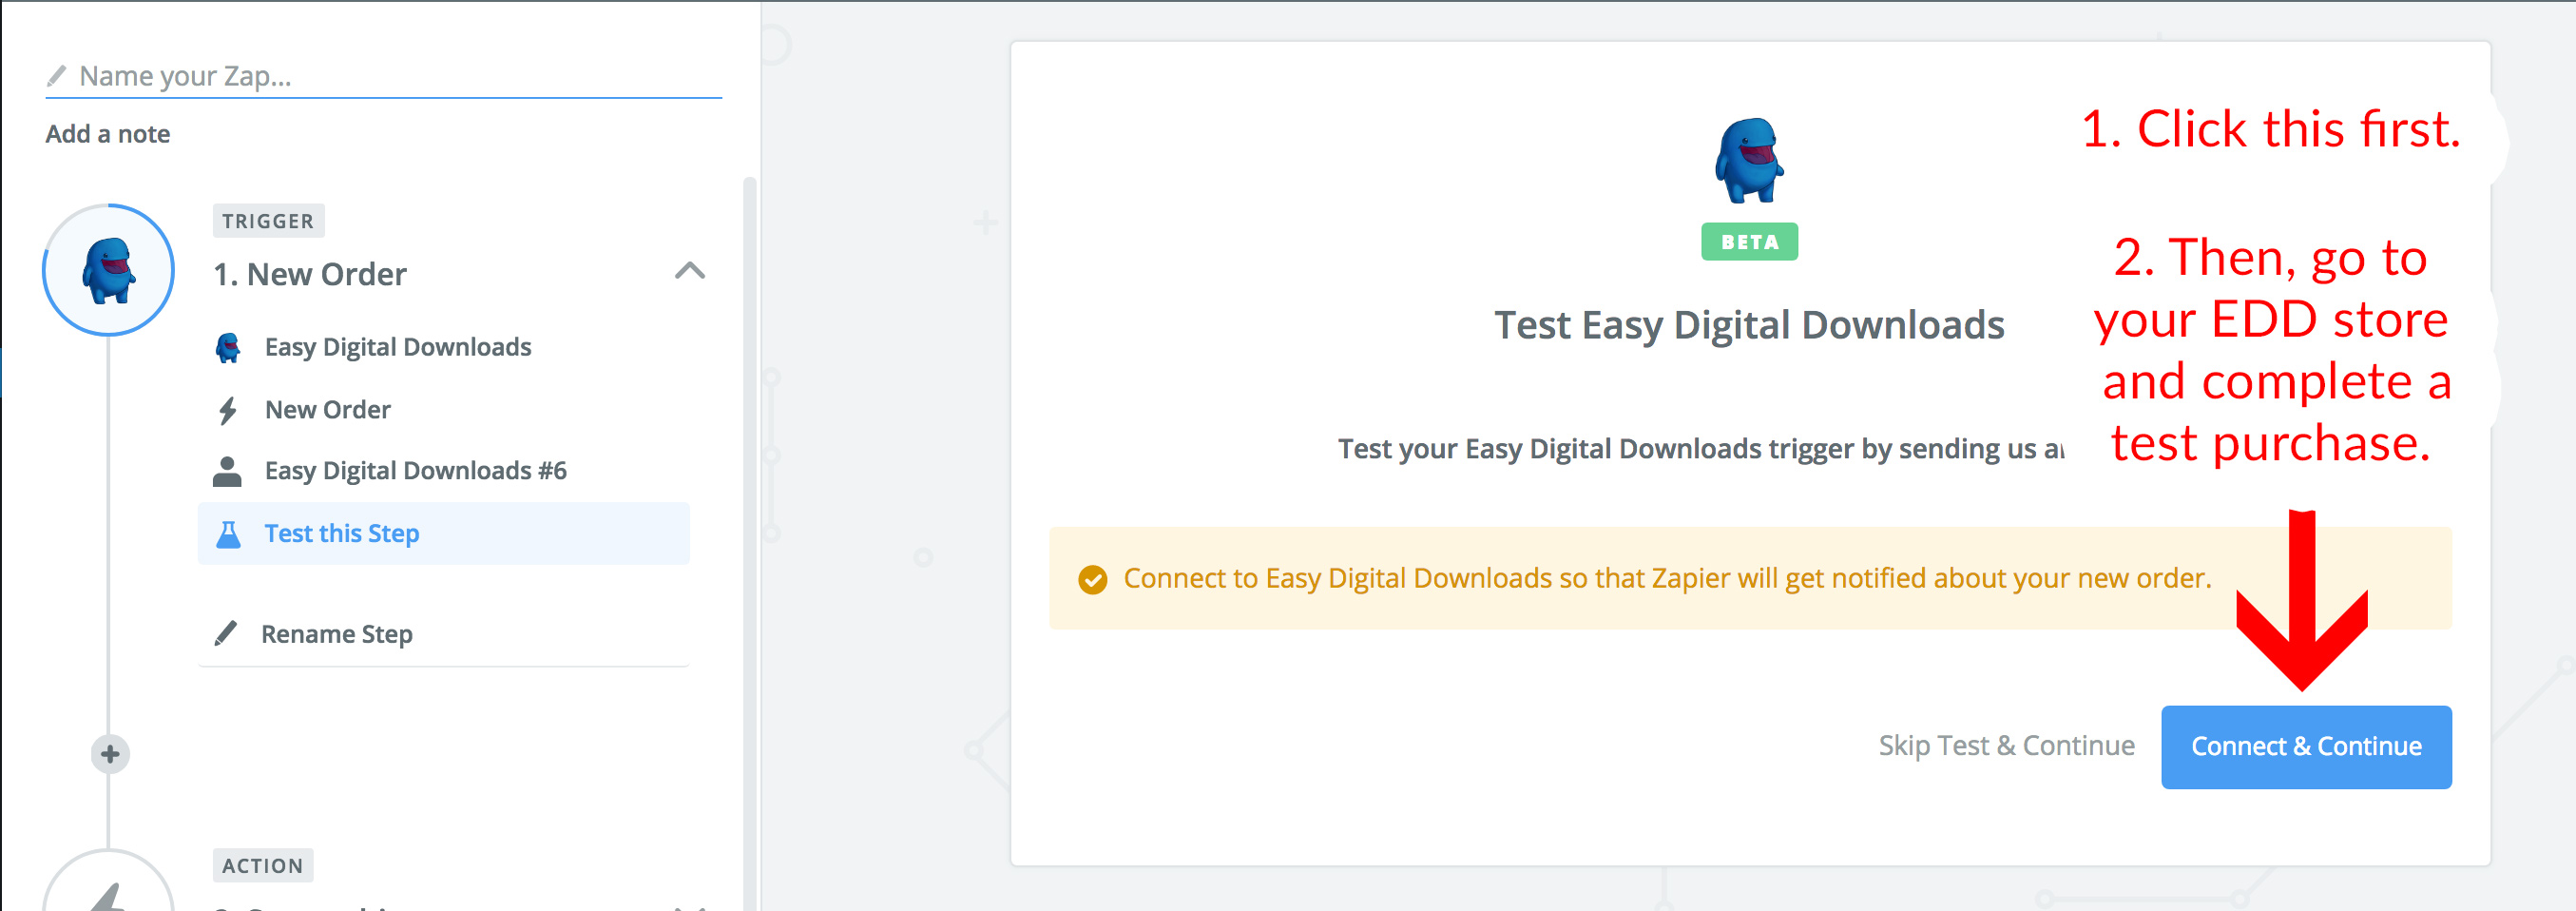
- Once you have authenticated your site, you’ll be on “Test this Step”. Here you need to complete a test purchase in your store, making sure you fill out the custom fields you’ve set up on your Checkout. By filling them out and completing a test purchase, Zapier will become aware that your custom fields exist.
First, click the “Connect & Continue” button. This will make Zapier “Listen” for your test purchase.
Second, complete a test purchase in your EDD Store. In a separate browser tab, go to your store, add one of your products to the cart, and click “Checkout”. Again, make sure you fill out the custom fields on your Checkout page with some test data.

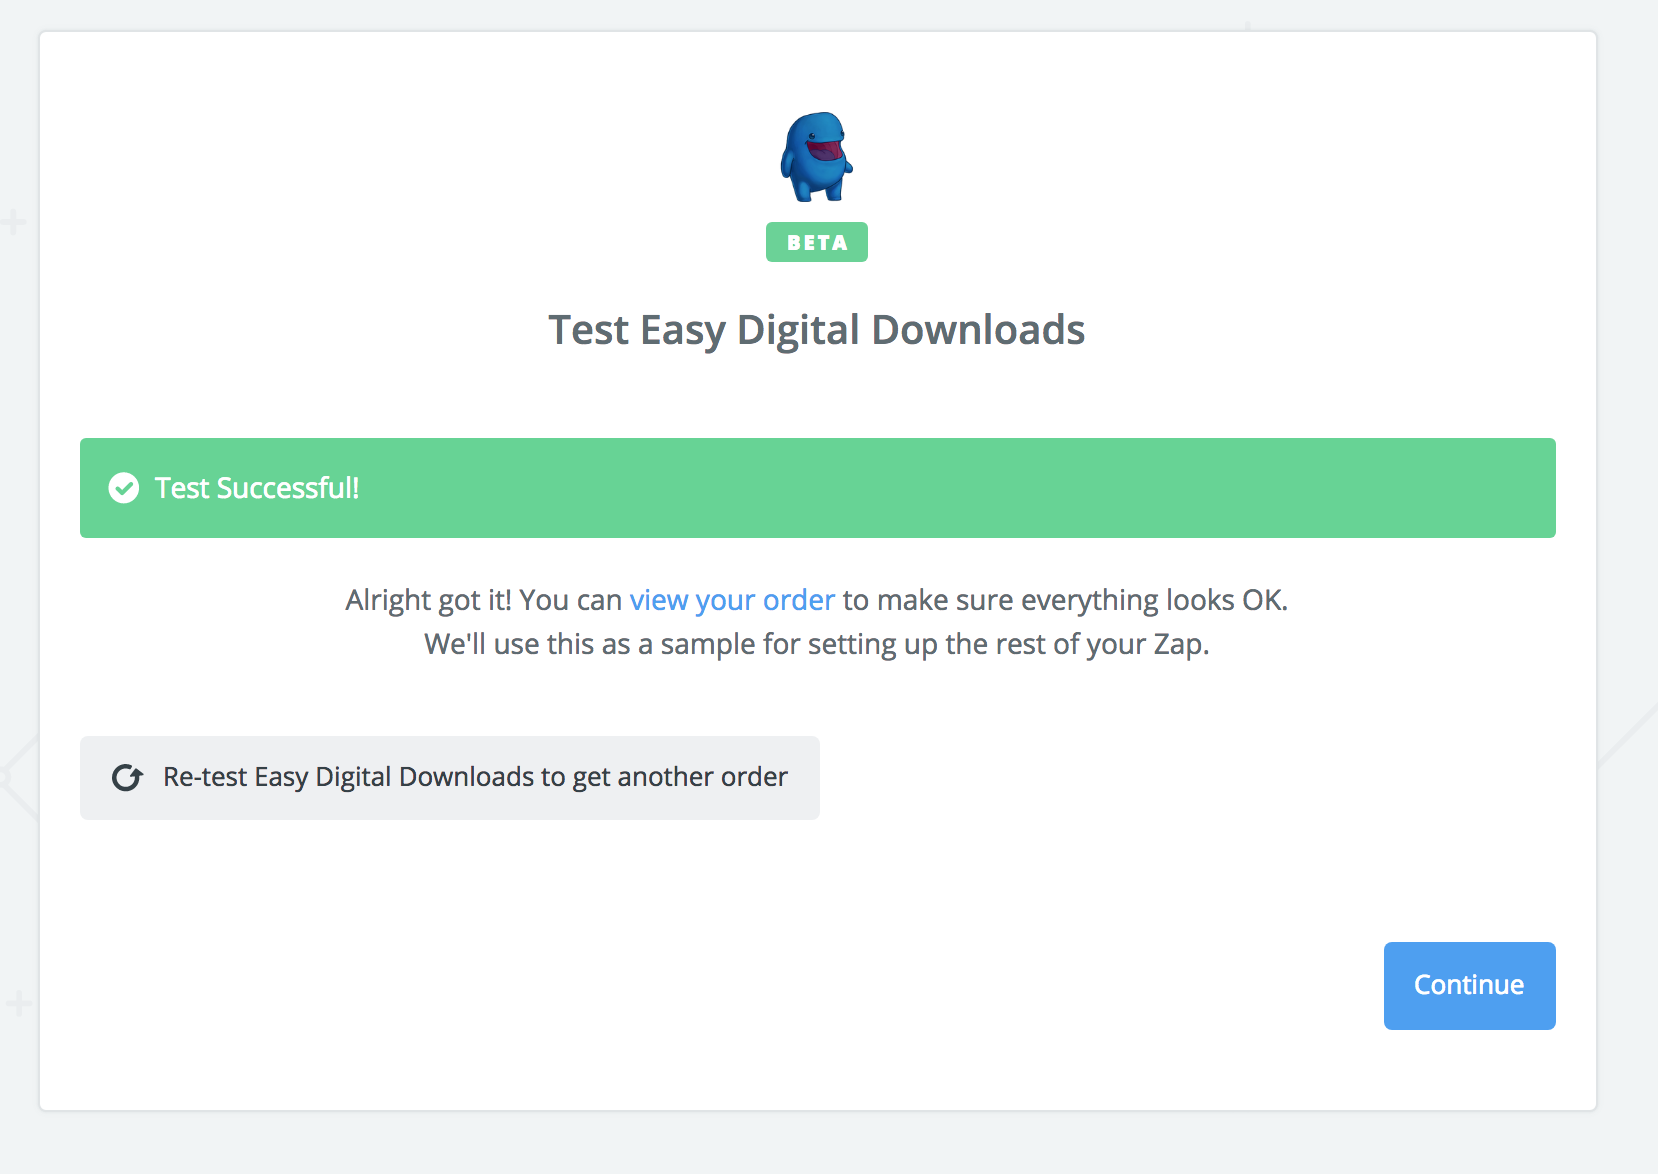
- Once you’ve completed the test purchase, go back to the Zapier tab. It will now say “Test Successful” and look like this:

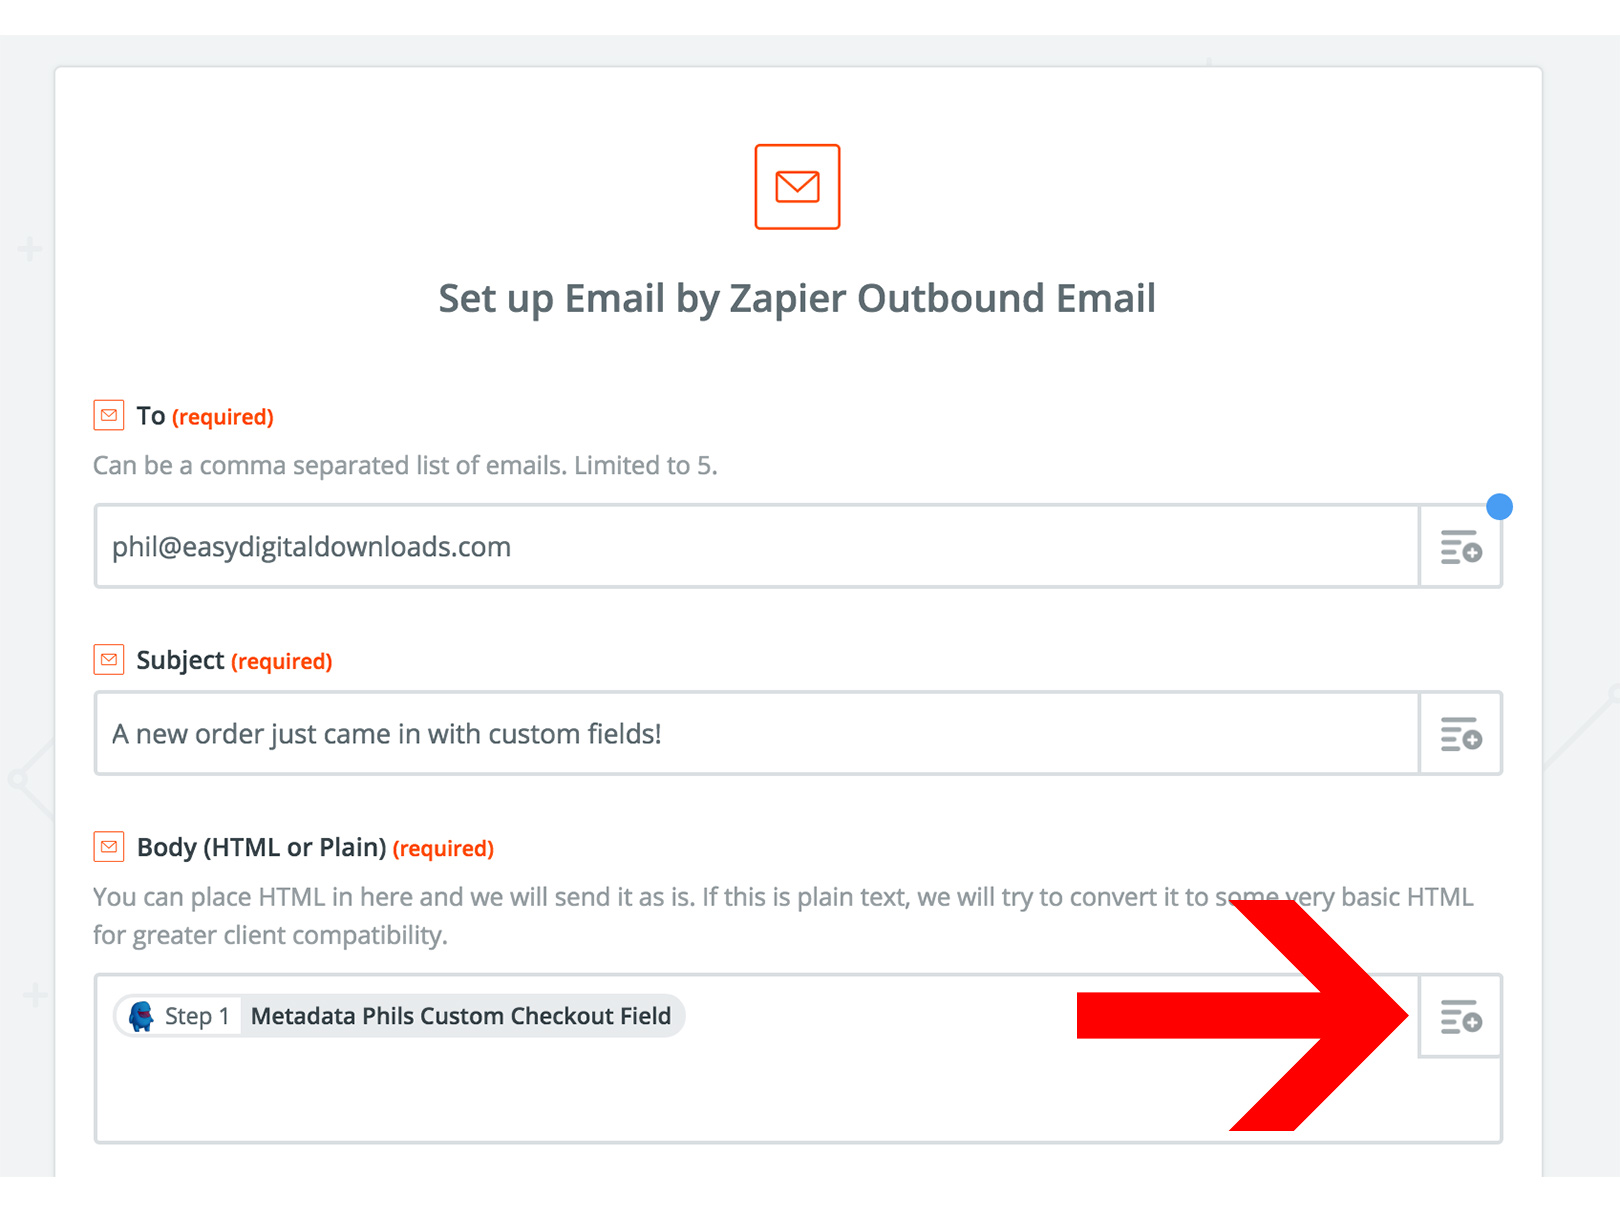
- Now you can set up the integration with the 3rd party app of your choosing. For this example we will use the “Email” action to email ourself whenever a new order is placed. We’ll make the email body contain my custom field information which was entered by the customer at checkout. For the Body (HTML or Plain) area, click on the top right icon and find your custom field in the dropdown. This will add it to the body.
 Now that you’ve put your custom field data into the body, you can finish setting up the “Zap” as normal and activate it in your Zapier account. That’s all there is to it!
 Now that you’ve put your custom field data into the body, you can finish setting up the “Zap” as normal and activate it in your Zapier account. That’s all there is to it!
Note: Keep in mind that it is extremely important that you follow all of these steps in this order. If you don’t you may not see your custom fields in Zapier.
Also, once you’ve set up your “Zap” successfully, make sure to take your store back out of Test Mode in your EDD settings.


