


Switching between your WordPress dashboard and Slack all day gets exhausting fast. Fortunately, Easy Digital Downloads’ Slack integration transforms how you stay on top of your digital product sales.
Rather than important events slipping through the cracks, this WordPress Slack integration brings your store notifications directly into your team’s communication hub. You’ll get instant alerts for sales, failed payments, new registrations, and dozens of other events — without leaving Slack.
In this guide, I’ll take you through the EDD Slack integration step-by-step.
Why Use WordPress + EDD Slack Integration
Connecting your Easy Digital Downloads store to Slack is about more than just getting notifications; it’s about creating a central command center for your business.
Instead of constantly switching tabs to monitor your WordPress dashboard, you bring your store’s most important events directly into your team’s daily workflow. This streamlines communication, improves efficiency, and ensures you never miss a critical moment.
While basic plugins send simple alerts, EDD’s Slack extension creates a powerful, two-way bridge to your store.
Here’s a look at the key automations you can set up:
📊 Real-Time Sales & Revenue Sharing: Get instant notifications for every sale, complete with customer details, purchase amounts, and items purchased. You can also trigger alerts for failed payments so your team can follow up immediately, and track discount code usage to see which promotions are most effective.
👏 Store & Team Management: Keep your team in sync with alerts for key events. Get notified about new user registrations, blog comments that need moderation, and even triggers from other EDD extensions. For example, receive alerts for license activations and deactivations (Software Licensing) or notifications for new vendor applications or product submissions (Frontend Submissions).
📣 Interactive Commands & Actions: This is where the integration truly shines. You can take action without ever leaving Slack. Use Interactive Buttons to approve or reject new vendor applications, mark a transaction as fraudulent, or moderate comments with a single click directly from the Slack message. Or leverage Slash Commands to instantly pull store data.
How to Set Up EDD’s Slack Integration
If you’re new to Easy Digital Downloads, it’s a powerful WordPress plugin designed specifically for selling digital products like software, eBooks, courses, and downloads.
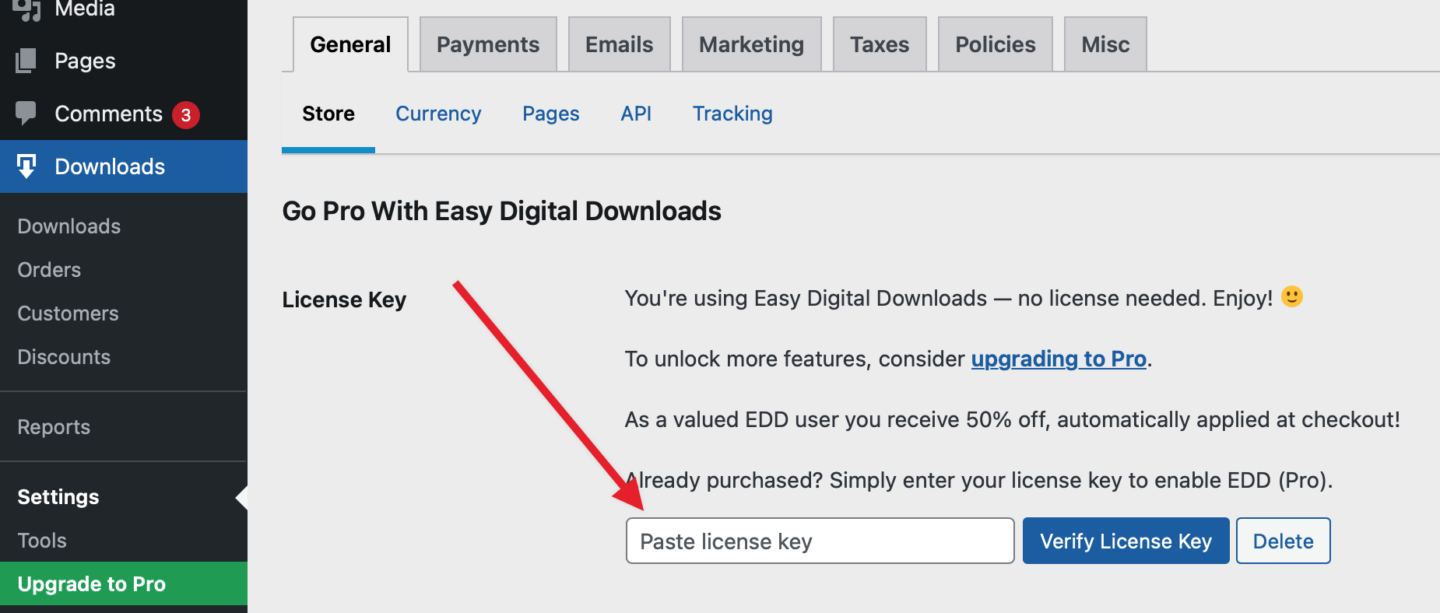
The free version provides basic eCommerce functionality, but the Slack integration covered in this tutorial requires Easy Digital Downloads Pro (a Professional Pass or higher).
Personal, Extended, and Lite users can easily upgrade their EDD pass to unlock Slack integration along with other advanced automation features.
Step 1. Install EDD Slack Extension
Once you have your Pro pass installed and activated, you can install the EDD Slack add-on directly from your WordPress dashboard.
Go to Downloads » Settings » Extensions. You’ll see a list of available extensions based on your EDD pass level.
Find Slack in the list and click Install.

The extension downloads and activates automatically. You’ll see a green checkmark indicating it’s active and ready to configure.
If you don’t see Slack in your extensions list, check that your EDD license is active and you have at least a Professional Pass. The extension won’t appear for lower-tier licenses.
Step 2. Connect EDD to Slack Account
Before EDD can send messages to Slack, you need to create a webhook URL that gives it permission to post in your workspace.
In your Slack workspace, click your workspace name in the top left corner, then select Tools & settings » Manage apps. This opens the Slack App Directory.

Search for “Incoming Webhooks” and click Add to Slack.

Choose the channel where you want notifications to appear by default. Don’t worry – you can send different notifications to different channels later. Select Add Incoming WebHooks Integration.

Slack generates a webhook URL that looks like https://hooks.slack.com/services/T00000000/B00000000/XXXXXXXXXXXXXXXXXXXXXXXX. Copy this entire URL.

Back in WordPress, go to Downloads » Settings » Extensions » Slack.

Paste your webhook URL into the Default Webhook URL field and click Save Changes.
Step 3. Create Your First Slack Notification
Now we’re ready to automate EDD notifications with Slack.
On the same Slack settings page, click Add Slack Notification. This opens a form where you’ll configure when and how notifications get sent.

The Identifier for this Notification field is just a label for your reference. Something like “New Sales Alert” works perfectly.
This form has several sections, but don’t let that intimidate you. Each field has a specific purpose in creating useful, targeted notifications.
Step 4. Choose Your WordPress Trigger
The Slack Trigger dropdown contains dozens of options depending on which EDD extensions you have active.
For your first notification, select Purchase Complete. This triggers whenever a customer successfully completes a purchase on your site. It’s the easiest way to send EDD purchase alerts to Slack,

Other popular triggers include New User Registration for community building, Purchase Failed for customer service alerts, and Discount Code Applied for marketing insights.
When you select a trigger, additional fields appear below with options specific to that event type. For purchase notifications, you can filter by specific products or price ranges.

The trigger you choose determines what information gets passed to Slack, so pick something that provides actionable value for your team.
Step 5. Customize the Slack Notification Message
The (optional) message fields let you create rich, informative notifications using dynamic content.

- Message Pre-text appears above the main message in smaller text. Use this for context like “New sale on your store!”
- Message Title is the main headline. For purchase notifications, something like “Sale: cart” works well.
- Message is where you include detailed information. You can use variables like
email,total, andpayment_linkto include purchase details.
Step 6. Configure Your Slack Action
The Slack Channel field lets you override the default channel from your webhook. Leave it blank to use the default, or specify a different channel like #sales or #notifications.

To send notifications to a specific person instead of a channel, use the @username format. Just remember that person needs to be in your Slack workspace.
- Username changes who the message appears to be from. “Store Bot” or your site name works well. This doesn’t need to be a real Slack user.
- You can also add an Icon Emoji or Image URL.
- Color adds a colored bar to the left of your notification. Use green sales, red for problems like failed payments, and yellow for things that need attention.
When you’re done, select Save Slack Notification, then Save Changes on the EDD Extensions » Slack settings screen.
⚙️ For more detailed instructions, check out our Slack integration setup doc.
Step 7. Test the EDD Slack Integration
Once you save the notification, it should appear under the EDD Slack Notifications with a green checkmark indicating it’s active.

Before going live, test your notification to make sure everything works correctly.
You can do this by making a test purchase on your site. First, select the option under Downloads » Settings » Payments » Enable Test Mode.

Then visit the front of your site, add a product to your cart, and complete the checkout process. Within a few seconds, you should see your notification appear in the designated Slack channel.

If the notification doesn’t appear, check that your webhook URL is correct and that the notification shows a green checkmark in the EDD settings. Red X marks indicate configuration problems.
💡 Test notifications often trigger faster than real ones because there’s no payment processing delay. Don’t worry if live notifications take 30-60 seconds to appear.
Advanced EDD Slack Integration Features
The above tutorial covers the basic settings of the EDD Slack integration. But there are a handful of other features I highly recommend using to get the most value from it.
Integrate EDD Extensions With Slack
EDD’s Slack integration becomes even more powerful when combined with other extensions. The system recognizes which addons you have active and unlocks additional notification triggers.
- With Software Licensing active, you get alerts for license activations, deactivations, and upgrades. Perfect for SaaS businesses that need to monitor license usage patterns.
- Commissions extension adds notifications for new affiliate earnings and payouts. Your affiliate managers can track performance.
- Frontend Submissions unlocks vendor-specific triggers — new applications, product submissions, and vendor feedback notifications. Essential for marketplace management.
The integration also supports multiple channels and workspaces. Send sales notifications to your marketing team’s channel while routing technical alerts to developers. Each notification can have its own destination and formatting.
You can even set up different notification rules based on purchase amounts. Big sales might go to a VIP channel with @here mentions, while smaller transactions use quiet notifications.
Create Custom Slack App
To create interactive notifications and slash commands, you’ll need to create a custom Slack app to connect EDD and your Slack workspace.
To get started, go to https://api.slack.com/apps and select Create an App.
Next, select the From scratch option.

Enter an App Name (something like “EDD Store Notifications”) and select the Slack workspace where you want Easy Digital Downloads Slack notifications to appear. You can always add more workspaces later. Click on Create App.

Now you should see all of your App Credentials.

You’ll see Client ID, Client Secret, and Verification Token fields. You can copy and paste those values into their respective fields in your EDD Slack extension settings.

Then click on Save Changes.
Note: There are a handful of settings you need to complete under the OAuth & Permissions tab from the Slack App settings. This includes adding Bot Token Scopes and your Redirect URL. Follow the step-by-step instructions outlined in our Slack App documentation before proceeding.
When you’re done configuring the above, return to the Extensions » Slack settings, and select the Link Slack App button.

A window will open with a permission request for EDD Store Notifications to access your Slack workspace. Click Allow.
Then you’ll see a notification banner and message letting you know the Slack App was linked successfully.
Set Up Interactive Slack Notifications
This is where EDD’s Slack integration really shines. Instead of just receiving notifications, your team can take action directly from Slack.
Interactive buttons work with specific triggers like downloads or vendor applications. When these events happen, Slack shows clickable buttons alongside the notification.
To get started, go to your Slack App settings and go to the Interactivity & Shortcuts tab.

Click to enable the Interactivity toggle. and enter the Request URL according to our doc instructions.
When you’re done, click on Save Changes.
Now let’s say you have Frontend Submissions installed and want to set up interactive notifications for vendor applications.
You could create a new notification with the trigger New Vendor Application. Vendor applications, product submissions, and edits can all be approved or rejected directly from Slack.
💡 Interactive buttons respect WordPress user permissions. Team members can only approve items they’d normally have permission to moderate in your WordPress dashboard.
Configure Slash Commands
Slash commands turn Slack into a command center for your store and let you pull store data without leaving Slack. Think of them as instant reports you can run from anywhere in your workspace.
In your Slack app settings, go to Slash Commands and click Create New Command.

Set the command as /edd and point the request URL to your WordPress site.com/edd-sl-api/.

Back in your EDD Slack settings, you’ll see a Slash Commands section. Enable the commands you want your team to use:
/eddhelp— Shows all available commandssales today— Displays today’s sales summarysales this_month— Shows monthly performancecustomer [email protected]— Pulls up customer detailsdiscount SAVE20— Shows discount code usage stats
These commands are incredibly useful during team meetings or when someone asks quick questions about store performance. No more “let me check the dashboard and get back to you.”
⚙️ Check out the Slash Commands section of our Slack doc for more.
Auto-Invite Users to Your Slack Team
Team invites automatically add customers to a private Slack community when they make purchases. This creates opportunities for customer engagement, support, and community building around your products.
You can enable and configure this option under the Slack extension settings in WordPress.
FAQs on the EDD Slack Integration
Let’s wrap up with some frequently asked questions about using the EDD Slack integration in WordPress.
How do I connect my WordPress site to Slack?
Create a Slack webhook URL through your workspace’s app directory, then enter it in your WordPress plugin’s settings. Most WordPress-Slack plugins use this webhook method for basic connectivity.
For digital stores, Easy Digital Downloads’ Slack extension offers the most comprehensive features, including interactive notifications, slash commands, and eCommerce-specific triggers.
How can I get Easy Digital Downloads sales notifications in Slack?
The EDD Slack extension sends real-time sales notifications with customer details, purchase amounts, and product information. Once you install the add-on and connect Easy Digital Downloads to a Slack channel, go to Downloads » Settings » Extensions » Slack in WordPress and select Add New Notification. Then you can select Purchase Complete as the trigger.
Can I send notifications from WordPress to Slack for free?
Basic webhook notifications are free through Slack’s API. However, most quality WordPress plugins with Slack integration require premium licenses. EDD’s Slack integration requires a Professional Pass or higher.
Is it possible to integrate WordPress and Slack without a plugin?
Technically yes, through custom webhook coding, but it requires significant development work. Using a purpose-built plugin like EDD’s Slack extension provides pre-built triggers, message formatting, and interactive features that would take months to develop manually.
Can I customize which notifications go to different Slack channels?
Yes, each notification can be configured with its own channel destination. For instance, you could send sales alerts to #marketing, payment failures to #support, and vendor applications to #marketplace-management for organized team communication.
Automate Slack Integration With EDD
EDD’s Slack integration transforms how digital stores operate by centralizing team communication and automating routine tasks. Real-time notifications keep everyone informed, interactive buttons eliminate constant WordPress logins, and slash commands provide instant access to store data.
The time savings add up quickly. Instead of checking multiple platforms throughout the day, your entire team stays synchronized through one communication hub they already use.
Grab an Easy Digital Downloads Pro Pass to unlock Slack integration and dozens of other powerful features that scale your digital business.
📣 P.S. Be sure to subscribe to our newsletter and follow us on Facebook, Twitter/X, or LinkedIn for more WordPress resources!


