
Do you want to learn how to easily create an exit intent popup in WordPress?
It’s super simple. As an e-commerce business owner, you can use these popups to capture your website visitors’ attention and prevent them from leaving your site.
Plus, with the right plugin, you’ll have multiple popup types to choose from and plenty of customization options.
🔎 In this article, we’ll cover:
Why Create an Exit Intent Popup?
An exit intent popup appears when a website user is about to leave your e-commerce site. They can be added anywhere in your online store, from product pages to checkout pages.
These strategically timed overlays are triggered by the user’s cursor mouse movements. For example, as they near the browser’s close button or URL address bar to leave your site, it presents the popup to present a final opportunity to engage them. This could be through a discount, subscription form, or other types of Calls to Action (CTA).
There are many benefits of using an exit intent popup for e-commerce, including:
- Reducing cart abandonment
- Generating leads
- Showcasing promotions
- Increasing engagement
- Upselling & cross-selling
From reducing cart abandonment to building a robust email list, exit intent popups offer a versatile solution to enhance your conversion rates and keep your audience engaged.
Best Exit Intent Popup Examples
There are various types of popups you can create, each catering to different goals and industries. The best option depends on the type of products/services you offer and what you’re looking to achieve.
For instance, do you want to increase email subscribers with a newsletter opt-in form? Perhaps you want to boost sales by offering a limited-time discount.
Exit intent popups also come in various formats. For instance, there are slide-ins, floating bars, full-page overlays, etc.
Let’s look at some exit popup examples. One of the most popular are the kind that display a coupon or time-sensitive discount code or a percentage off the total purchase. This exit-intent trigger can entice users who are about to leave to reconsider and complete their purchase.

Present a popup announcing a flash sale or limited-time offer, creating a sense of scarcity and driving immediate action. Another option for creating a sense of urgency is using a countdown timer to indicate that the offer is expiring soon.

Show a popup reminding users of the items they left in their cart, along with an option to quickly return to complete the purchase to reduce your bounce rate.
WordPress popups can be used as marketing tools. For instance, you can offer a valuable resource, such as an ebook, guide, or exclusive content, in exchange for users subscribing to your email list.
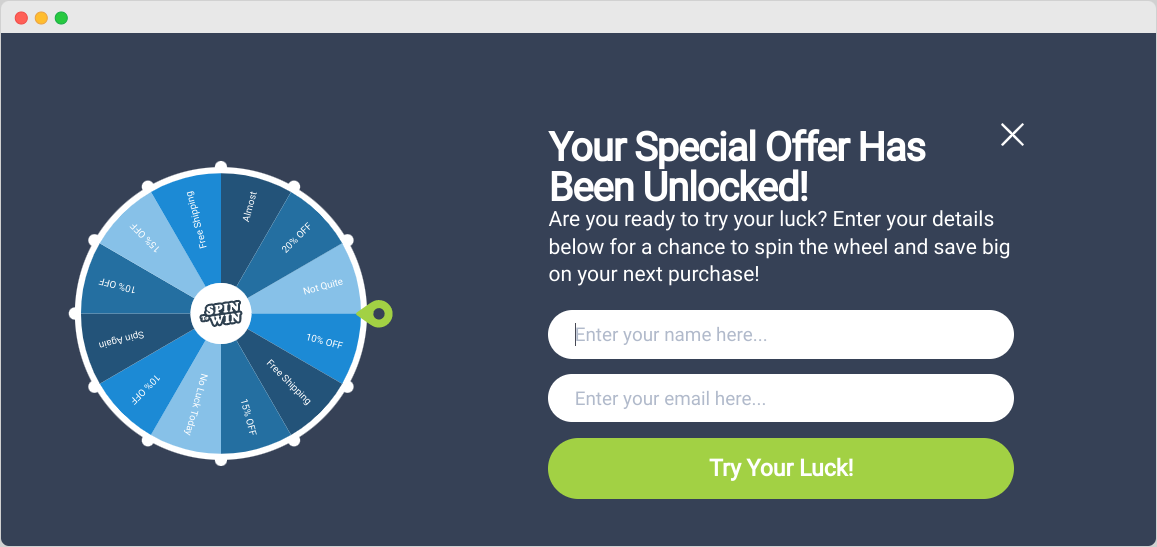
Some popup campaigns introduce an element of gamification by offering users a chance to spin a wheel for a prize or engage in a quiz to receive a personalized discount.
Remember that the effectiveness of exit intent popups depends on factors like timing, relevance, design, and the value you provide. A well-crafted popup that aligns with your audience’s preferences and needs can significantly reduce your bounce rate and enhance your engagement and conversion rates.
How to Create a WordPress Exit Intent Popup
Ready to get started? Below I’ll walk you through step-by-step how to create an exit intent popup for your WordPress website.
Step 1: Sign Up for OptinMonster
There are a handful of exit intent popup plugins you can use for your WordPress site. I recommend OptinMonster:
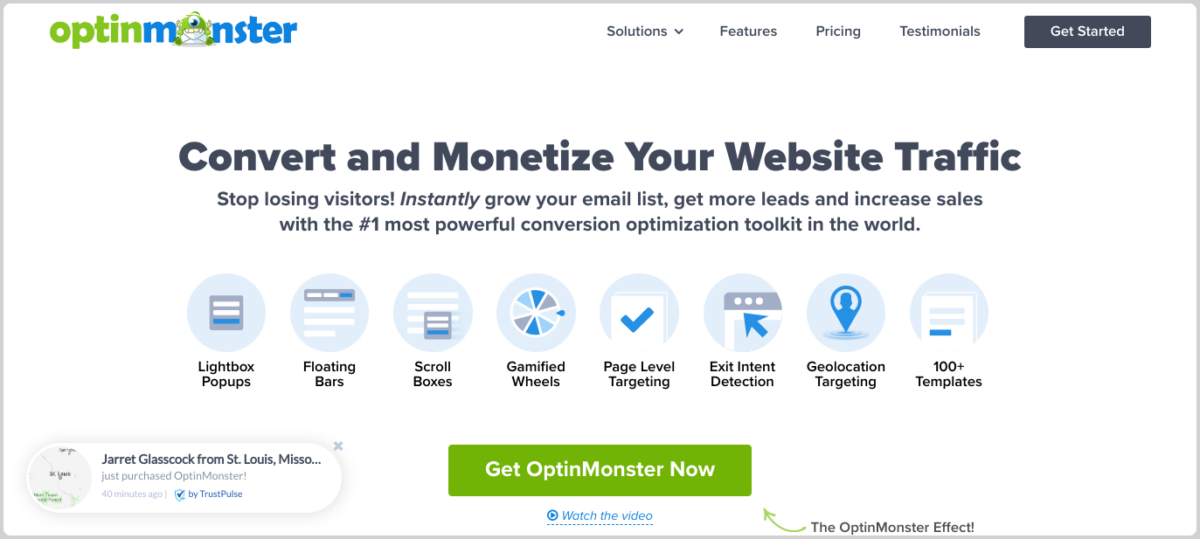
It is a powerful lead generation and conversion optimization tool that seamlessly integrates with WordPress and tons of plugins. This includes e-commerce plugins like Easy Digital Downloads (EDD) and WooCommerce as well as landing page and website builders like SeedProd and Elementor.
In addition to the popup maker and form builder functionality, OptinMonster offers advanced features such as A/B testing, animations, and more.
To get started, you’ll need to choose a pro plan. There are multiple pricing options available.
After you select your plan, install the OptinMonster plugin to your WordPress site (Plugins » Add New). Once you activate the plugin, go to OptinMonster and select Launch the Setup Wizard:
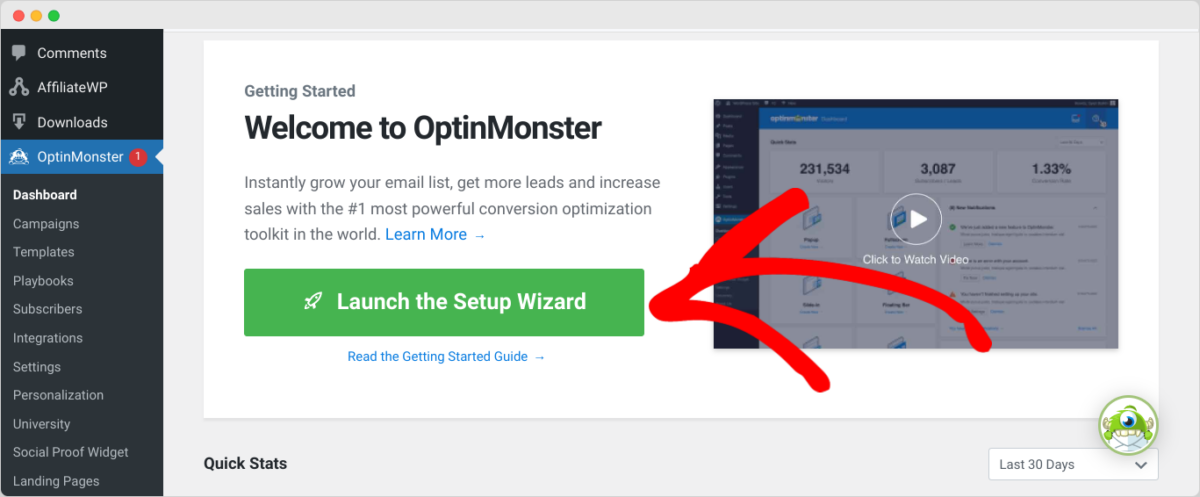
Then you can follow the prompts to connect your WordPress site to your OptinMonster account. For more detailed instructions, check out OptinMonster’s WordPress plugin installation guide.
Step 2: Choose Your Exit Intent Popup Template
Next, you can begin creating your first exit intent popup campaign. From your OptinMonster account dashboard, click on Create New Campaign:
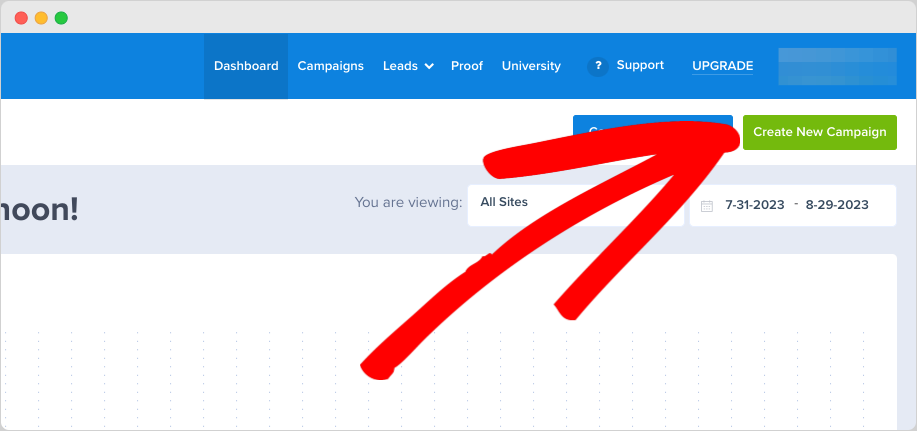
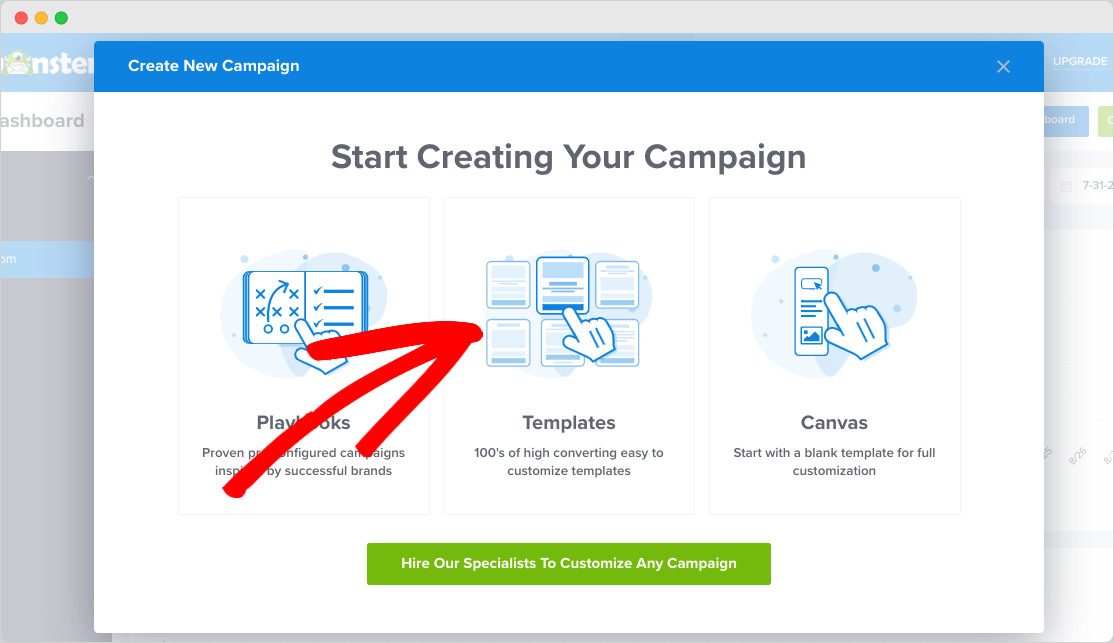
In the modal window that opens, select Templates:
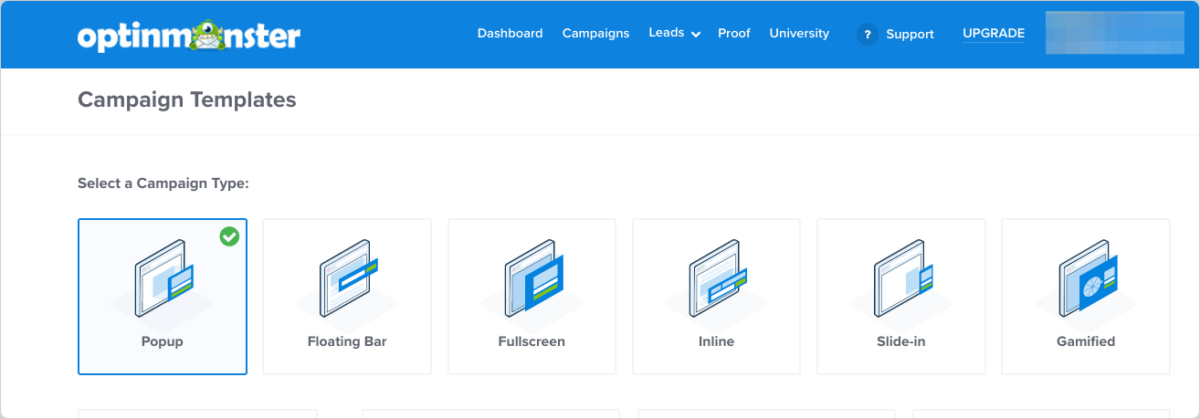
Next, select Popup as the Campaign Type:
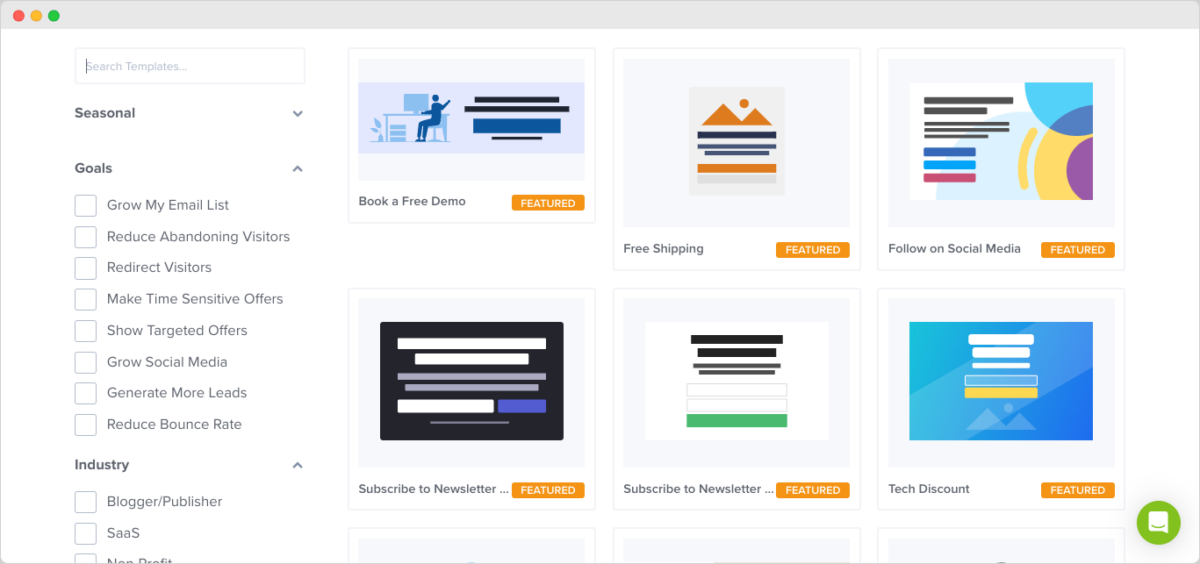
Below that, browse the various template options and select one that resonates with your campaign’s goal. I’ll use one for offering a discount:
Next, name the campaign, then select your website as the site that you want to add the popup to:
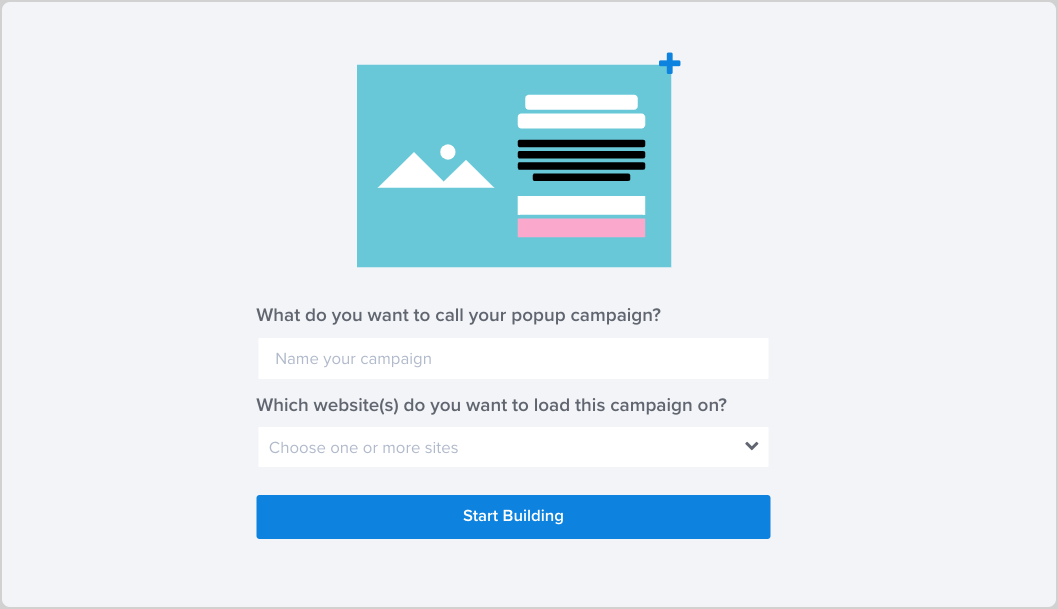
When you’re done, click on Start Building.
Step 3: Customize the Exit Intent Popup
Now use OptinMonster’s intuitive drag-and-drop editor to customize the exit intent popup template:
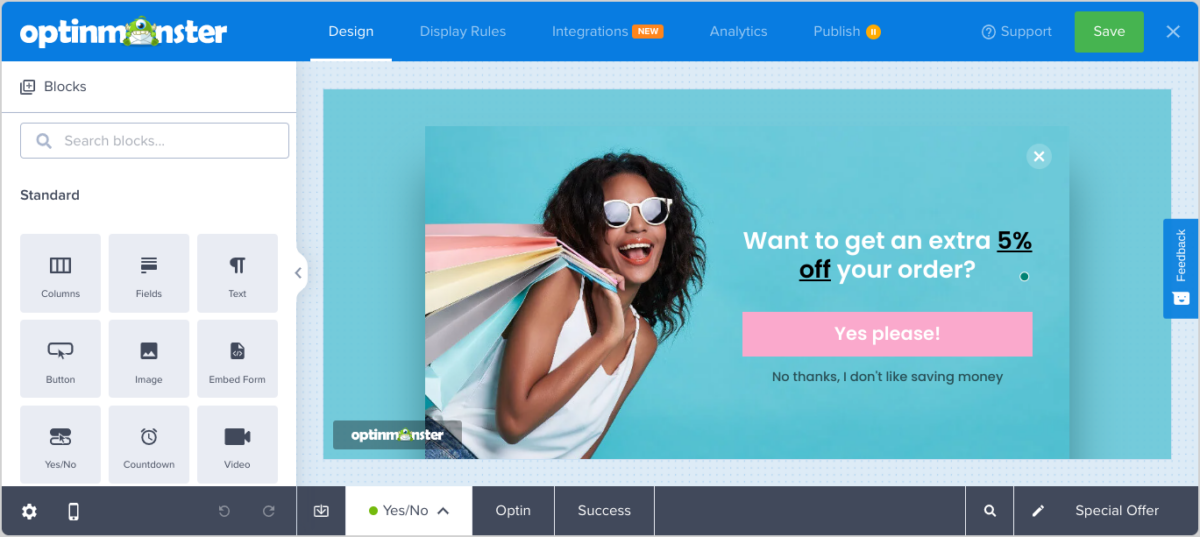
On the left-hand sidebar menu, you’ll find a wide variety of settings and editing options. Click on any element within the popup to edit it. You can change the text, images, colors, etc.
Drag and drop any of the modules and widgets, such as a countdown timer or form:
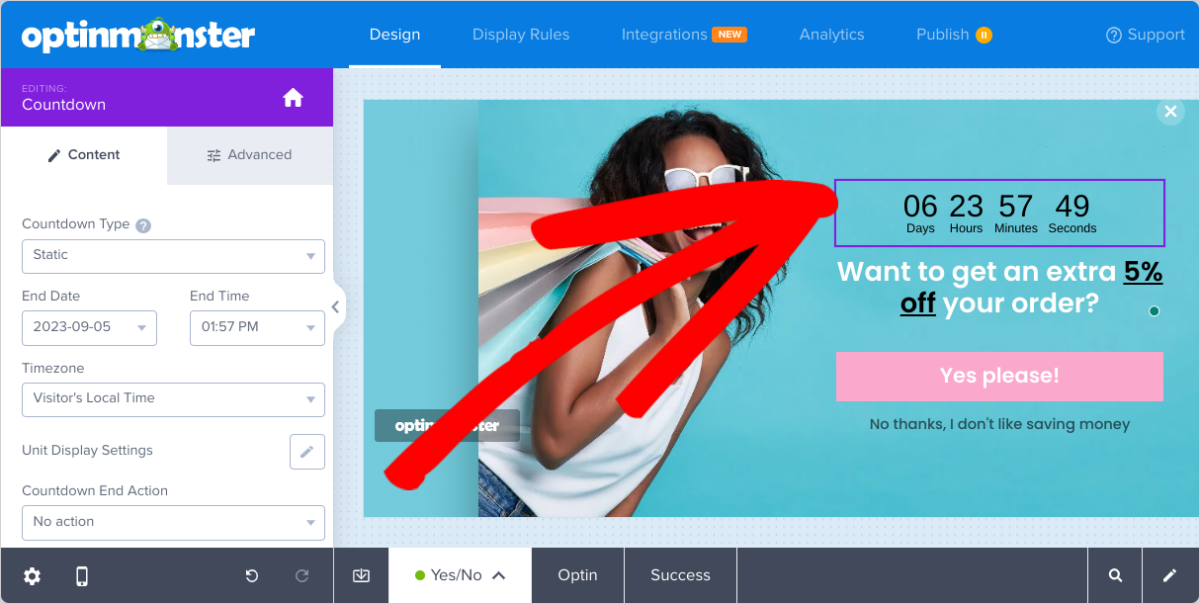
When you’re done customizing the design and appearance of the exit intent popup, click on Save.
Step 4: Configure the Exit Intent Popup Settings
The next step is to configure the triggers for when your popup will appear on the web page. Navigate to the Display Rules tab along the top menu bar:
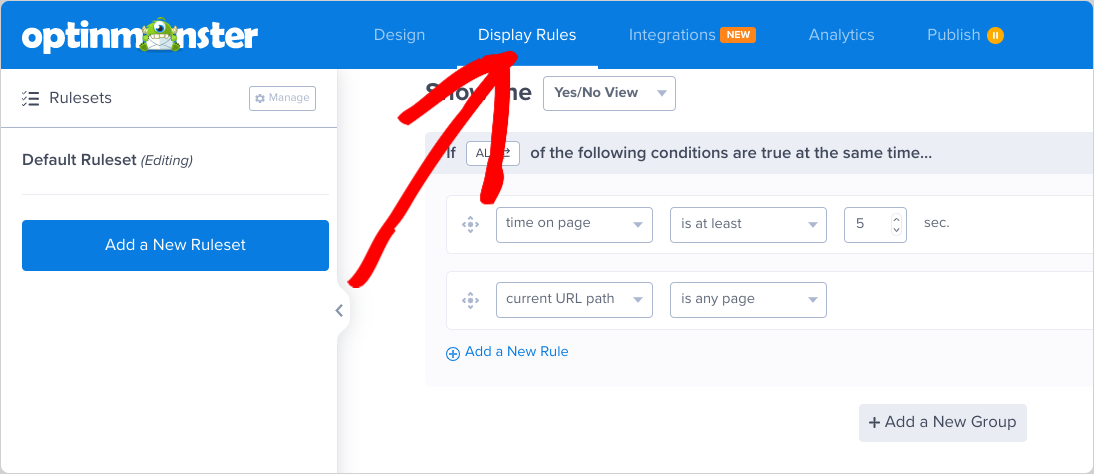
Add a new Ruleset to configure conditions for when the popup is triggered. Under the If… option, go to When and select Exit-Intent as the trigger:

Then you can modify the sensitivity settings to control when the popup appears. You can learn more about that on the OptinMonster documentation.
Click on Save Ruleset and give it a name. Select Done to move on to the Actions tab if you want to add effects like animations or sounds:
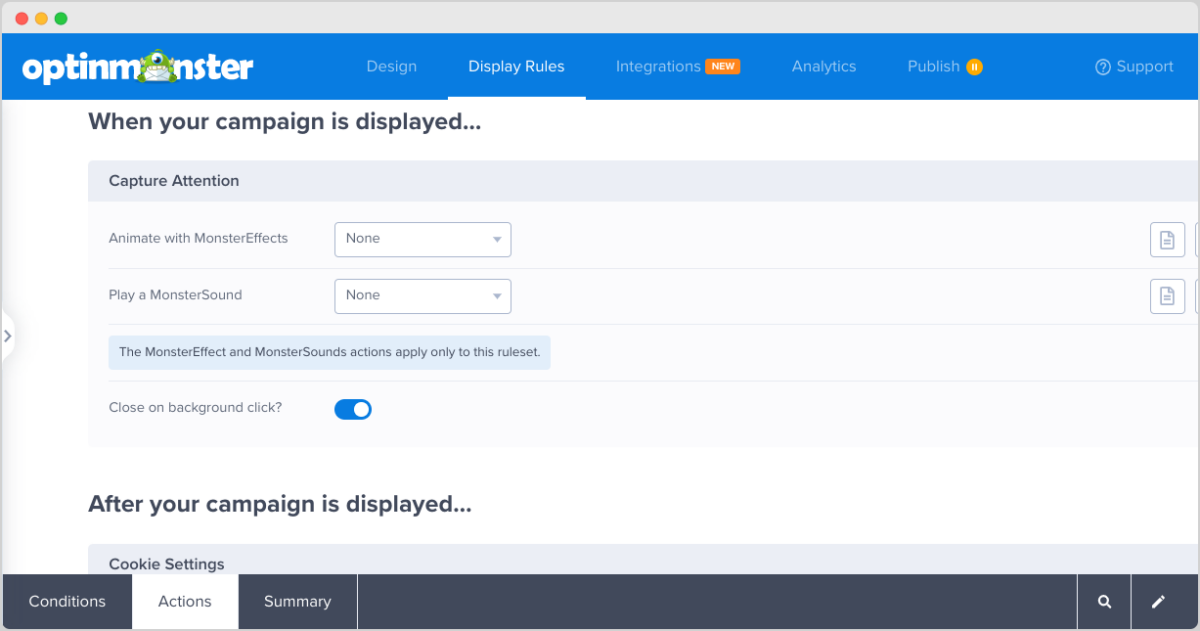
Select Done again and go to the Summary tab. If everything looks as it should, click on the Save button in the top right-hand corner.
You can also connect your popup to an email marketing service provider, such as Mailchimp. Under the Integrations, click on Add New Integration, locate the app, and select Connect:
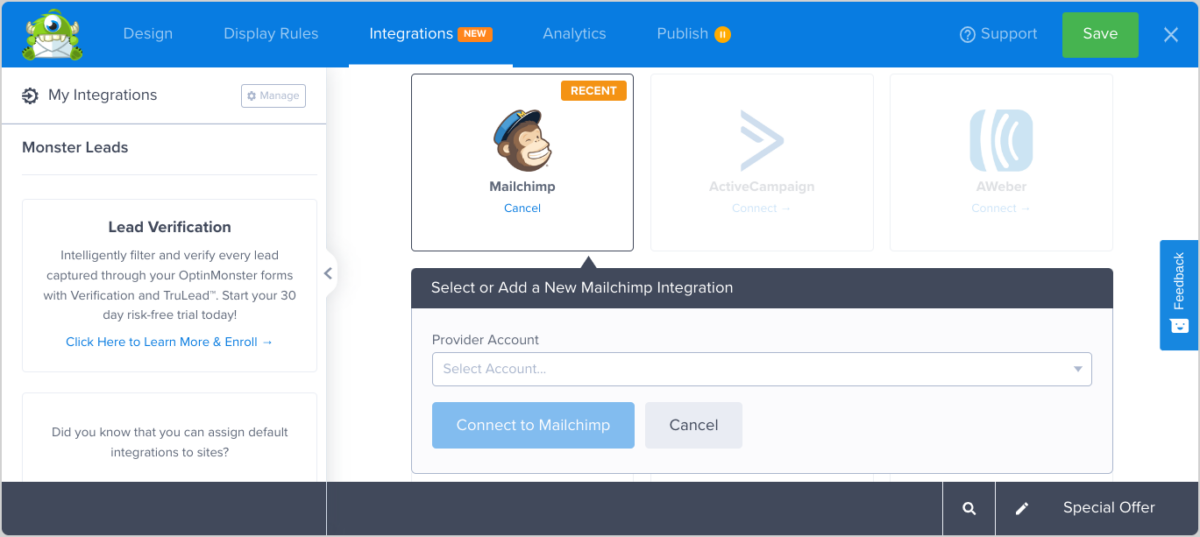
From the drop-down menu, select your email service provider account and list, then complete the on-screen instructions to connect the service. When you’re done, click on Save again.
Step 5: Preview & Publish the Exit Intent Popup
Before going live, thoroughly review your popup’s design, copy, and settings. Go to the Publish tab:
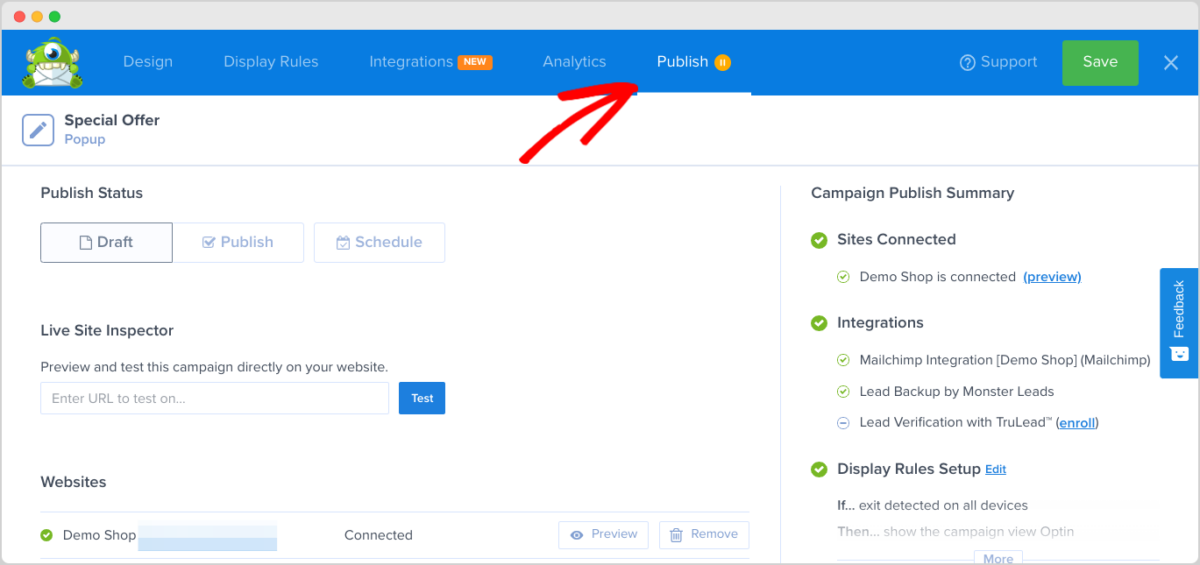
The Preview button next to your site name opens a new tab so for you to see how the exit intent popup appears to customers:
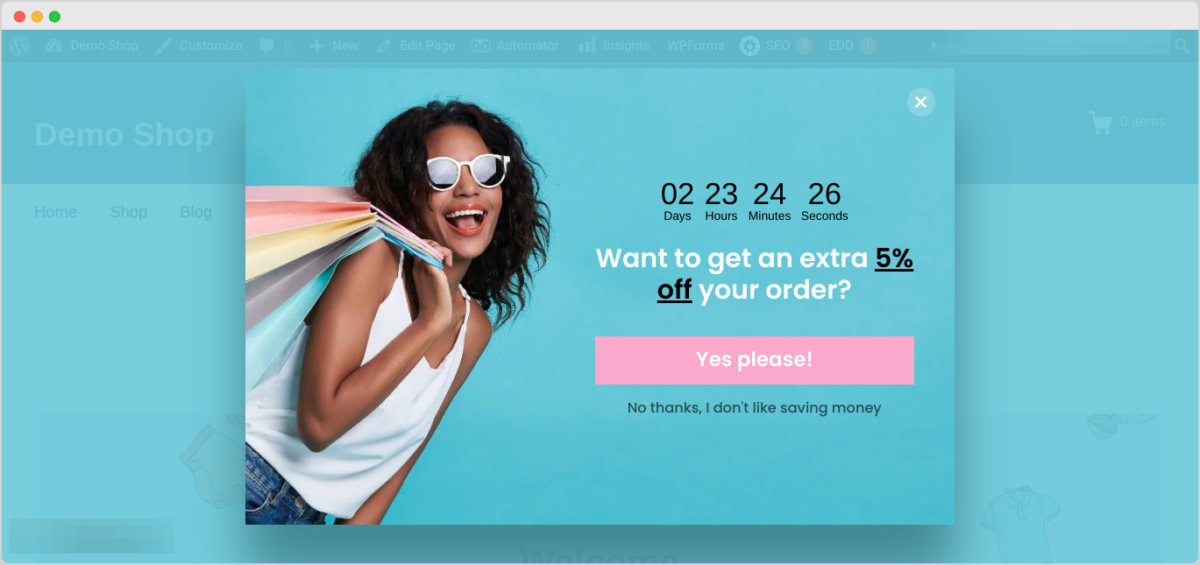
If you’re satisfied, you can publish it. OptinMonster provides various publishing and platform options. Under the Publish tab, scroll to the Platforms section.
You can use the embed codes or select the specific platform (like WordPress) to publish the exit intent popup on.
If you’ve already connected the OptinMonster to your WordPress site, feel free to skip this step. Simply navigate back to your WordPress dashboard and go to OptinMonster » Campaigns.
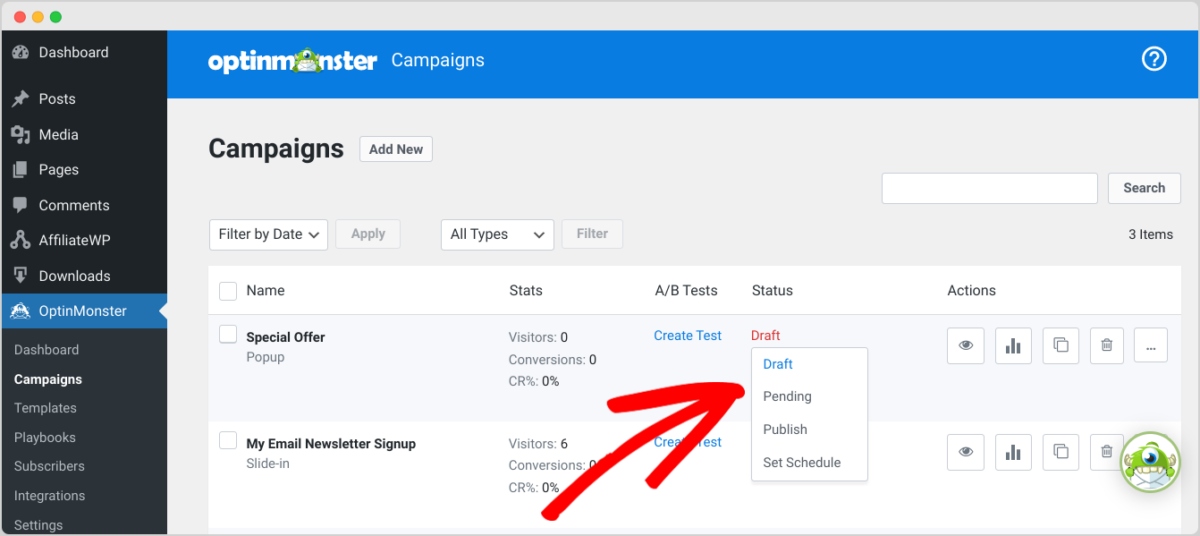
Under the Status column of your popup campaign, change it from Draft to Publish. That’s it!
FAQs About Exit Intent Popups in WordPress
Let’s wrap up with some frequently asked questions.
What is the best way to create an exit intent popup in WordPress?
The best way to create an exit intent popup in WordPress is to use a plugin like OptinMonster. This WordPress plugin includes a user-friendly yet advanced popup builder that includes Exit-Intent Technology, multiple targeting options, and more.
Aside from OptinMonster, there are a handful of other plugins that can help you add new exit-intent popups to your site. Popular options include Thrive Leads, OptiMonk, HubSpot, and Sumo. All these providers have pros and cons.
How does exit intent work on mobile?
If you’re using a quality exit intent popup plugin, your popups should translate to mobile. OptinMonster’s popups are designed to be responsive across various devices, ensuring a seamless experience for desktop and mobile users.
How do I measure the effectiveness of my exit intent popups?
OptinMonster provides detailed analytics that track impressions, conversions, and click-through rates. Analyzing these metrics helps you refine your popup strategy for better results.
Use Exit Popups to Boost Ecommerce Sales
Exit intent popups are a valuable tool in the arsenal of e-commerce business owners using WordPress. By leveraging the power of OptinMonster, you can create visually appealing and highly targeted popups that engage visitors at the right moment.
For more options, check out the 9+ Best Exit Intent Popup Plugins for WordPress (Compared).
Want to enhance your e-commerce store and further boost conversions? Upgrade to Easy Digital Downloads Pro to access tons of premium extensions & advanced features:
📣 P.S. Be sure to subscribe to our newsletter and follow us on Facebook or Twitter for more WordPress resources!
Using WordPress and want to get Easy Digital Downloads for free?
Enter the URL to your WordPress website to install.
Disclosure: Our content is reader-supported. This means if you click on some of our links, then we may earn a commission. We only recommend products that we believe will add value to our readers.