Do you want to learn how to easily create an online order form for your website?
As an eCommerce seller or online entrepreneur, it’s important to optimize your site to deliver a seamless user experience and smooth checkout process.
While a full shopping cart system can certainly help you do that, there’s also another strategy that can streamline your order process and increase conversion rates: online order forms.
🔎 In this article, I’ll cover:
Why Use Online Order Forms?
An online order form delivers a faster, more convenient way for customers to purchase your products without venturing through a traditional shopping cart.
Online order forms unlock a unique set of advantages that can transform your WordPress site into a conversion-friendly eCommerce machine.
Even if you already have a complete eCommerce solution like Easy Digital Downloads or WooCommerce in place, adding an order form can be a helpful and powerful addition to complement your store.
💡 If you’re using Easy Digital Downloads, easily customize your checkout page and checkout forms with Checkout Fields Manager.
Online order forms can be particularly useful for:
- Selling digital products like eBooks, music, software, or any downloadable goods
- Quick orders for single-product offerings, subscriptions, or express checkout scenarios
- Lead capture to gather valuable email addresses or preferences for future marketing campaigns
- Donations and contributions to make it easy for people to support your cause or organization
- Events and bookings so you can manage registrations, ticket sales, and guest details for workshops, seminars, or online events
Using a drag-and-drop interface, you design and customize your form by adding product fields, contact details, and payment gateways. Then you choose where you want the form to appear on your website, be it a specific page, post, or even a sidebar widget.
With their straightforward process and user-friendly design, online order forms ensure a smooth experience for both you and your customers.
How to Create an Online Order Form
Ready to unlock the power of online order forms for your website? Below is a step-by-step guide to creating order forms in WordPress.
Step 1. Download and Install WPForms
The first thing you’ll need is a form builder plugin like WPForms:
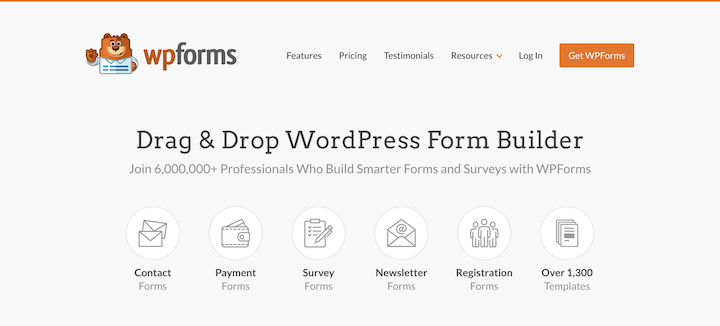
WPForms is the best WordPress form plugin that makes creating powerful, user-friendly online forms a breeze. It lets you easily create visually appealing online order forms, contact forms, payment forms, surveys, and more.
WPForms also comes with powerful features like payment integrations and conditional logic. While there is a free version available, you’ll need WPForms Pro to unlock the full suite of features and templates (including the WordPress Order Form).
💡 Learn more about using WPForms in WordPress.
Once you select your plan and download the plugin, head to your WordPress dashboard. Then navigate to Plugins » Add New » Upload Plugin » Choose File:
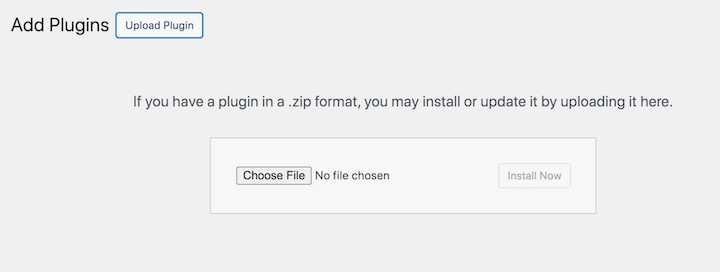
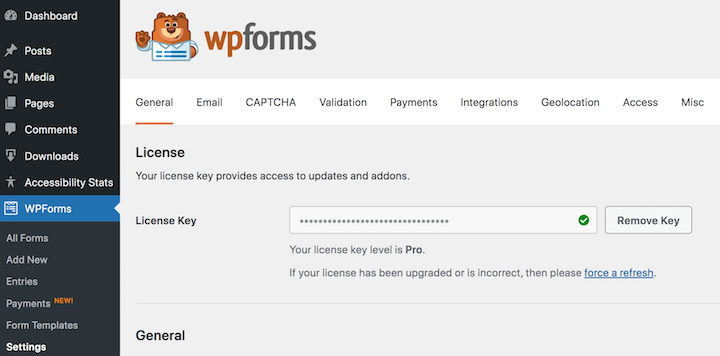
After uploading the plugin file, select Install Now followed by Activate. If you have a Basic, Plus, or other paid plan, you may need to enter your license key under WPForms » Settings:
Before creating your online order form, I recommend integrating your payment gateway (such as PayPal or Stripe) with WPForms. This is needed to facilitate secure online transactions and allow customers to pay with debit or credit cards, digital wallets, and other payment methods.
Under WPForms » Settings, go to the Payments tab and select Connect with Stripe:
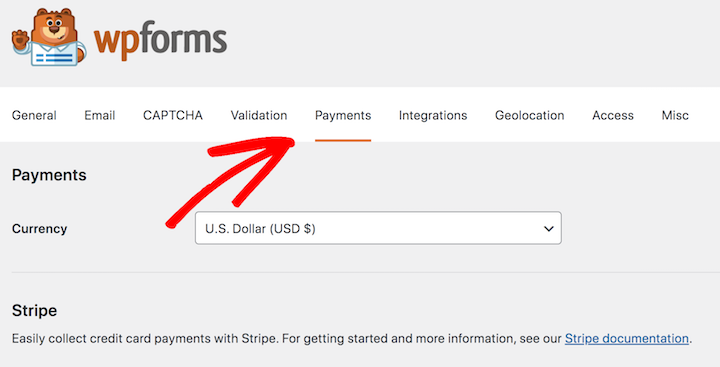
Follow the on-screen instructions to log into and connect your Stripe account with WPForms.
Step 2. Create a New Online Order Form
Once you’ve installed and activated the WordPress plugin on your website, the next step is to create a new form.
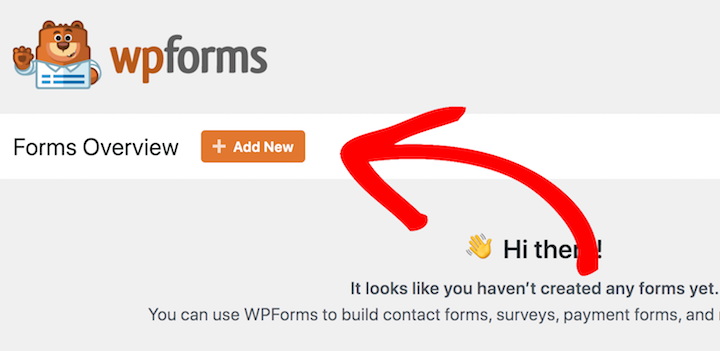
From your WordPress dashboard, go to WPForms » Add New:
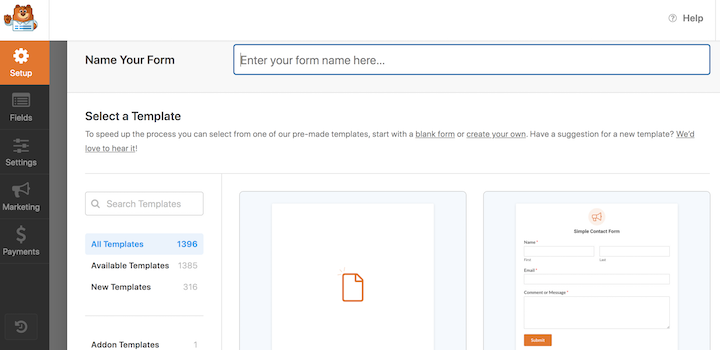
Next, it takes you to the form builder where you name your online order form and select a template:
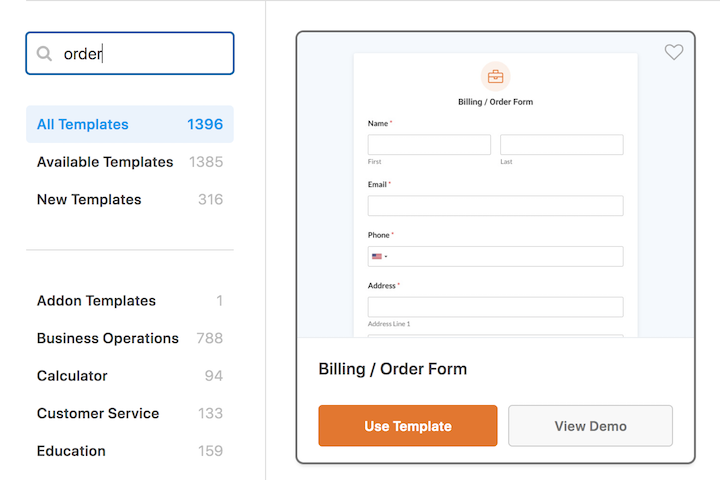
There are a handful to choose from. For small businesses, I recommend the Billing/Order Form in most cases:
If you don’t want to use a pre-built template, you can also create a simple order form from scratch.
Step 3. Customize Your Online Order Form
Once you select your order form template (hover + Use Template), you’ll be brought to the form editor. To the right, is the form preview window. To the left is a variety of field options and settings to customize and configure:
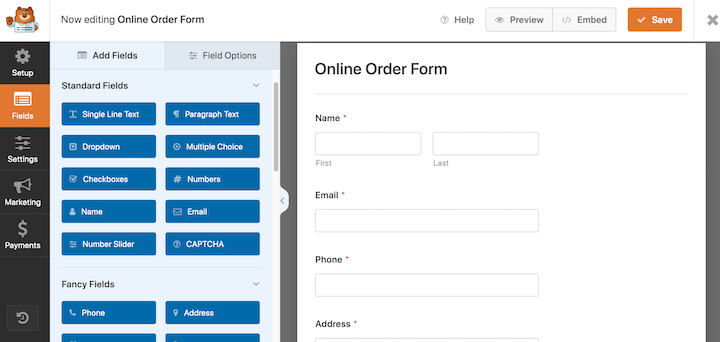
Use the drag-and-drop builder to add and edit your form fields. You can customize the field labels, descriptions, validation rules, and more.
Most of the default form fields are ones you’ll need to include on your online order form, such as name, address, etc. However, you’ll need to edit the Available Items section to add your products:
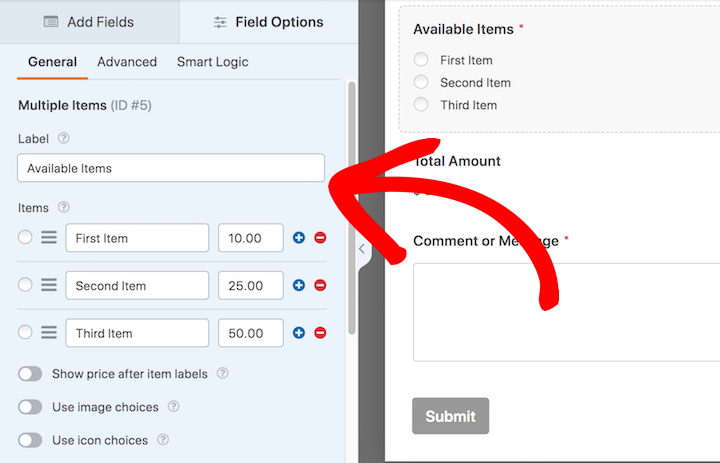
Simply click into this field to add the names and prices of your offerings.
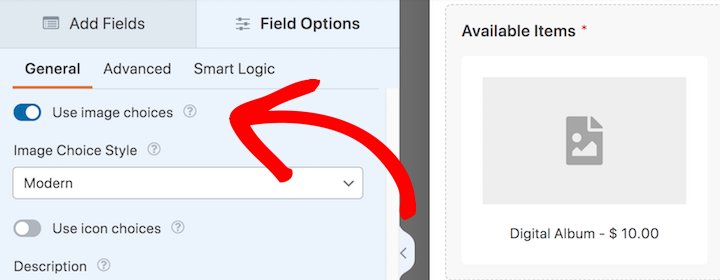
If you’re adding multiple options, you may want to include an image next to each one. To do this, toggle on the Use image choices option:
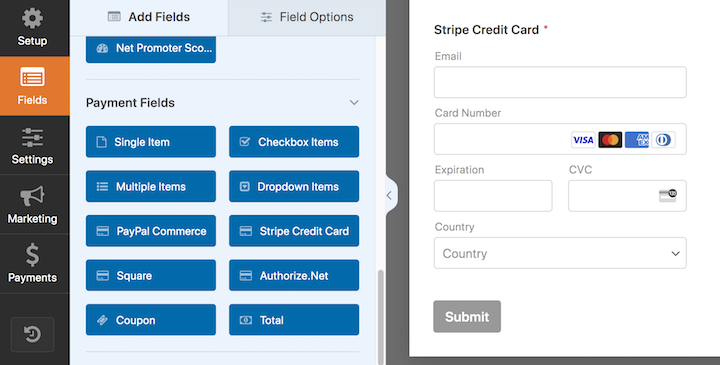
Next, you’ll need to include a payment option for your customers on the online order form. Under the Fields tab, navigate to Payment Fields, then select your preferred gateway:
There are tons of other ways to design, format, and style your online order form. Feel free to refer to WPForms documentation for more in-depth guidance.
When you’re done, remember to save your changes.
Step 4. Configure the Online Order Form Settings
Once you’re happy with the look of your online form, you can move on to the payment and notification settings. Under the Payments tab, select your gateway from the payment options (in this case, Stripe):
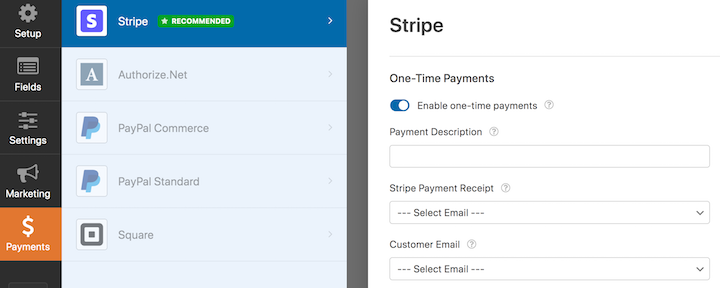
Then select Enable Stripe payments (one-time and/or recurring). Once enabled, additional optional options will expand to let you add a payment description, configure payment receipts, etc.
When you’re done, select Save again.
Next, go to the Settings » Notifications tab to set up your online order form notifications:
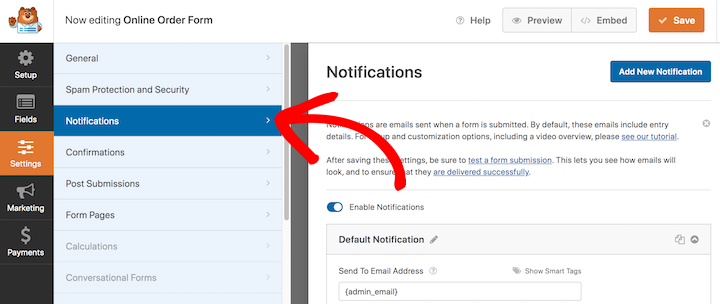
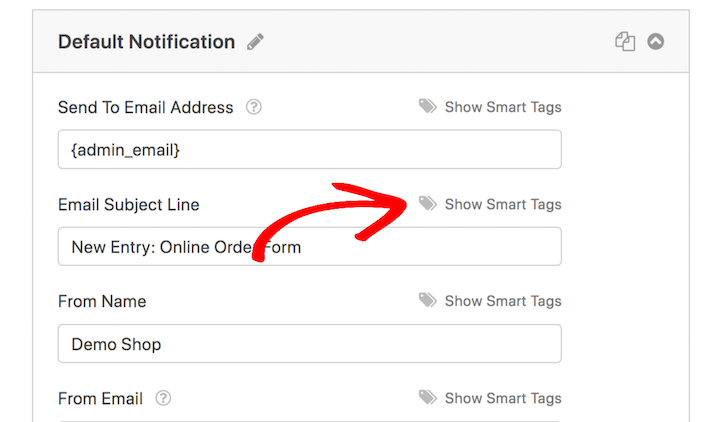
WPForms automatically sends new notifications to the admin after users submit forms. Here, you’ll find options to customize the email notifications.
For instance, you can modify the subject line or use the smart tags to personalize the fields:
Under Settings » Confirmations, there are three options for the confirmation message that displays to customers after they submit an online order form:
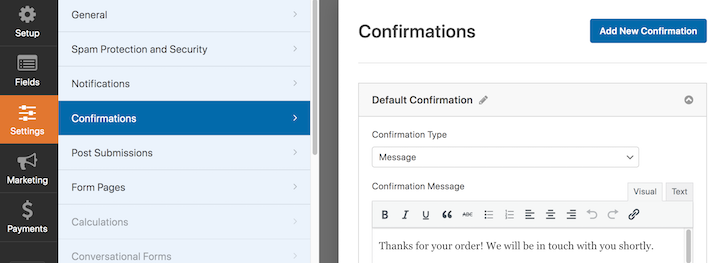
Choose between Message, Show Page, and Go to URL (Redirect).
Once you select your preferred option, feel free to customize the message. When you’re done, save your changes.
Step 5. Place & Publish Your Online Order Form
Now the only thing left to do is to add the online order form to your site. There are a few ways to do this.
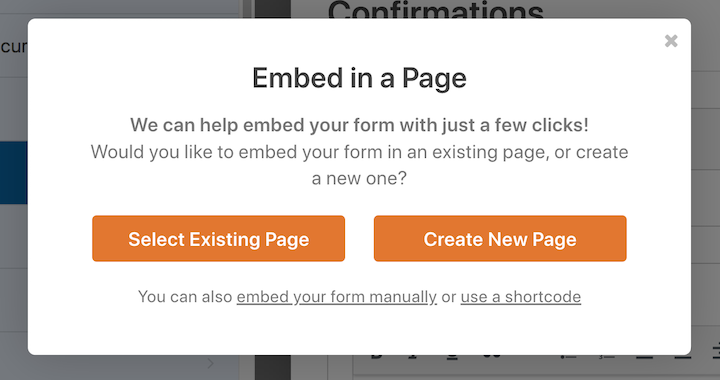
When you click on Embed at the top of the page, you’ll see the option to embed your WordPress order form in an existing or new page:
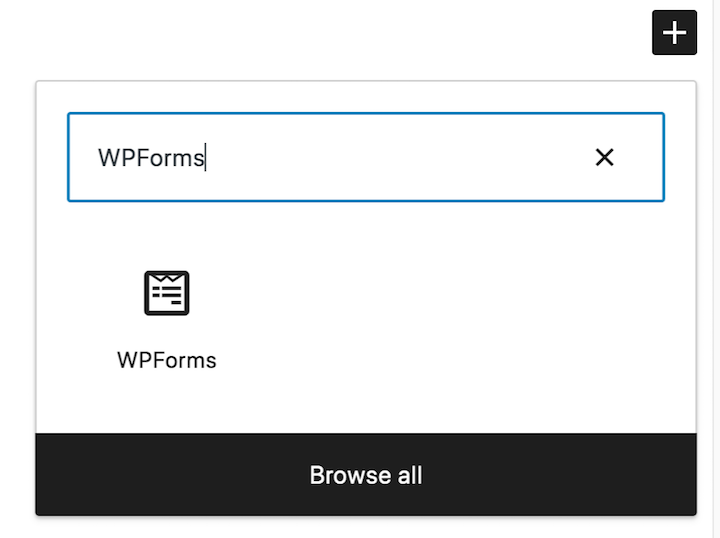
Alternatively, you can go to whichever page you want to add it to on your site. From the WordPress editor, select the Add Block (+) button, then search for the WPForms block:
Once added, click on the Select a Form dropdown menu and choose your online order form:
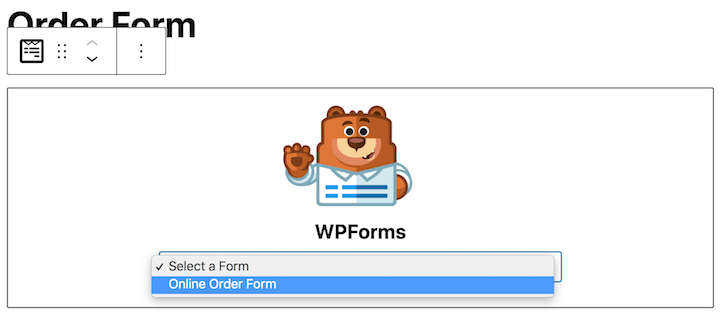
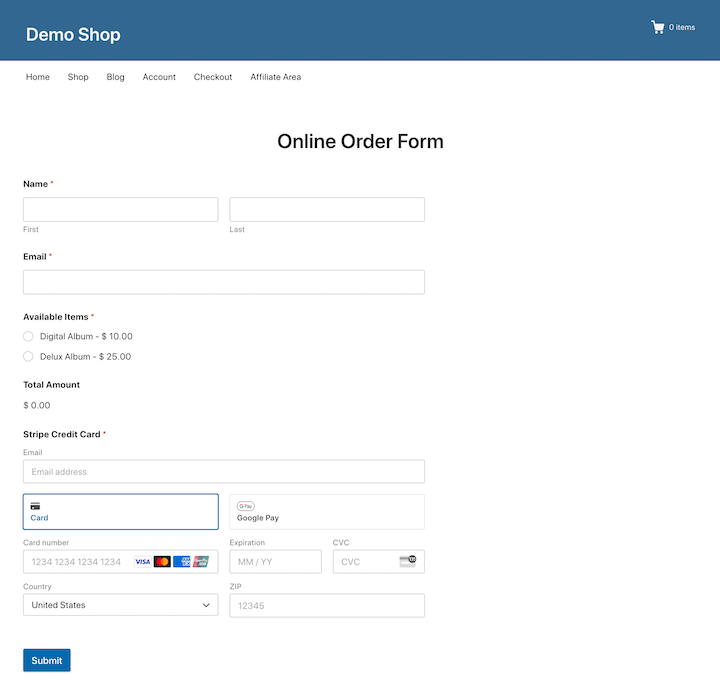
A preview will appear within the editor. Save/Update/Publish the page.
That’s it! Now just test the online order form from the front end of your live site to ensure it works properly.
In the future, you can track form submissions directly from your dashboard. For more ways to customize and optimize your order forms, I also recommend exploring the WPForms addons.
FAQs About Creating Online Order Forms
Let’s wrap up with some frequently asked questions.
Which payment gateways are available with WPForms?
WPForms integrates with popular payment processors like PayPal, Stripe, Authorize.Net, and Square. Check the WPForms website for a full list of compatible gateways.
Can I collect additional information & custom fields?
A: Absolutely! WPForms offers a wide range of field types, including text fields, dropdowns, checkboxes, and even upload options for specific needs.
What if I don’t have any products on my site yet?
You can create pre-order forms for upcoming product launches using Easy Digital Downloads and Stripe. You can also use online order forms for collecting donations, event registrations, or even lead generation through email capture fields.
Add Your Online Order Form in WordPress
By implementing online order forms, you’re equipping your WordPress website with a powerful tool that can streamline your sales process, enhance user experience, and ultimately boost your sales.
Don’t have your online store set up yet? Download Easy Digital Downloads today to get one up and running in no time:
What’s next? Learn how to accept pre-orders for digital products in WordPress!
📣 P.S. Be sure to subscribe to our newsletter and follow us on Facebook or Twitter for more WordPress resources!
Using WordPress and want to get Easy Digital Downloads for free?
Enter the URL to your WordPress website to install.
Disclosure: Our content is reader-supported. This means if you click on some of our links, then we may earn a commission. We only recommend products that we believe will add value to our readers.