
Want to learn how to save payment details in WordPress?
Doing so can expedite and enhance the checkout process for your customers. The automated convenience eliminates the need for shoppers to manually enter their credit card info whenever they want to purchase something from your online store.
Saving payment details also benefits your business. It can reduce shopping cart abandonment, boost conversion rates, and drive sales.
Why Save Payment Methods for Customers?
There are many reasons to set up your eCommerce checkout to let users automatically save their payment details. Let’s look at some of the biggest benefits.
- Simplified one-click checkout experience. Letting users save payment details allows returning customers to skip the hassle of entering their information every time they make a purchase. You create a user-friendly experience that encourages repeat purchases.
- Time-saving convenience. Time is of the essence in today’s fast-paced world. Saving payment details provides a time-saving convenience that customers appreciate.
- Increased conversion rates. A complicated and lengthy checkout process can lead to cart abandonment. Adding a feature that saves payment details reduces barriers to purchase and increases conversion rates.
- Enhanced security measures. Saving payment details should be done securely and in compliance with industry standards. By using trusted and reputable payment gateways like Stripe, you can assure your customers that their payment information is safe.
Saving payment details opens the door to providing a personalized customer experience. By having access to customers’ past purchases and payment information, you can tailor product recommendations, offer personalized discounts, or provide targeted promotions.
Using Stripe to Save Payment Info in WordPress
There are a handful of popular payment processors that you can use to accept credit card payments on your WordPress website, such as PayPal and Authorize.net.
One of the best payment options to use, and one highly recommended for WordPress and online selling, is Stripe. The Stripe payment gateway for EDD/WordPress lets you accept credit and debit cards, Apple Pay, Google Pay, and more.

You can configure it to establish an express checkout that auto-fills the payment form for your customers, rather than them having to manually enter their card details every time.
It also lets you enable Test Mode so you can preview the user experience of making online payments on your eCommerce platform without actually having to make a real transaction.
Stripe makes it incredibly simple for your users to save payment details in WordPress. On the checkout page, after entering their card information, they can select the checkbox to opt-in to Link by Stripe:
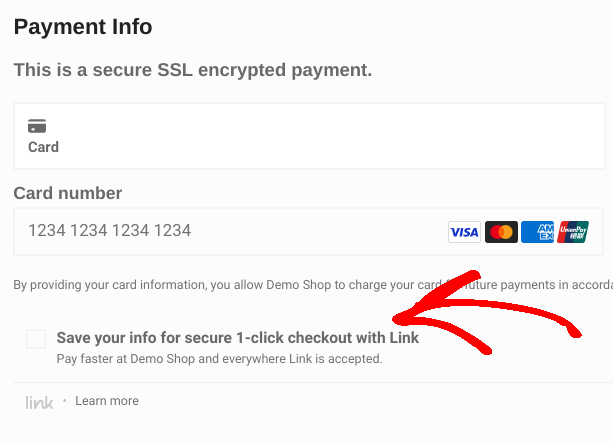
This functionality is what saves payment information for your customers.
Once the credit card(s) are added, users can choose which one to use, update existing cards on file, and add a New payment method:
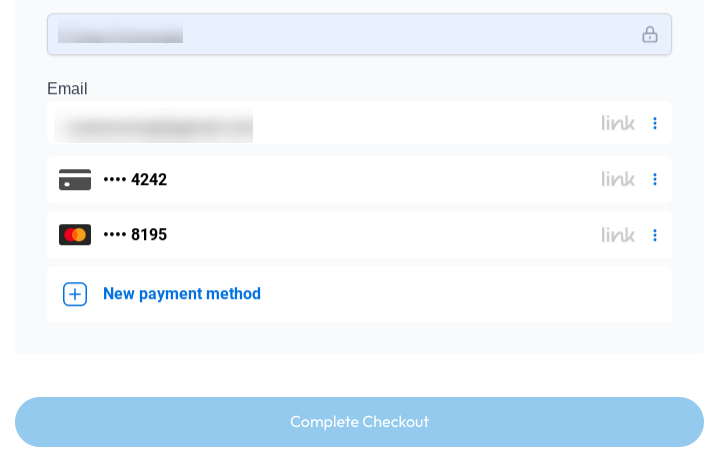
When payment details/methods are added to Link, shoppers can use them on any website that supports Link by Stripe (not just yours).
💡Learn more about How to Use Stripe Payment Element Feature in WordPress
How to Save Payment Details in WordPress
Here, I’ll explore the steps in setting up and saving payment details in WordPress for a quick checkout using Easy Digital Downloads and Stripe.
Note that for this tutorial, I’ll assume you already have a WordPress site and Stripe account. Still need a WordPress site? Check out SiteGround’s Managed EDD Hosting. These plans include everything you need to get your e-commerce site up and running in no time.
You can create a Stripe account for free by visiting stripe.com and selecting Start now.
Step 1. Get Easy Digital Downloads Pro
If you haven’t already, the first step is to download and install Easy Digital Downloads (EDD) Pro.

There is a free version of the WordPress plugin. But to leverage Stripe Pro and its Payment Element and Link features, you’ll want to grab an EDD Extended Pass (or higher).
After you purchase your pass, you can download and install the EDD Pro plugin on your website. From your WordPress dashboard, go to Plugins » Add New.
Once it’s activated, you can click on the Get Started button to launch the Onboarding Wizard.
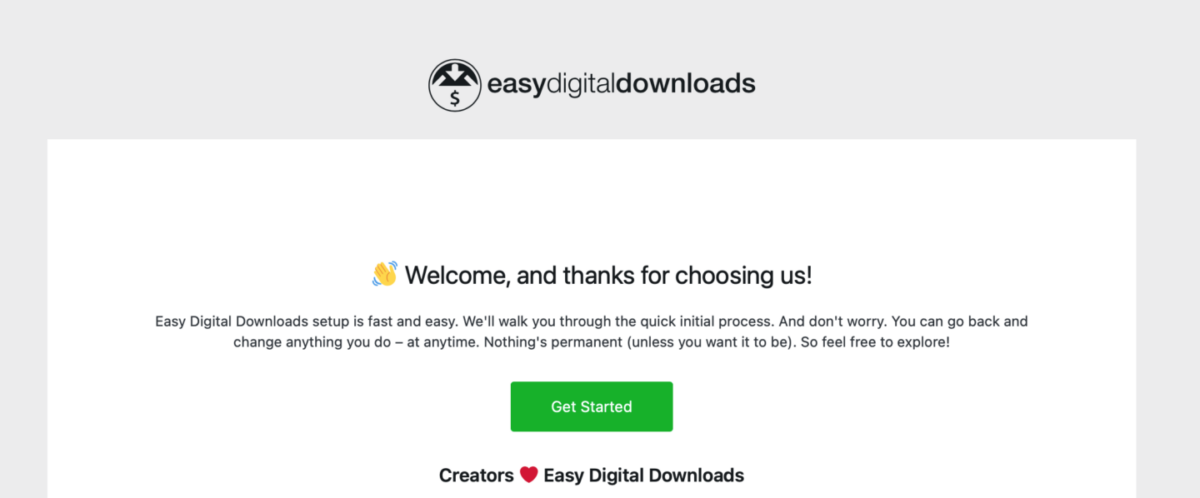
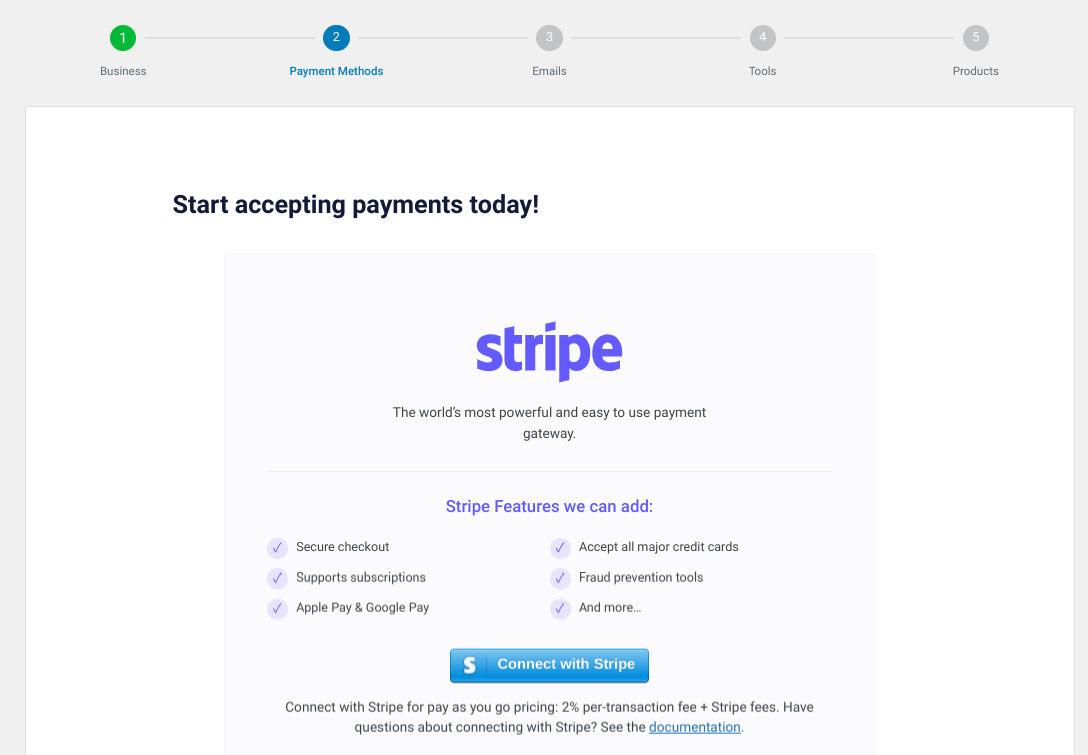
This takes you through the initial steps of setting up your EDD store. For example, you can enter your business details, add your first product, and opt-in to conversion and optimization tools. You’ll also have the option to Connect with Stripe.
⚙️ You can use these guides if you need help:
Step 2. Activate & Connect Stripe With WordPress
Next, we’re going to configure the Stripe payment gateway.
EDD offers built-in support for Stripe. But the Pro version gives you more advanced features and capabilities, like accepting pre-approved payments. Plus, it removes the transaction fees you’d otherwise be responsible for.
If you haven’t already connected and configured Stripe, you can do so under settings.
Go to Downloads » Settings » Payments. Enable Stripe under Active Gateways, then select Save Changes.
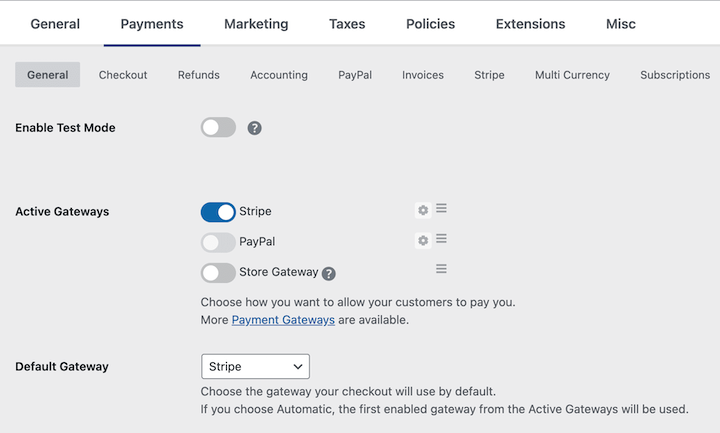
Next, go to the Stripe tab and click on Connect with Stripe.

You can create or log into your existing Stripe account.
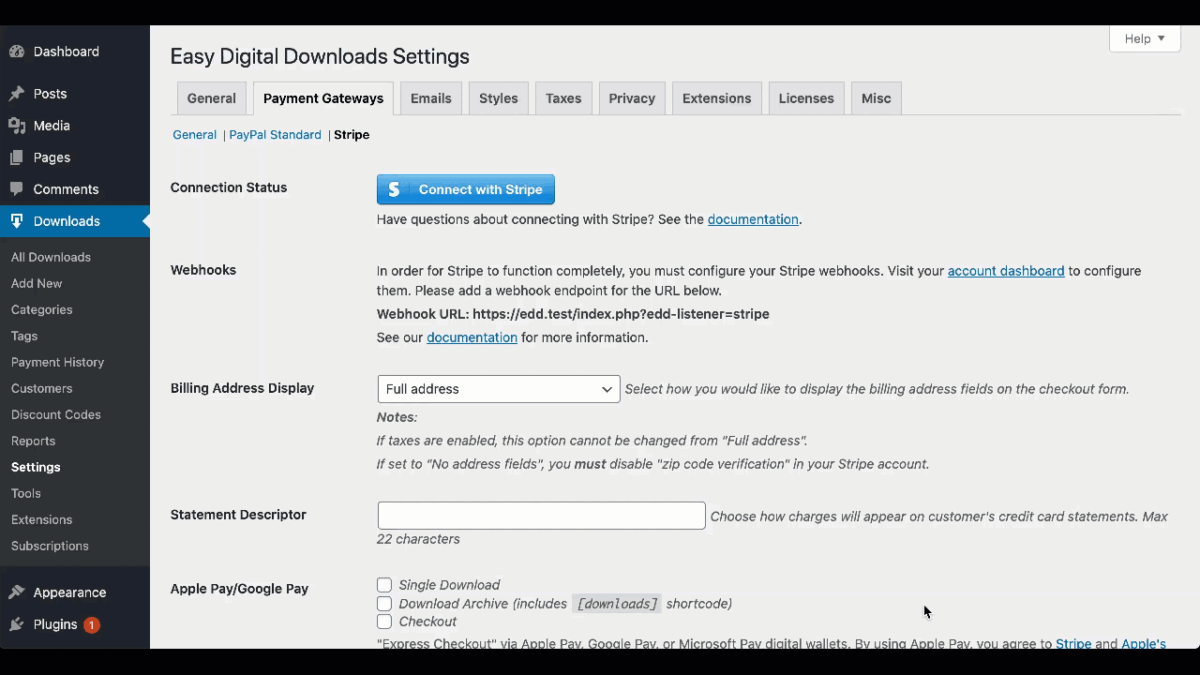
You’ll have to configure Stripe webhooks to complete the connection process. Click on the account dashboard link. Then refer to our Stripe documentation for step-by-step guidance.
Remember to save your changes when you’re done.
Step 3. Create & Customize Checkout Page/Form
Once your Stripe account is connected to your online store, you can customize your Checkout page. EDD automatically creates one for you.
You can find it under Pages » Checkout Page.

By default, this page uses the EDD Checkout block. It displays the items in the cart, plus the forms for entering customer information, like billing address and payment info.
Go to the checkout page settings under Downloads » Settings » Payments » Checkout.
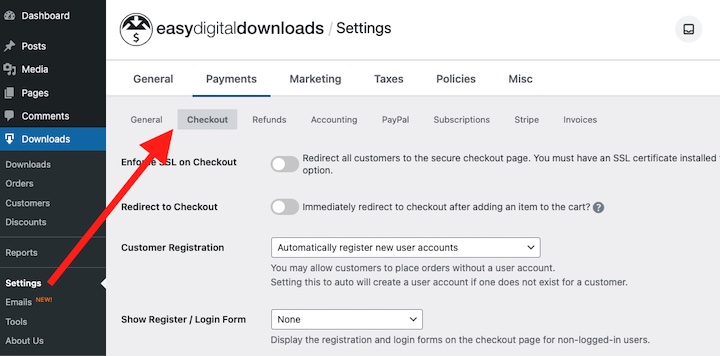
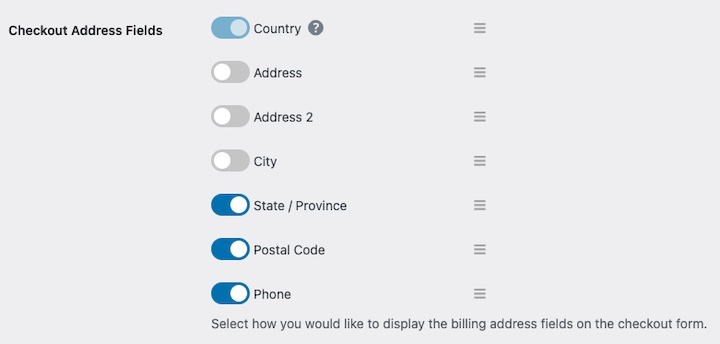
You can customize the checkout address fields here as well.
💡For more, check out How to Add WordPress Custom Fields to eCommerce Sites.
Save your changes when you’re done.
Step 4. Save Payment Details in WordPress
Now the only thing left to do is to preview and test the checkout process to ensure everything works as it should.
Visit the front end of your site and add an item to your cart. Proceed to the checkout page.
Select the option to save payment details via Link.

If you’ve already set up Stripe and added a payment method to Link, you’ll be asked to enter a code sent to the phone number associated with your account.
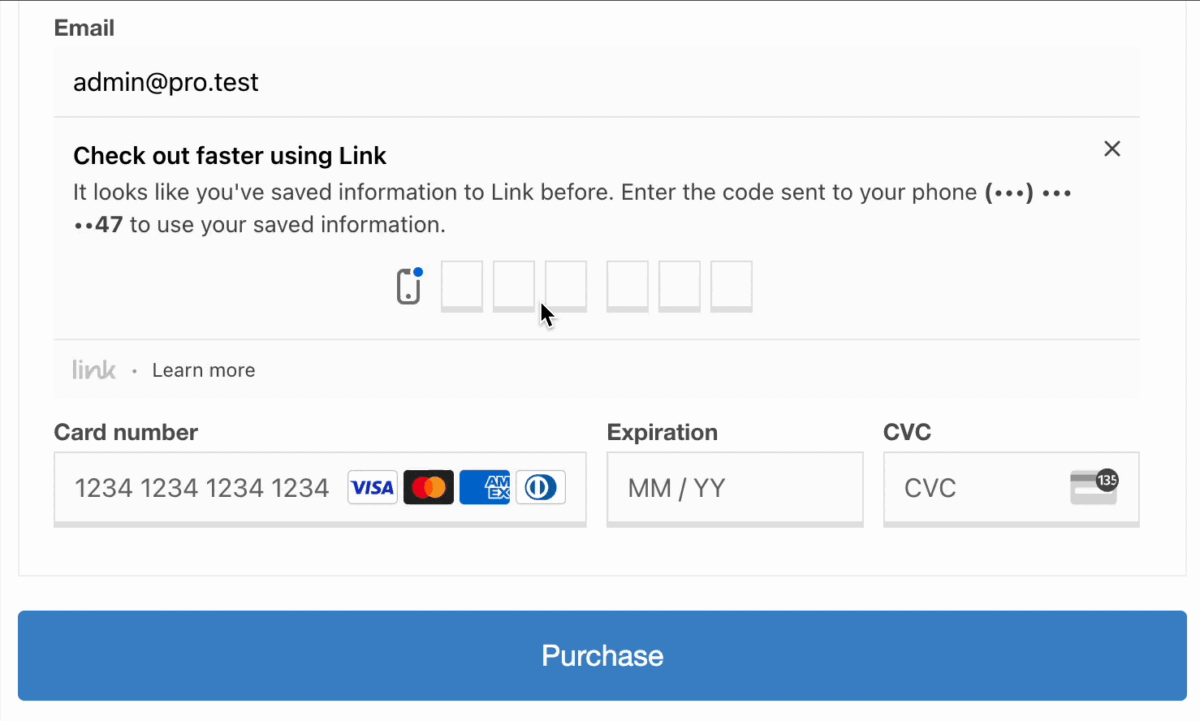
Once you enter the code, you can select your saved payment method.
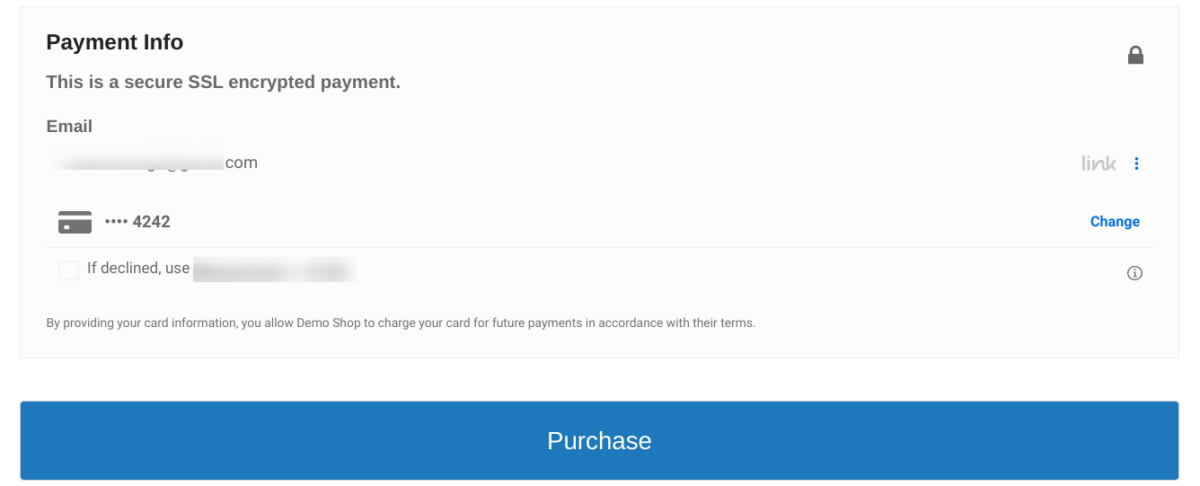
Click on the Purchase button. That’s it! You should now see a purchase confirmation page letting you know it was successful.
💡How to Test Stripe Payments in WordPress.
FAQs on Saving Payment Details at Checkout
Let’s wrap up with some frequently asked questions.
Why should I save payment methods for customers?
Saving payment methods for customers offers several benefits. It simplifies the checkout process by allowing returning customers to skip the hassle of entering their information every time they make a purchase. It also saves time for customers and improves conversion rates through repeat purchases.
Can I test the saving of payment details without making a real transaction?
Yes, with Stripe, you can enable Test Mode to preview the user experience of making online payments on your eCommerce platform without actually having to make a real transaction. You can also check out our guide on How to Test Stripe Payments.
Is it secure to save payment details in WordPress?
Yes. By using trusted and reputable payment gateways like Stripe and an eCommerce plugin like Easy Digital Downloads, which offer advanced security features, you can assure your customers that their payment information is safe.
Get EDD to Save Payment Details in WordPress
Saving visitors’ payment details on a WordPress eCommerce site offers numerous advantages. It simplifies the checkout process, saves time for customers, and improves conversion rates through repeat purchases.
Download Easy Digital Downloads and easily save payment details in WordPress using Stripe!
📣 P.S. Be sure to subscribe to our newsletter and follow us on Facebook, Twitter/X, or LinkedIn for more WordPress resources!
Using WordPress and want to get Easy Digital Downloads for free?
Enter the URL to your WordPress website to install.
Disclosure: Our content is reader-supported. This means if you click on some of our links, then we may earn a commission. We only recommend products that we believe will add value to our readers.