Do you want to learn how to set up link expirations in WordPress?
If you run an online store, it’s important to limit access to your file downloads and digital products. One way to do that is by adding an expiration date to links, sometimes known as expiring URLs. This lets you control the duration of time that a user has to access or download a product or link before it expires.
In this post, we’ll cover:
- What Is an Expiring Link?
- Why Set Up Expiration Links in WordPress?
- How to Create Link Expirations in WordPress
- Bonus: Setting Up Expiration Links With Extensions
What Is an Expiring Link?
Expiring URLs are links that are only valid or available for a set period of time. They automatically redirect your visitor to another page after a set time, or after the user has visited the page for a certain number of times. Expiry links can be an excellent way to control access to your file downloads.
Let’s say you set up a file download link to expire after 5 minutes. Once the paying customer clicks on the link, they will have 5 minutes to access the content. After that, the download file will no longer work. If they click on the link again, they’ll be redirected to another page or see a message informing them that the the link they downloaded or followed has expired:

Why Set Up Link Expirations in WordPress?
There are several reasons to set up link expirations in WordPress. They can come in handy for limited-time offers or time-sensitive purchases.
Mostly, they can help you optimize security for your eCommerce site and prevent unauthorized users from accessing your digital products and downloads.
By setting up expiration links in WordPress, you can prevent paying customers from sharing their download links publically, such as on a forum or social media. This can minimize long-term piracy and help ensure that your digital downloads and products aren’t shared freely among users without a license.
How to Create Link Expirations in WordPress
If you want to add expiration links to your products or file downloads in WordPress, the easiest way is to use our Easy Digital Downloads plugin:

This powerful eCommerce tool lets you sell digital goods, such as software and eBooks, with ease. It also lets you add and configure expiration links for your file downloads.
While the plugin comes with this functionality built-in, we recommend upgrading to a premium plan to get access to a wide range of extensions, some of which we’ll cover in this post.
With EDD, all file download links that are sent in purchase receipts to your customers will expire after a set amount of time. Once a download link expires, it cannot be used again.
In the following step-by-step tutorial, we’ll walk you through how to set up link expirations in WordPress:
- Download and Install the EDD Plugin
- Create Your Digital Download or Product
- Configure the Link Expiration Settings
Step 1: Download and Install the EDD Plugin
The first step is to download and install the EDD plugin. If you’re already using EDD on your WordPress website, you can jump to the second step.
Visit the EDD website and choose your plan. To enjoy all of the features and tools we offer, we recommend grabbing an EDD All Access Pass:

After you select Get Started and complete your purchase, you can visit your account dashboard and go to File Downloads to download the EDD plugin:
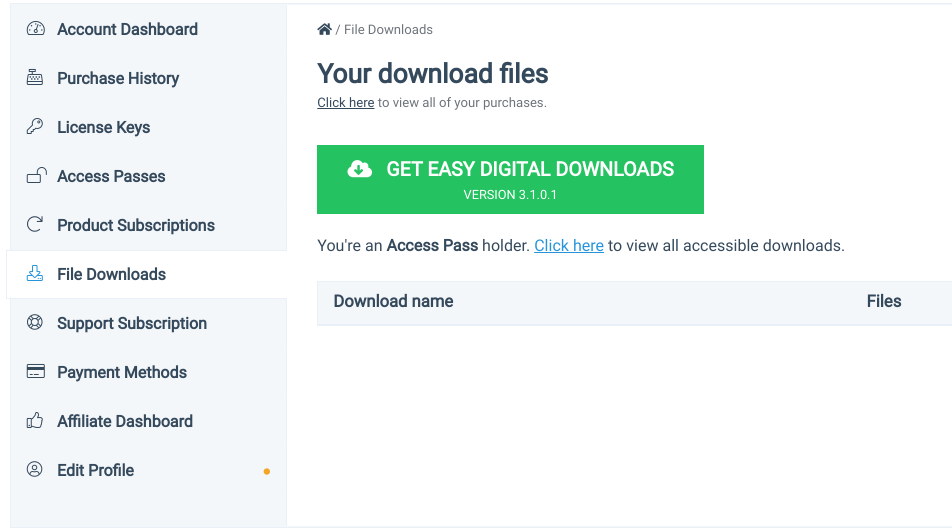
Once the .zip file is done downloading, you can go to your WordPress dashboard, then navigate to Plugins » Add New » Upload Plugin » Choose File:
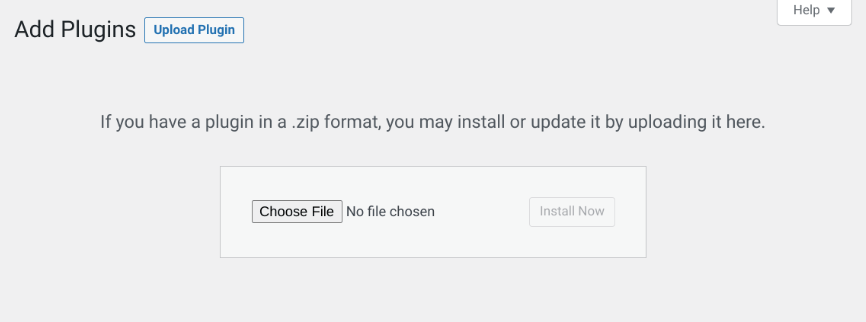
Select the EDD plugin you just downloaded. Then, you can click on the Install Now and Activate Plugin buttons.
Step 2: Create Your Digital Download or Product
Once EDD is activated on your WordPress site, you’ll see a Downloads menu item. This is where you’ll add new products and downloads as well as configure and customize the settings for your store:
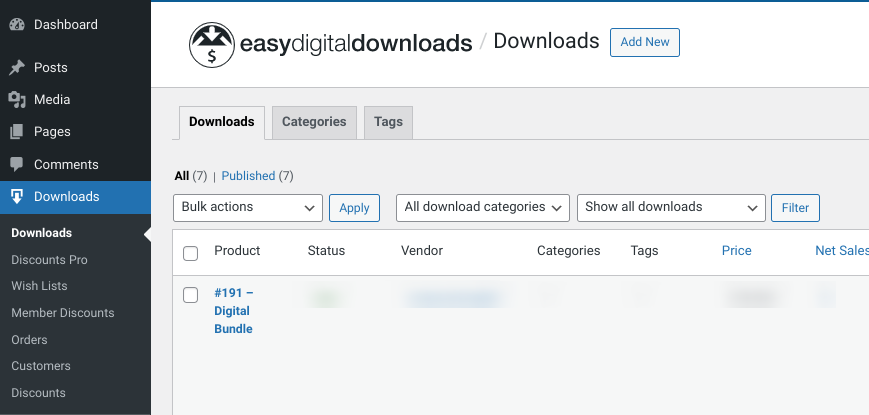
If you haven’t already, the next step is to create your digital download, product, or file that you want to set up an expiration link for. You can go to Downloads » Add New, then add a title and description:
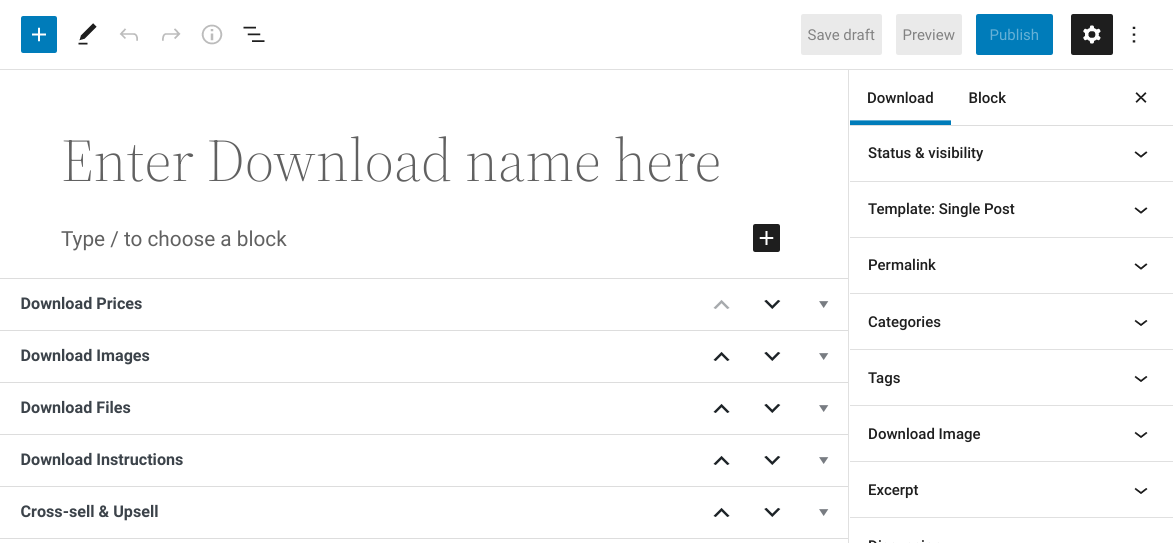
There are a handful of options that you can use to create and customize your product. We won’t go through all of them in this post, but if you need help, feel free to check out any of the following guides:
Step 3: Configure the Link Expiration Settings
As we mentioned earlier, EDD file download links sent to your customers in purchase receipt emails are automatically set to expire. By default, the links are valid for 24 hours.
But if you want to change the expiration time, you can go to Downloads » Settings » Misc » File Downloads:
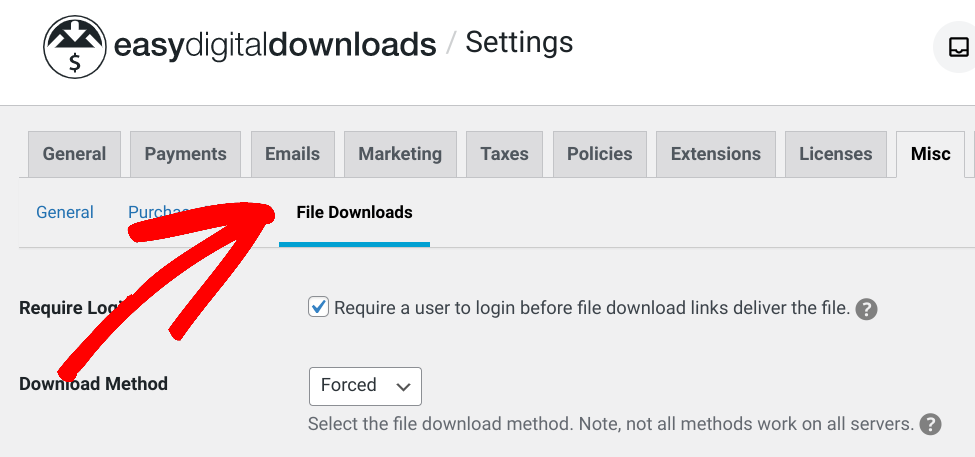
On this screen, there are a handful of options for customizing file downloads. Look for the Download Link Expiration setting:
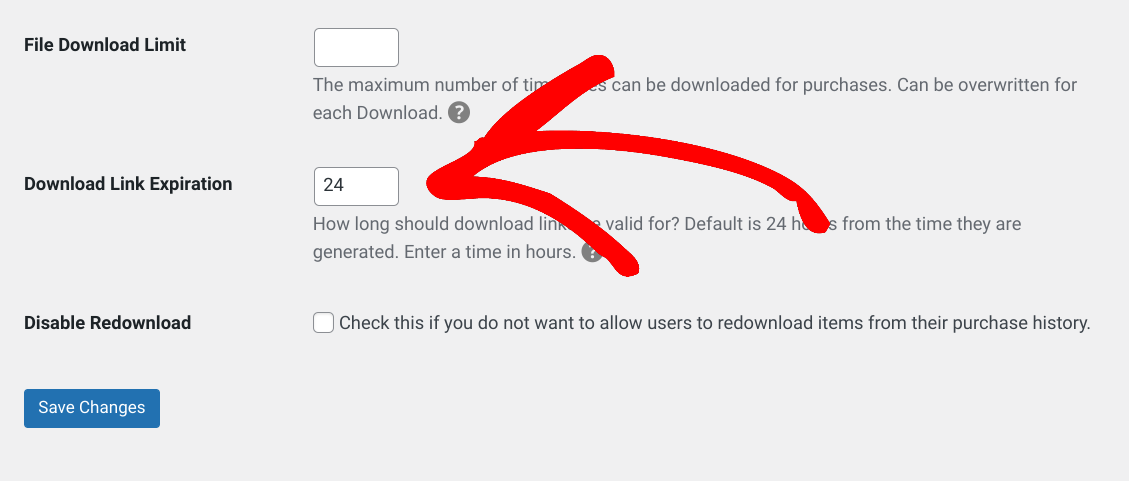
In the text field, you can enter the number of hours that you want the download link to be valid for. When you’re done, click on Save Changes. That’s it!
Note that setting up a file download expiration link doesn’t mean that your customer will forever lose the ability to download the file once the link expires. They can still log into their account to generate a fresh download link. The expiration time on the new link will be the same duration that you specified in the above settings.
Bonus: Setting Up Link Expirations With EDD Extensions
There are a ton of extensions and add-ons that you can integrate with EDD to add even more features and functionality to your eCommerce platform. Two options you can use for setting up expiration links on files and products are Purchase Limit and Dropbox.
Setting Up Expiration Dates With Purchase Limit
Purchase Limit allows you to configure purchase limits on a per-product basis. You can disable a file after it’s been bought a specified number of times. You can also specify the start and end dates that downloads are available for purchase.
For instance, this can be an excellent option if you’re running a limited-time offer or special promotion for a product in your store.
You can add the Purchase Limit add-on by going to your EDD account dashboard, followed by View Your Downloads:
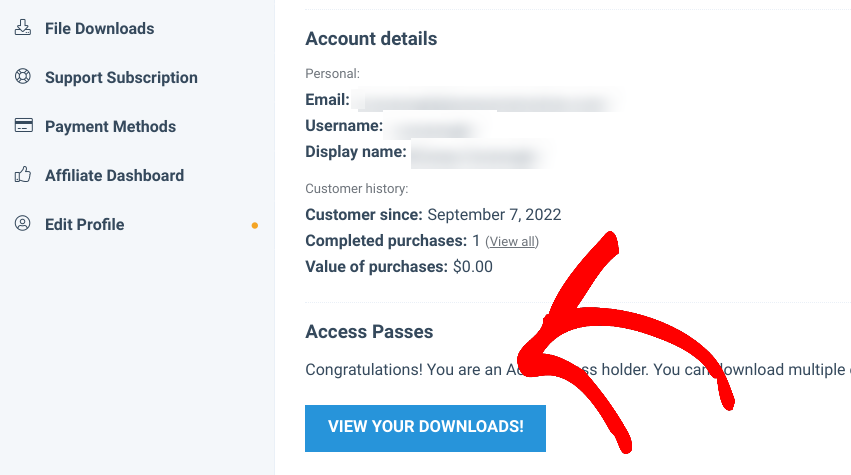
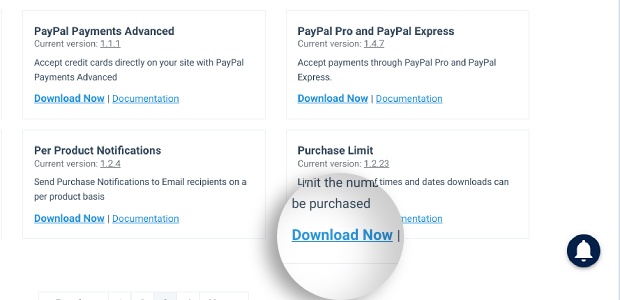
On the next page, click Next until you find Purchase Limit, then select Download Now:
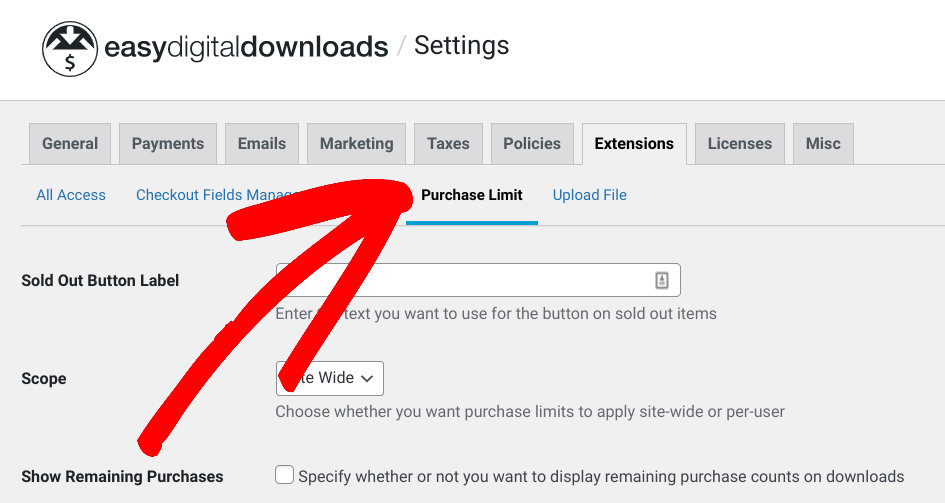
Upload the file to your WordPress site (Plugins » Add New » Upload Plugin), then activate it. Next, you can go to Downloads » Settings » Extensions. Next, select Purchase Limit:
Click the Enable Date Restriction option:
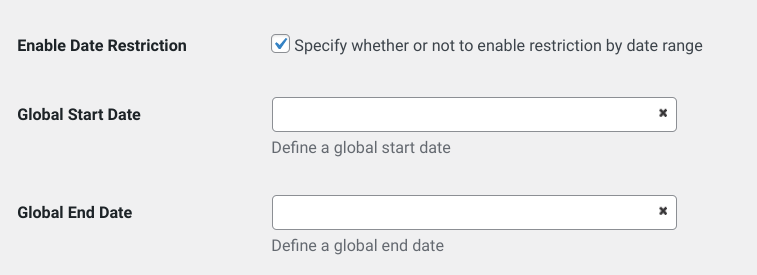
In the fields that appear, you can enter a start and end date for when your file downloads will be available for purchase.
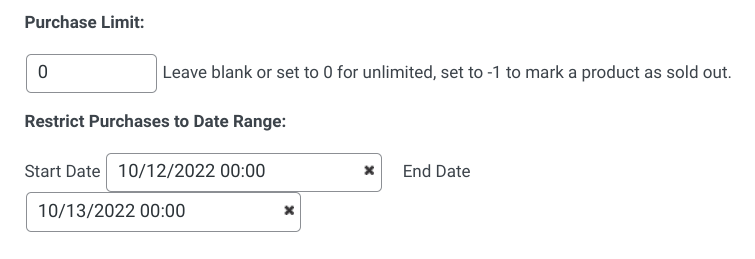
When you’re done, click on the Save Changes button. You can also configure these settings on each download page under the Purchase Limit section:
If a visitor tries to purchase the product before the start date begins, instead of the Download or Buy button, they’ll see “Product is not available for purchase yet”.
If the window to purchase the product has expired, they will see something like the following:

Setting Up Expiration Links With Dropbox
Depending on the plan you have, Dropbox may let you create expiration dates for your shared links and folders:
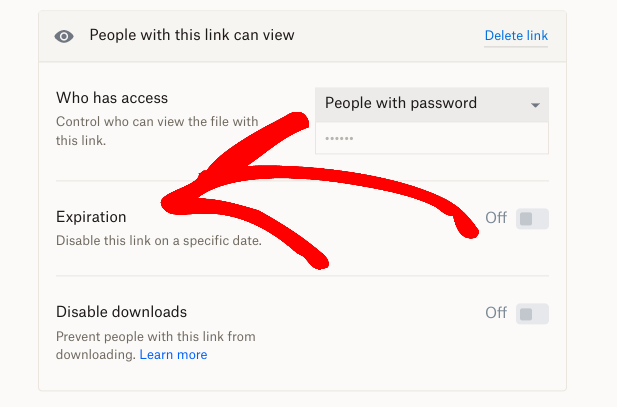
But you can also easily integrate Dropbox with EDD using the Dropbox extension.
The EDD plugin will establish a secure connection to the Dropbox file and give customers an auto-expiring link when they complete a purchase. Only paying customers will be able to see and download your Dropbox files.
You can download and install the Dropbox add-on by following the same process we covered with the Purchase Limit extension. For more detailed guidance on using Dropbox and EDD, you can refer to How to Use Dropbox and WordPress to Sell Digital Files (Products).
Start Creating Link Expirations in WordPress
If you want to control who has access to your content (and for how long), Easy Digital Downloads can help. You can use the plugin to set up link expirations in WordPress and control the amount of time users are able to download files from your site.
To further secure your files, check out our post on How to Password Protect PDFs in WordPress!
Be sure to subscribe to our newsletter and follow us on Facebook or Twitter for more WordPress resources!
Using WordPress and want to get Easy Digital Downloads for free?
Enter the URL to your WordPress website to install.
Disclosure: Our content is reader-supported. This means if you click on some of our links, then we may earn a commission. We only recommend products that we believe will add value to our readers.
Hi Casey, I’m interested in the url expiry date feature of EDD. Can you tell me if this feature is available in all versions or just a few.
Thanks Dale
Hi Dale, Yes – this feature is available in all versions!
Hi Casey,
it seem that this feature is static -so i can create one link and have it expire.
I would need to let my Survey Maker create an expiring link when a guest finishes a survey. So every guest gets his unique expiring link. Would pretty link be able to get called from a survey plugin (everest forms in this case).
Hi Martin! If you reach out to our support team, they can help you 🙂
Does this require them to create a login for them to have access to their downloads?
Hi Pardeep, There is an optional setting to require users to login before downloading the files. If you have more questions, feel free to reach out to our support team!