
Do you want to boost sales and grow your business? Of course! One proven way to do this is to grow an email list by using lead magnets in WordPress.
A lead magnet is a free resource available on your website that users can easily download by simply entering their email address.
While there are many types of lead magnets (eBooks, worksheets, checklists, etc.), they all have one thing in common: they help the user do something they want to do, while promoting your business.
🔎 In this article, we’ll cover:
Why Add Lead Magnets in WordPress?
A lead magnet is a great way for turning engaged website visitors into email subscribers and then paying customers.
When a user downloads and uses your free resource, it helps establish trust.
Since you get the visitor’s email address in exchange for a free download, you can follow up with them. You can use email marketing to deliver additional resources and offer special offers to convert the subscriber into a paying customer.
This is why all smart business owners use lead magnets as part of their growth strategy.
Adding a lead magnet used to be hard in the old days, but WordPress makes it super easy, and you can do it in just a few minutes without writing any code.
How to Add Lead Magnets in WordPress
Below is step-by-step guidance for adding lead magnets in WordPress using EDD.
Step 1. Get Easy Digital Downloads
The easiest way to add a lead magnet in WordPress is to use Easy Digital Downloads (EDD).

EDD is a powerful and user-friendly solution for selling digital downloads. EDD is trusted by more than 50,000 businesses to sell and share digital files and products like lead magnets.
You’ll need to purchase an extension Pass to use the Free Downloads extension. This extension allows your site visitors to download your lead magnet for free, only if they provide their email address.
An EDD Pass also includes email integration extensions. You’ll probably want those too. We’ll talk about this later in the article. Learn more about EDD Free vs EDD Pro.
Once you download the EDD Pro plugin, you can upload it to your site. From your WordPress dashboard, go to Plugins » Add New. After uploading it, select the Install Now and Activate buttons.

If you’re new to WordPress or not sure how to install a plugin, you can check out this step-by-step guide on how to install a WordPress plugin on WPBeginner.
After activating the Easy Digital Downloads plugin, you can click on Get Started to launch the Onboarding Wizard.
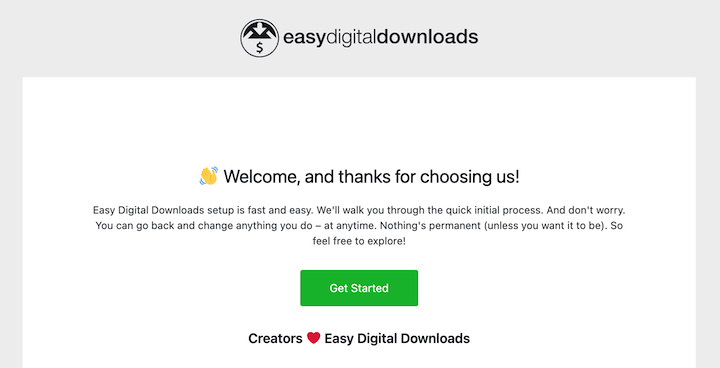
This takes you through the initial steps, like entering your business information, connecting to Stripe payment gateway, etc.
You can also go to Downloads » Settings to configure these options and general settings.
⚙️ For help setting up your EDD store, use these guides:
- What Are Digital Downloads? A Beginner’s Guide to Selling Online
- How to Sell Files Online
- Set Up an Online Store With WordPress
- EDD Quickstart Guide
Step 2. Install the Free Downloads Extension
Next, you can add the Free Downloads extension.
To start, go to Downloads » Extensions to view the addons available with your pass.
Next, enter “free downloads” in the Search Extensions field in the top-right corner.

Once you locate it, click on the Install button:

Sweet! Now you have EDD and Free Downloads installed, and you are almost ready to roll.
Step 3. Configure the Free Downloads Extension
Now that you’ve installed EDD and Free Downloads, let’s configure the Free Downloads extension. Under Downloads » Settings » Marketing, go to the Free Downloads tab.
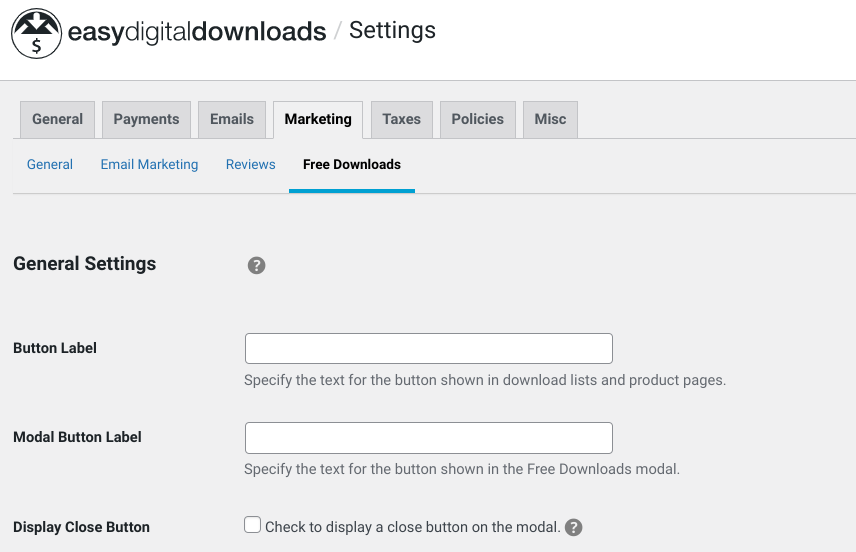
I recommend these settings when you’re first getting started. You can’t go wrong with these.
- Button Label: Decide how you want to word your download call-to-action. The default is ‘Download now’, but you can set it to ‘Get your free resource!’ or anything you like.
- Modal Button Label: Set the same call-to-action text here.
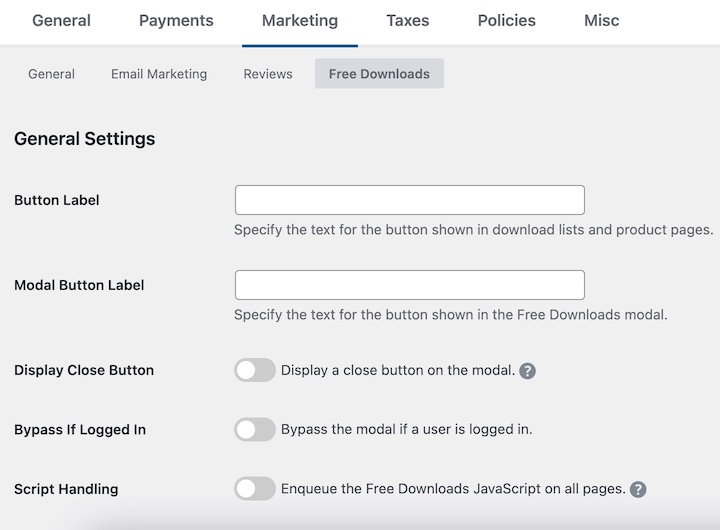
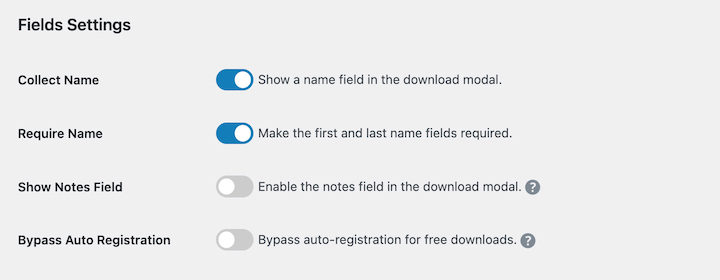
- Collect Name: Check this box to collect first and last names. This allows you to be more personable in your emails. You can choose whether the form will require names, or just request them.
- Require Email Verification: You should also check this box. You’ll require site visitors to provide a real, active email address and not a fake one.
- When you’re done there, click the Save Changes button at the bottom of the page.
- You can learn more about Free Downloads settings on this Doc.
Step 4. Publish Your Lead Magnets in WordPress
Let’s get your lead magnet published on your site. On your WordPress dashboard, go to Downloads » Add New. You’re now creating an actual digital product on your site.
In this example, we’re uploading a PDF resource created above. First, be sure to add a title, a description, and set the price to 0.00.
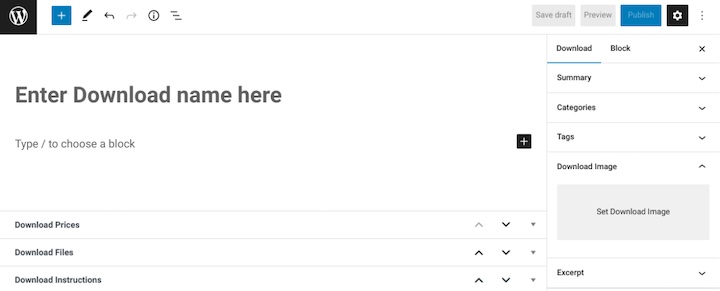
Note: setting the price to 0.00 will automatically have EDD set your lead magnet resource as a free download. Paid downloads get added to the cart or take the visitor to the checkout screen.
Next, upload your lead magnet. Under Download Files area, click the file upload icon to add the file from your computer.
This will add your lead magnet to the Media folder on your WordPress site. EDD will hide this file from Google and site visitors unless they give you their email address.
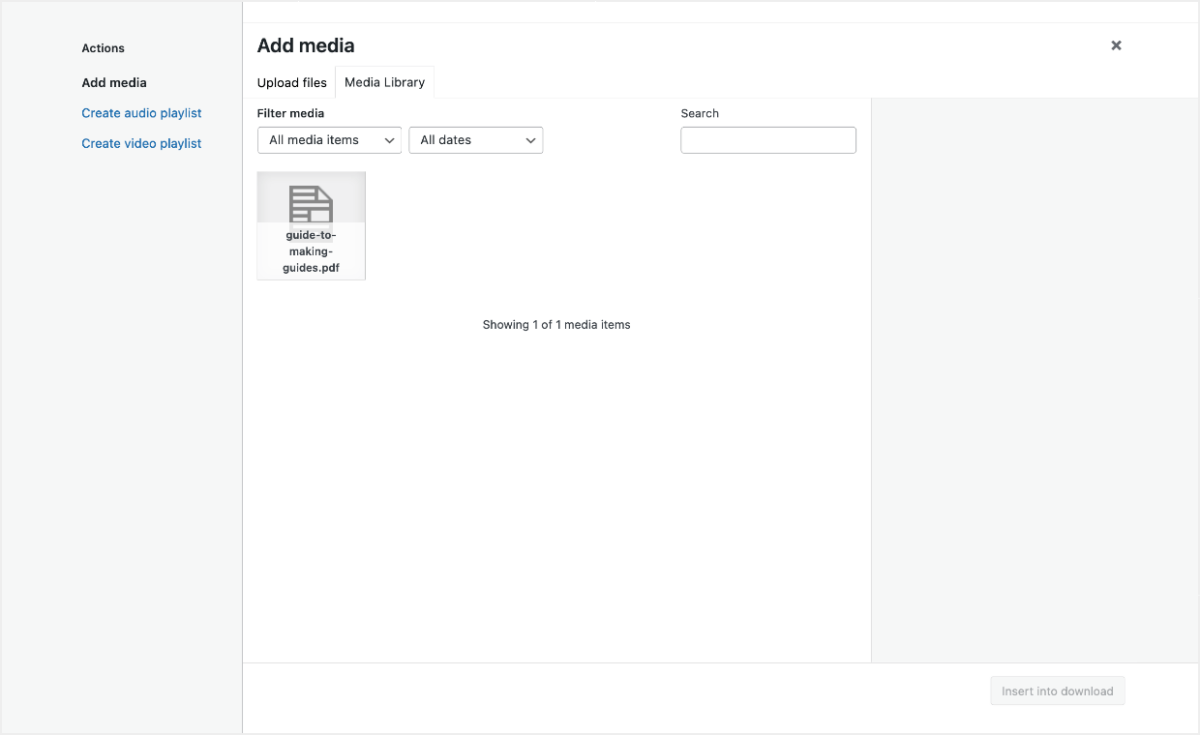
After all that, hit Publish.
Your lead magnet is ready to go on your site!
Step 5. Preview Your Lead Magnets
Click the View Download link on the green banner on the top of the page.
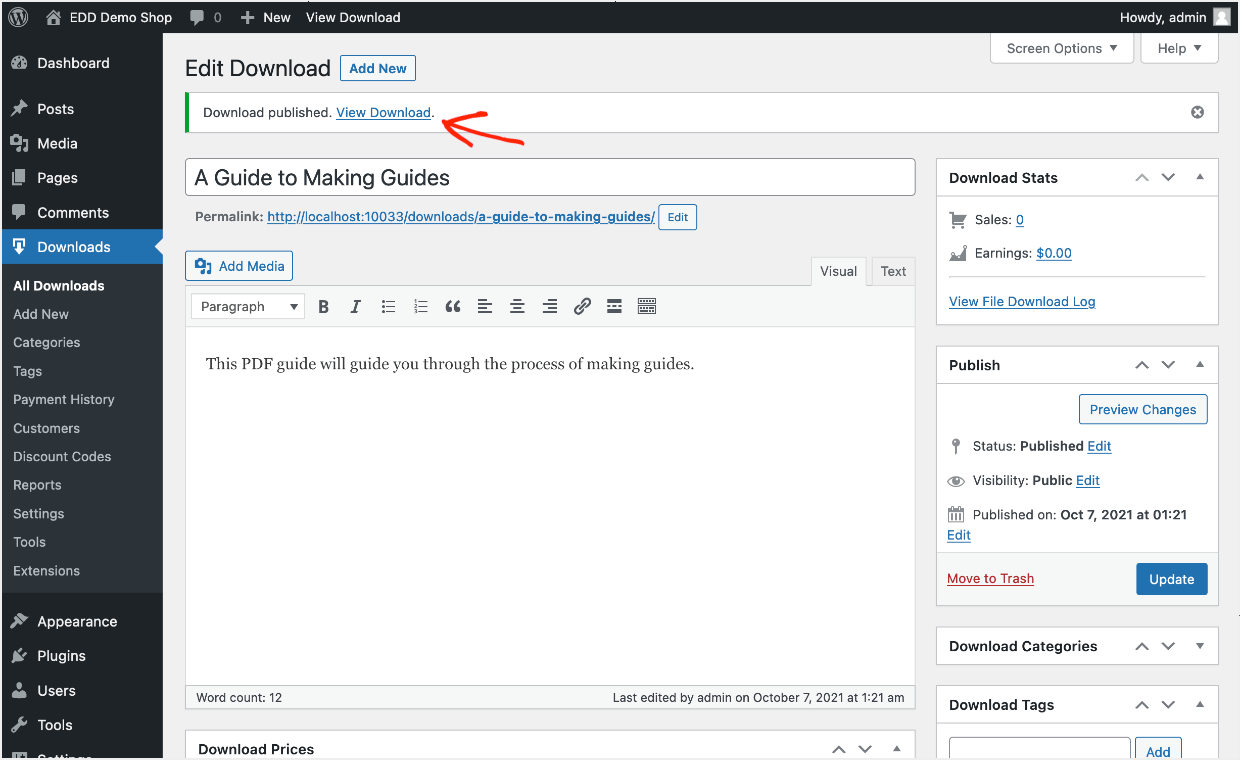
Your Download page will look similar to this. The look and feel will vary depending on which WordPress theme you are using.
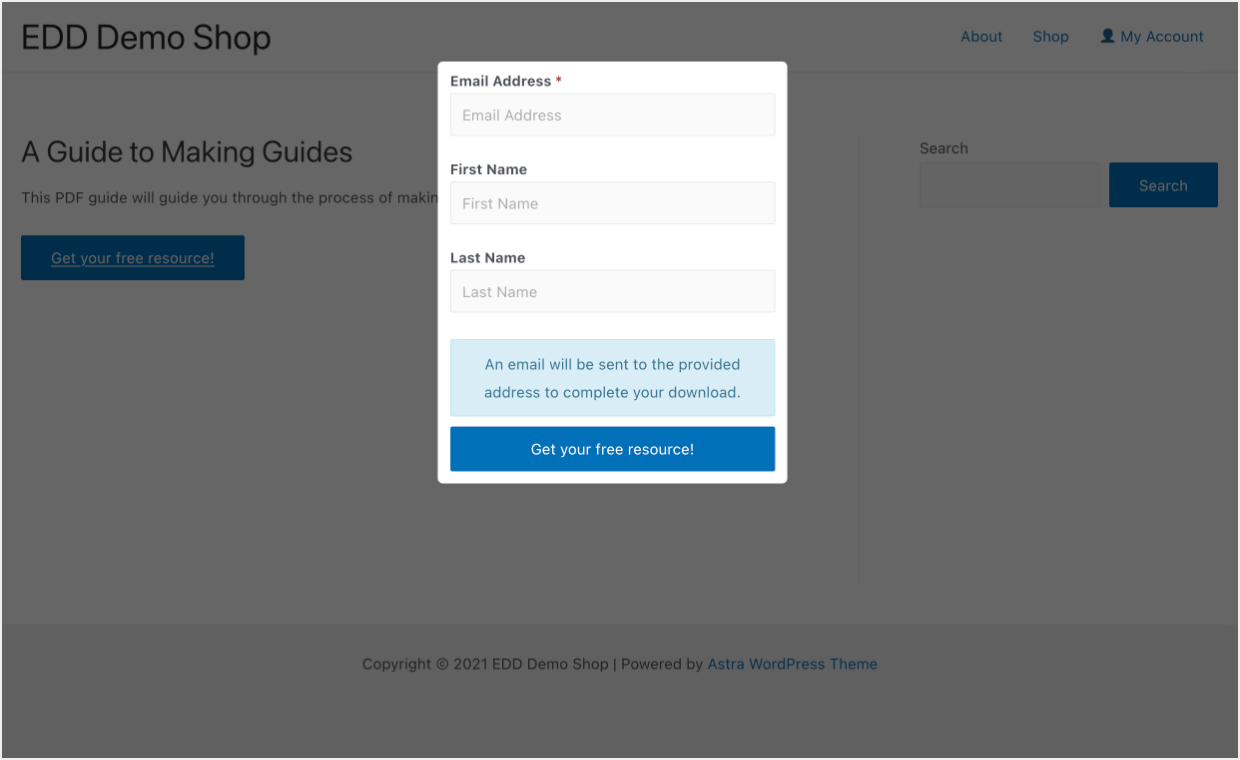
When a visitor to this page clicks the Get your free resource! button, a modal pops up. They will have to enter their name and email address. This is your newsletter signup form. Then, they will receive a verification email with a link to complete the download process.
How to Manage Your Growing Email List
As visitors download your lead magnet, EDD will start storing them as ‘customers’ on your website. Simply go to Downloads » Customers. Here you will see a list of your new leads!
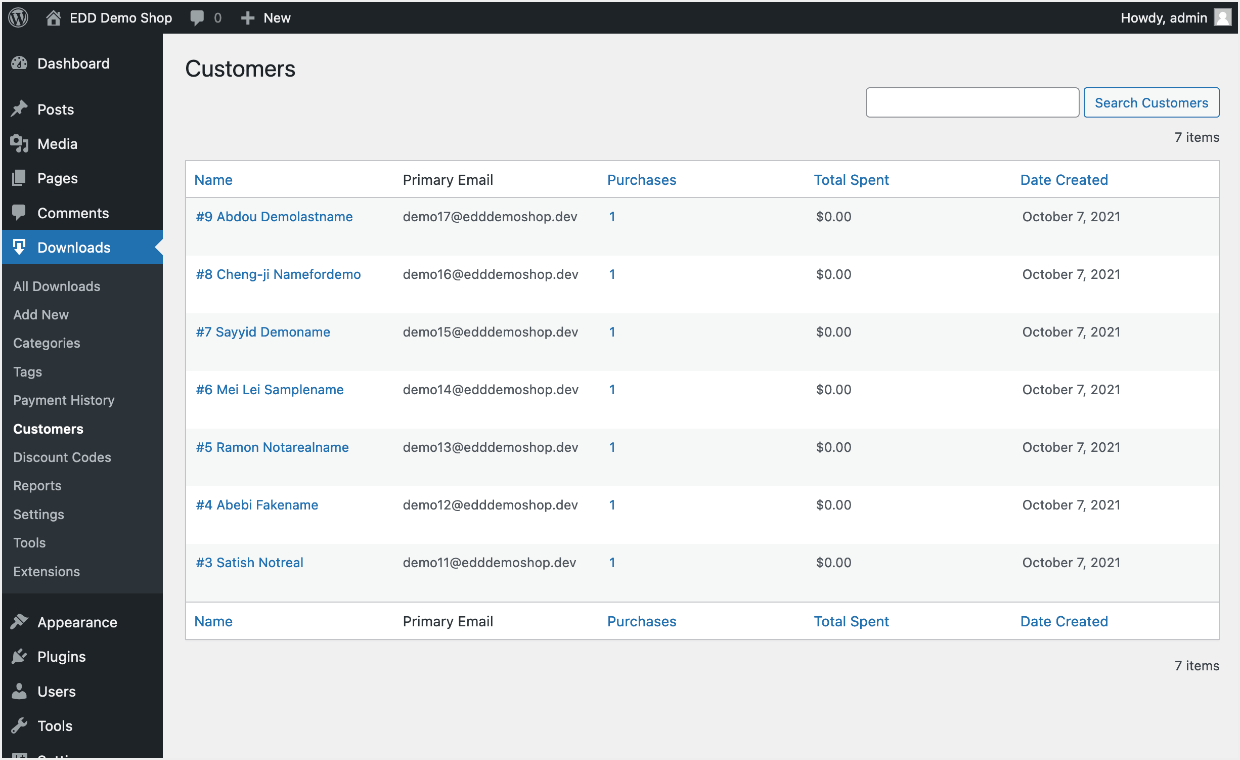
Note: even though they are called ‘customers’ within EDD, you can track which ones are ‘leads’ by how much they have spent. Look for the column labeled Total Spent. Any ‘customer’ who has not spent any money on your site is a ‘lead’.
What should you do with these leads?
Choose an Email Marketing Platform
You don’t want to email these leads one at a time from your personal email account. That takes too much time. Also, if you send an email from your personal email account, to a large list of recipients, your email will likely go to the spam or junk folder.
When you are emailing lots of people, you need a professional email marketing platform. Some people refer to these as email service providers (ESPs). These allow you to:
- Manage your lists of contacts (leads)
- Send emails from trusted servers so they don’t go to junk or spam folders
- Send emails that are professional-looking, and
- Integrate with your website and store
- For example: you can configure EDD to automatically subscribe customers to a certain email list when they make a purchase or download
There are many email marketing platforms out there. Most of them have free plans. EDD integrates with most of the popular ones.
Which email marketing platform should you use? Here are some of our top recommendations:
Stay in Touch with Your Leads
Keep in touch with your leads and try to convert them into paying customers.
Consider setting up a welcome email. Thank them for downloading your resource. Then share more about your company, values, and products.
You can also set up an email newsletter. Share industry news and trends with your leads.
Your main goal with emailing leads is to show them how you can help solve their problems.
Creating a Lead Magnet in WordPress (Free Resource)
First, you need to make a free resource that will entice your website visitors to share their email address. The type of lead magnet depends entirely on your business, industry, and target market.
But generally, a lead magnet must have high perceived value for your site visitors.
Some questions to think about when coming up with lead magnet ideas:
- What are my website visitors hoping to accomplish?
- Do they have pain points?
- What problems do they need to solve?
After that, you need to create a free resource that helps them achieve their desired results.
Here are some common types of lead magnets:
- PDF guide
- eBook
- Audio interview or presentation
- Google Doc or Word template
- Spreadsheet/Excel template
- Graphic or layered graphic file (Adobe, Sketch, or Affinity)
- Canva template (link)
For more details, see this helpful guide with 69 irresistible lead magnet ideas.
Once you have the idea in mind, your first step is to create the lead magnet resource and have that ready to upload to your WordPress site.
Free Lead Magnet Template
The easiest lead magnet trick is to convert your most popular blog post into a downloadable PDF with some additional bonus resources. Use our free template (learn more below).
You want to make it look professional with a graphic at the top that includes your logo. You can do this yourself without hiring a designer!
There are all sorts of free tools and resources available on the web for this.
Here’s a quick list of free resources that you can use right away:
- Use Canva to create a Document. Canva is an online app for making graphics. They have lots of useful templates to get started quickly. You can export your final graphic as a PDF. All for free.
- Use free stock photo sites like Unsplash and Pexels to place photos in your document.
- You can add icons with Streamline’s free icon set, and don’t forget you can use good ol’ emoji as well. Who doesn’t love emoji?
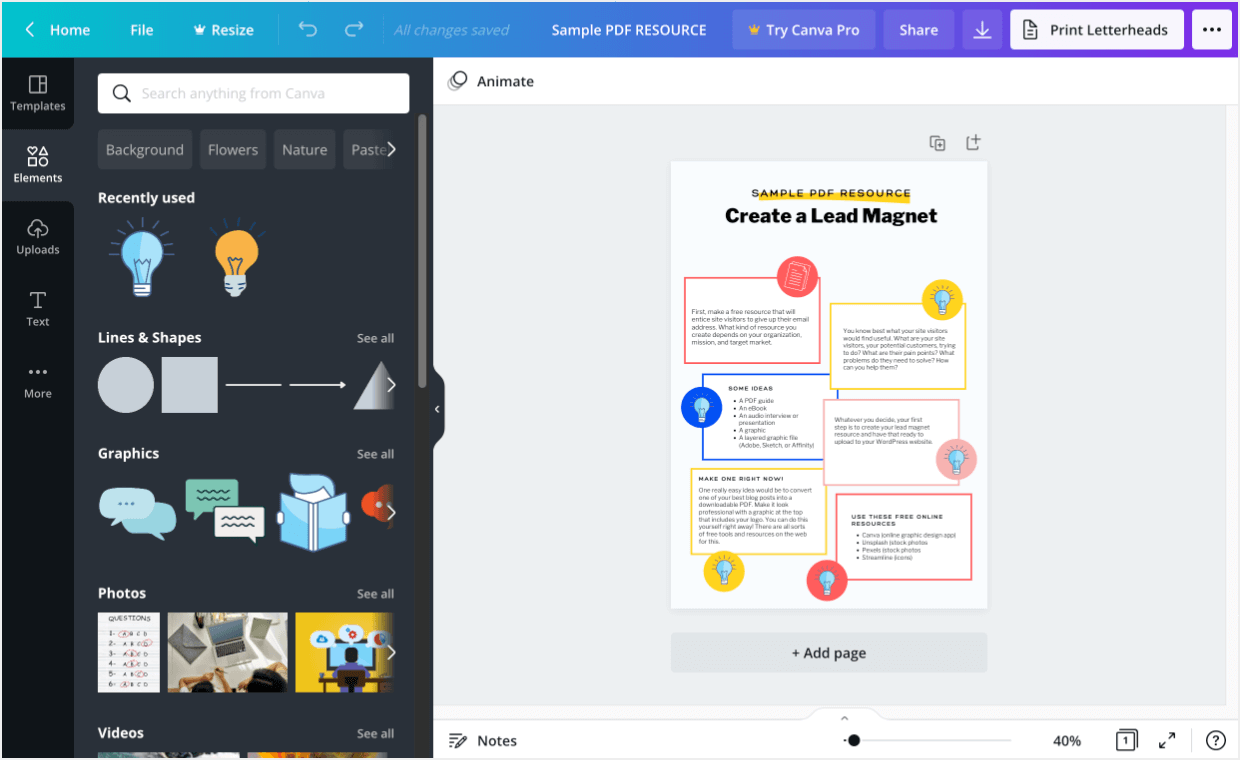
Here’s an example made using the Canva editor:
- Click here for the Canva template to make your own version (requires a free Canva account)
- Download the a PDF of the completed Lead Magnet
Once you have your lead magnet file ready, you need to add it to your WordPress site.
FAQs About Lead Magnets in WordPress
What are lead magnets?
Lead magnets are valuable resources or incentives offered to website visitors in exchange for their contact information, usually their email addresses. These resources can be e-books, templates, checklists, guides, or any other digital content that provides value to your target audience.
Why should I add lead magnets to my WordPress site?
Adding lead magnets to your WordPress site helps you build your email list and capture leads. It allows you to engage with your audience, nurture relationships, and eventually convert them into customers. Lead magnets act as a powerful tool to attract visitors, establish credibility, and demonstrate expertise in your industry.
Use EDD for Lead Magnets in WordPress
Good job! You’ve successfully added a lead magnet and have begun growing your email list.
Work on developing a welcome email or email series. Here is a good article on getting started with a custom welcome email.
If you haven’t already, download Easy Digital Downloads to get started.
I hope you found our article on adding lead magnets in WordPress helpful!
📣 P.S. Be sure to subscribe to our newsletter and follow us on Facebook, Twitter/X, or LinkedIn for more WordPress resources!
Using WordPress and want to get Easy Digital Downloads for free?
Enter the URL to your WordPress website to install.
Disclosure: Our content is reader-supported. This means if you click on some of our links, then we may earn a commission. We only recommend products that we believe will add value to our readers.
Easy Digital Downloads is a fantastic solution for anyone looking to sell digital products online! Its user-friendly interface and robust features make managing sales and customers a breeze. Highly recommend for small businesses and entrepreneurs! Thank you