There are many benefits of running an eCommerce store. But it’s important to take measures to prevent unauthorized access to your products. One way to do that is to restrict file downloads in WordPress.
Controlling who is able to download files on your site can help you manage security. It ensures that only certain user roles or paying customers can download and use your products. This can protect your offerings while also increasing sales and growing your business.
In this post, we’ll walk you through step-by-step how to go about this. We’ll cover:
Why Restrict File Downloads in WordPress?
If you sell digital downloads on your WordPress website, it’s important to have controls that prevent unauthorized access. By restricting file downloads in WordPress, you can ensure that only paying customers have access to your files. This means they won’t be able to freely share the URL or download with third-parties or on public forums, such as social media.
Another important reason to restrict file downloads is that it can help optimize the user experience on your site. By limiting the availability of certain files, you can reduce the risk of malicious users stealing your data or damaging your reputation. Overall, managing file downloads in WordPress can help you protect your site and keep your users safe. It also lets you gain valuable insights into how people are engaging with your content.
How to Restrict File Downloads in WordPress (In 4 Steps)
The easiest way to restrict file downloads in WordPress is to use a plugin. Below is how you can do it in four simple steps:
Step 1: Install and Activate Easy Digital Downloads
If you haven’t already done so, the first step is to download, install, and activate the Easy Digital Downloads (EDD) plugin:

This is a freemium WordPress plugin that makes it easy for you to manage and sell digital products like eBooks, PDF files, and software downloads. It provides a complete eCommerce solution. The features and functionality include a full shopping cart, activity tracking, multiple payment gateways, discount codes, and more.
One of the benefits of EDD is that it automatically secures all files to authorized customers. But there are a handful of tools and settings you can configure to enhance file download restrictions and limitations.
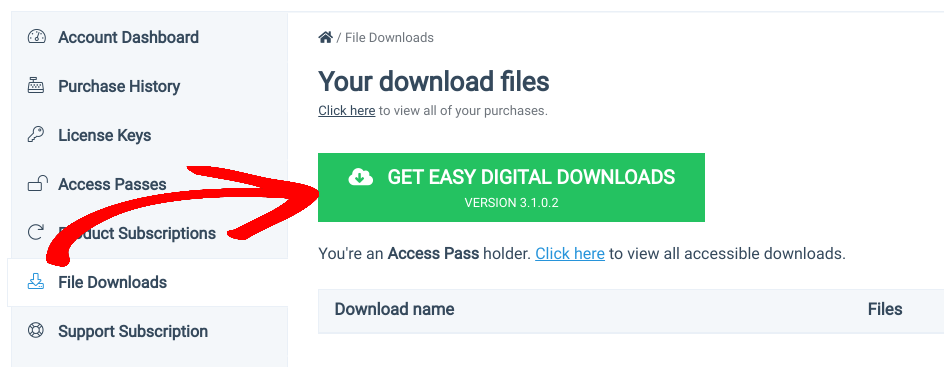
To get started, you can select a plan from the website and complete your purchase. Then you can download the EDD plugin from your account dashboard under File Downloads:
Next, go to Plugins » Add New » Upload Plugin » Choose File from your WordPress dashboard:
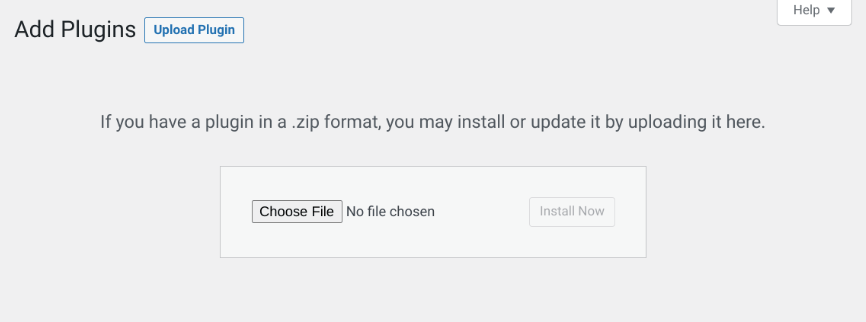
After you select the EDD zip file, select the Install Now then Activate Plugin buttons.
Step 2: Configure the Plugin Settings
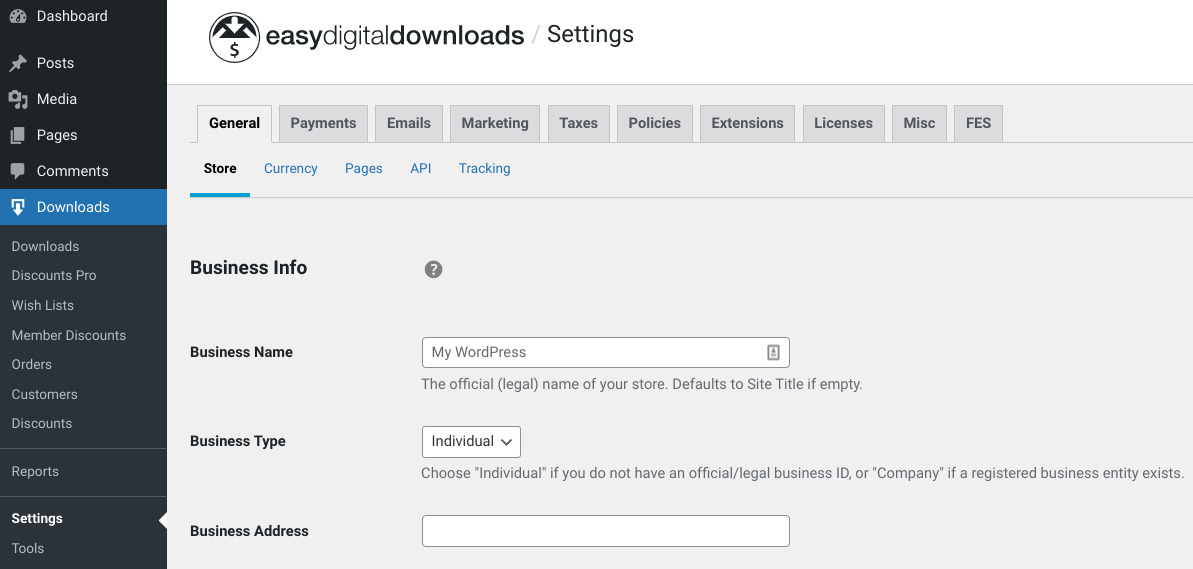
Once you activate the EDD plugin, you can configure the settings for your store. You can navigate to Downloads » Settings from your WordPress admin to add your business information:
Next, you can go to Payments to choose a default payment gateway for your users:
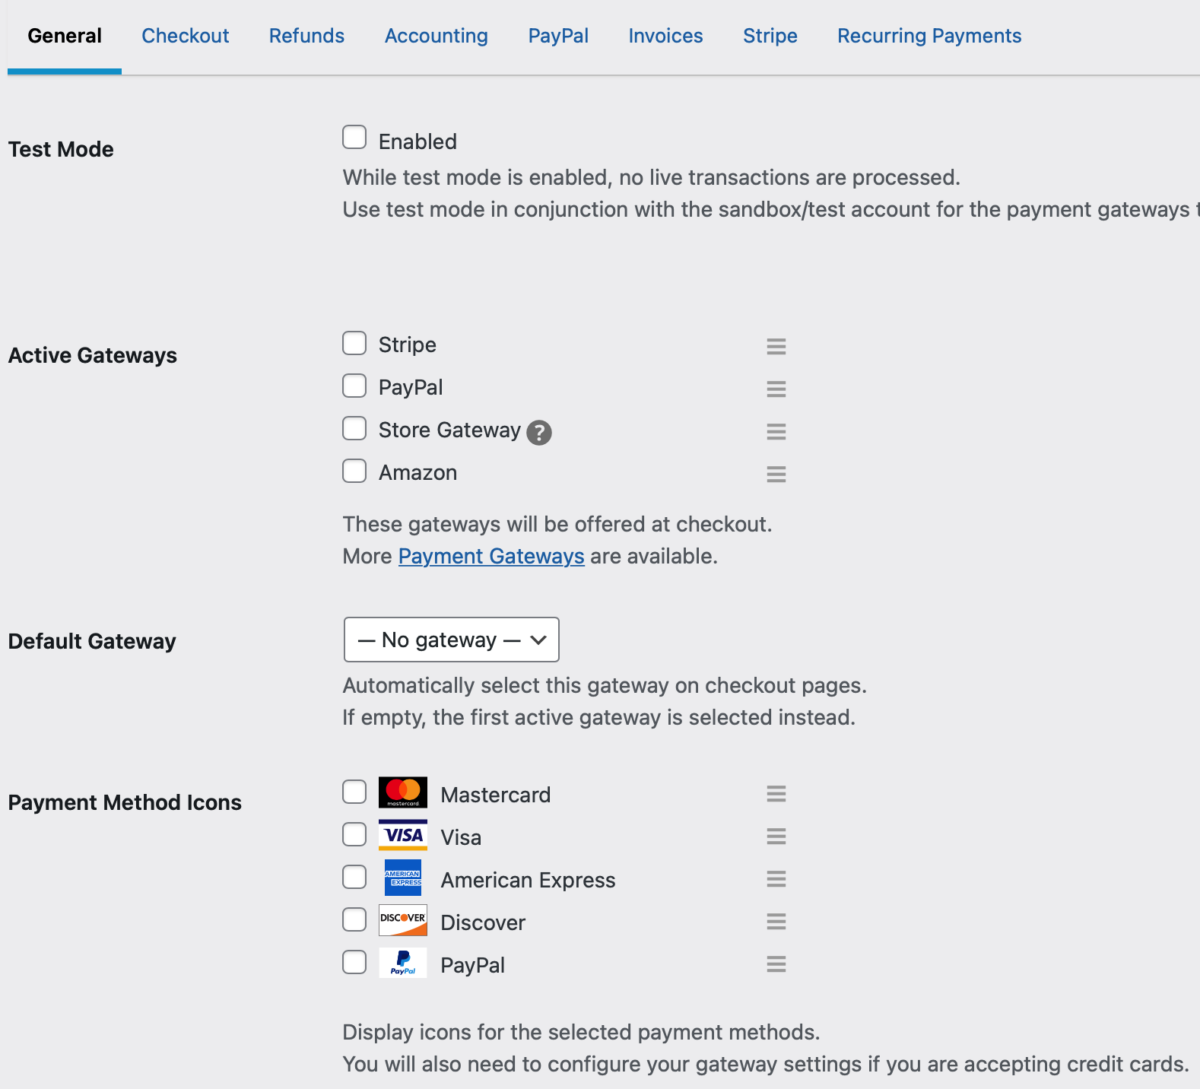
There are a lot of settings you can configure to personalize your eCommerce store. We won’t cover them all in this post. But for more guidance, you can refer to the following tutorials:
Step 3: Add Your Download(s)
Once you’ve got your online store up and running, you can add your files or digital downloads. To get started, you can go to Downloads » Add New from your WordPress site:
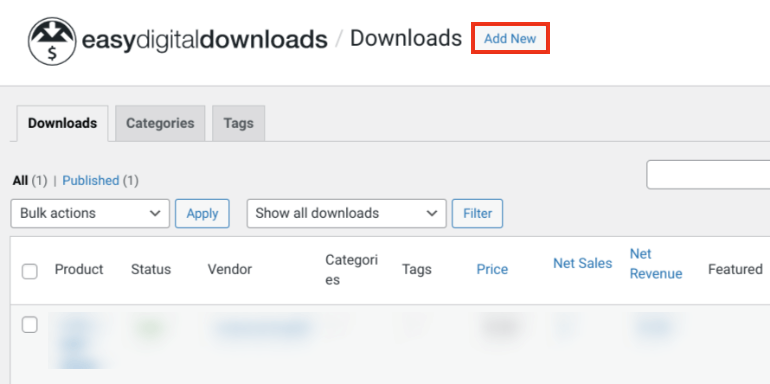
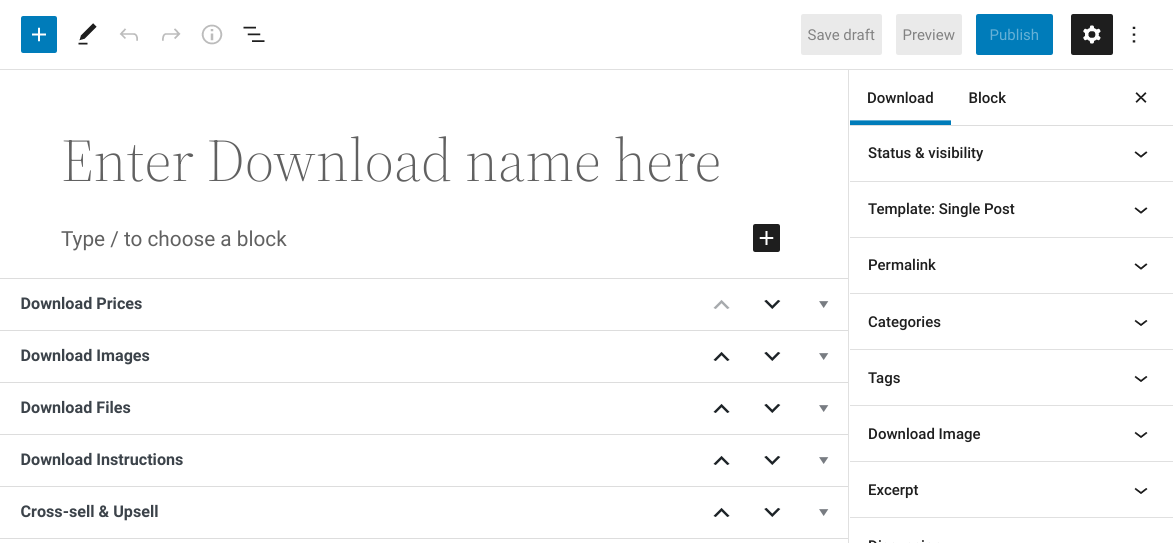
You can enter a title, then add a description:
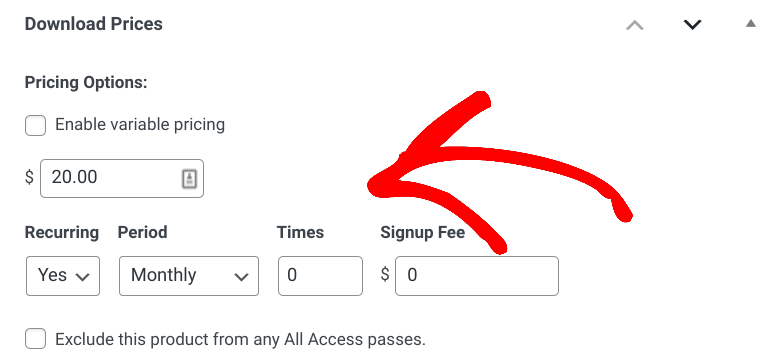
You can set a price under Download Prices:
Next, to add the new file, browse to the Download Files section:
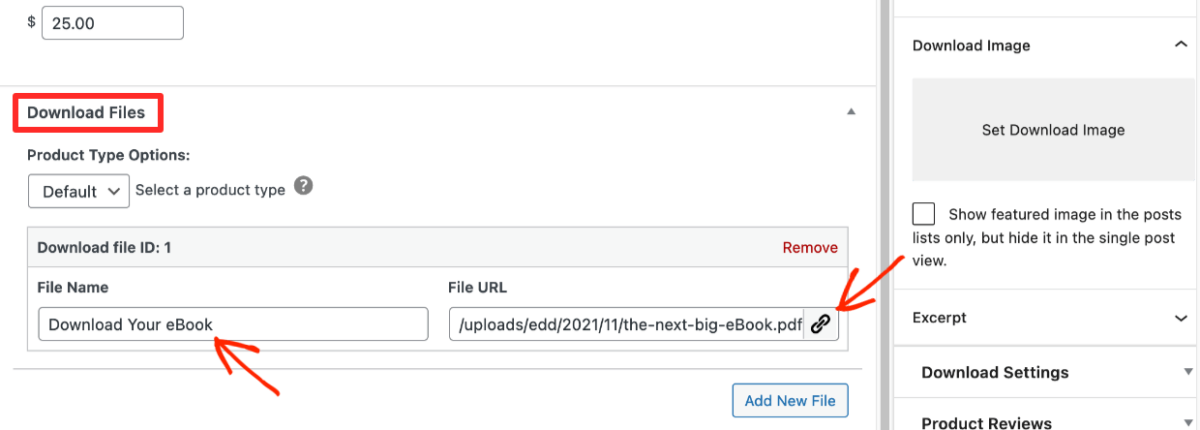
Here, you can choose a Product Type. You can enter a filename for the WordPress file, then click on the upload file (link icon) option under File URL.
When you’re done, you can click on the Publish button.
Step 4: Restrict File Downloads in WordPress
There are a few different ways you can restrict file downloads in WordPress. For instance, one option is to limit file downloads to logged-in users. If you want to make this the default setting for all files uploaded to your site, you can go to Downloads » Settings » Misc » File Downloads. Next, select the Require Login setting:
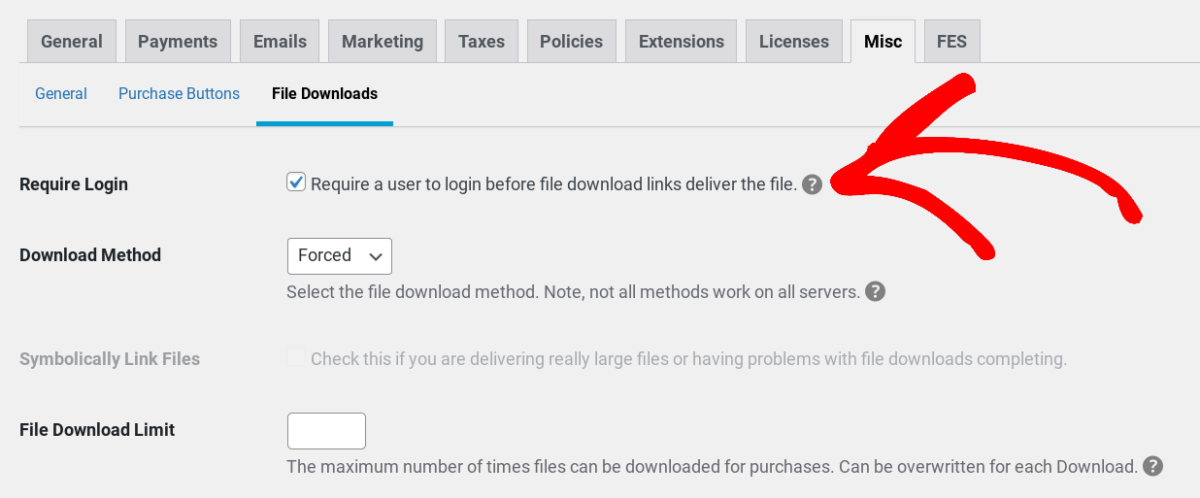
With this enabled, a popup will prompt users to log in once they click on the download button.
Another way to restrict file downloads in WordPress is to set a File Download Limit. By default, when a customer purchases an item, they’ll be able to download it as many times as they’d like. But with this setting, you can restrict file downloads so that the URL expires after the number of uses that you enter into this field.
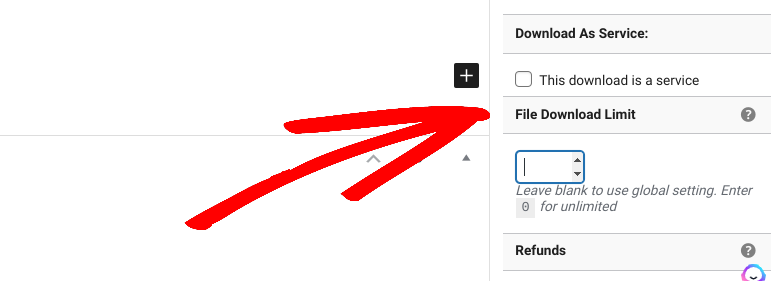
You can enter a number limit to apply across all file downloads on your site. Alternatively, you can configure the settings on a per-product basis. On the download page, you can browse to the Download Settings panel, then enter the value in the File Download Limit field:
Under File Downloads, you also have the option to Disable Redownloads:

With this option enabled, the download link on the customer’s Account page will be hidden. They can still download the file from their receipt.
When you’re done, select the Save Changes button. Another option is to add password protection to the WordPress page you use to offer paid or free downloads.
If you’re using a premium version of EDD, you can also install the Lock Downloads to IP extension.
This add-on lets you restrict file download access to the IP address that was originally used to purchase the files. It’s an excellent way to prevent customers from sharing the links to your file downloads.
Restrict File Downloads in WordPress
Restricting file downloads in WordPress can help you better manage the security of your online store. You can control which users have access to the downloads as well as the terms, limits, and permissions for using them.
To better manage your digital products and restrict file downloads in WordPress, download Easy Digital downloads today! You can also check out How to Set Up Link Expirations in WordPress to further control the accessibility of your downloads!
Be sure to subscribe to our newsletter and follow us on Facebook or Twitter for more WordPress resources!
Using WordPress and want to get Easy Digital Downloads for free?
Enter the URL to your WordPress website to install.
Disclosure: Our content is reader-supported. This means if you click on some of our links, then we may earn a commission. We only recommend products that we believe will add value to our readers.