Do you want to learn how to send push notifications from your WordPress site?
Staying connected with your customers is vital for e-commerce success. Sending push notifications can help you achieve this. These bite-sized messages can instantly grab your users’ attention and keep them engaged with your WordPress website.
Plus, with the right tool, creating and optimizing them is quick and easy, even for beginners.
🔎 In this article, I’ll cover:
What Are Push Notifications?
Push notifications are short, attention-grabbing messages sent directly to users’ devices, such as smartphones, tablets, or desktop computers. These messages can appear on the device’s screen, even when the user is not actively using your website or mobile app.
Push notifications serve various purposes, including delivering news updates, promoting special offers, reminding users of abandoned carts, or simply providing valuable information.
Push notifications typically consist of:
- Title that summarizes the content
- Message that makes up the primary content of the notification
- (Optional) Image to enhances the notification
- Call to Action (CTA) button that encourages users to take a specific action (visiting your website, making a purchase, or reading an article)
- Destination URL link that users click
Push notifications are a powerful way to engage with your audience, increase website traffic, boost sales, and enhance user retention.
Why Use Push Notifications for Ecommerce?
Before delving into the technical aspects of sending them from your WordPress store, it’s crucial to understand why e-commerce push notifications are useful.
Instant Communication
Push notifications allow you to communicate with your customers in real-time. Whether you want to inform them about a flash sale, promote a new product, or share important updates, push notifications ensure your message reaches them promptly.
High Visibility
Unlike emails that can end up in spam folders or be ignored, push notifications are impossible to overlook. They appear directly on users’ screens, making them hard to miss. This high visibility can significantly increase site traffic and click-through rates.
Increased Engagement
Push notifications keep your audience engaged with your store. Use them to remind users about abandoned carts, offer personalized product recommendations, or share valuable content, all of which can drive more conversions. You can use these notifications, as well as social media, to help boost engagement and clicks on your site.
Cart Recovery
Shopping cart abandonment is a common challenge for e-commerce businesses. Push notifications enable you to send timely reminders to customers who’ve left items in their carts, encouraging them to complete their purchases.
Targeted Marketing
Sending push notifications allows you to segment your audience and send highly targeted messages. This ensures that your notifications are relevant to each user, increasing the likelihood of conversions.
How to Send Push Notifications from WordPress
Now that you understand the importance of e-commerce push notifications, let’s proceed to the step-by-step tutorial of how to send push notifications in WordPress.
Step 1: Sign Up for PushEngage
PushEngage is a popular push notification platform that seamlessly integrates with WordPress, WooCommerce, and Easy Digital Downloads:
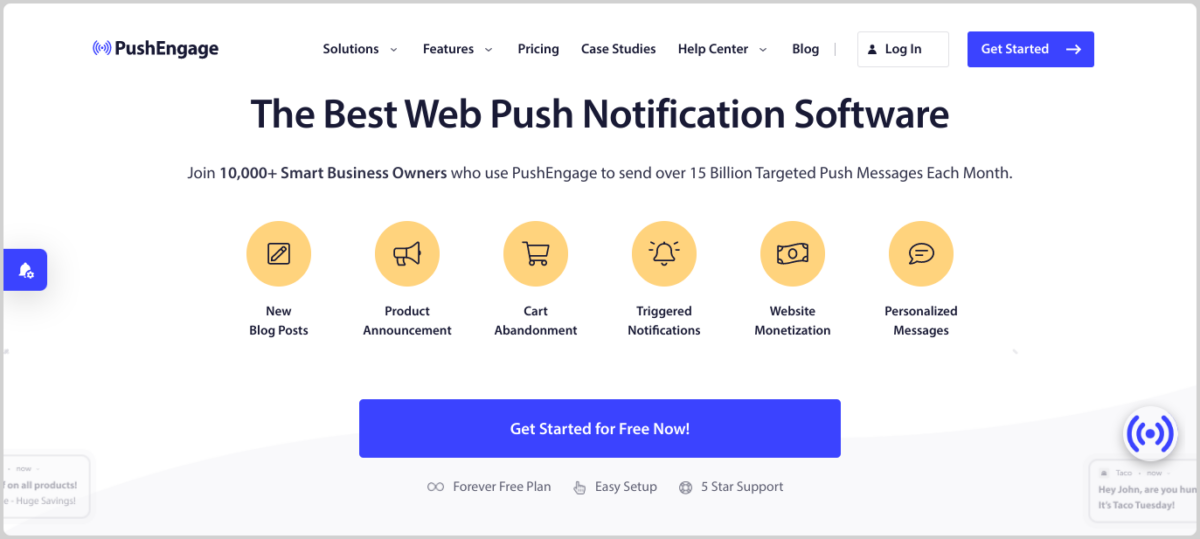
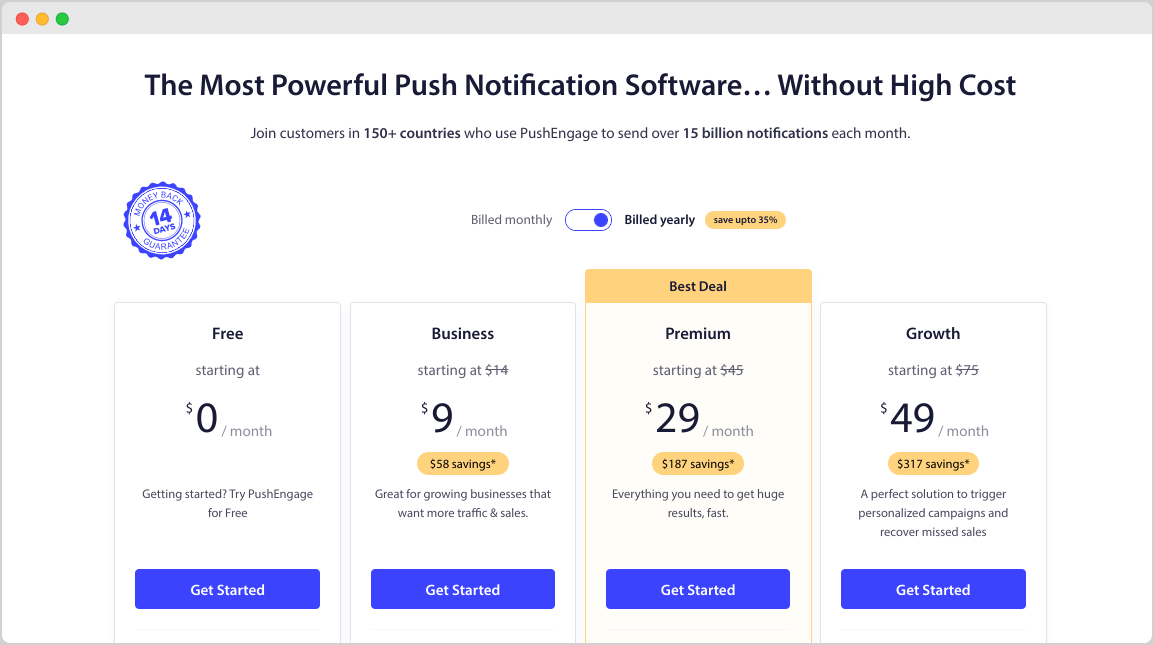
To get started, visit the PushEngage website and click on Get Started to sign up for an account. You can choose between their free plan and paid plans depending on your needs:
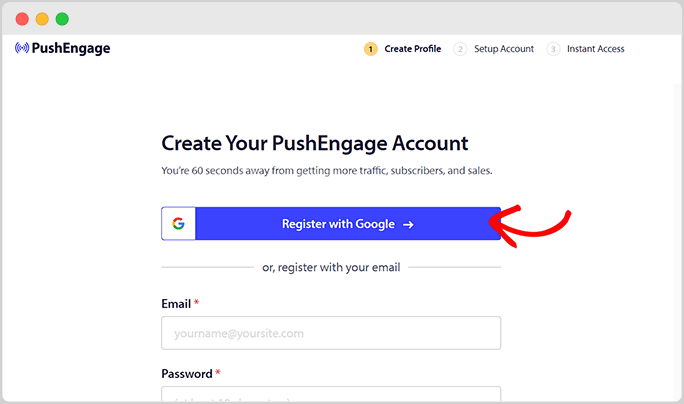
Next, complete the on-screen prompts and instructions to register your account:
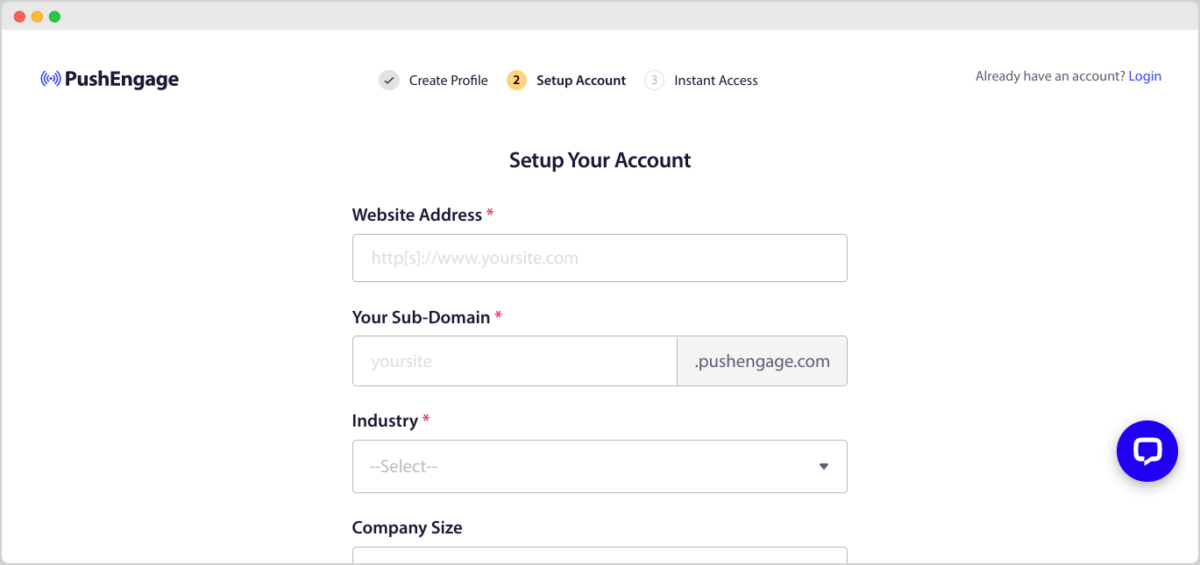
After signing up, you’ll be asked to set up your account and provide some basic information about your website:
Once your website is added, navigate to the settings section in PushEngage (Site Settings » Site Details). Here, you add your site name, URL, and upload a site icon:
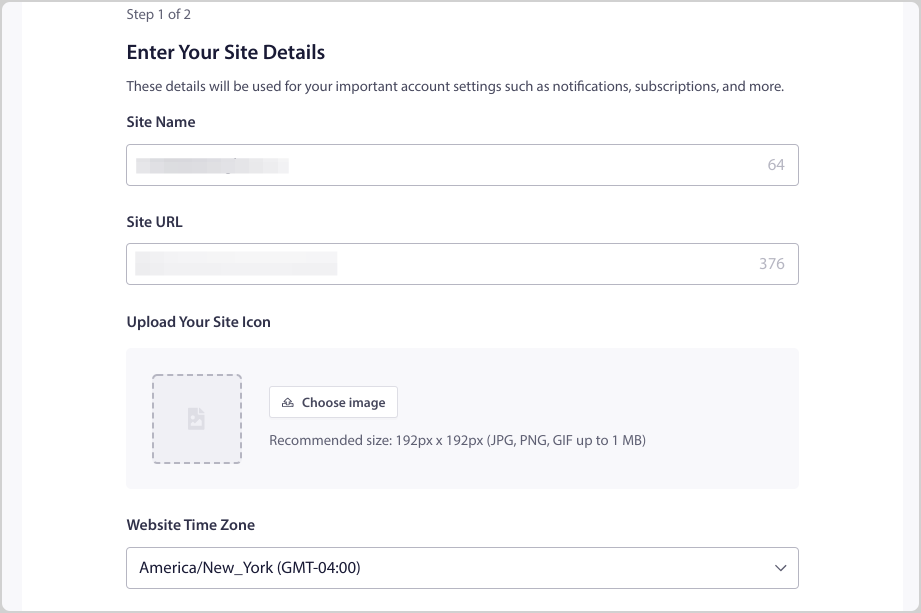
When you’re done, select Save and Continue at the bottom to move onto Step 2 of the Onboarding Setup Wizard.
Step 2: Connect WordPress and PushEngage
Next, you can connect your WordPress site with your PushEngage account. The easiest way to do this is by installing the PushEngage WordPress plugin.
On the next screen, select WordPress as your platform. Then click on Install PushEngage WordPress Plugin:
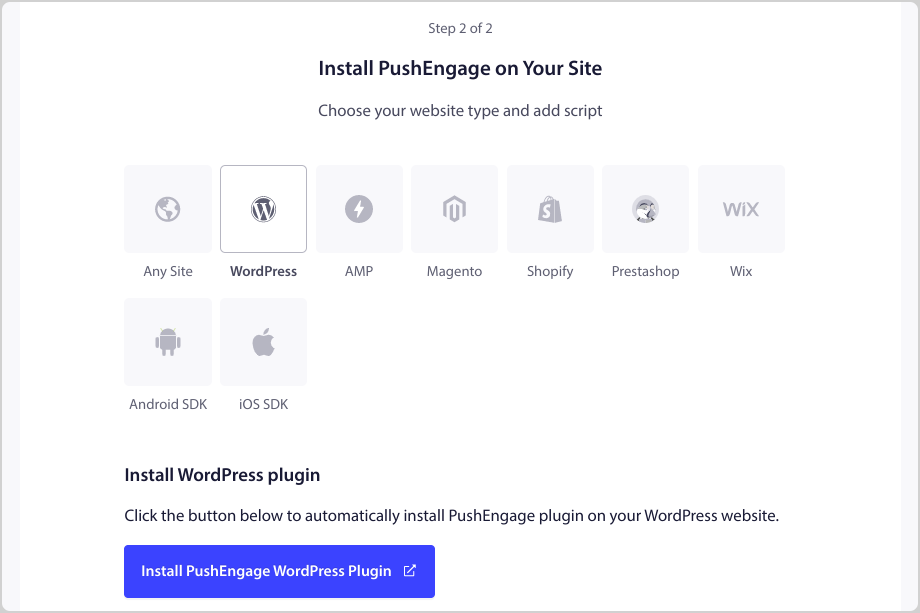
This automatically launches your WordPress admin in a new tab. On the PushEngage plugin, select Install Now, followed by Activate.
It will prompt you to claim your free account or connect an existing one:
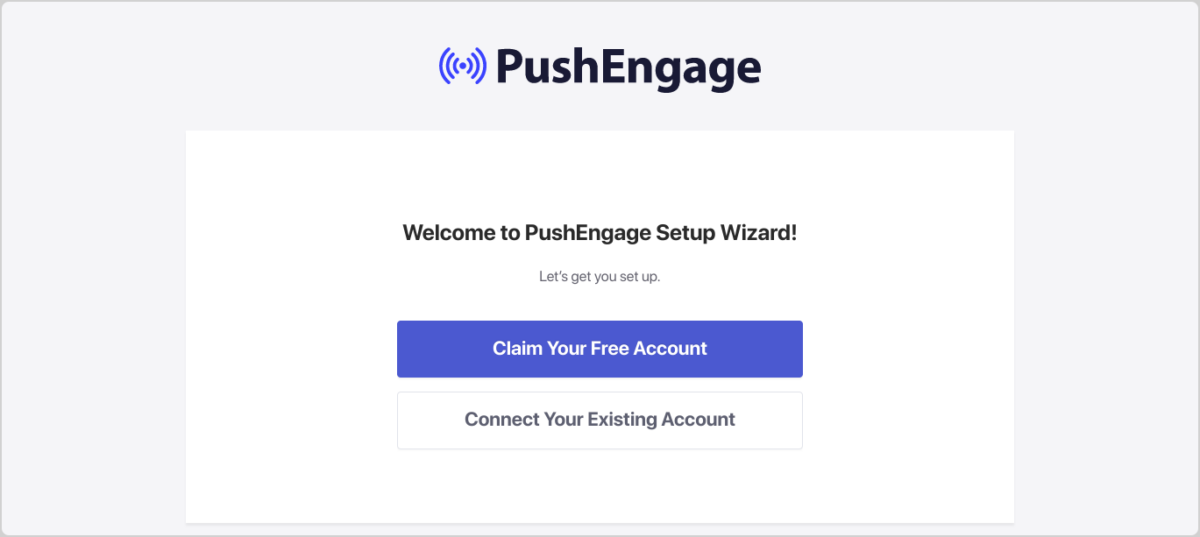
Select your site name from the dropdown menu in the modal window that opens. Then click on Let’s Get Started. On the next screen, if you don’t want to upgrade, skip to the next step.
When it’s done installing the plugin and connecting your account, you’ll see a success message with a few options:
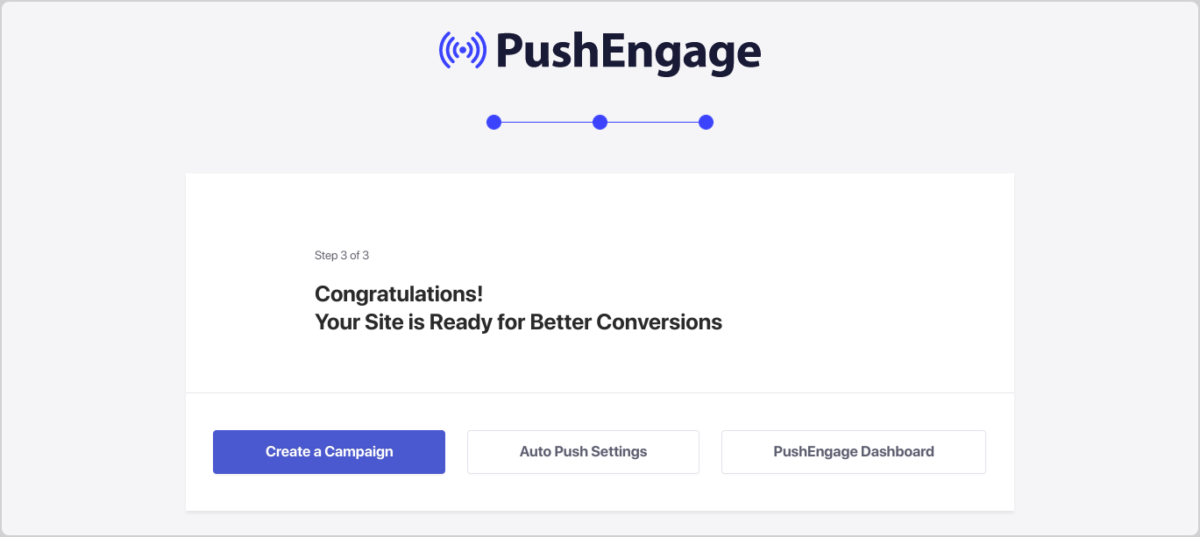
Select Create a Campaign to get started. Alternatively, you can return to your WordPress dashboard.
Step 3: Create Your Push Notification
Now that your PushEngage account is set up, it’s time to start creating push notifications.
From your WordPress admin area, navigate to PushEngage » Dashboard and select Create New Push Broadcasts:
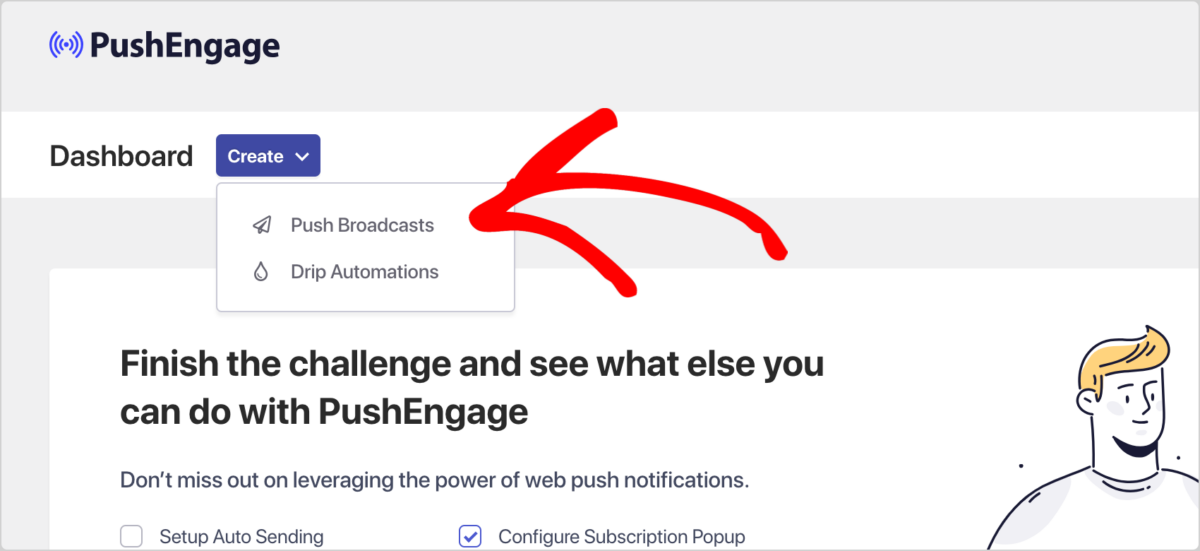
Note that you can also follow this same workflow from the PushEngage dashboard. This walk-through is to show you how to create and send push notifications from WordPress directly, without leaving your site.
On the next screen, begin creating your notification:
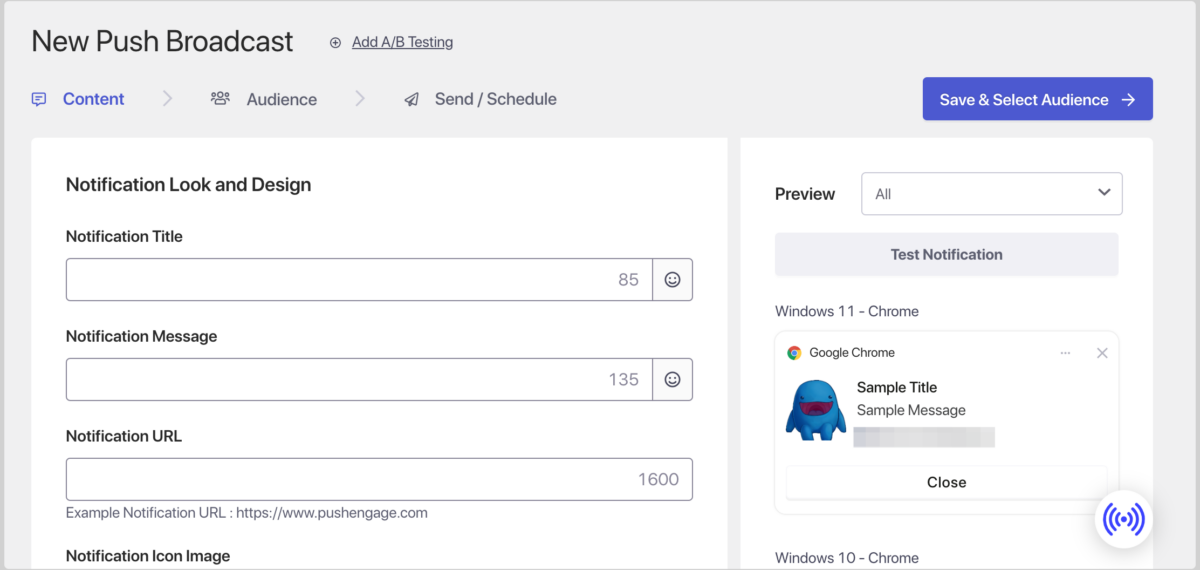
You can enter a Notification Title, Message, and URL. To the right, you’ll see previews of how the push notification will appear within various web browsers. This includes Chrome, Safari, Android, iOS, etc.
I’ll create a notification for a new e-book pre-order:
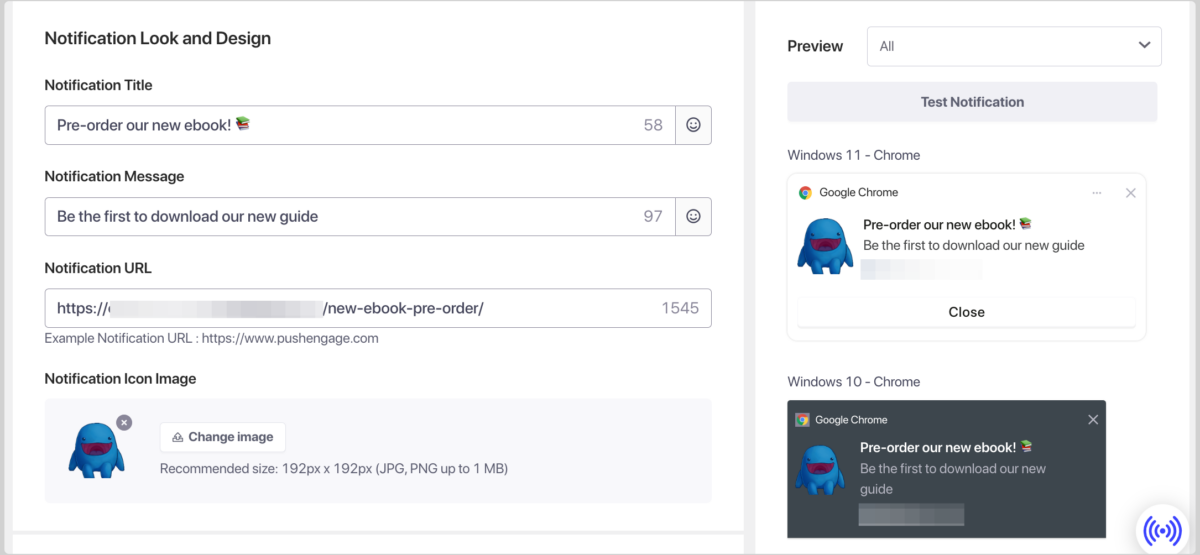
To help engage users, you can add emojis within the title and/or message. In the URL field, add the address of the webpage you want the notification to bring users to.
Under Notification Icon Image, the logo you previously uploaded should appear. You can change it if you want. To show a large image with the notification, enable Show Large Image:
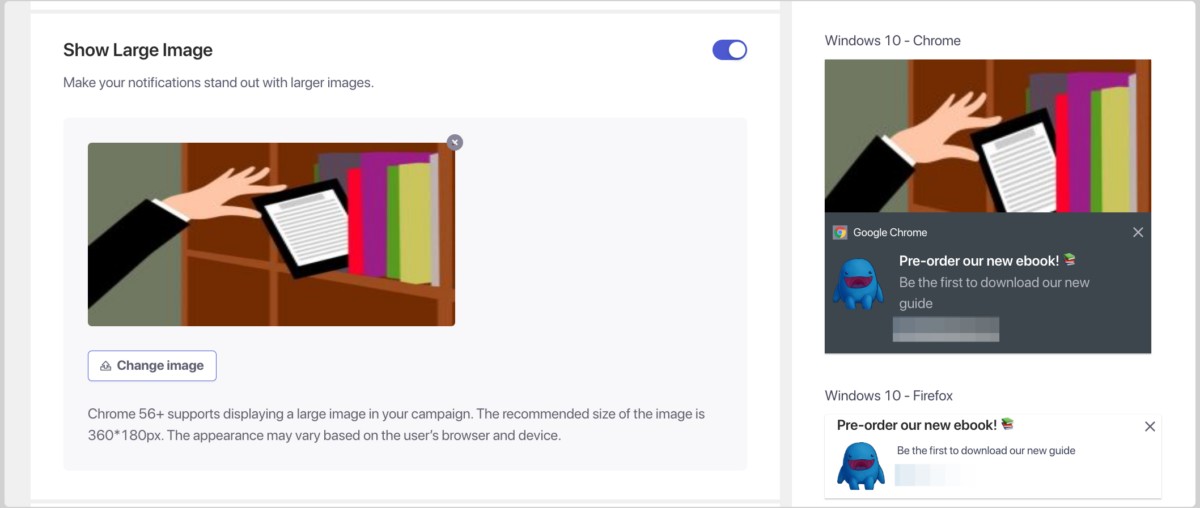
Then click on Change Image and either upload an image or select one from your Media Library.
You can also change the Notification Duration and update UTM Parameters:
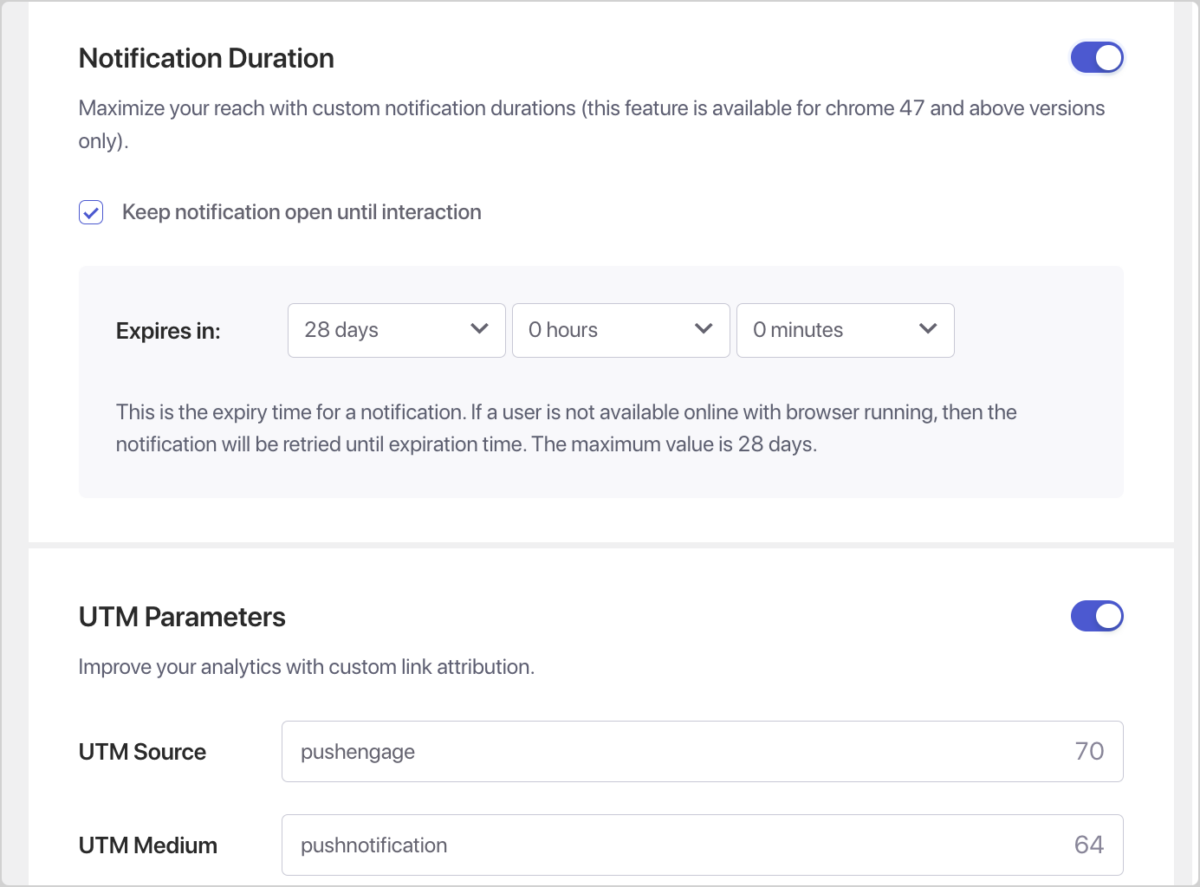
When you’re done, select Save & Select Audience:
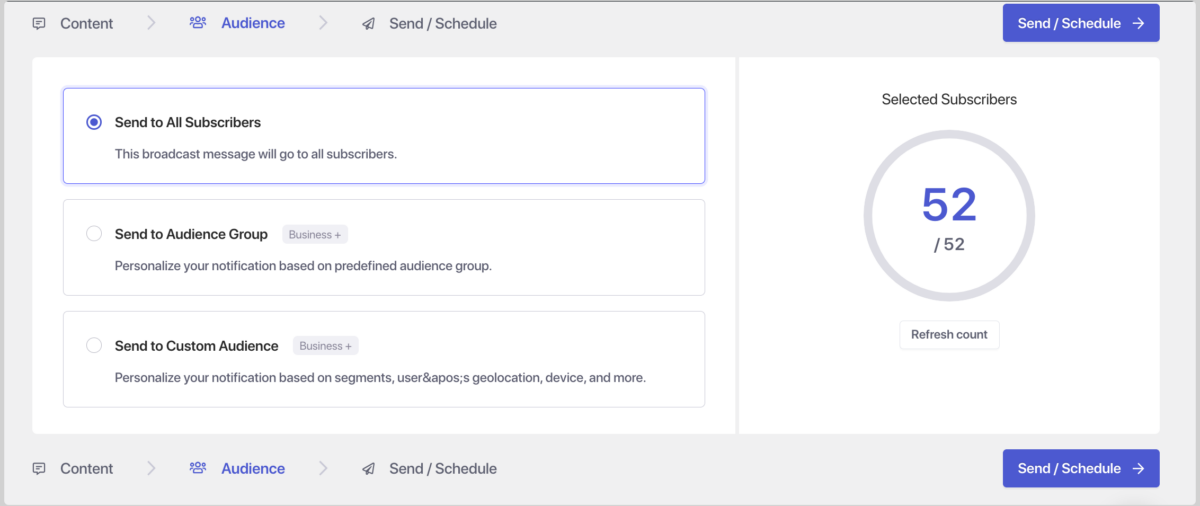
On this screen, choose which audience groups to send the notification to. If you want to segment specific groups, you may need to upgrade your PushEnage account.
To send it to everyone on your email marketing list, keep it set to the default Send to All Subscribers, then click on the Send/Schedule button.
Step 4: Schedule & Send Push Notifications
Timing is crucial when sending push notifications. You want to reach your audience when they are most likely to engage with your message.
Thanks to PushEngage’s schedule feature, you can select the optimal delivery time to schedule your push notifications. You can also send them for different time zones, ensuring global coverage.
On the Send/Schedule screen, choose when to send it:
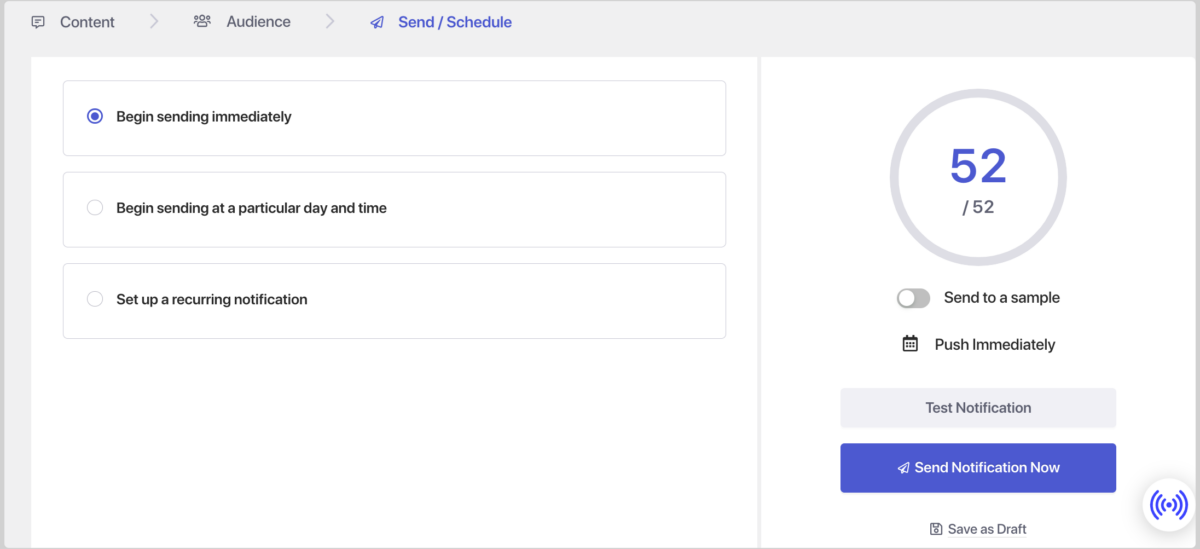
If you don’t want to send it immediately, select Begin sending at a particular day and time. Click on Test Notification to preview how it will appear. If you’re not ready to send or schedule it yet, select Save as Draft.
Step 5: Configure PushEngage + EDD Settings
If you want to send push notifications from WordPress for your e-commerce store, there are a handful of additional settings you can configure to control when they’re sent. You can configure the plugin settings to trigger notifications for certain events, such as when you publish new WordPress posts or add new products.
For instance, when you create a new product/download in EDD, scroll to the bottom of the editor to find the PushEngage Push Notification Settings:
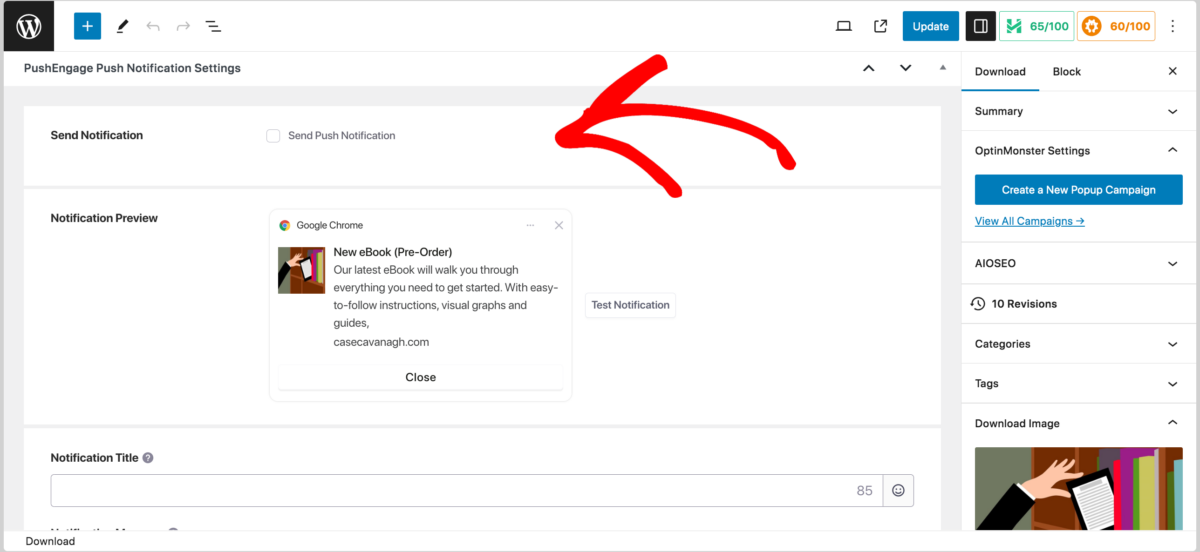
Here, you can enter the title and message you want the notification to display alongside that product/download.
You can also configure and enable automatic push notification settings. Navigate to PushEngage » Settings » Auto Push Settings:
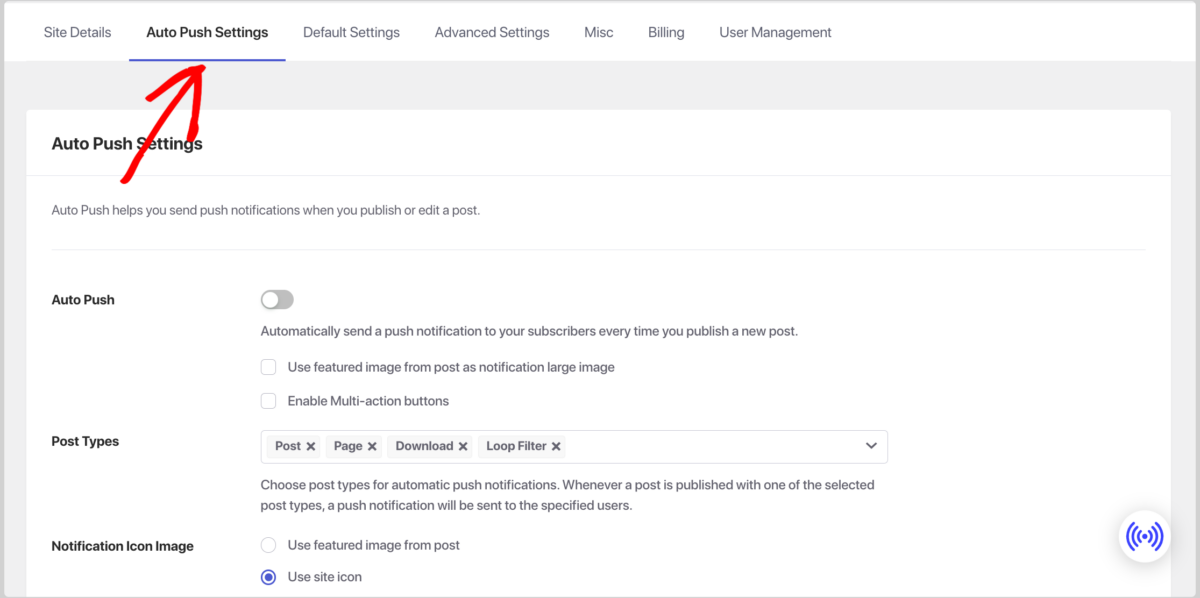
Switch the Auto Push toggle to enable notifications to send every time you publish a new post. Additionally, under Post Types, you can specify which custom post types. For instance, for an e-commerce site using Easy Digital Downloads, you would add Downloads.
That’s it!
FAQs About WordPress Push Notifications
Let’s wrap up with some frequently asked questions about push notifications.
Can you send push notifications without an app?
Yes, you can send push notifications for WordPress without an app. Web push notifications work directly in web browsers and on mobile devices, allowing you to reach users who have visited your website, even if they don’t have an app installed.
What’s the best WordPress push notification plugin?
Ultimately, it depends. PushEngage is considered one of the best WordPress push notification plugins due to its user-friendly interface, robust features, and seamless integration with WordPress and popular e-commerce platforms. It offers advanced targeting, automation, and customization options, making it versatile for various websites and businesses.
How do push notifications work?
Push notifications work by sending short, clickable messages directly to users’ devices. When a user subscribes to push notifications from a website, the site can send notifications even when the user is not actively browsing.
Can you schedule push notifications?
Yes, you can schedule push notifications using most push notification platforms, including PushEngage. Scheduling enables you to send notifications at optimal times, increasing their effectiveness.
When is the best time to send push notifications?
The best time to send push notifications depends on your audience and their habits. Generally, research suggests that mid-morning or early afternoon on weekdays tends to yield higher open rates. However, it’s crucial to analyze your audience’s behavior and conduct A/B tests to determine the optimal timing for your specific notifications.
Also, it’s best to avoid overwhelming users with too many notifications. Aim for a balance that keeps users engaged without becoming intrusive.
EDD + PushEngage to Send Push Notifications
Push notifications are a powerful marketing tool that allows you to engage with your customers in real-time, increase website traffic, and boost conversions.
By following the steps outlined in this guide, you can use PushEngage to send push notifications from your WordPress site. Plus, it integrates seamlessly with Easy Digital Downloads!
Don’t have your premium pass yet? Get one today:
Want more ways to engage users? Check out How to Increase Website Traffic to Your Online Store.
📣 P.S. Be sure to subscribe to our newsletter and follow us on Facebook, Twitter/X, or LinkedIn for more WordPress resources!
