Do you want to learn how to send push notifications for your store’s upcoming sale?
The holiday season is the busiest time of year for e-commerce businesses and digital sellers. With so much competition, it’s important to find ways to stand out and reach your target audience.
Push notifications are a great way to do this, as they allow you to send personalized messages directly to your subscribers’ devices.
🔎 In this article, I’ll cover:
Why Send Push Notifications for Holiday Sales
Push notifications are a great way to promote holiday sales, whether it be for Black Friday, Cyber Monday, Christmas, or another seasonal flash sale.
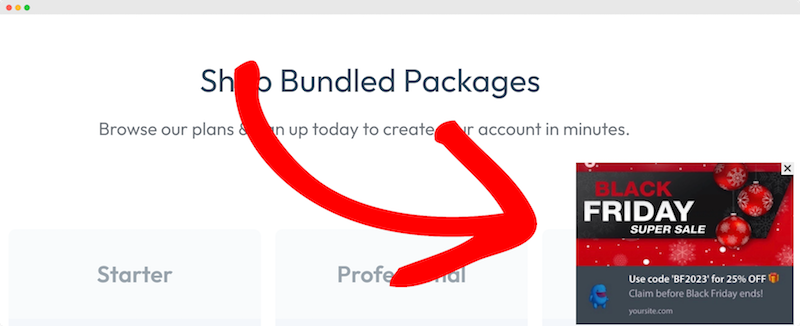
These notifications are a direct channel to your customers. They cut through the noise of emails and social media, increasing the likelihood of your message getting noticed during the chaotic periods of holiday shopping.
One of the primary reasons to use push notifications is that they’re immediate and attention-grabbing. When a subscriber receives a push notification, it pops up on their screen.
You can segment your subscribers based on their interests and purchase history. A targeted approach makes it easier to send relevant messages, which can help boost conversion rates and reduce abandoned carts.
Push notifications are also measurable, letting you track the click-through and open rates to monitor their performance. This information can help inform and improve your future marketing strategy and marketing campaigns.
How to Send Push Notifications for Your Sales
Let’s get into how to send push notifications for holiday sales in WordPress.
1. Create Your Holiday Sale Discount
If you haven’t already, the first step is to create your holiday sale discount or offer. The best way to do this depends on what WordPress eCommerce plugin you’re using to power your store.
In this tutorial, I’ll be using Easy Digital Downloads (EDD):
However, WPBeginner has a guide on creating smart coupons in WooCommerce.
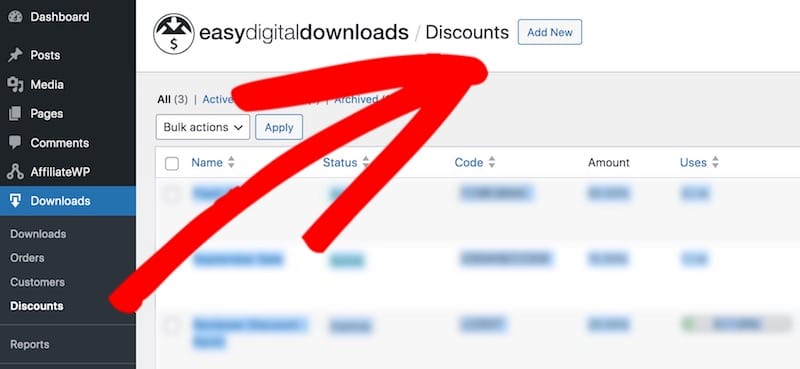
With EDD installed, go to Downloads » Discounts from your WordPress dashboard, then click Add New. I’ll create a 25% discount for a Black Friday sale:
Add a Name and Code:
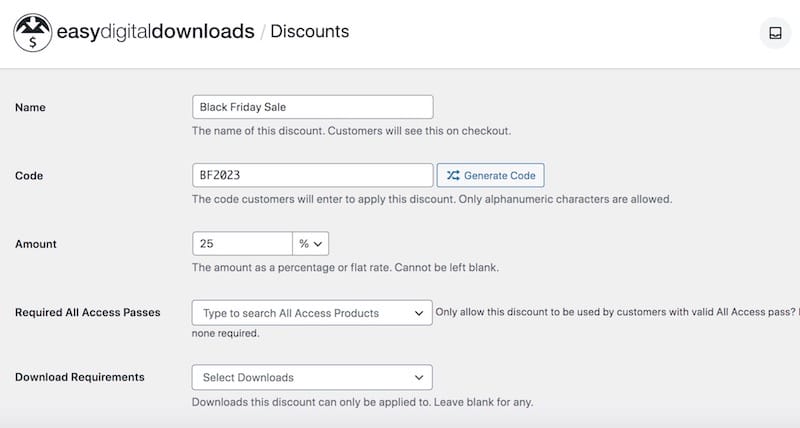
Under Amount, select the type of discount you want to offer (percentage or fixed amount).
If relevant, select which products to include/exclude from the offer, start and end dates, and minimum/maximum uses:
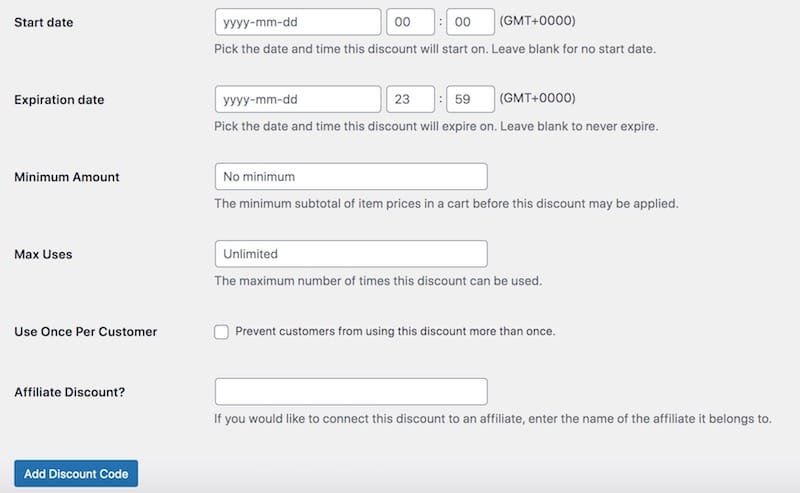
When you’re done, select Add Discount Code.
💡 For more detailed guidance, feel free to check out How to Set Up Coupon & Discount Codes with WordPress.
2. Install & Connect PushEngage
The next step is to connect your WordPress site to PushEngage:
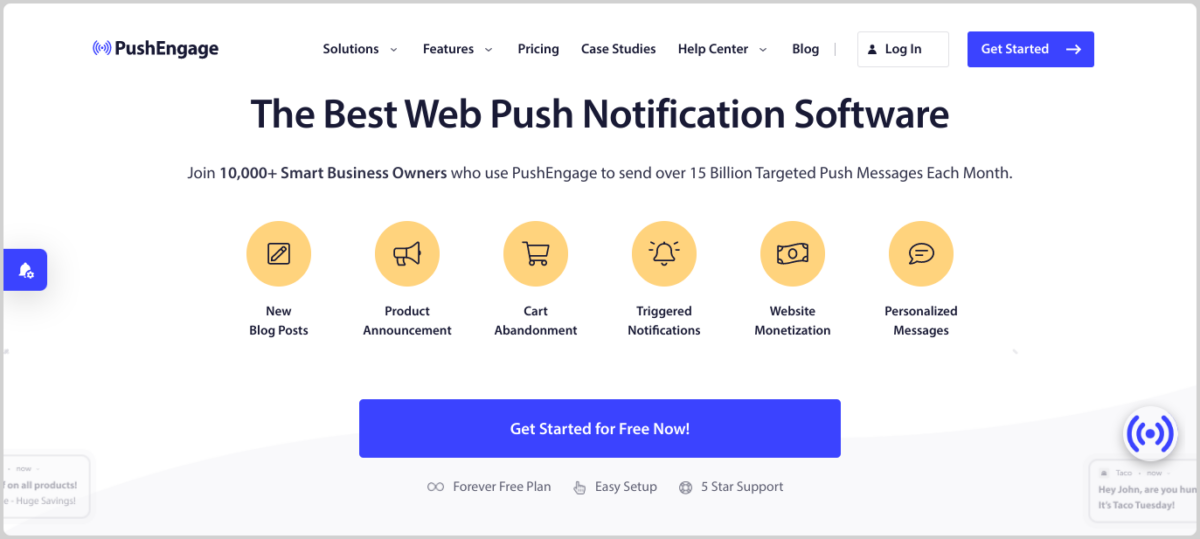
This is a powerful solution for creating both mobile and web push notifications. It’s beginner-friendly and packed with helpful features. For instance, you can add visuals and use A/B testing to see what resonates most with your audience.
To start, go to the PushEngage site and select Get Started. After you choose a plan, enter your email address, create a password, and verify your email address.
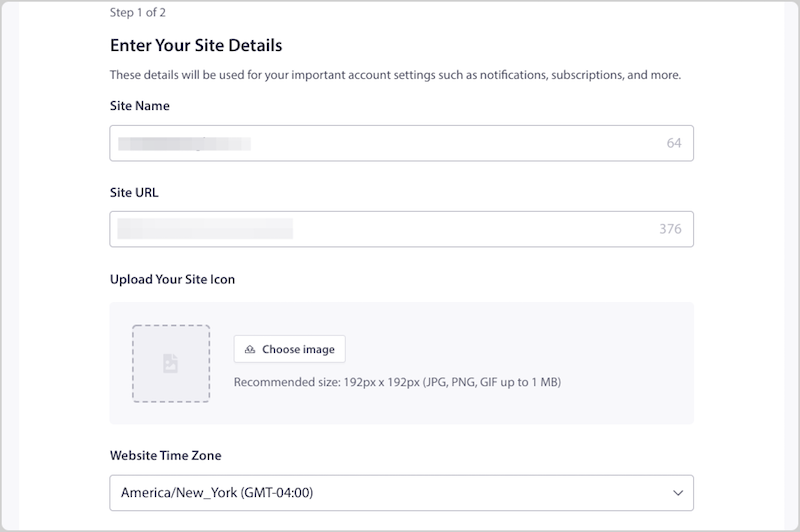
From the settings section of your PushEngage account (Site Settings » Site Details), add your site name, URL, and upload a site icon:
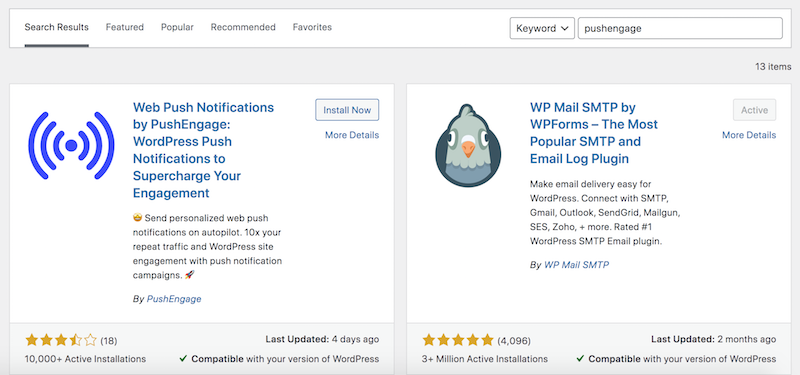
Next, install the PushEngage plugin on your website. From your WordPress dashboard, go to Plugins » Add New. Search for “PushEngage” then select Install Now followed by Activate:
On the next screen, click on Connect Your Existing Account:
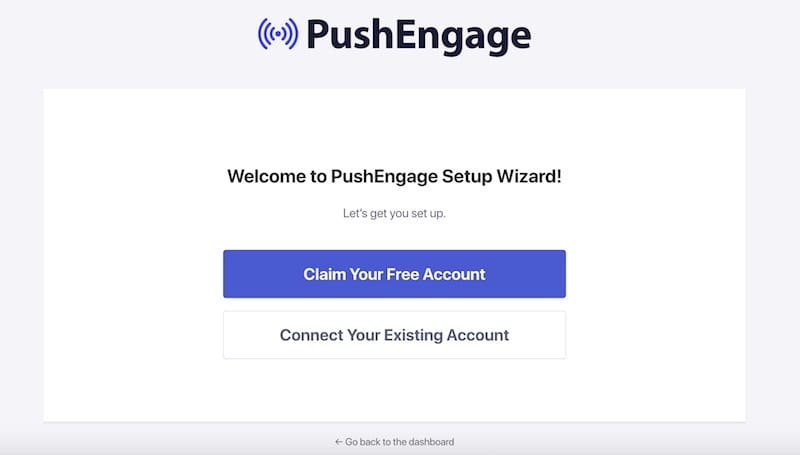
Follow the prompts to log in and connect WordPress and PushEngage.
3. Create Holiday Sale Push Notifications
Now it’s time to create your push notification for the holiday sale.
Go to PushEngage » Campaigns » Add New/Create New Campaign:

Under Content, enter a Notification Title and Message. Then add the Notification URL to your pricing page, sale landing page, or wherever you want the notification to link to:
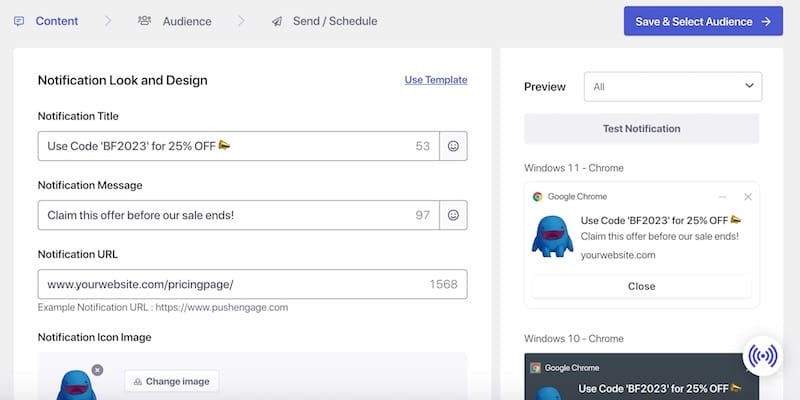
On the right side of the screen are previews of how the push notification appears for various browsers and devices.
Under Notification Icon Image, keep or update your previously uploaded logo. Below that, you can enable Show Large Image and upload an image from your computer or Media Library:
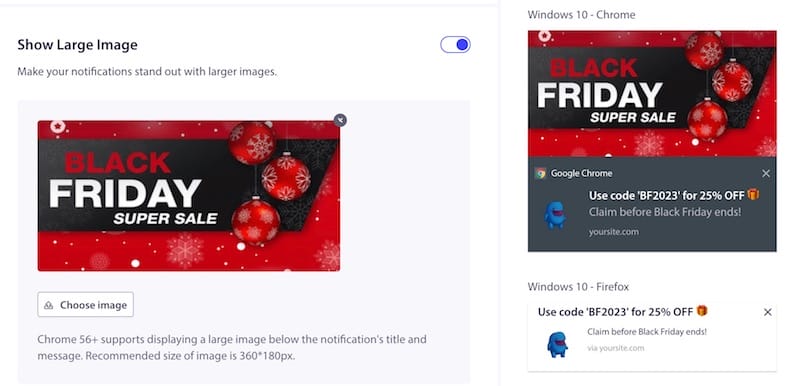
Next, there are settings that let you:
- Configure Multi Action Notification to add multiple call-to-action (CTA) buttons
- Change the Notification Duration
- Update UTM Parameters
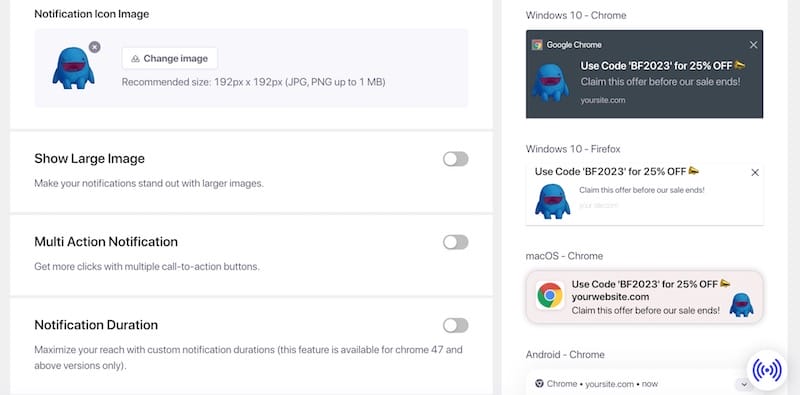
When you’re done, select Save & Select Audience:
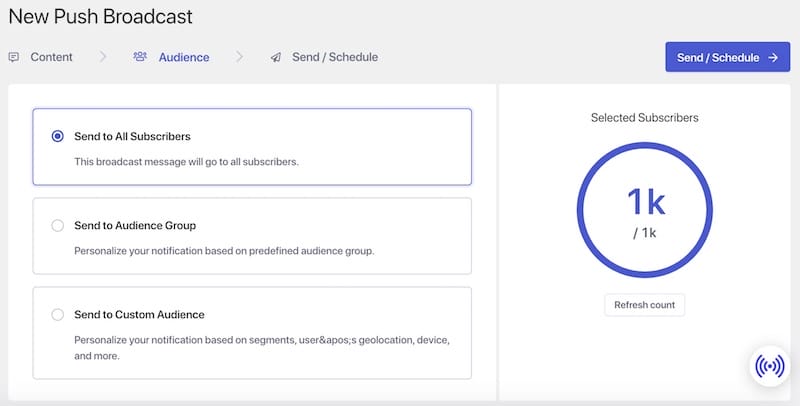
On this screen, you can leave it set to the default Send to All Subscribers or segment it by audience group.
4. Schedule & Send Push Notifications
You have the option to send push notifications immediately or schedule them for a future date and time. Under the Send/Schedule tab, select your preferred option:
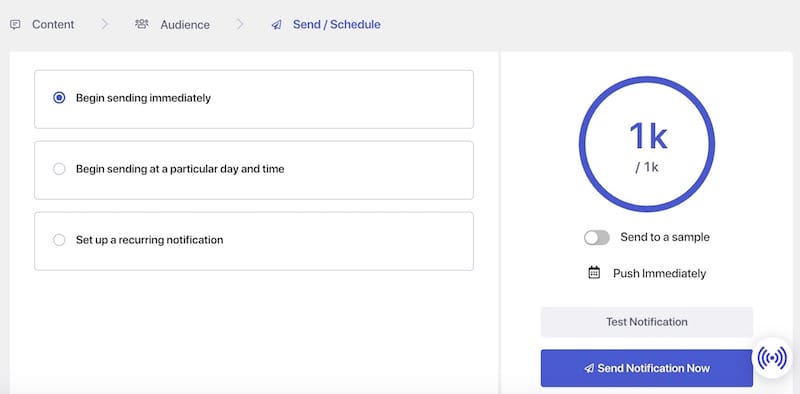
Click on Test Notification to see how the notification looks. If you’re not ready to send or schedule the message, select Save as Draft.
That’s it! Repeat this entire process for as many holiday sale push notifications as you want to send customers.
Tips & Best Practices for Push Notifications
As with any type of digital marketing campaign or marketing channel, it’s smart to establish a push notification strategy.
First, consider using them for different types of content. Aside from holiday sale promotions, you could use push notifications to promote new products, blog posts, case studies, company updates, and more.
To help leverage shoppers’ Fear Of Missing Out (FOMO), create a sense of urgency by adding a limited-time offer disclaimer to your messages. Use actionable calls to action to inform subscribers what you want them to do, such as “Shop Now” or “Learn More.”
Adding emojis and personal details, like their name, in the notification title and/or message can also help engage users.
Timing is another important factor to consider when scheduling and sending push notifications. Consider when your target audience and loyal customers are most active to choose the best time to deliver your notifications.
Finally, it’s essential to track the performance of your push notifications. PushEngage’s A/B testing and monitoring functionality can help you understand what’s working so you can optimize opt-ins and lower your unsubscribe rates.
FAQs About Sale Push Notifications
Let’s wrap up with some frequently asked questions.
What’s the ideal length for push notifications?
The ideal length for push notifications is around 10 or fewer words or about 40-50 characters. It’s best to keep them short and sweet because people are more likely to read and click on short, concise notifications.
The maximum character length for push notifications varies depending on the device and platform. Generally, it’s recommended to keep notification titles under 40 characters and body messages under 90 characters. This helps ensure that your notifications are displayed fully on most devices.
Can I send push notifications for specific products only?
Yes, you can send notifications for individual products in your online store. For instance, you can link the notification to a specific product page and/or create discounts that are only valid for chosen items.
How do I segment my subscribers in PushEngage?
To segment your subscribers in PushEngage, go to the Segments section of your dashboard (Audience » Segments). Click Create a New Segment and add one based on your desired criteria, such as email address, purchase history, website activity, and more.
Boost Holiday Sales With EDD + PushEngage
Sending push notifications for holiday sales using Easy Digital Downloads and PushEngage can be a game-changer for your business. By crafting compelling messages, offering discounts, and tracking your success, you can maximize your holiday sales and customer engagement.
Don’t have Easy Digital Downloads yet? Get started in no time:
Want to further prepare your online business for the busy holiday season? Learn how to prevent eCommerce fraud in WordPress.
📣 P.S. Be sure to subscribe to our newsletter and follow us on Facebook or Twitter for more WordPress resources!
Using WordPress and want to get Easy Digital Downloads for free?
Enter the URL to your WordPress website to install.
Disclosure: Our content is reader-supported. This means if you click on some of our links, then we may earn a commission. We only recommend products that we believe will add value to our readers.