Do you want to learn how to install an SSL certificate in WordPress?
In today’s digital landscape, online security is paramount, especially for eCommerce website owners who handle customers’ credit card details and other sensitive information.
An SSL (Secure Sockets Layer) certificate is necessary for establishing a secure connection between your WordPress site and your visitors’ browsers.
Fortunately, adding an SSL certificate to your eCommerce site is relatively simple.
🔎 In this article, I’ll cover:
What Is an SSL Certificate?
WordPress is generally a safe and reliable Content Management System (CMS) for powering online stores. However, no platform is ever entirely 100% protected from the ever-evolving threat of hackers. That’s why it’s important to prioritize WordPress security and take proactive measures to safeguard your site.
An SSL certificate is a digital credential that validates your website’s identity and enables secure communication. Its encrypted connection (using HTTPS protocols) safeguards data transmission, preventing interception and unauthorized access.
SSL certificates act as digital passports. They utilize encryption algorithms to protect the data transferred between your visitors’ browsers and your site’s web server. SSL helps ensure any info exchanged across your site address remains confidential.
The organizations trusted to issue these digital certificates are known as certificate authorities (CAs). When someone visits your site, the CA verifies the certificate’s authenticity and confirms that your certificate is valid.
Why an SSL Certificate Is Important
The implementation of SSL is crucial for WordPress sites. For e-commerce stores, employing an SSL certificate is essential for several reasons. Let’s look at some of the biggest.
Enhance Security & Trust
SSL certificates encrypt data transmission, preventing sensitive customer information from being misused.
They also build trust among users by displaying the padlock icon and “HTTPS” in the site URL/address bar, signaling a secure connection. This differs from websites without SSL using non-secure HTTP where browsers now display a warning message with ERR_CERT_AUTHORITY_INVALID or a similar error:
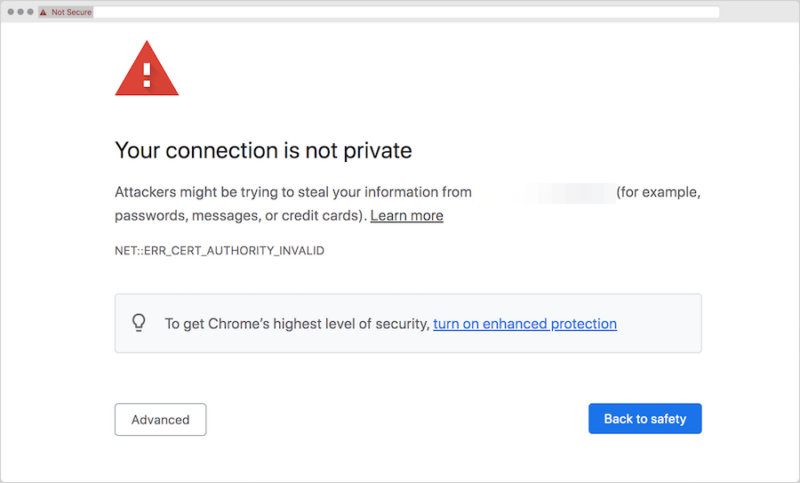
A valid SSL certificate builds digital trust with users, indicating that you value their data privacy and security.
Search Engine Optimization (SEO)
There’s a reason why warning messages are shown for sites without SSL certificates. Search engines like Google prioritize websites with SSL certificates, boosting your site’s ranking in search results.
SSL implementation positively impacts SEO by signaling trustworthiness to search engines. HTTPS sites are favored by search algorithms over HTTP urls, potentially leading to improved rankings.
Payment Gateway Compliance
Another important reason to install an SSL certificate on your e-commerce site is that it’s often necessary in order to accept online payments. Many payment processors require merchants to have an SSL certificate to process online transactions securely.
Overall, SSL offers essential benefits for website security. It protects user data, builds trust, prevents data tampering, and mitigates phishing attempts, fostering a secure online environment.
Types of SSL Certificates
SSL certificates come in different types and levels of validation to suit various budgets and needs, such as how many domains you want to secure and the sensitivity of the data you’re transmitting.
A single-domain certificate is only valid for one domain. You can’t use it for other domains or any subdomains. For that, you would need a multi-domain certificate, which can cover validation for as many as 100 domains.
Another popular option is wildcard SSL certificates. With this type, you can secure a single domain and multiple subdomains.
There are also varying levels of validation.
- Domain Validation (DV): This is the most basic level of validation. It only verifies that you own the domain name of the website that you are using the certificate for.
- Organization Validation (OV): This level of validation verifies that you own the domain name of the website and that you are the authorized representative of the organization that is using the certificate.
- Extended Validation (EV): This is the highest level of validation. It verifies that you own the domain name of the website, that you are the authorized representative of the organization that is using the certificate, and that your organization is legitimate.
Each offers varying levels of trust and security. Assess your website’s needs to choose the most suitable SSL certificate.
Where to Get an SSL Certificate
There are various methods for obtaining an SSL certificate, with the main options being via:
- Certificate Authority (CA)
- Web hosting provider
- Domain registrar
As I mentioned earlier, CAs are dedicated SSL providers that specialize in issuing and managing SSL certificates, usually for free.
One of the most popular CAs that offers free SSL certificates is Let’s Encrypt:
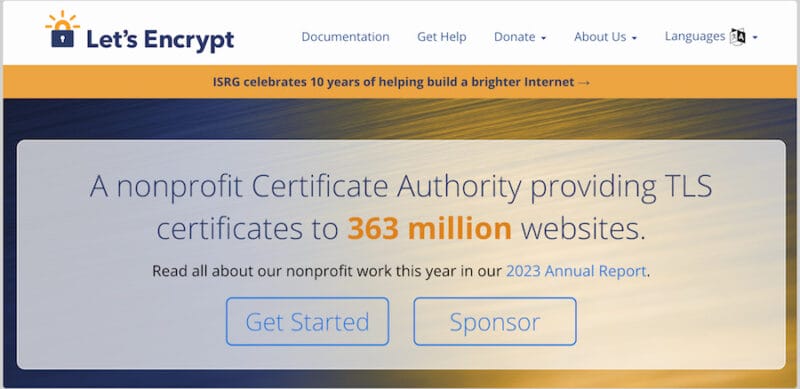
It’s a free, open-source CA that is widely used by websites of all sizes. Other well-known options include Comodo, GeoTrust, GlobalSign, and DigitCert.
Most WordPress hosting providers offer Let’s Encrypt SSL certificates for free with their plans. Some domain registrars, like GoDaddy and Namecheap, offer SSL certificates alongside domain registration and hosting services.
Typically, the quickest and easiest way to get a WordPress SSL certificate is to go through your hosting provider. But if they don’t provide that option or you prefer to handle the process manually yourself, you can get the certificate directly from Let’s Encrypt (or your CA of choice).
I’ll explain the process for both below.
How to Install an SSL Certificate in WordPress
The step-by-step tutorial for installing an SSL certificate on your WordPress site depends on the method you’re using.
First, I’ll cover the process for going through your WordPress hosting provider. Then I’ll get into the more complex option of manual installation.
Install an SSL Certificate from WordPress Host
For the following sections, I’ll be using SiteGround as an example. The process can vary depending on your specific provider.
Also, keep in mind that SSL certificates aren’t the only factor to consider when choosing a host. You also need to take into account pricing, speed and performance, etc.
Step 1. Choose Your WordPress Hosting Provider
If you haven’t already, the first step is to select and purchase a hosting plan from a provider that offers free SSL certificates.
For e-commerce sites selling digital products, I recommend SiteGround Managed hosting plans:

In addition to free SSL certificates, you get the Easy Digital Downloads plugin for digital selling, a handful of growth and optimization tools, and a pre-installed setup wizard.
Other hosts that offer free WordPress SSL certificates include:
If you’re already using one of these hosts, you can get a certificate from your hosting account.
Step 2. Install Your SSL Certificate
Next, install your certificate. As I mentioned, the exact process will depend on your host and what SSL functionality and features are included in your plan.
Some hosting companies include one-click installation within their control panels (like cPanel or Plesk). Others provide easy-to-follow instructions. In some cases, they may automatically handle the process for you.
If you’re unsure where to start, look within the Security section of your hosting dashboard.
For instance, with SiteGround, go to Site Tools » Security » SSL Manager:
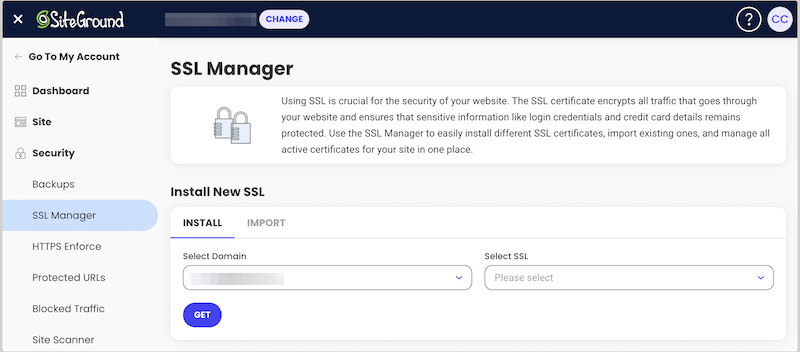
On this screen, select your domain, then the type of certificate you want to use:

In this instance, I have a few options and will choose Let’s Encrypt.
Select Get.
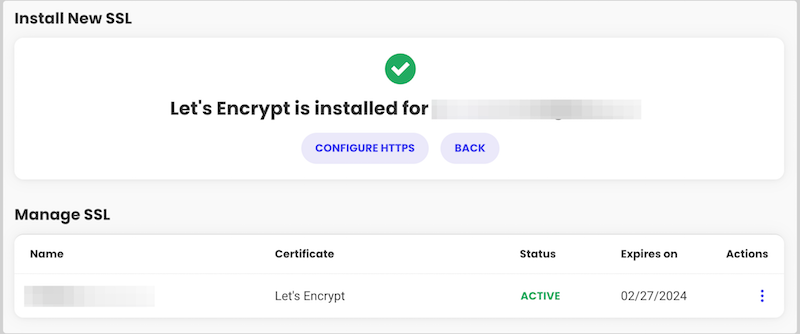
When it’s finished processing, you’ll see a success message:
Step 3. Configure HTTPS
The only thing left to do is configure the settings to enforce HTTPS. This is to ensure your WordPress address URL works over the encrypted and secure HTTPS connection.
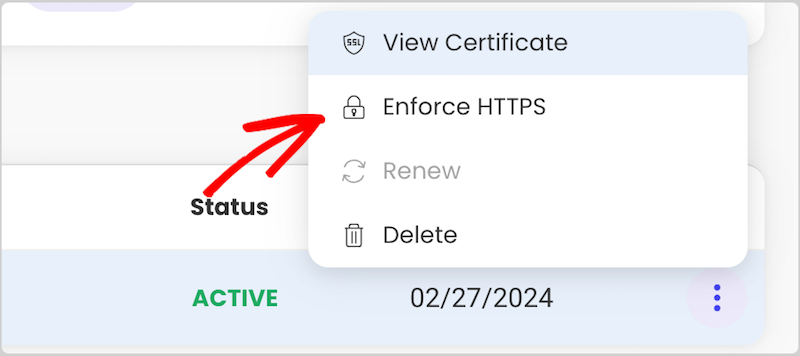
Click on the three vertical dots under the Actions column followed by Enforce HTTPS:
On the next screen, click to enable the HTTPS Enforce switch:

That’s it!
If you’re having trouble locating your free SSL option or completing the installation process, reach out to your hosting support team for more in-depth guidance.
Manually Install an SSL Certificate (Plugin)
For those looking for a more hands-on approach, manual SSL installation is an option. If you’re not technically savvy and aren’t comfortable working with your server/site files, I recommend using the Really Simple SSL plugin:

This WordPress plugin helps site owners install SSL certificates with ease. They provide free Let’s Encrypt certificates via a simple setup wizard, or you can manually import one you purchased.
You’ll still need to configure more settings than you would with a one-click option from a hosting provider. However, it’s more straightforward and beginner-friendly than editing the server files directly.
You can use this list to check whether your host supports installing Let’s Encrypt certificates via Really Simple SSL.
Step 1. Select Your CA & Certificate
To start, you’ll need to decide what type of SSL certificate you want and which CA to use. These both affect the pricing, CA options, etc.
Generally, you’ll need to request an SSL certificate from a CA by generating a Certificate Signing Request (CSR) and submitting it for verification. However, if you want a basic and free Let’s Encrypt certificate via Really Simple SSL, jump to the next step.
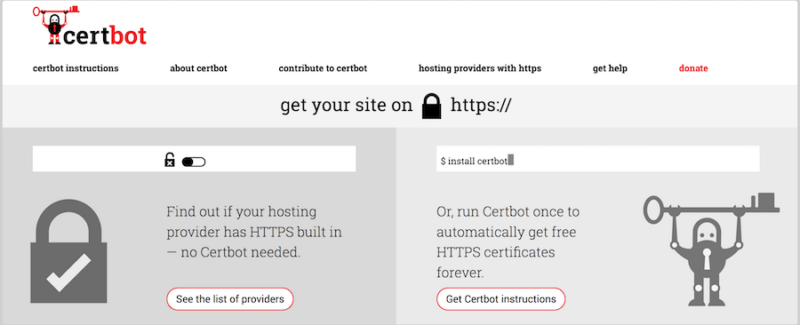
This aspect can vary depending on your web host, operating system and server, and whether you have shell access. If you’re confused or don’t know where to start, you can use Certbot:
When you’re requesting your certificate, you’ll need to have some info on hand, including:
- IP address
- Server username
- User password or SSH key authentication
- Software (i.e. Apache, Nginx, IIS, etc.)
The verification process could take a bit. But when you’re verified, you should receive three important certificate files (.crt, private key file, and CA bundle file). These files make up your SSL certificate.
Step 2. Configure the Really Simple SSL Plugin
If applicable, install the Really Simple SSL plugin.
From your WordPress dashboard, go to Plugins » Add New Plugin. Search for the plugin, then select Install Now followed by Activate.
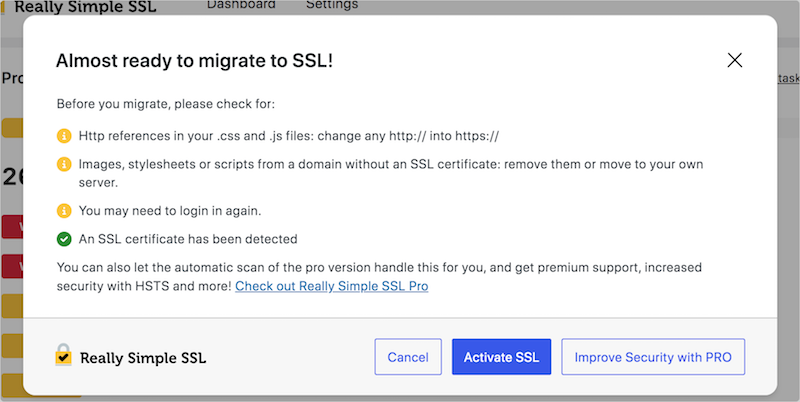
The Let’s Encrypt Wizard should launch automatically. If your host supports free automatic installation, you should be able to activate the SSL certificate:
Otherwise, select Install SSL Certificate (also available under Settings » SSL & Security):
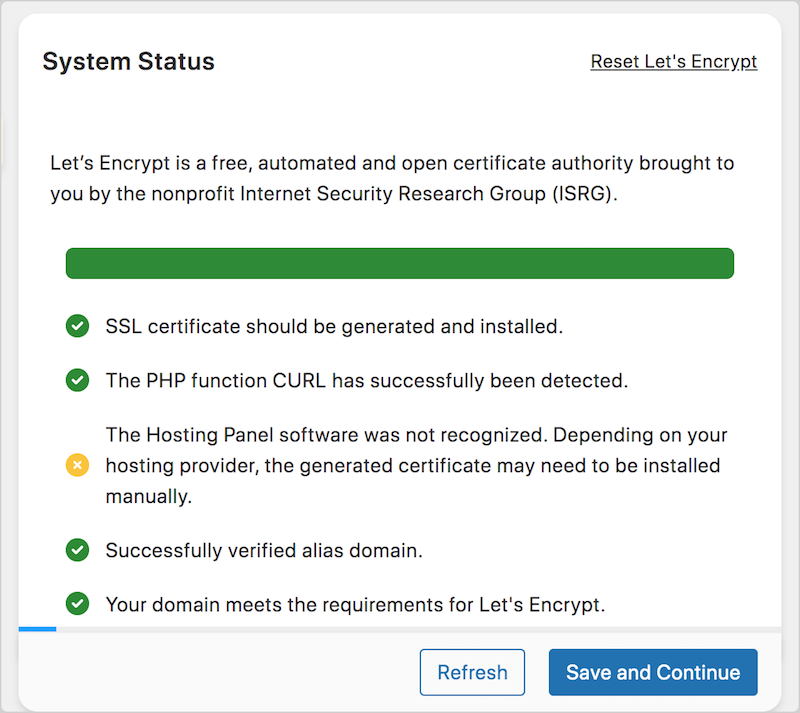
During the system status check, the Wizard detects and verifies whether your domain and website meet the Let’s Encrypt requirements, including:
- Any currently active certificates
- PHP version
- Type of server software (cPanel, Plesk, etc.)
- Alias domains
For the general settings, enter your email address and agree to the terms of service. You may also be asked to enter your hosting credentials. Remember to click Save between each step.
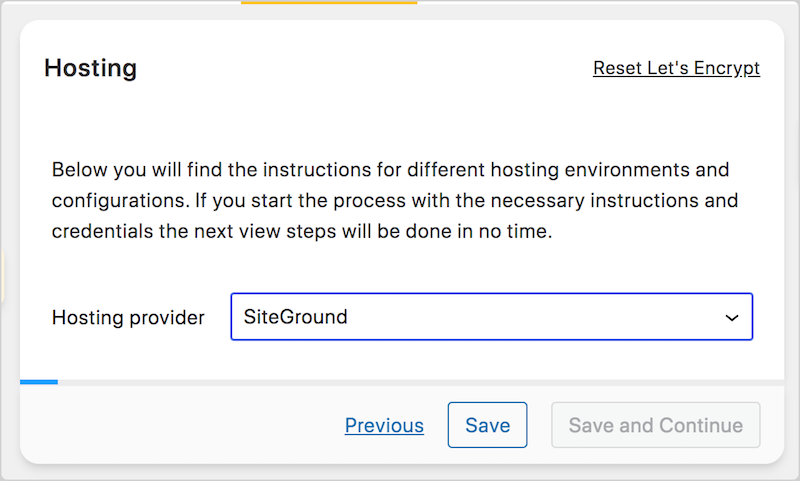
Next, your hosting provider from the dropdown list:
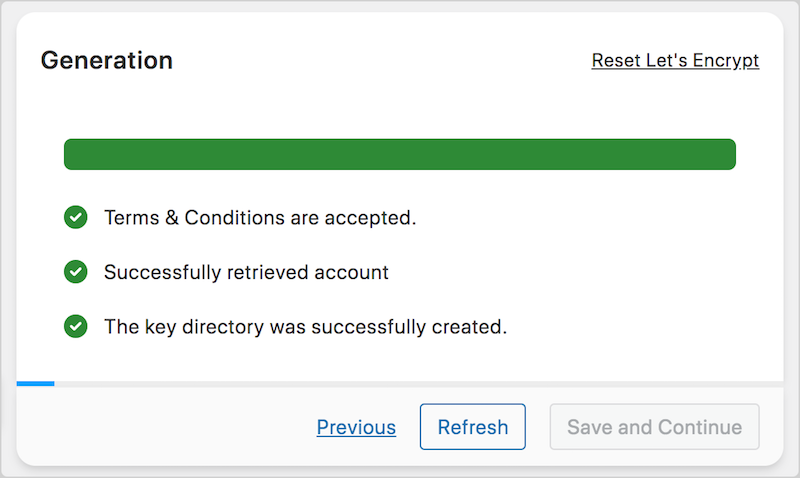
If there aren’t any issues, it successfully completes the SSL generation:
Step 3. Install & Active Certificate
During installation, the plugin informs you whether the SSL certificate can be installed automatically or must be done manually.
If it’s the latter, you likely need to upload the CRT, KEY, and BUNDLE files to your hosting environment before proceeding.
Generally, you’ll need to log into your hosting account control panel and locate the SSL/TLS Manager (or similar section).
Then, from the Really Simple’s Activation tab, individually copy the file contents of each of the three files:
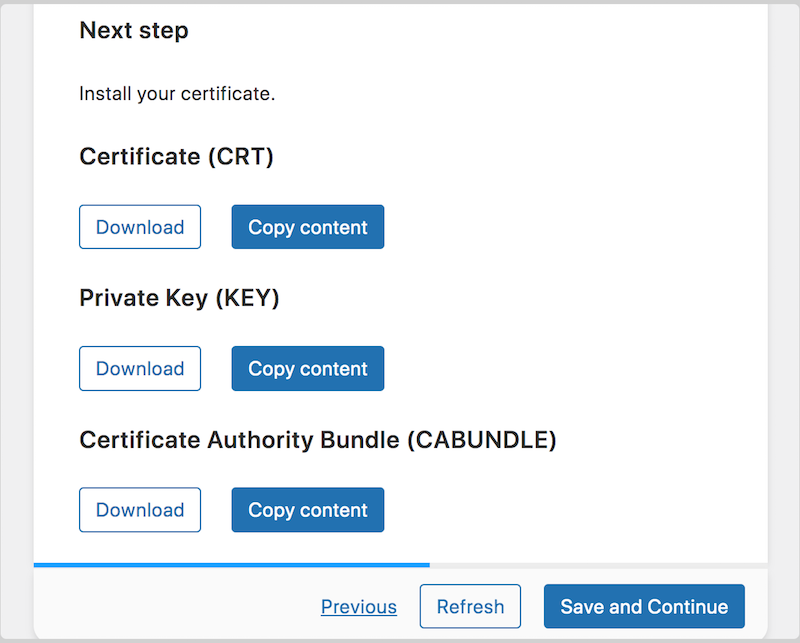
Return to your hosting SSL manager and paste the contents into their respective fields:
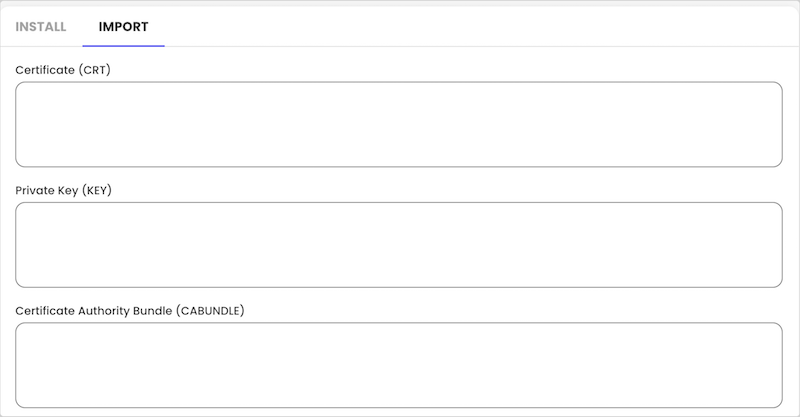
Save the settings to complete the import and installation. Return to the Let’s Encrypt Wizard and select Save & Continue.
It detects your SSL certificate, enables it, and updates your site’s settings to use HTTPS. You’ll receive a confirmation message stating that SSL is now activated with HTTPS enabled on your WordPress site:
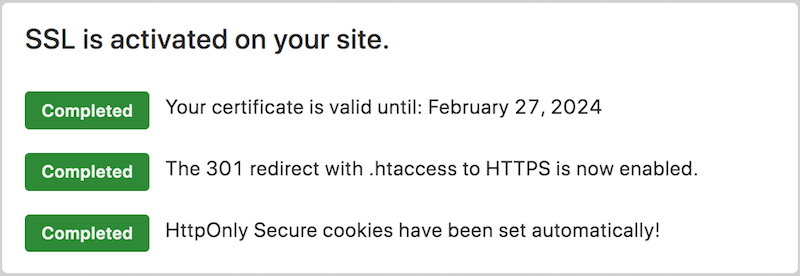
Congrats! You’ve now learned how to install an SSL certificate on your WordPress site.
Tips for After You Install an SSL Certificate
Implementing SSL isn’t just about installation—it involves ongoing maintenance. Adhering to best practices, such as keeping certificates up to date, regularly checking for vulnerabilities, and using strong encryption, ensures robust security for your WordPress site.
After the installation process, verifying the SSL certificate’s successful integration is essential. To confirm that SSL is working correctly, visit your website using “https://” in the URL. Ensure that the padlock icon appears in the browser’s address bar, indicating a secure connection.
Diagnostics tools like DigiCerts SSL checker can confirm if the certificate is properly installed and functioning:
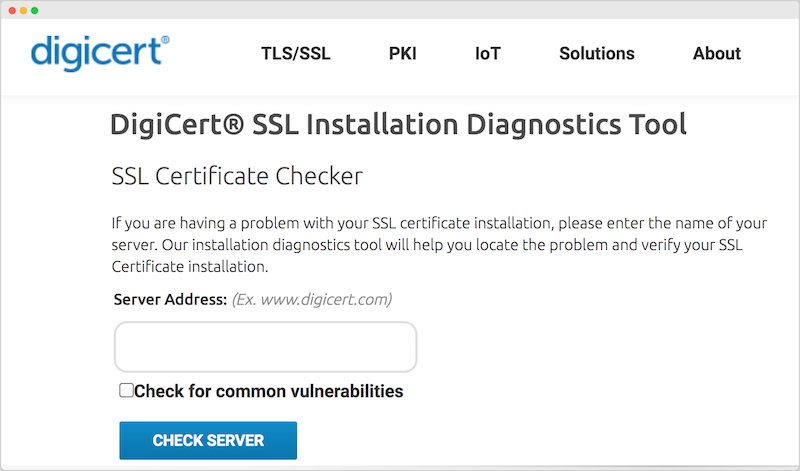
Despite successful installation, issues may arise. Troubleshooting common problems, such as mismatched certificates or mixed content errors and warnings, ensures a smooth functioning SSL setup.
Finally, it’s important to remember that SSL certificates have expiration dates. Understanding the renewal process and setting reminders for timely renewal is crucial to prevent lapses in website security due to expired certificates.
FAQs About SSL Certificates
Let’s wrap up with some frequently asked questions about how to get an SSL certificate and what to know in order to properly maintain one.
How do I know if my site doesn’t have an SSL certificate?
The absence of an SSL certificate is often indicated by a red warning message in browsers, stating that the connection is not secure. This appears instead of a padlock icon in the browser bar when you visit a URL.
Can I install an SSL certificate myself?
Yes, you can install an SSL certificate yourself, but it’s often easier to have your hosting provider assist you.
How much does an SSL certificate cost?
The cost of an SSL certificate varies depending on the provider and the certificate type, validation level, and duration. DV SSL certificates are typically free or low-cost, while OV and EV SSL certificates are more expensive. You can typically expect to pay between $5-$500 or $500-$1,000 per year for an SSL certificate.
How long does an SSL certificate last?
The validity period of an SSL certificate typically ranges from one to three years. Upon expiration, you’ll need to renew it in order to continue using it.
Add an SSL Certificate for Better Site Security
Adding an SSL certificate to your WordPress website is a crucial step towards enhancing security, building trust, and boosting your eCommerce business’s success.
🔒 What’s next? To further protect your site, learn how to prevent eCommerce fraud in WordPress.
If you haven’t already, grab an Easy Digital Downloads pass to access to plenty of eCommerce extensions, including ones that can help safeguard your site:
📣 P.S. Be sure to subscribe to our newsletter and follow us on Facebook or Twitter for more WordPress resources!
Using WordPress and want to get Easy Digital Downloads for free?
Enter the URL to your WordPress website to install.
Disclosure: Our content is reader-supported. This means if you click on some of our links, then we may earn a commission. We only recommend products that we believe will add value to our readers.
2 comments
Comments are closed.
Thank you for this helpful post. I do have a question though : My web host is O2Switch. It provides a Let’s Encrypt certificate for free with my hosting plan.
I want to install the Really simple SSL plugin on my wordpress to “double” the security. Is it a good idea or is it going to create some trouble on my site ? (or is it useless ?)
Thank you for your help 🙂
Hi Sonia! You can only have one SSL certificate for your site, so if you have an active Let’s Encrypt you’re likely covered and don’t need the Really Simple plugin. It could only help if you needed help enabling HTTPS or fixed mixed content errors. But SSL certificate wise, there’s no need for both. Feel free to reach out to our support team if you need further help with this! 🙂