
Do you want a quick and easy way to add WordPress custom fields to your eCommerce site?
You’ve come to the right place! Easy Digital Downloads (EDD) is a complete eCommerce solution you can use to create, customize, and optimize your online store, even as a beginner.
🔎 In this article, we’ll cover:
What Are WordPress Custom Fields?
Before we dive into adding custom fields to your eCommerce site, it’s important to understand what custom fields are and how they work in WordPress.
WordPress custom fields are a feature that lets you add additional information to your posts, pages, and other areas of your website. In the context of eCommerce sites, custom fields come into play typically for checkout pages.
Regardless of which eCommerce plugin you use, you may want to tailor the checkout process better to fit the specific needs of your business and customers. Adding WordPress custom fields to your checkout page and payment forms is a quick and easy way.
Custom fields offer a wide range of benefits, including an enhanced user experience. Custom fields can be used to collect extra information from your customers and/or for your products, such as special requests or specifications, attached files, customizations, etc. It can be an excellent way to collect information for custom deliverables.
How to Add WordPress Custom Fields to Your Site
Ready to get started? Below, we’ll show you how to add WordPress custom fields to your eCommerce site using Easy Digital Downloads.
Step 1: Get Easy Digital Downloads
If you haven’t already, the first step is to download and install and activate the Easy Digital Downloads plugin:

This is the best WordPress eCommerce plugin for selling digital downloads and goods. It’s the ideal alternative to WooCommerce if you don’t sell physical goods and products.
There is a free version. However, to get instant access to the Checkout Fields Manager add-on that we’ll use to add WordPress custom fields in the next step, you’ll want to upgrade to EDD Pro. You can grab a pro version license from the pricing page.
That is our promise. Most eCommerce solutions limit your creativity
…not Easy Digital Downloads!
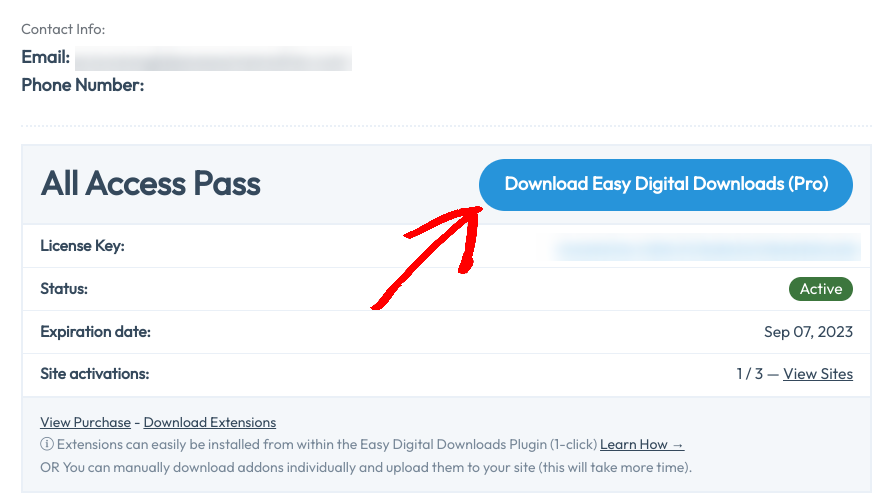
After you get your pass, you can download the EDD Pro WordPress plugin from your account dashboard:
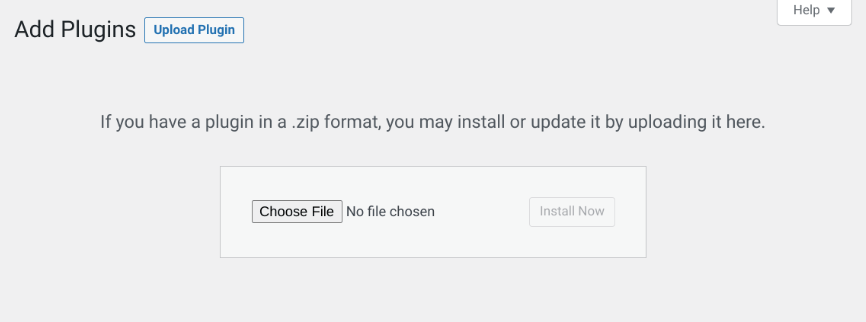
Next, you can upload the zip file to your WordPress dashboard (Plugins » Add New » Upload Plugin » Choose File):
If you need help installing a plugin in WordPress, WPBeginner has a great tutorial.
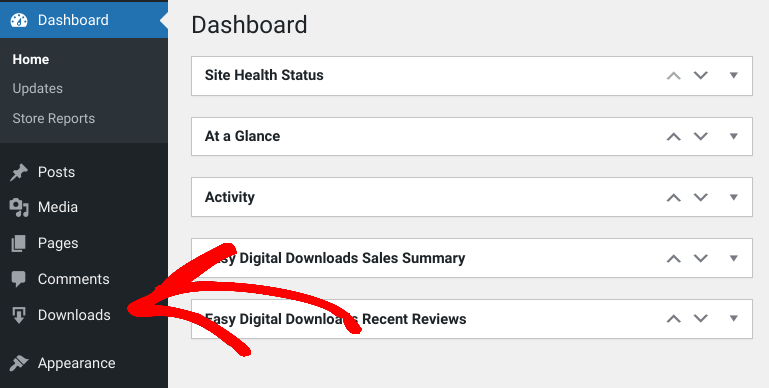
Upon activation, a Downloads menu item appears:
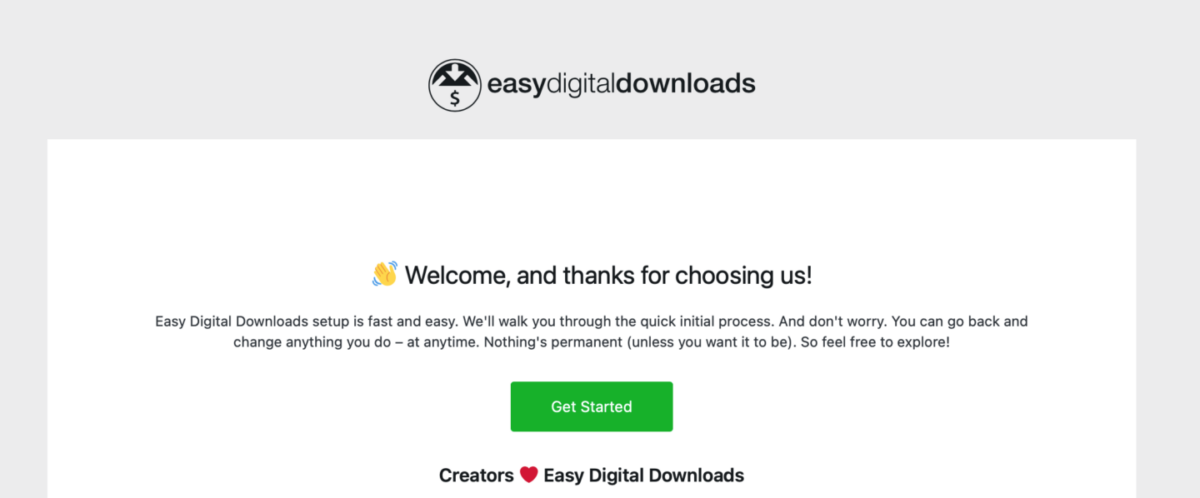
You can follow the Onboarding Wizard to complete the initial key steps to get your store set up:
The plugin automatically creates a checkout page for you (Pages » Checkout). If you need help, you can check out our EDD Quickstart Guide.
Step 2: Install the Checkout Fields Manager Add-On
Next, you can install the Checkout Fields Manager extension:

If you have a premium license, the easiest way is to go to Downloads » Extensions directly from your WordPress dashboard. Search for Checkout Fields Manager, then select the Install button.
To begin adding WordPress custom fields to your checkout page, you can go to Downloads » Checkout Form:
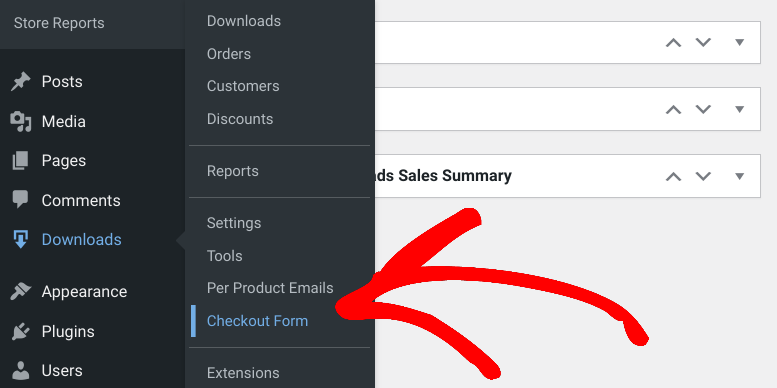
For guidance using this add-on, refer to our Checkout Fields Manager documentation.
Step 3: Add & Configure WordPress Custom Fields
Next, you can select the WordPress custom fields you want to add to your checkout page:
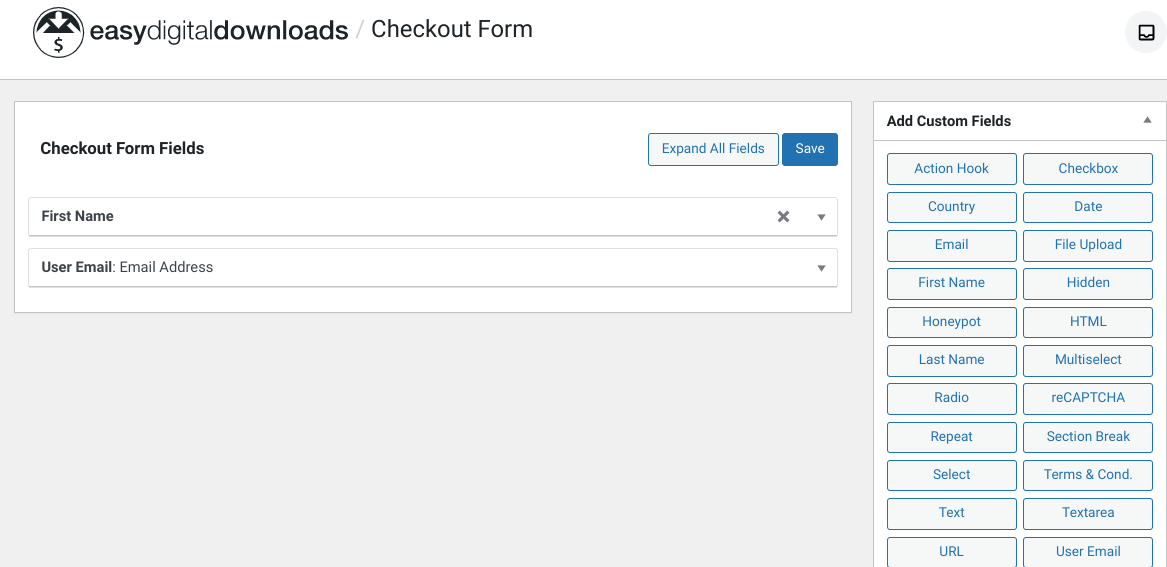
You can drag and drop the field to the desired location on your checkout page. You can also change the order of the fields by dragging them up or down.
There are 22 custom field types supported. If you want to add more sophisticated functionality, you can add custom fields with conditional logic. You can refer to our documentation for a full list of conditional logic fields.
When you’re done, click on the Save button.
That’s it!
FAQs About WordPress Custom Fields
What types of custom fields can I add to my Easy Digital Downloads checkout page?
The EDD Checkout Fields Manager extension allows you to add various types of fields, including text fields, email fields, phone fields, dropdown menus, radio buttons, checkboxes, and more.
Can I make custom fields required for checkout?
Yes, you can choose whether a custom field is required or optional when creating the field.
How many custom fields can I add to my checkout page?
There is no limit to the number of custom fields you can add to your checkout page using the EDD Checkout Fields Manager extension. However, it’s important to only add the necessary fields to avoid overwhelming your customers with too many questions.
Use EDD to Get WordPress Custom Fields for Your Site
Adding custom fields to your Easy Digital Downloads checkout page can provide valuable information about your customers and improve their shopping experience.
With the Easy Digital Downloads + Checkout Fields Manager extension, adding custom fields is easy and straightforward. Follow the step-by-step instructions outlined above, and you’ll be able to add WordPress custom fields to your eCommerce site with ease.
eCommerce without limits!
That is our promise. Most eCommerce solutions limit your creativity
…not Easy Digital Downloads!
📣 P.S. Be sure to subscribe to our newsletter and follow us on Facebook or Twitter for more WordPress resources!
Using WordPress and want to get Easy Digital Downloads for free?
Enter the URL to your WordPress website to install.
Disclosure: Our content is reader-supported. This means if you click on some of our links, then we may earn a commission. We only recommend products that we believe will add value to our readers.