Are you looking for the best way to sell large files in WordPress?
WordPress and Easy Digital Downloads is a powerful combination for creating an eCommerce store and selling digital products. But if plan to sell large files, it’s important to do so in a way that won’t hurt the speed or security of your site.
Fortunately, this is easy to do. With the right tools, you can optimize and use your website for really large files without sacrificing performance.
🔎In this post, we’ll cover:
Why Sell Large Files With WordPress and EDD?
As one of the most popular Content Management Systems (CMSs) available, WordPress is an excellent choice for creating a website. In addition to being easy to use and customize, there are a variety of eCommerce plugins to choose from.
For physical products, you could use WooCommerce. To sell digital files and downloadable goods, the best plugin to use is Easy Digital Downloads (EDD):

With EDD, you can sell nearly any type of digital product or file you can think of. This includes:
- Open Source Software
- eBooks
- Video and audio files
- WordPress themes and templates
- PDFs, documents, and spreadsheets
- Much more
✅ For a full guide, refer to How To Sell Files Online (Best Way + Comparisons)
As a WordPress user, you can choose a secure hosting plan with enough storage space to accommodate your needs. Many managed web hosting providers offer multiple server options depending on the size and amount of files you intend to sell.
➡️ Click here to get SiteGround hosting + WordPress + EDD set up for you
Additionally, a digital eCommerce WordPress plugin like EDD lets you integrate with third-party cloud storage services like Dropbox or Amazon Simple Storage Service (Amazon S3). These platforms offer secure file hosting, storage, and delivery to help you save space on your WordPress server.
Some of the benefits of this approach include:
- Fast download speeds
- Secure storage
- Reliable uptime
- Seamless sharing and selling
You can use EDD and WordPress to sell downloadable products, set up discounts, track orders and customers, and integrate with email marketing and other third-party tools. With these features in place, you’ll have a complete eCommerce store perfect for selling large files online.
How to Sell Large Files in WordPress (Step By Step)
Ready to learn how to sell large files in WordPress? In this step-by-step guide, we’ll walk you through how to do it in four simple steps:
- Install Easy Digital Downloads
- Add a File Store Extension
- Connect Your Site and Storage Platform
- Create Your File/Digital Product
Note that for the following tutorial, we’ll assume you already have a Dropbox or Amazon S3 account. If you need help setting up an account with either, you can refer to that platform’s documentation.
Step 1: Install Easy Digital Downloads
If you haven’t already, the first step is to buy, download, and install Easy Digital Downloads:
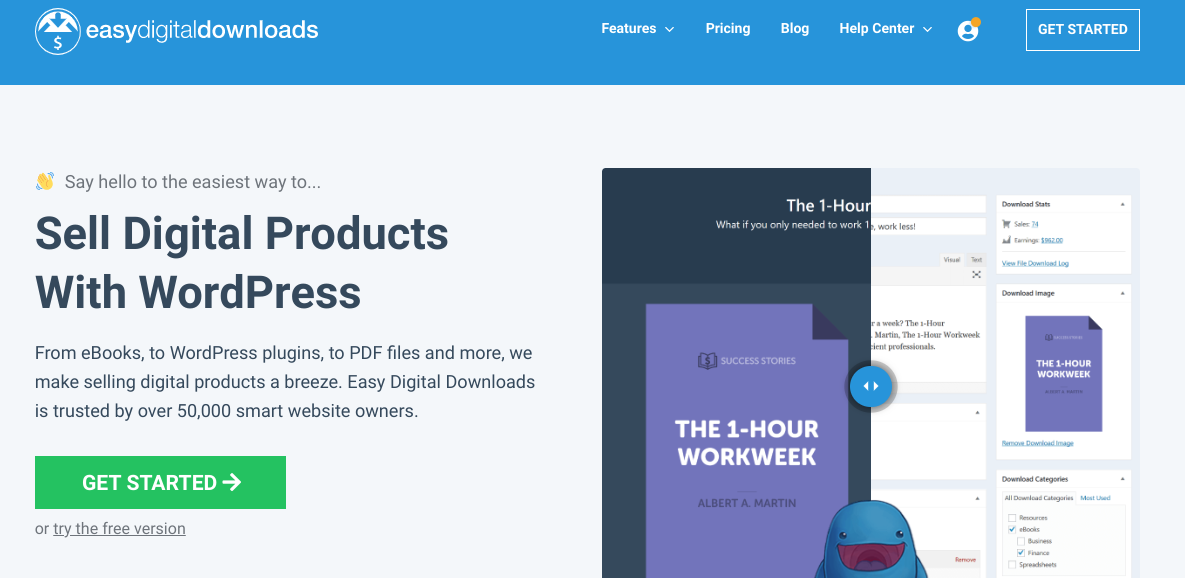
There is a free version of the plugin available. But we recommend grabbing an EDD Extended Pass to access all our premium extensions for your eCommerce platform. This includes Dropbox File Store and Amazon S3 (more on that in a moment).
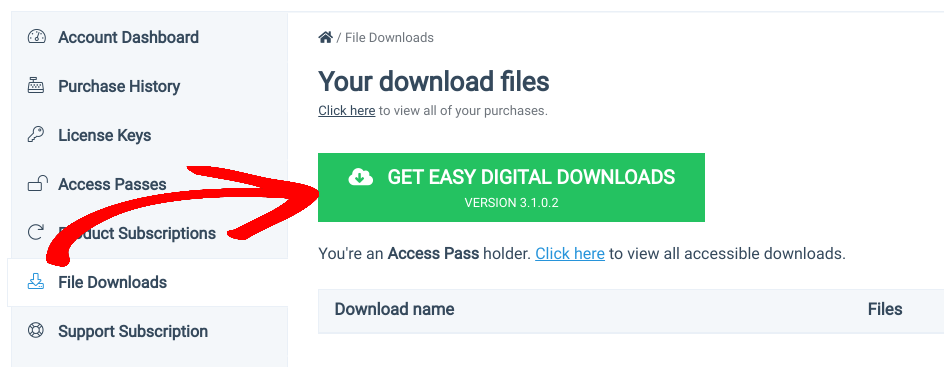
Once you register your account, you can download the plugin by going to the File Downloads tab of your dashboard. Then click on Get Easy Digital Downloads:
Next, upload it to your WordPress website. Navigate to Plugins » Add New » Upload Plugin » Choose File:
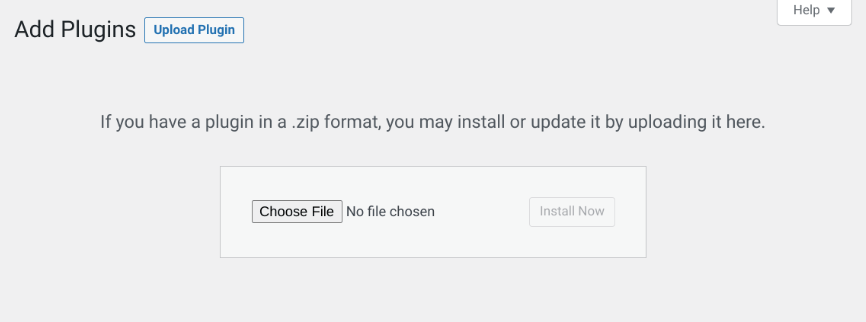
After you upload the zip file, select the Install Now and Activate Plugin buttons. You’ll see a new Downloads menu item added to your WordPress dashboard:
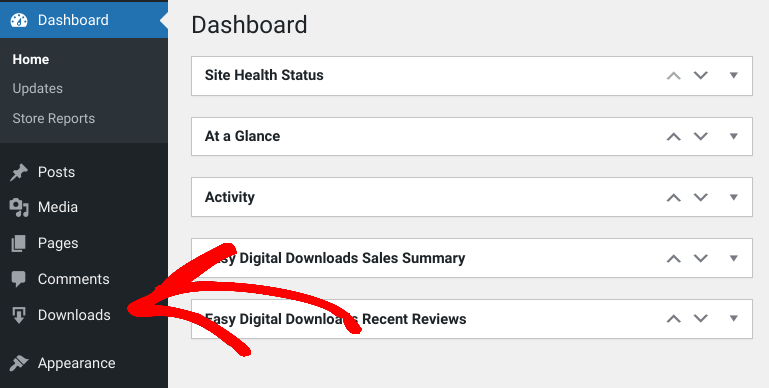
We won’t get into step-by-step instructions here. But there are a handful of important setup tasks to address. This includes entering your store details, selecting a payment gateway, and choosing a theme.
⚙️For help getting started, you can refer to:
Step 2: Add a File Storage Extension
Once you have your online store set up, the next step is to install a file storage extension. The two main options are Amazon S3 and Dropbox File Store.
These EDD extensions let you upload and store your files in the cloud. Then you can generate a download link or Buy Now button for customers to purchase the file on your WordPress site.
The steps for configuring the extension vary slightly depending on which you’re using. Regardless, to start, go to Downloads » Extensions » All from your WordPress dashboard:
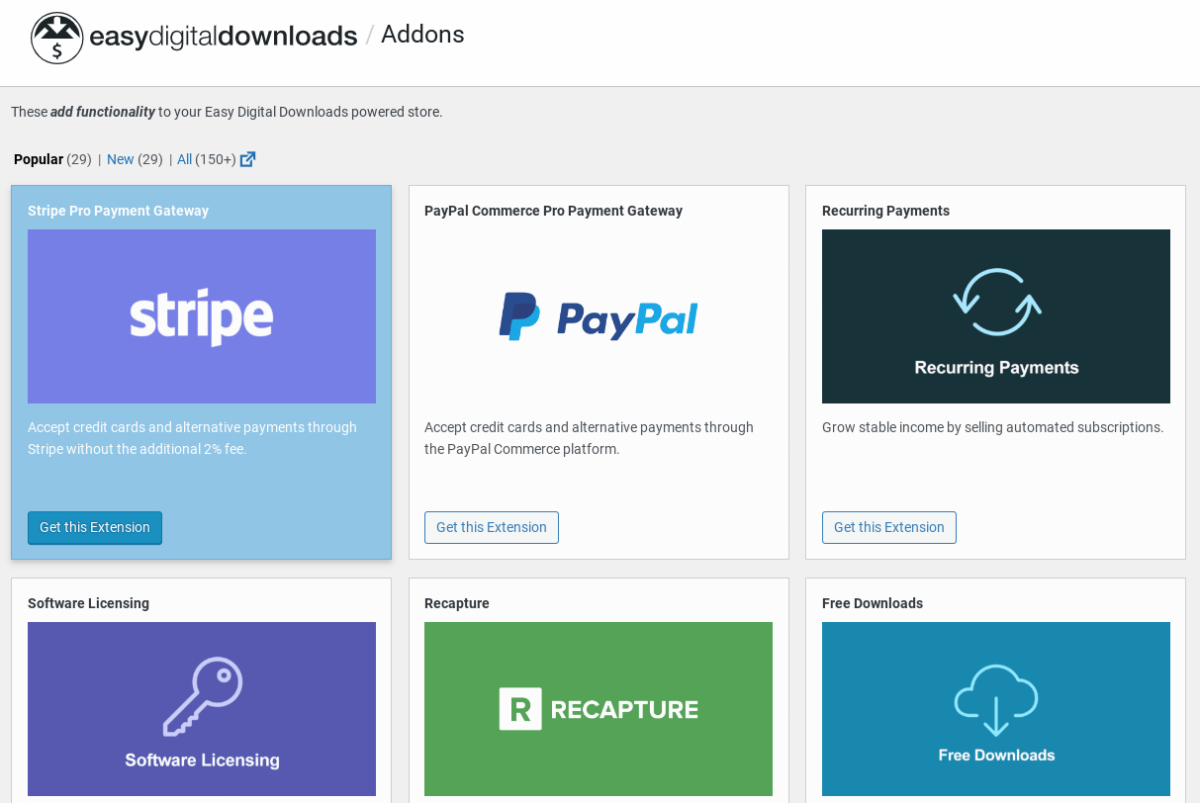
You’ll be redirected to the EDD Extensions page. There are tons of addons you can use to enhance all aspects of your eCommerce site. This includes tools for SEO optimization, selling subscriptions, automating email lists, integrating with Google Analytics, and more.
Search for the addon (Dropbox/Amazon S3) you want to install and click on Download Now:
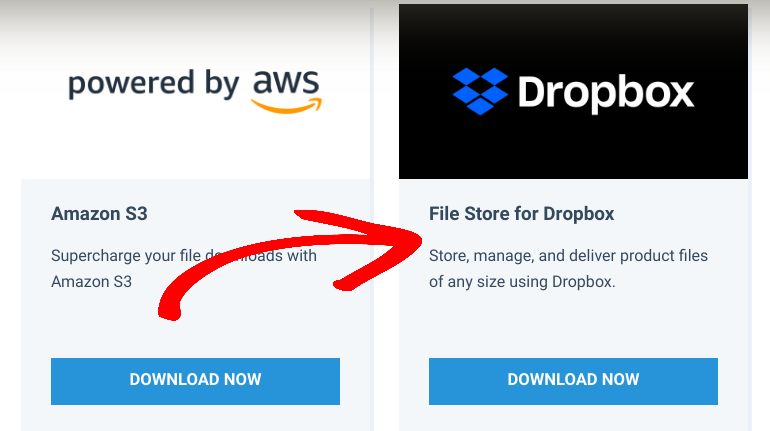
Then you can upload it to your WordPress site like you did the EDD plugin. Remember to activate it.
Step 3: Connect EDD and File Storage Platform
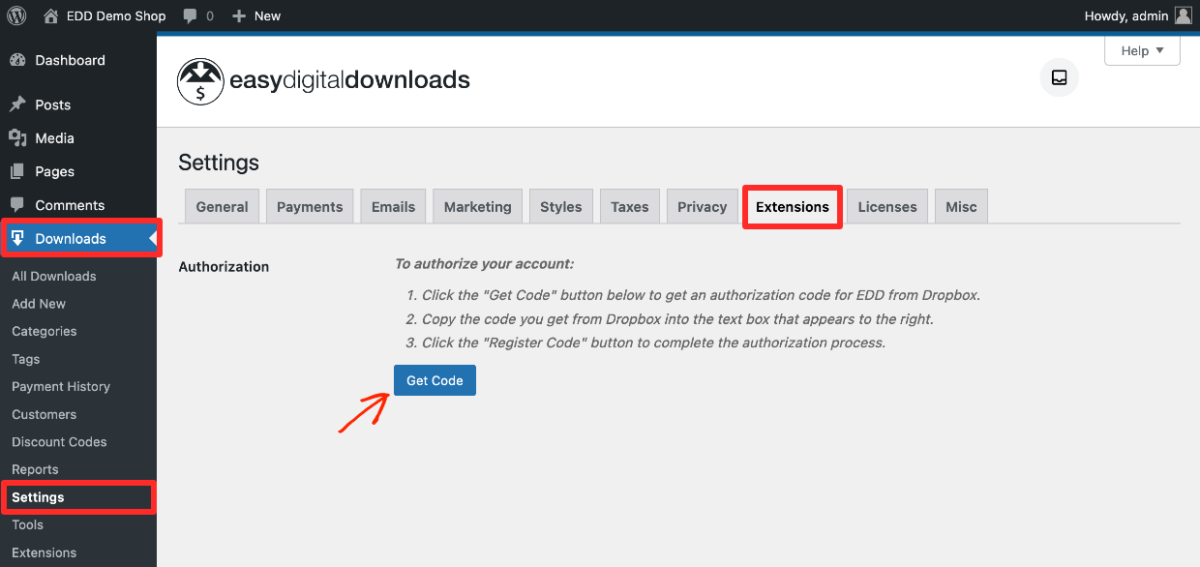
Next, we’ll configure the extension settings to link your WordPress site to Dropbox/Amazon. Go to Downloads » Settings » Extensions from your WordPress dashboard:
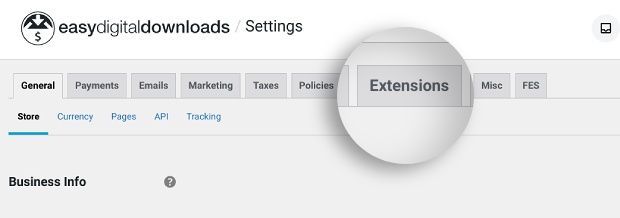
Let’s start with the Dropbox extension setup. Select Dropbox, then click the Get Code button:
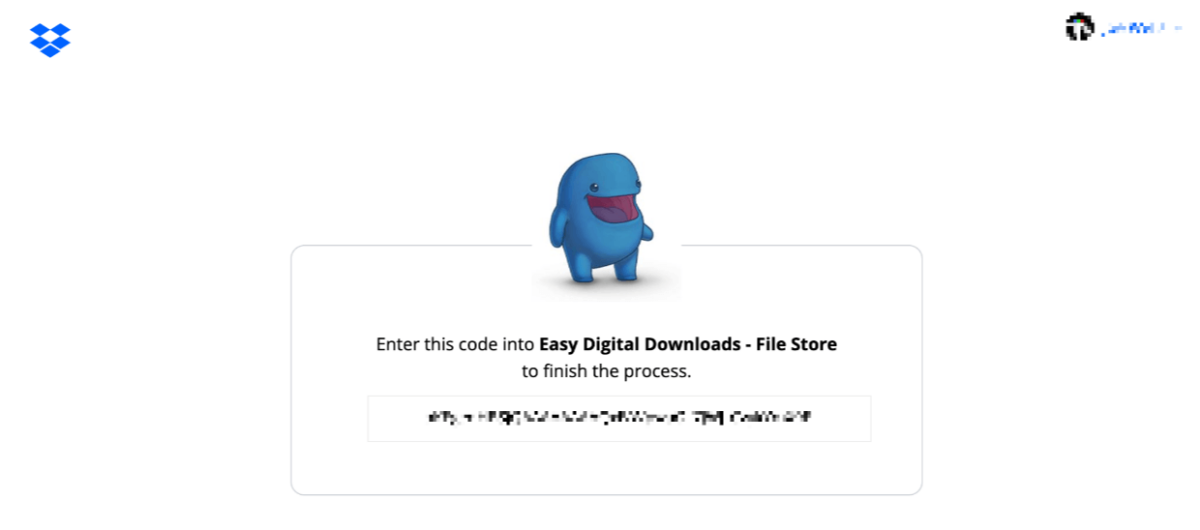
In the new window that opens, you can log in to your Dropbox account and authorize Easy Digital Downloads – File Store to access the files and folders. After you click Allow, copy the code it provides:
Return to your WordPress Dropbox settings screen, paste the code in the text field, and select Register Code:
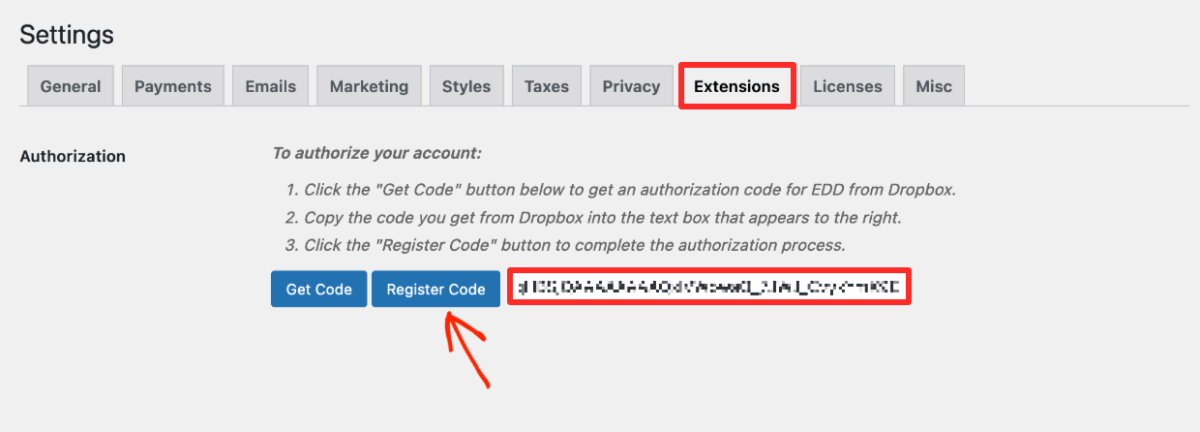
When you’re done, click on Save Changes.
Alternatively, you could select Amazon S3 under Extensions:
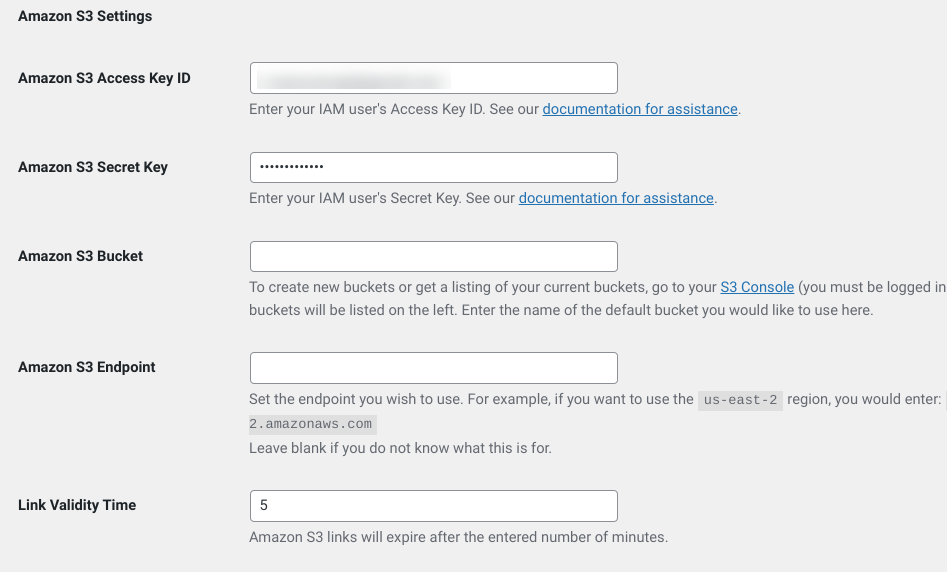
On this screen, you’ll need to enter:
- Access Key ID
- Secret Key
- Default bucket
- Amazon S3 host (optional)
- Link expiry time (optional)
For in-depth guidance on each setting, you can refer to our Amazon S3 extension setup documentation.
Regardless of which file storage extension you use, you can also configure the file download and delivery settings. Go to Downloads » Settings » Misc » File Downloads:
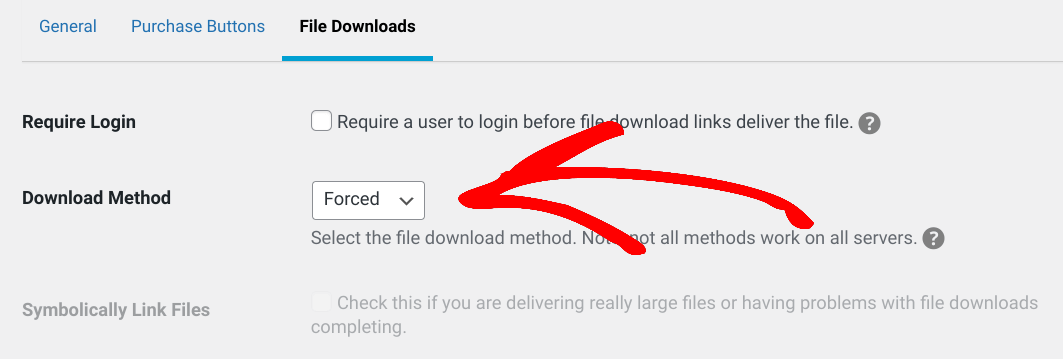
Under the Download Method dropdown menu, the two options are Forced or Redirect. We recommend selecting Redirect.
With this method, EDD tells the user’s browser where the file is located (Amazon S3, Dropbox, etc.) and downloads it directly from the server. Then the file opens within the browser. This download method is ideal for selling and delivering large files from third-party platforms.
🔗Learn more about Forced vs Redirect file delivery
Step 4: Create Your File/Digital Product
The last step is to create the product (or “download”) you’ll use to sell the file. Go to Downloads » Add New:
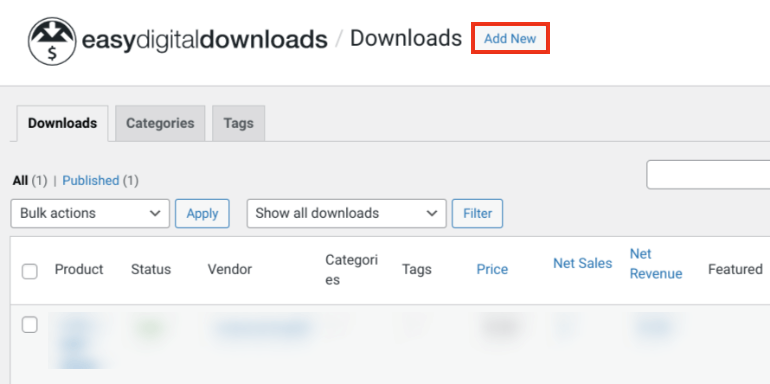
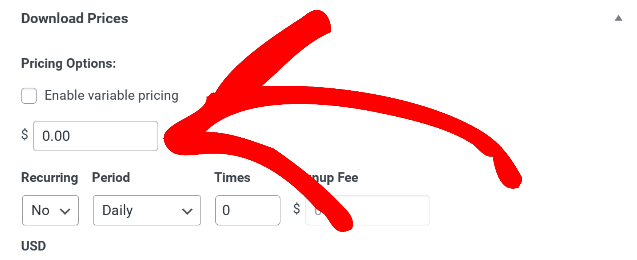
Give it a name/title and add a description. Next, enter a price under Download Prices:
Next, you’ll configure your Download Files settings. This is the file link the customer gets after their purchase:
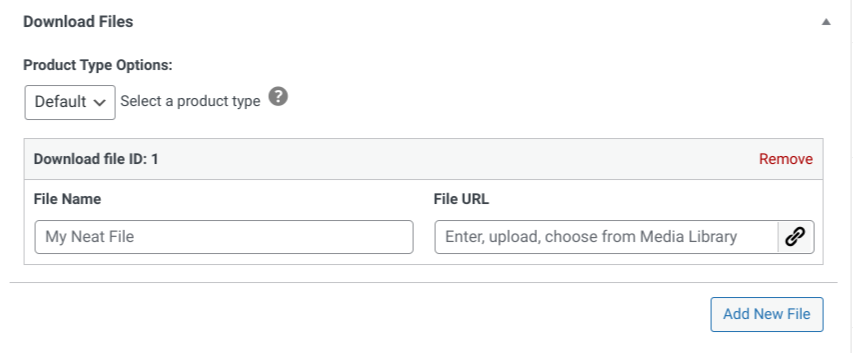
Under File URL, select Upload a File (the link icon). In the Upload Media pop-up panel, there will be a handful of options:
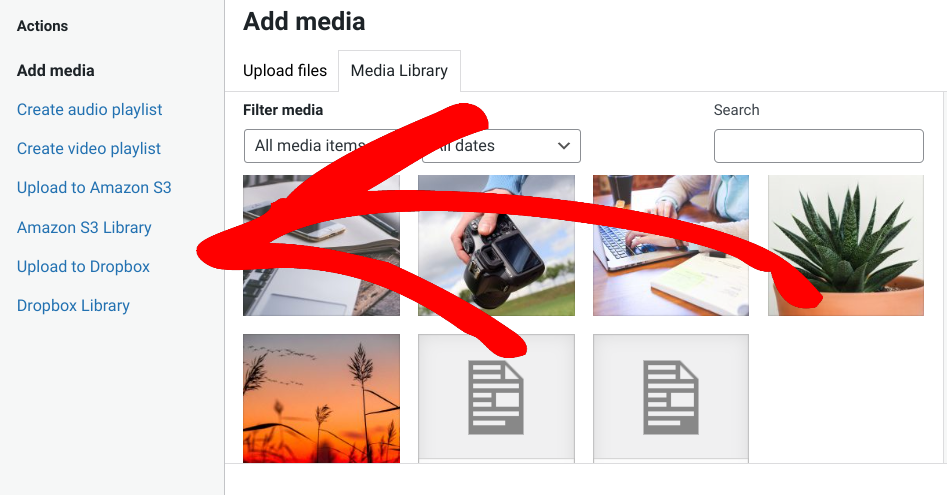
In addition to Media Library, one option is Upload to Dropbox. This setting lets you upload a file from WordPress to your Dropbox account. It bypasses the need to upload your files in your Dropbox folder outside of WordPress.
For the purpose of creating a product to sell large files, click the Dropbox Library option:
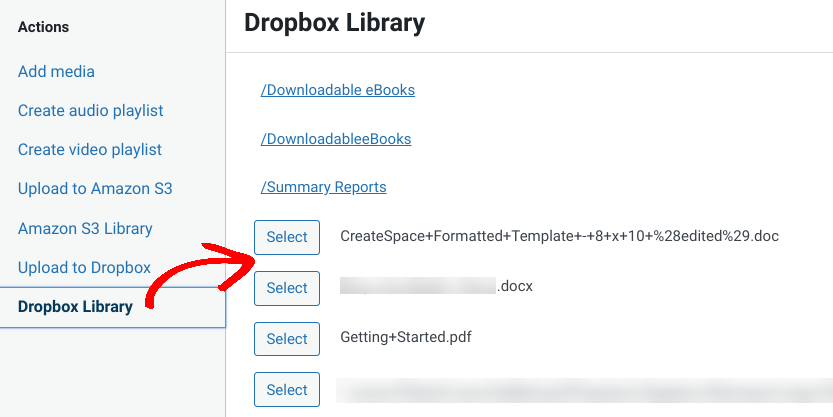
Locate and select the file you have stored in your Dropbox folder that you want to sell. If you’re using the Amazon S3 extension, you’ll find equivalent options (Upload to Amazon S3 and Amazon S3 Library).
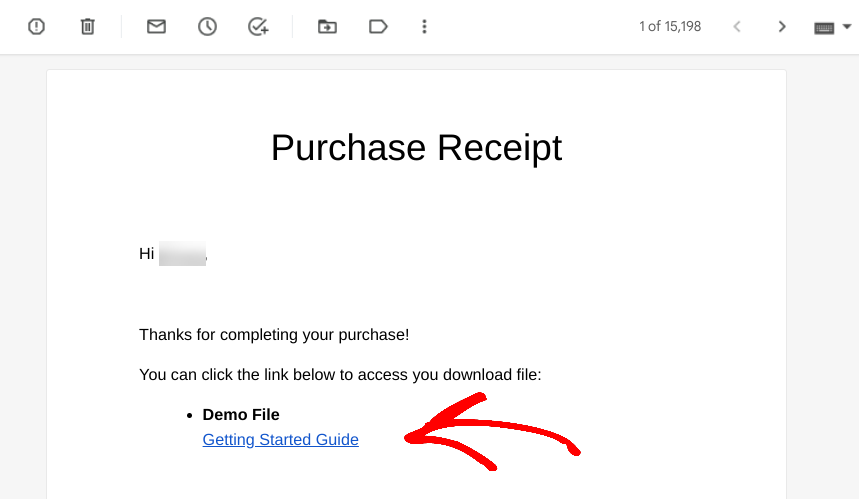
Next, under File Name, enter a phrase to describe the product:

This is the clickable link text that appears on the confirmation page and email purchase receipt:
When you’re done, select the Publish button in the top right-hand corner of the screen. You can also click Preview to see how the product page looks to your customers:
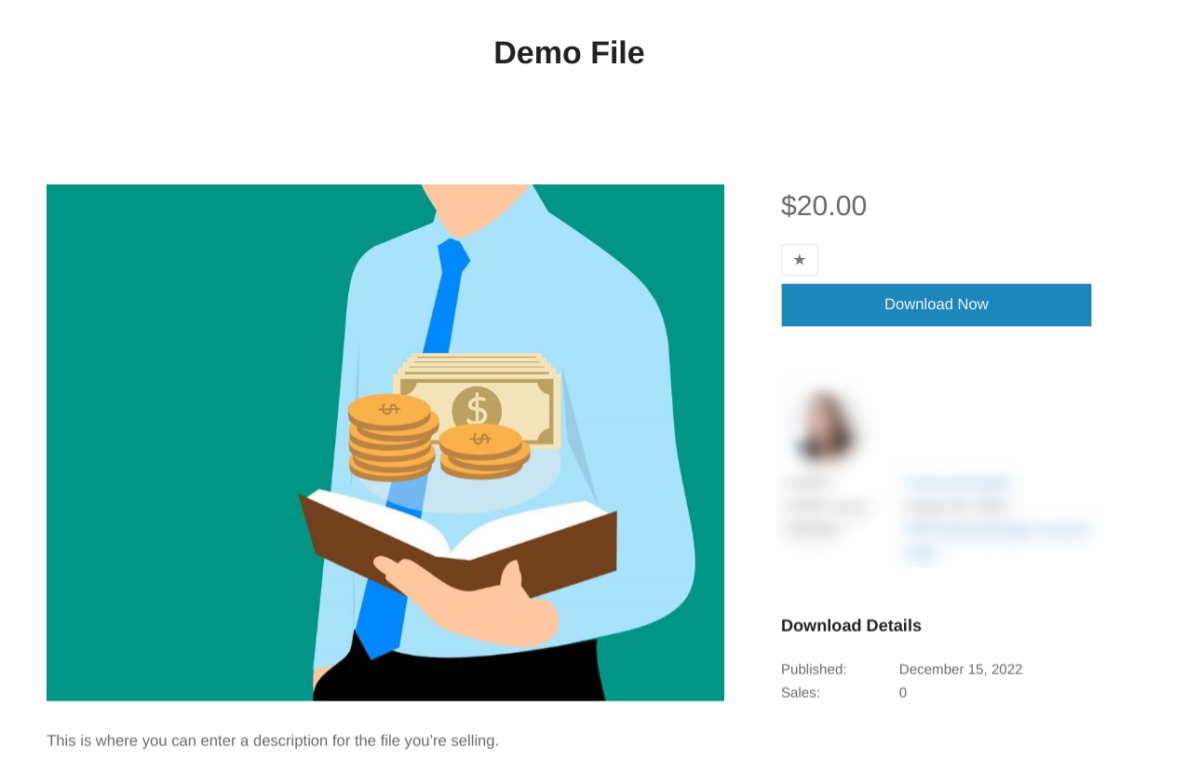
That’s it!
🔗For additional/advanced settings, check out:
- Add Download Link Expiration
- Force Files to Download (Not Open In Browser)
- Set a File Download Limit
- Restrict File Downloads to Logged In Users
Get EDD to Sell Large Files in WordPress
If you’re trying to sell large files in WordPress, we recommend using Easy Digital Downloads and the Dropbox or Amazon S3 extension. This combination provides excellent features for starting and managing your eCommerce store.
Ready to start selling? Download Easy Digital Downloads and install the file store extension of your choice to begin the process in a few minutes!
📣 Be sure to subscribe to our newsletter and follow us on Facebook or Twitter for more WordPress resources!
Using WordPress and want to get Easy Digital Downloads for free?
Enter the URL to your WordPress website to install.
Disclosure: Our content is reader-supported. This means if you click on some of our links, then we may earn a commission. We only recommend products that we believe will add value to our readers.