Are you selling digital products? Then you need to have fantastic digital product images.
🌇 Why? Because well-made images:
- Make a good first impression,
- Increase the appeal of your products,
- Build trust, and, thus,
- Increase sales!
In this article we’ll show you how to make great digital product images. We’ll show you proven tips and provide free templates to get you started.
Let’s make something cool-lookin’! Skip around as needed:
- What are digital product images?
- Why are digital product images important?
- Tips for making good product images
- How to upload images and sell online
- Free templates to jumpstart your work
What Are Digital Product Images?

At the risk of sounding obvious, digital product images are images that demonstrate what your product is and how it’s used.
They appear on your product pages on your website, or listing pages on marketplaces. They are the images that should accompany your product titles and product descriptions. They’re important. Have you ever bought something on Amazon without pouring over the product images? I haven’t.
What Makes Digital Product Images Tricky?
One thing that makes digital product images tricky is that your product is digital. 😼 Maybe virtual is a good word. Not-physical? I know that sounds weird.
🔑 It can be hard to visualize or demonstrate what a digital product looks like.
It’s very obvious how to make a product image for a physical product like a t-shirt. You do product photography of the t-shirt or make a digital product mockup if it’s print-on-demand.
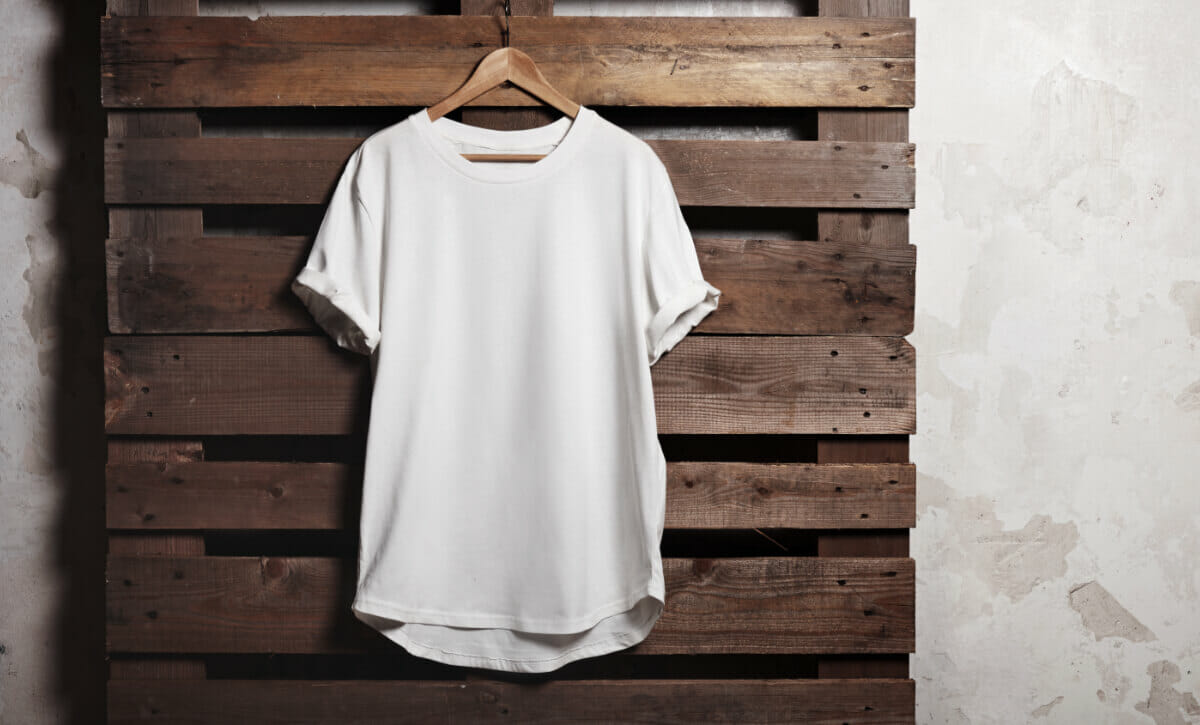
On the other hand, how do you make a digital product image for some digital products that don’t exactly have a physical component? Some examples:
- A spreadsheet formula
- A PDF document or eBook
- A WordPress plugin, theme, or piece of software that is composed of files on a computer
- An HR document template
- A detailed data report (when the data gathering is part of the product, thus not ready yet)
Sure you can take a screenshot image of your product in action. But screenshots often don’t look very interesting, and also don’t shrink down well into small ‘thumbnail’ images.
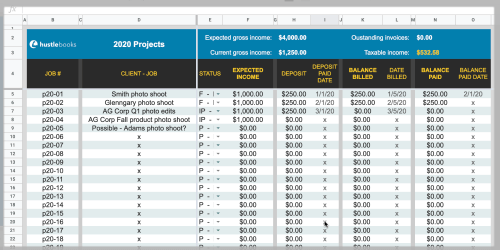
We’ll talk about some tips for overcoming these challenges below.
Why Are Digital Product Images Important?

Humans are very visually oriented. Especially when we’re shopping. We never, or rarely, buy something we can’t see. Or at least can’t visualize in our minds.
Therefore, your online store, selling digital products (aka digital downloads, downloadable products, or virtual products) needs to be full of images that help potential customers visualize what they are buying.
These images need to be as attractive and appealing as possible. The digital product store (website) with the nicest-looking images is likely going to win (get more sales).
Social Media
Digital product images are also important for social media. Sharing your products on Facebook, Instagram, LinkedIn, Twitter, TikTok and others is often a great way to spread the word.
But these are busy and noisy places. Attractive images are essential if you want to stand out.
Tips For Making Good Product Images

You can spend a lot of time thinking and overthinking your digital product images. Our tips are useful to anyone, but especially useful if you are a busy small business owner and need DIY results FAST.
Also bear in mind that the photography and graphic design required for making good product images used to require dedicated professionals (and it’s often a good idea to hire them). However, now, it is possible to get high-quality images all by yourself with internet-based design tools. That’s what we’ll show you here today.
This article is not an in-depth step-by-step tutorial for professional design tools like Adobe Photoshop and Illustrator or Affinity Photo and Designer. However we do have some templates for use in those programs below as well!
Here are our big four tips for making high-quality product images:
- Make them eye-catching
- Make images high-quality
- Format images for versatility
- Optimize images for the web
Make them Eye-Catching
You want your images to stand-out and look nice. Here are some proven and easy ways to make that happen.
Colors
Colors make images jump off the page. They draw attention. Colors can delight the viewer. When used with repetition and consistency they build a consistent brand that builds trust and helps your customers (and potential customers) recognize you.
Don’t use black and white or all gray, unless you have a reason to. Not unless you have a certain look-and-feel you are going for.

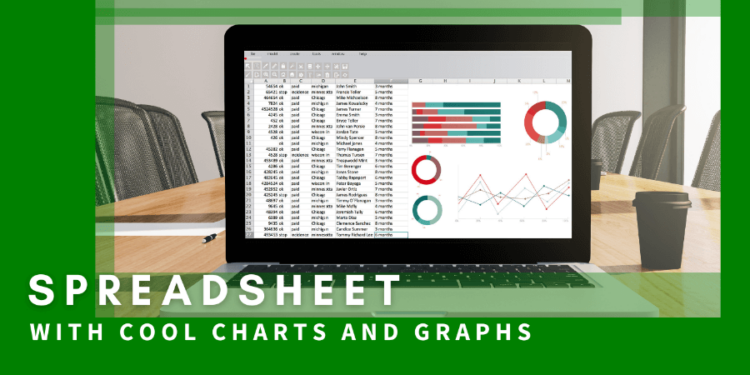
Colors can communicate many things. For example, with this screenshot for a spreadsheet template, I decided to use a similar green that both Google Sheets and Microsoft Excel use in their branding. (Note: It’s not a coincidence Google followed Excel into green branding for sheets, and blue branding for Docs like Microsoft Word uses!)
Contrast
Contrast is the difference between elements in your design or product photo. The difference between light areas and dark areas. Or differences in colors.
Similar to color, contrast draws attention and makes an image attractive, even delightful. Using colors that stand out (contrast) from one another helps you communicate a mood or vibe.
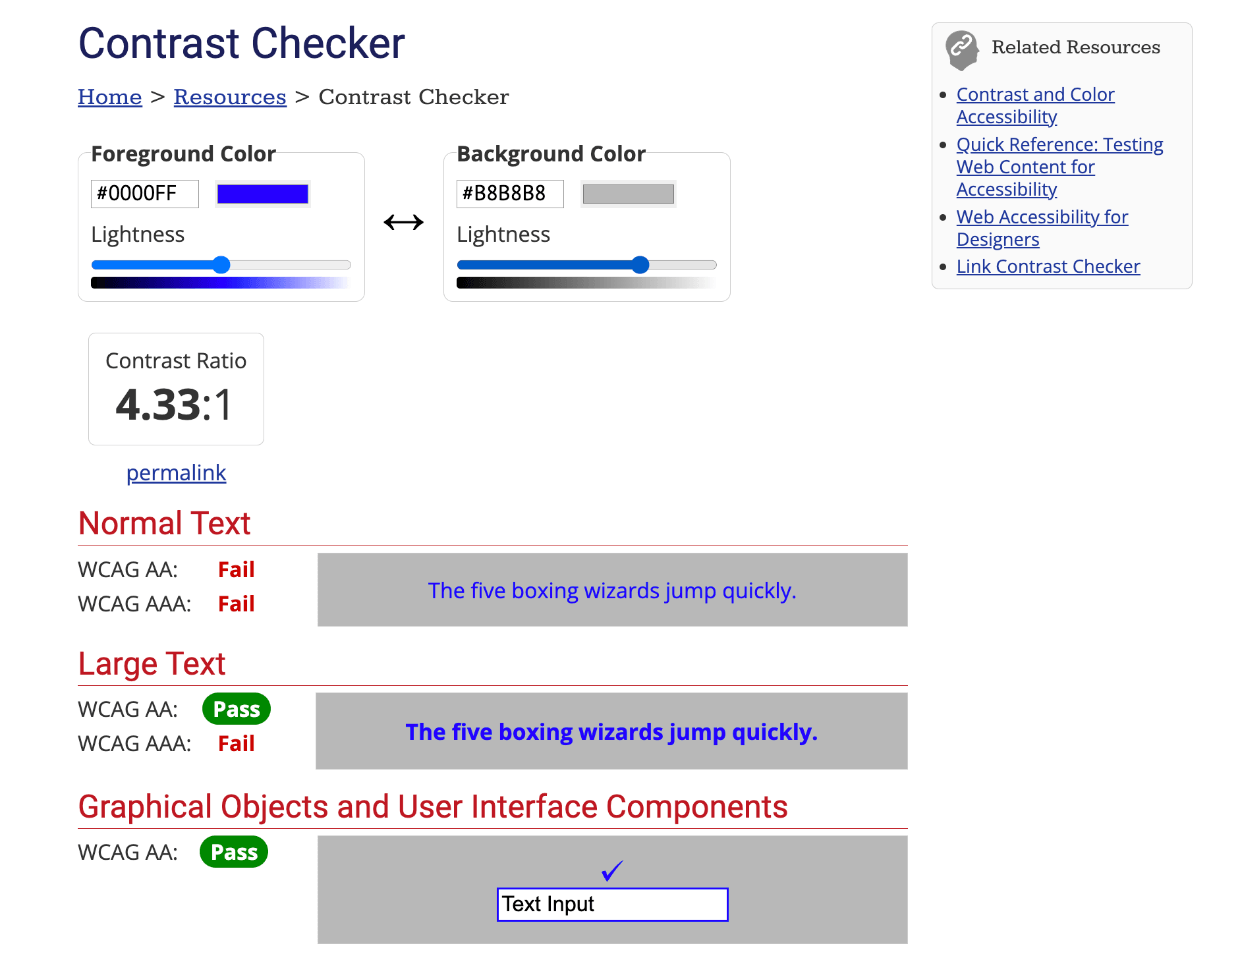
Also be sure that your background color and font color contrast enough for easy reading. Keep in mind those with visual impairments like color-blindness. The AIM Color Contrast Checker helps with that. It lets you try out colors with a drag-interface to find which color values have enough contrast.
- Get ideas for color pairings at Adobe Color
- Be sure your colors have enough contrast to be visible for those with visual impairments at the AIM Color Contrast Checker
Fonts
Using different fonts in a design can add appeal and excitement. If all you use is Arial or Times New Roman in your design, things will look boring and unprofessional.
Some fonts are made for body copy. These fonts are clean and easy to read. That’s good when you’re reading a lot of text. Body copy is where you use ‘less exciting’ fonts like Arial.
Other fonts are for headlines and subheadings. These fonts can be fun. They draw attention to themselves. Some fonts communicate a style or era. They’re good for social media banners or headlines, because they stand out. But you don’t want to read five long paragraphs of a headline font.
The trick is to pair different fonts together in a design. Typography is an entire academic discipline. It can take years to learn and make use of the subtle differences in type faces.
For today, here are two ways to go about getting good font pairings.
- Search font sites – You can try out different fonts at sites like https://fonts.google.com/ or https://fonts.adobe.com/fonts.
- This can be time consuming, and
- You need to bear in mind that you have to pay for many fonts
- Use templates – You can learn as you go, and get quick results with templates. There are tons of free templates available with online design tools like Canva, VistaCreate, and Adobe Creative Cloud Express (CCE).
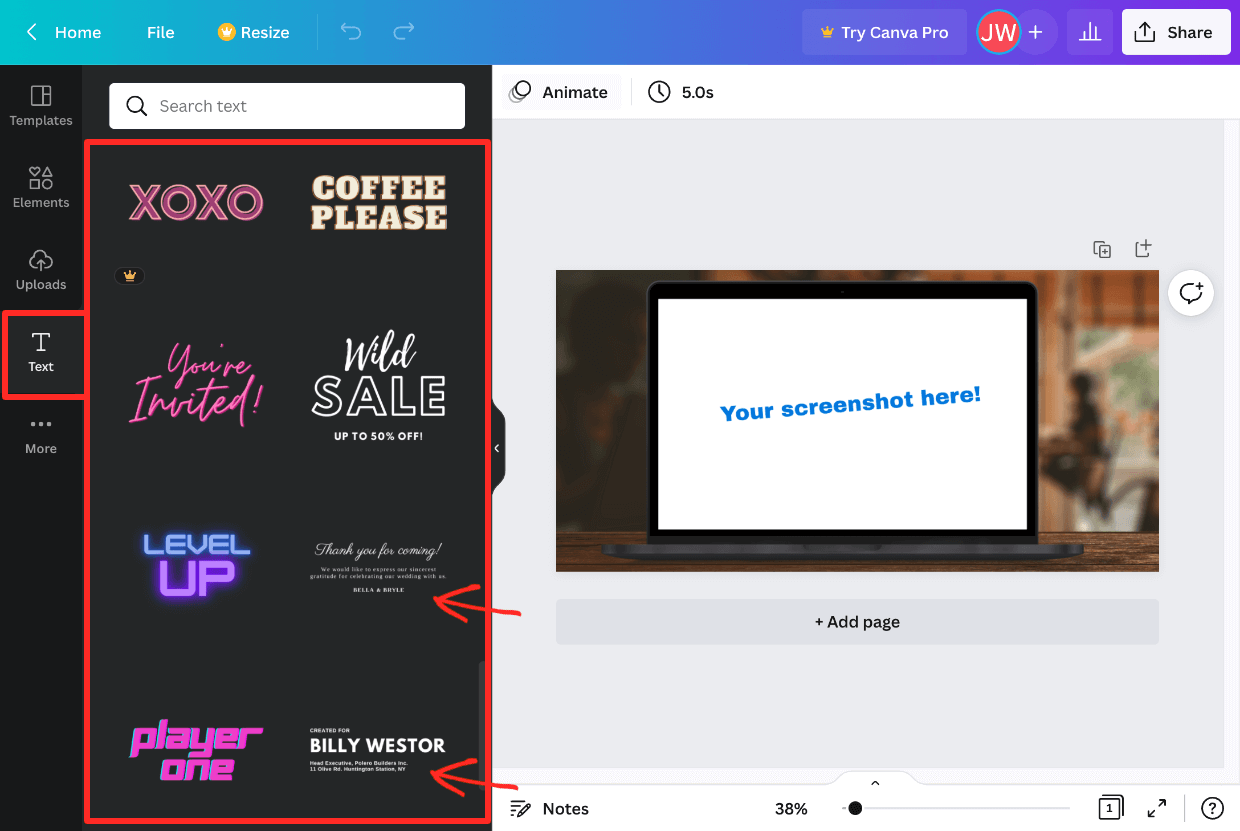
We recommend starting out with templates to see good font pairing in action. Just look at all the font-fun you can discover on Canva (above). Try things out. Learn as you go.
💙 Love fonts? You should make and sell your own! Learn how and see what cool stuff other EDD customers are doing with fonts.
Make Use of Good Composition and Layouts
One could argue that understanding and using them requires a college degree and years of experience. That may be true in some ways. But that doesn’t mean you can’t start off by using these proven composition tips.
Rule of Thirds
The rule of thirds is a long-used guide to making striking images. You divide an image into 9 squares. You place important elements of your photo or design along these lines, close to these lines, or where two lines meet.
For example, this document template product image is more appealing because the document is off center.

Angles Are Often Interesting
Rotating your images or text headlines just a little gives your product images or designs some energy and excitement.
For example, with this eBook product image, the slight angle adds some nice flare.

Use Physical Products as Context
Sometimes it’s ok to borrow imagery and context from the world of physical products for your digital products. People will catch on to your idea.
Help people visualize what your digital product is by placing it into the context it will be used.
For example, you can show a spreadsheet product on a nice new laptop screen in an office setting. People will understand that they aren’t buying the laptop, or the conference table, just your spreadsheet from the context of your website.

Or, another example, you can show an eBook being read on an eReader device or iPad. Potential customers understand they are only buying the eBook.
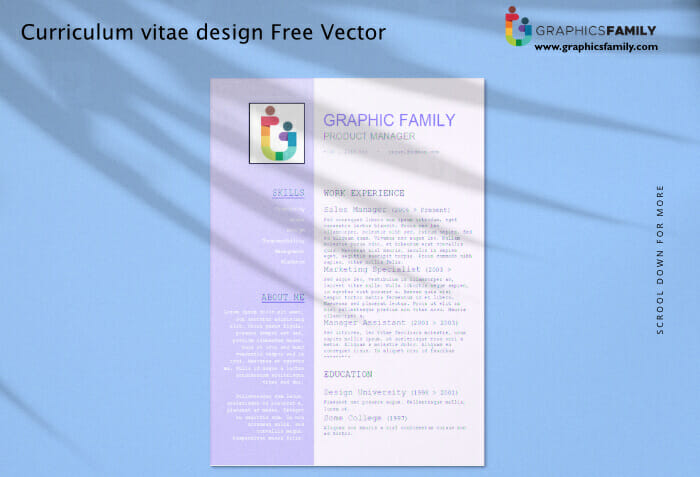
One last example, there is a big trend to add shadows of tree branches on printable document templates and similar types of products. This is visually appealing and allows the potential customer to imagine their printable sitting on their table in the tropical breeze, even if it is winter where they are, it feels nice.
Make Images High-Quality
To some degree, what makes an image high-quality is subjective. One person may think a design (or product image) is so easy anyone could have made it, while another person may think the same image is amazing because of its simplicity.
We’ll focus on a few things you can do to make your image high-quality from a technical perspective.
Make sure your image sizes are:
- High resolution
- Not too small
- In focus (if photography is involved)
High Resolution
Many displays and monitors today are much more pixel-dense than just a few years ago. Be sure to make your images large so they can be properly displayed on high-DPI displays and monitors.
It’s normal for screens to have 225 pixels per inch these days. A few years ago 95 PPI was more common.
- PPI – Pixels per inch
- DPI – Dots per inch
- Retina – Apple’s term for high-PPI screens. Any iPhone, iPad, or Mac made in the last 7-10 years has 225-260 PPI. You want your images to look nice on them.
🔑 The best practice for this is to make your images twice as large as you want them to be displayed.
For example:
- Do you want your product image to display at 600×600 pixels?
- Design and export your image at 1200×1200 pixels.
On high-PPI and Retina displays the higher pixel count will make the image look sharp. On the older 95 PPI displays the extra pixels simply won’t be visible. Nothing lost.
Not Too Small
Because of the high resolution of modern device screens, you should start off big with any pixel-based images. You can always resize them for output to the web later.
You can’t make a pixel-based image larger, it gets blurry and blotchy.
If you use vector-based graphics you can make them larger.
Pixels: the little dots that make up a photograph or design. You can’t scale up pixel-based images (make them bigger) but you can scale them down. Pixel file formats include JPG, PNG, GIF.
Vector: artwork made up of geometric lines. You CAN scale vector graphics up and down and they look sharp. Vector file formats include: SVG, AI, EPS.
- If you’re using pixel-based graphics, always start with a larger image. It needs to be at least twice the size you want to display it for high-PPI / Retina screens.
- You never know what different sizes you might need for social media formats, so be sure to never start off with a file that is too small. Start big, resize smaller.
In Focus
If you are taking photos be sure the product is in focus. This is pretty basic, but also important and needs to be mentioned. If you are using a mobile phone, most have autofocus tools that you can easily learn and use.
📸 Quick tip:
Hold your phone or camera with two hands, have one of your arms braced against your body for stabilization. The more stable your camera is, the more in-focus and sharp your images will be. A shaky photo is likely to be blurry.
Format Images For Versatility
There are so many possible sizes and formats to make your product images. Each social media channel has different sizes and nuances. Where do you start?
We recommend starting with one versatile format and then customizing out from there if/when needed.
The versatile size/format we recommend is 2:1. A widescreen format that is two units wide, one unit tall. We use it a lot on the EDD website.
- Go with 2000px by 1000px as your master document,
- Then output to 1200px by 600px
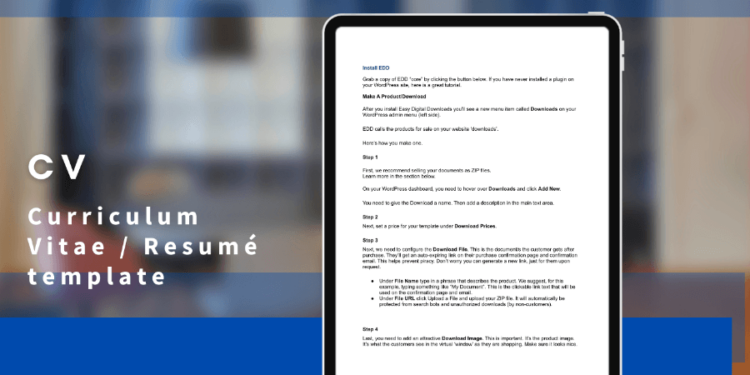
This format works pretty well across all channels. Then customize more formats as needed.
Optimize them for the web
Optimizing images for the web involves two different tasks.
- Using the correct image format for use on the internet
- Compressing the image
Using The Correct Format
There are four main image formats you’ll use on the web.
- PNG – Portable Network Graphics – Use these for anything but photos or animations (like logos or illustrations)
- JPG – Joint Photographic Expert Group – Use these for photographs
- GIF – Graphic Interchange Format – These are used for animated-GIF images (like fun memes). Use them for animations, but PNGs or JPGs are best for most static images.
- WebP – Web Picture Format – A newer file format for web images that are smaller than PNGs or JPEGs. A lot of apps (like Adobe and Affinity) don’t fully support this format yet. For now we’d recommend not using it. We’ll update this article as it becomes more and more common.
Compressing the Image
You want to make your digital product image files as small as possible, while still having them look good. This is called image compression.
This is a whole area of technical expertise unto itself. We recommend just using a website service to compress your images. On these types of websites you upload your original image, they compress it, and provide a new file for you to download.
Here are two we recommend:
Use the compressed images you get from one of these websites as the files you upload on your website. Small files make your website run faster for potential customers. That’s important. If they have to wait a long time to see your product pages, they’ll probably get annoyed and leave.
Use Alternative Text (Image Descriptions)
Be sure to give your images descriptions. This helps with accessibility (a11y) and search engine optimization (SEO).
- Alt-text – Short for Alternative Text
- Alt-tags – Another word for Alt-text
- Alternative Text – The text description you apply to an image for screen readers
For accessibility, alt-tags/image descriptions allow those with visual impairments or a disability to know what the image is. This is done with screen readers. Screen reading software will use the alt-text to describe the image with sound/spoken-word.
For SEO the image descriptions can help search engines understand what your content is about. It’s also a measure of quality that Google Search looks for on your site.
😇 Add image descriptions because it’s the right thing to do. It makes the web more accessible and inclusive. But you also get the benefit of SEO.
In the old days of the web you had to manually add image descriptions as alt-text in the HTML. Learn more here.
Now, modern website builders, like WordPress, have a visual interface for adding them in. Here are the two main ways to do this on a WordPress site.
The first is in the Media tab. On your WordPress dashboard go to Media on the left-hand side menu. Click on any image to load the Attachment Details pane. There on the top-left you’ll see the Alternative Text field. Enter a image description there.
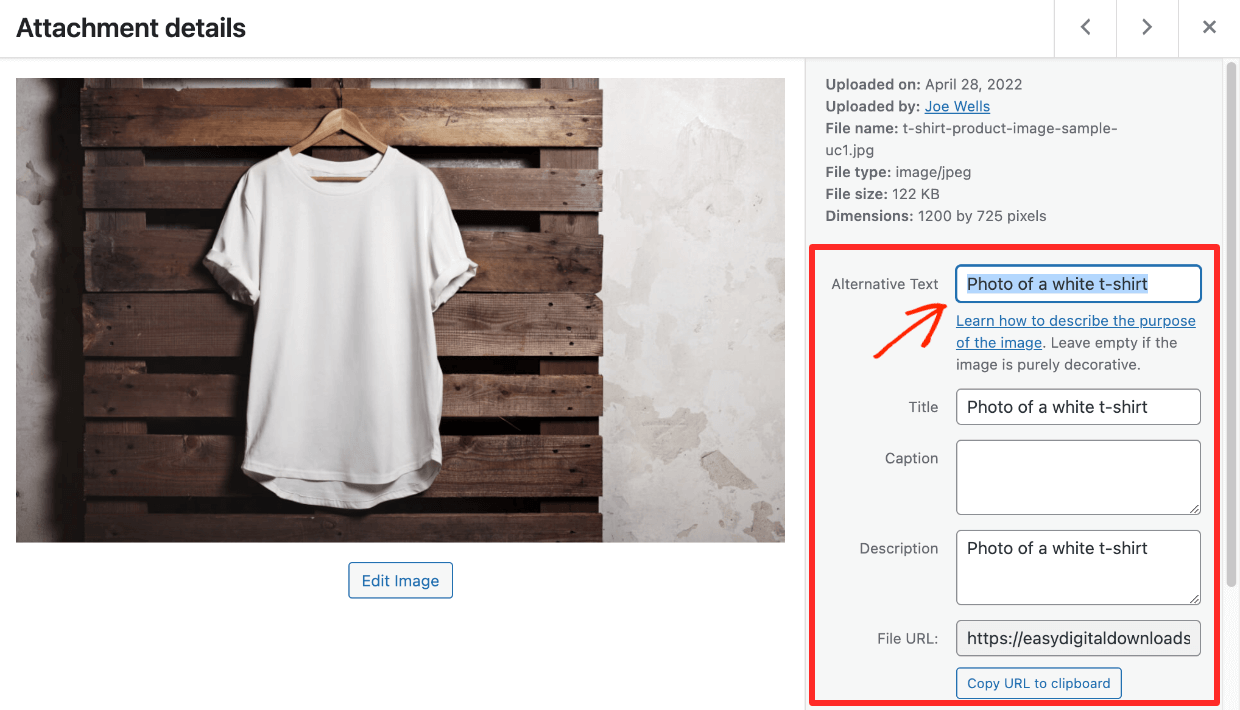
The second is within the post editor. When you’re writing a page or post on WordPress you can insert an Image block. Click on any image block and in the right-had side menu there is a box called Alt Text (Alternative Text). You can enter an image description there as well.

How To Upload Images and Sell Online

- ✅ You’ve created a digital product or products
- ✅ You’re working on some killer product images
- 🔲 Do you know how you’ll sell your digital products?
We can help you with that! We’ll show you how to sell and how to upload your product images.
The best way to sell your digital products is with WordPress and Easy Digital Downloads (EDD).

Why WordPress?
WordPress is the best website builder in the world. It powers more than 43% of the internet. No other website builder/platform has hit 5%.
You can trust it to be your eCommerce platform and more. No matter what you need years from now, you can trust a WordPress site can handle it. You can’t always safely say that about other platforms.
WordPress has the largest ecosystem of plugins, themes, and professional services providers. It is the right mix of powerful, affordable, and futureproof.
🤷🏾 Don’t have a WordPress site yet? You just need a good web host to run this free open source powerhouse. Click here for help with choosing one (there are discount codes too!).
Why EDD?
EDD is relied on by more than 50,000 eCommerce businesses. It’s one of the most trusted WordPress plugins available.
EDD is purpose-built for selling digital products. Most other solutions are not.
Easy Digital Downloads is a powerful way to build a full featured eCommerce website without any code! EDD has a free-forever version and can grow with you if you need it to do more in the future (with EDD Passes).
Why not other solutions?
Because most other eCommerce solutions are not built for digital products. They might ‘do’ digital products, but often it’s kinda an afterthought. Sometimes selling digital products on them is a flakey bolt-on addition.
👎🏾 Other eCommerce SaaS’s or Platforms
Many of the most popular platforms out there, like the one that rhymes with mop-iff-fy, are built for selling physical products. They have all sorts of tools and set up processes for shipping, inventory, and logistics that you need for physical goods, but that you don’t need as a digital creator. That can waste time.
Many platforms have expensive monthly fees and maybe a few days of a free trial. EDD has a free-forever version. EDD let’s you get started and operate with no overhead expenses.
👎 Marketplaces
The marketplaces, like Etsy or Creative Market are easy to get set up on. But they charge, arguably needless, middle-man fees in many cases. They take a cut of your revenue. The more you make, the more they take.
You can get started selling your digital products right away. For free! What’s stopping you?
Grab EDD today and get set up!
With one free download you’ll get:
- Full control over pricing
- Protected product files, only paying customers will have access to your digital downloads
- Control over the customer experience and branding (white label)
- Shopping cart with payment options
- Flexible checkout options
- eCommerce reports
- Customer management (basic CRM)
- Discount codes
- Stripe and/or PayPal payment gateway integration
- Use Stripe and/or Paypal for accepting credit cards
- Use Stripe for Apple Pay and Google Pay
Get started now with just a few clicks! 👇🏽
Using WordPress and want to get Easy Digital Downloads for free?
Enter the URL to your WordPress website to install.
Uploading Your Product Images
When you have EDD installed on your WordPress site you’ll have a new tab on the left-hand side of your WordPress dashboard called Downloads.
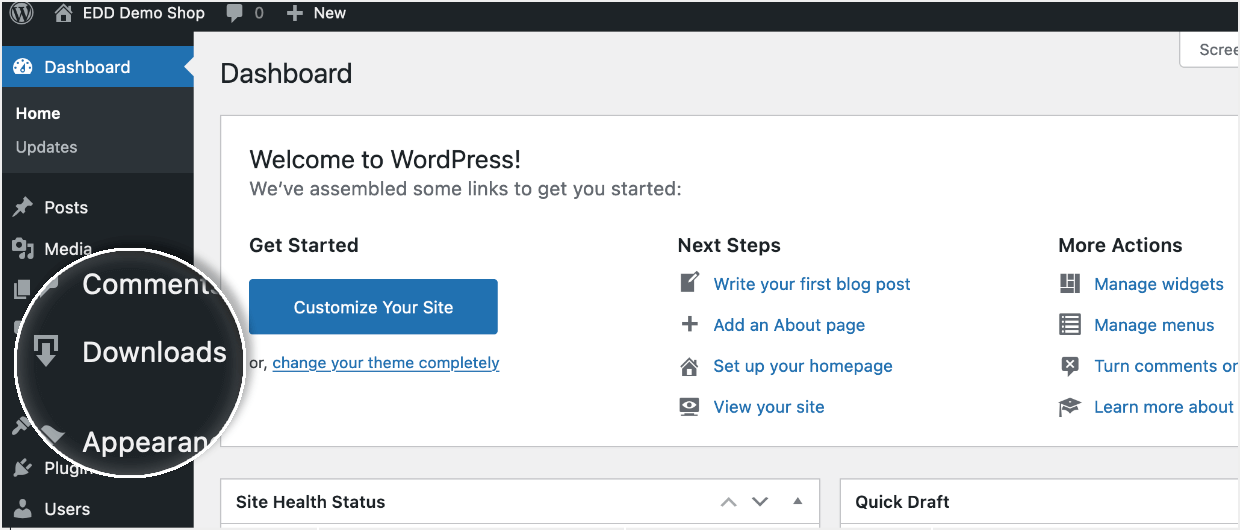
If you’ve never installed a WordPress plugin, click here to learn all about plugins.
The digital products you sell on your website with EDD are called ‘Downloads’.
To make a new one:
- Click on Add New
- Add a name, and product description
- Set a price
- Link the downloadable product files, and
- Upload an image under Download Image
- Click Publish to make it viewable on your website’s front-end
Add your image on the Download Image box located on the right-hand side.
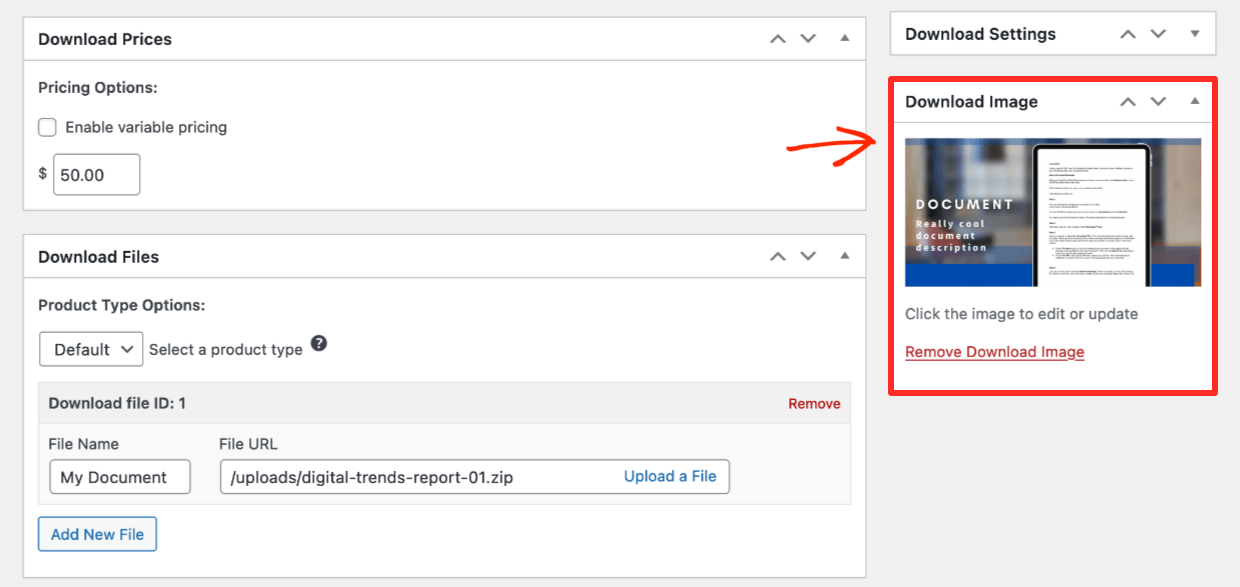
🔎 For more detailed instructions on making a Download and getting ready to sell, check out this quick start guide.
Remember, before you upload your images be sure to optimize them for the web. I recommend TinyPNG. Even though I use professional graphic software, I use this site every day because I’m very pleased with the quality of the images and small file sizes. The website makes optimized PNG and JPEG files (despite the name).
Free Templates To Jumpstart Your Work

Here are some templates to get you started. To use these you need either a free Canva account, an Adobe Photoshop or Creative Cloud license, or a copy of Affinity Designer or Photo.

Laptop Screenshot Template

Tablet Screenshot Template
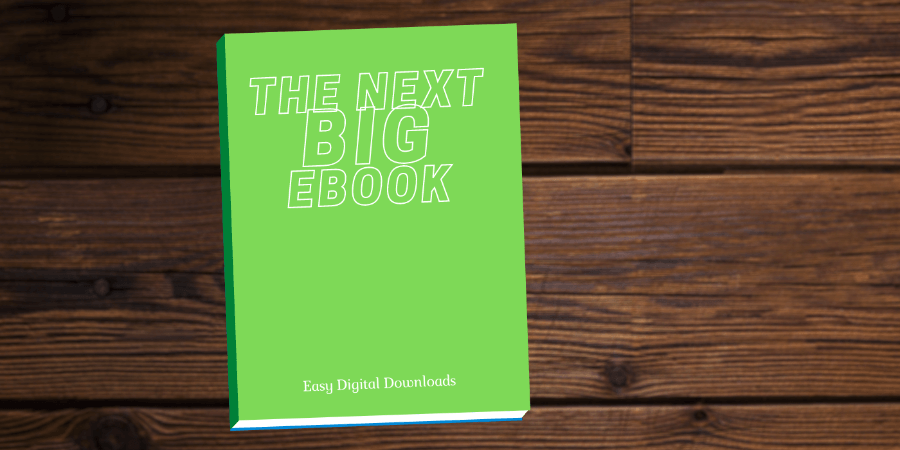
eBook Template
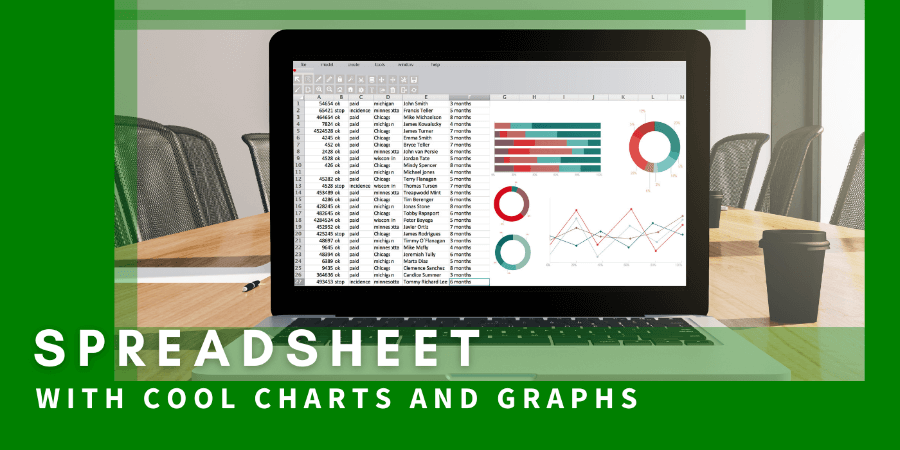
Spreadsheet Template
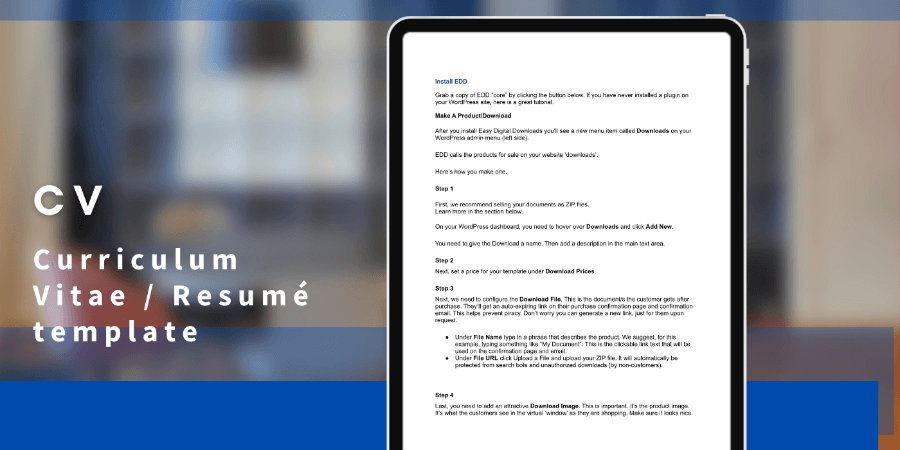
Document Template
Free Stock Images
There are a few great websites with free stock photos and vector graphics we wanted to share:
- Unsplash – A great site with free stock photos, including textures that can be used for a background image.
- Pexels – Another site with free stock photos and videos
- Streamline – A collection of some of the best vector icons, illustrations, and emoji on the web. They have free and paid collections.
Conclusion
Nice work! You’ve learned how to make fantastic digital product images. Hopefully one of our templates has you moving ahead at full speed.
Product images are very important. It’ll always be worth the extra effort to make them look nice. We trust they’ll help you succeed with your online small business and generate that coveted passive income.
We have a lot more resources for digital creators like you. What do you want to learn about next?
- 🤩 Easy Ways to Make Your Digital Download Store Look Great
- 🧲 Create Lead Magnets to Grow Your Email List
- Selling Guides:
Be sure to subscribe to our newsletter or follow us on Facebook and Twitter to get our latest resources for digital creators.
Using WordPress and want to get Easy Digital Downloads for free?
Enter the URL to your WordPress website to install.
Disclosure: Our content is reader-supported. This means if you click on some of our links, then we may earn a commission. We only recommend products that we believe will add value to our readers.
What a wonderful blog about eCommerce products image shoot, editing, colour contrast, background edit, and image upload all in one article.
Thanks so much. There are so many aspects to product images! 💪
Thanks for sharing informative article.
Thanks, Naresh. Glad you found it helpful!
I appreciate the great information on this page. This article mentions creating SVG vector graphics, yet I am finding that I am unable to use easy digital downloads for that type of file. I can upload an svg file into my wordpress media library but not through EDD. Can I get an definitive answer to this? Can I use EDD for selling SVG files for download in Wordpress.
Hi, Janet. Thanks for reading! Could you contact our support team so we can better assist you? Thanks! 🙂