Want to accept payments with Authorize.net on your WordPress site? Great idea.
Authorize.net is a trusted online payments system. And a WordPress website is perfect for building an online side hustle or business.
In this article we’ll show you how to accept credit card payments with Authorize.net, step by step. We’ll also provide a checklist of everything you need for an eCommerce site and share some alternative eCommerce solutions.
Let’s get to the money! Skip around if you want to:
- Step 1: Install Easy Digital Downloads
- Step 2: Set Up An Authorize.net Account
- Step 3: Connect Authorize.net to Easy Digital Downloads
- Step 4: Set Up a Download (Product) To Sell
- Step 5: View The Results
- Requirements and Alternatives
Step 1: Install Easy Digital Downloads

The best way to accept Authorize.net payments with WordPress is Easy Digital Downloads (EDD). EDD is one of the most trusted eCommerce plugins for WordPress, trusted by more than 50,000 websites.
🎉 With EDD, you don’t have to be a developer or know how to write custom HTML, CSS, or PHP code!
First, purchase an Extended Pass. You’ll get access to our Authorize.net Payment Gateway extension as well as 40+ other extensions to add advanced features like email integration and subscriptions to help you grow your business.
🤷🏾 Don’t have a WordPress site yet? Get WordPress and EDD preinstalled for you with security and automatic updates. Some call it magic, most call it managed hosting. Get SiteGround Managed EDD Hosting.
If you’re selling something other than digital products, check out some alternatives below.
Next, install Easy Digital Downloads. Click here for help if you’re not sure how to install a plugin.
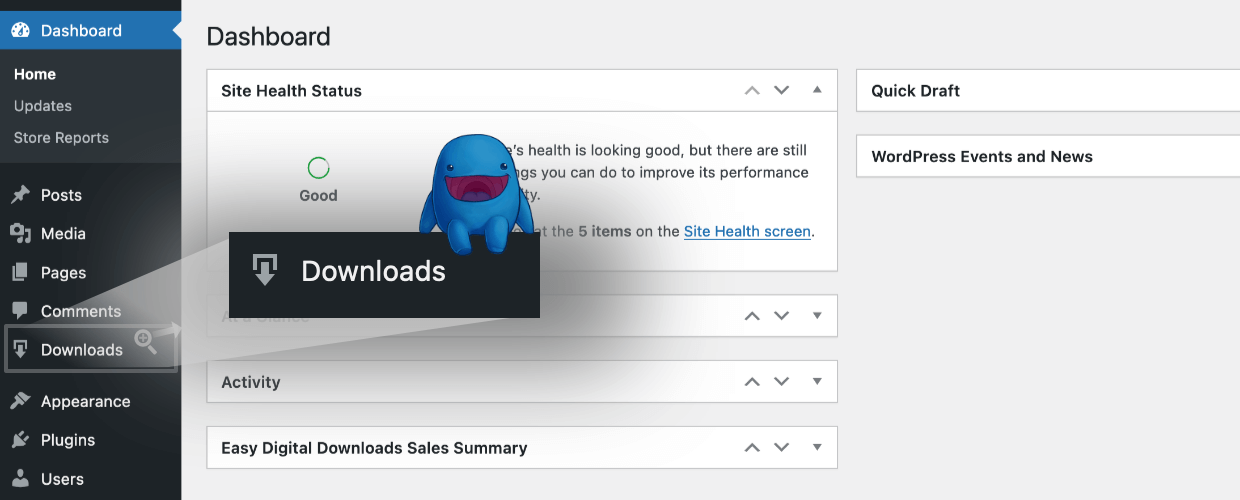
Once EDD is installed on your WordPress website you’ll have a new left-side menu item called Downloads on your WordPress dashboard.
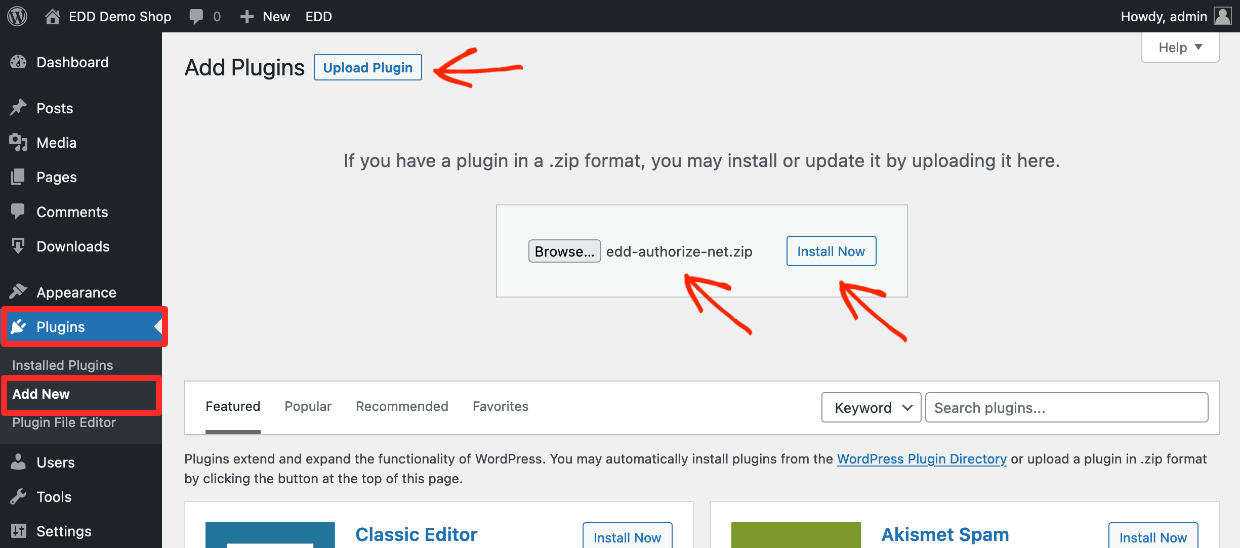
After that, install the Authorize.net extension. Go to Plugins » Add New. Click Install then Activate.
Step 2: Set Up An Authorize.net Account
If you don’t already have an Authorize.net account, go to their pricing page. Authorize.net has been around a long time. It’s owned by credit card giant Visa making it a trusted brand.
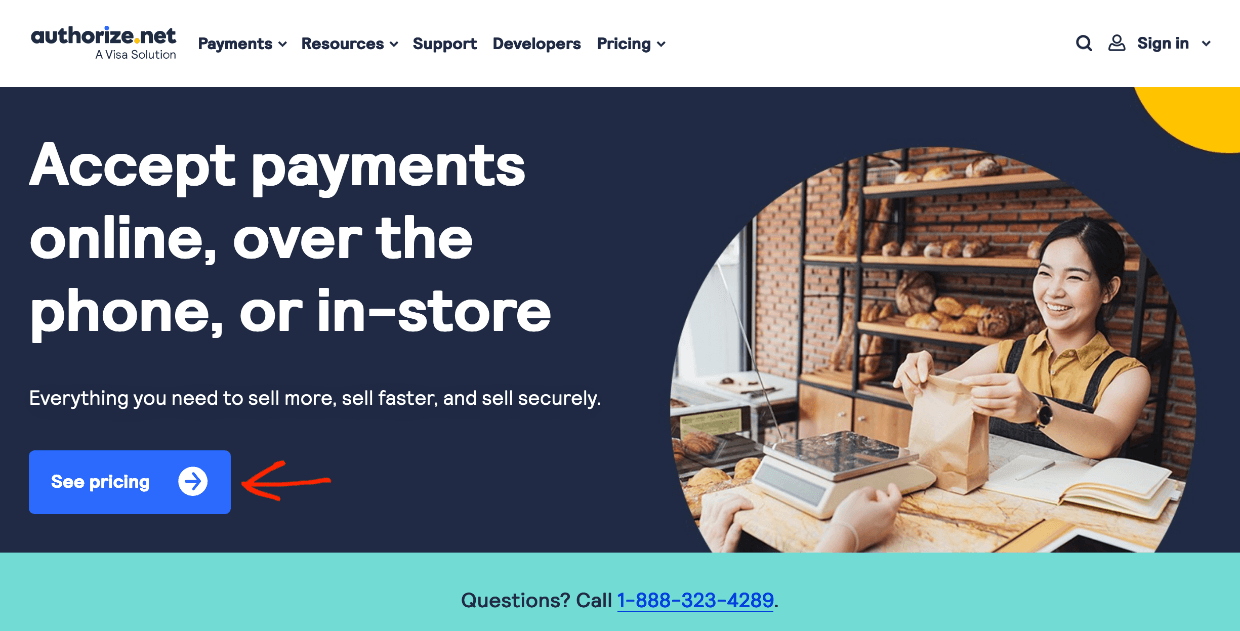
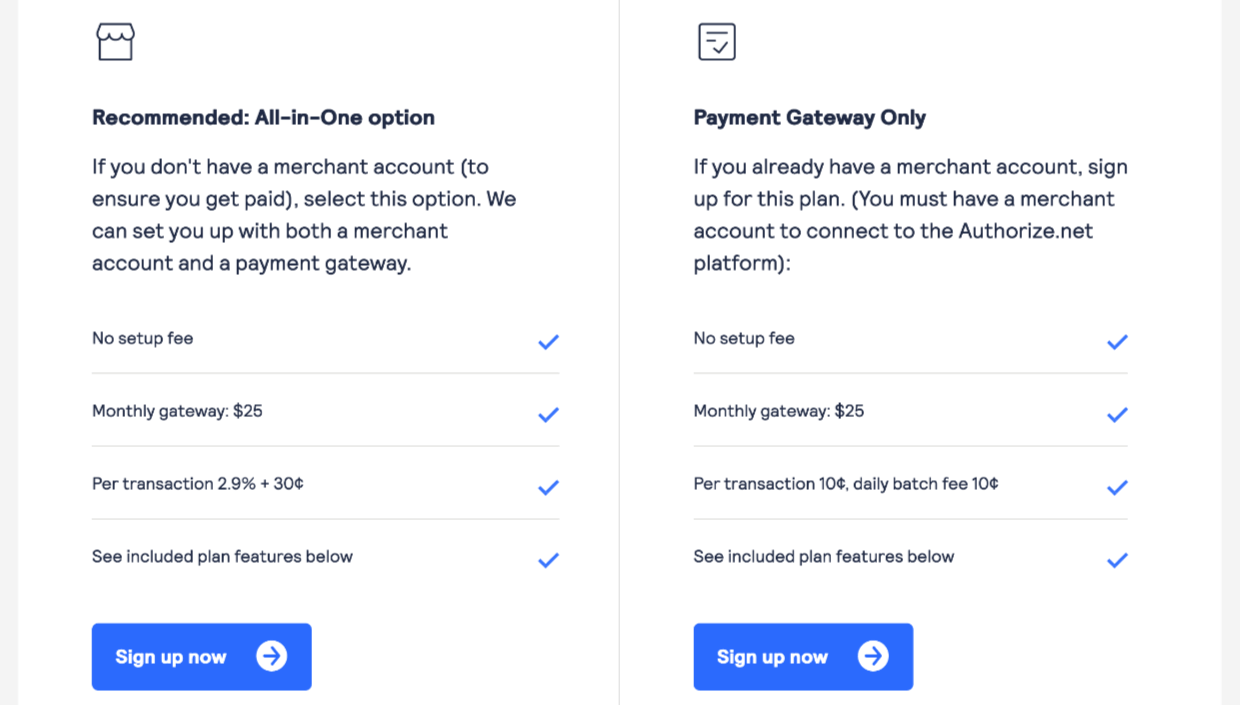
Choose a pricing tier that’s right for you.
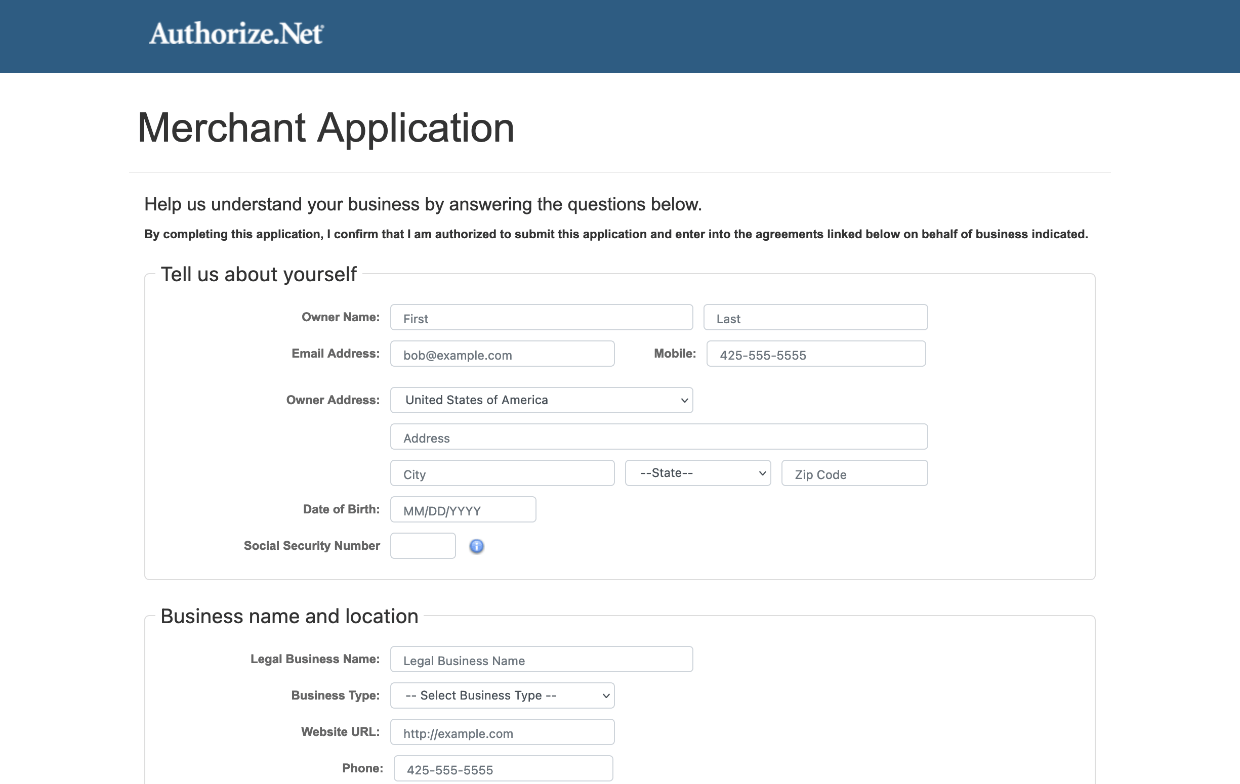
You’ll have to fill out an application and provide business information. The exact appearance of the form and required fields will vary by your region and whether or not you have a merchant account (bank account for businesses) already set up or not.
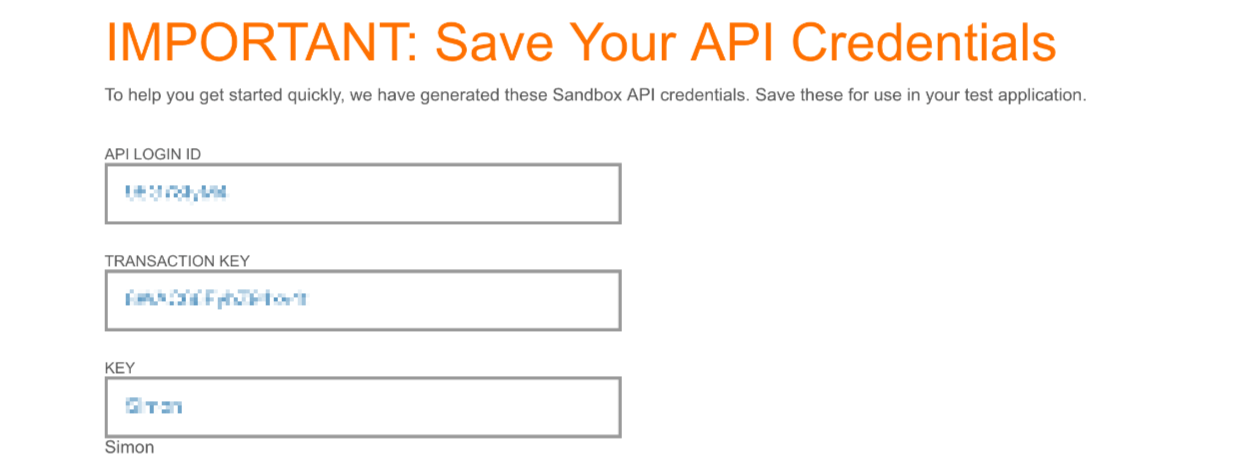
After you complete your account set up you’ll be provided with an API Login ID, Transaction Key, and Key. Hang on to these you’ll need to enter them into Easy Digital Downloads.
Your account will be in test mode. When you log in to your Authorize.net control panel there will be a checklist of steps to be taken to get your account ready for accepting payments (in live mode).
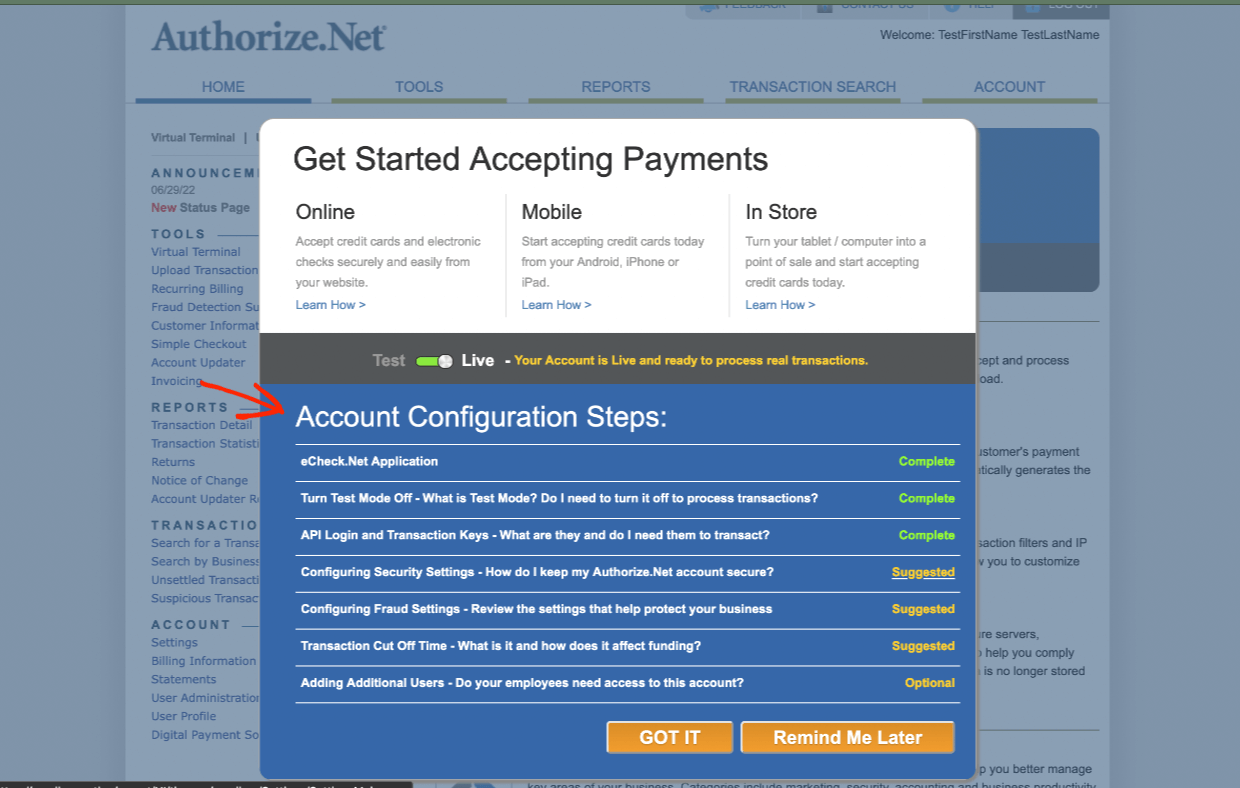
Tip: You can set up a test or ‘sandbox’ Authorize.net account to run test transactions. No real money ever moves around.
Step 3: Connect Authorize.net to Easy Digital Downloads
Next, let’s connect your EDD store and Authorize.net account. It’s super simple.
Go to Downloads » Settings » Payments » Authorize.net. Don’t be alarmed by the red alert banner at the top of the page. It’s just a reminder that you need to enter your account information or what’s called “API credentials” (API Login ID, Transaction Key, and Key).
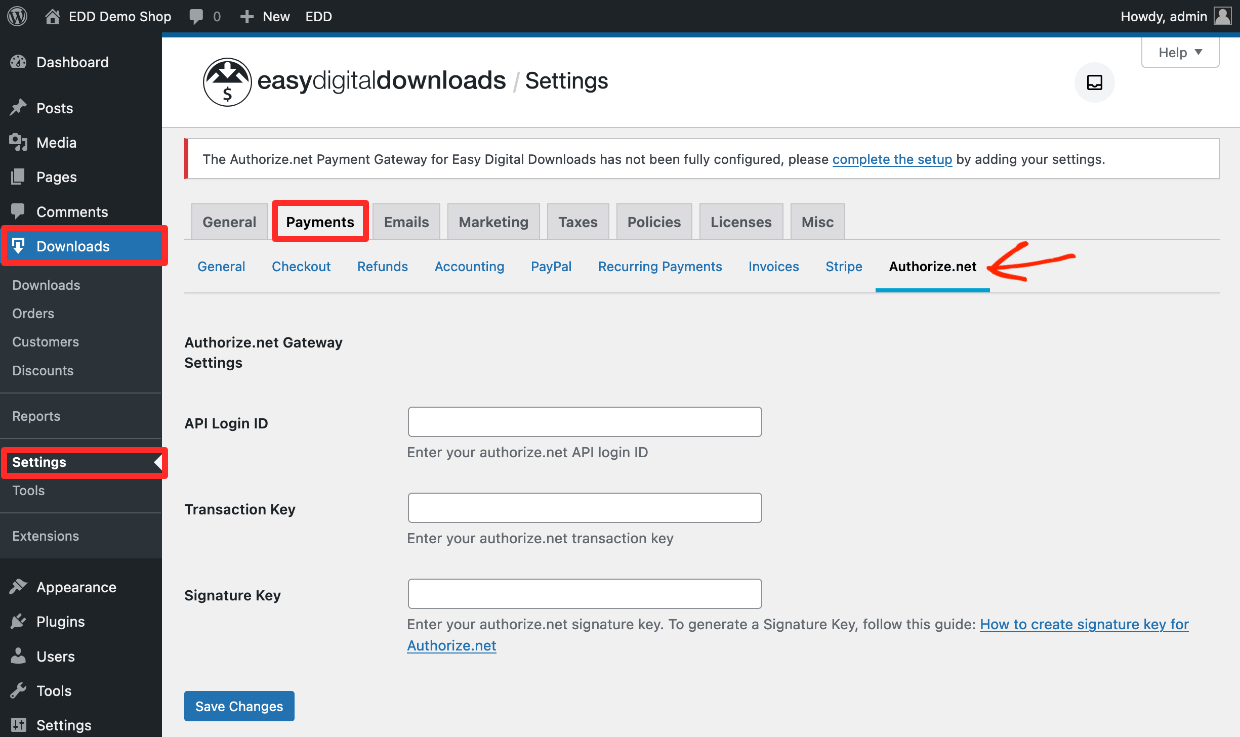
Simply enter your API Login ID, Transaction Key, and Key into the three fields in the center of the page.
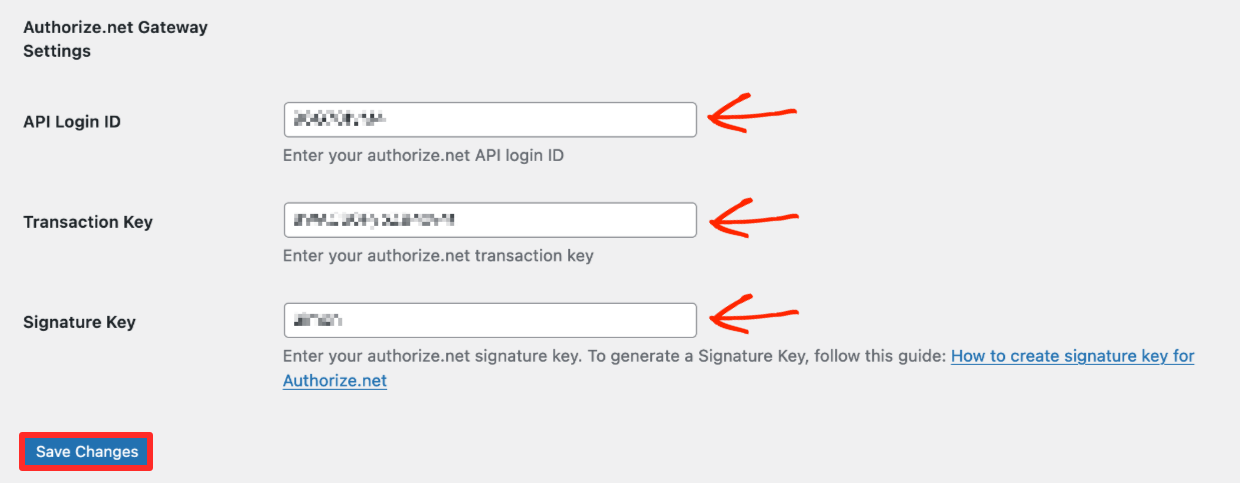
Be sure to click Save Changes when done.
Configure Webhooks
Authorize.net uses Webhooks to communicate with your store. This is a pretty standard system. You need to configure Webhooks inside your admin panel at Authorize.net.
First log in to Authorize.net and go to your Account page and click on Webhooks.
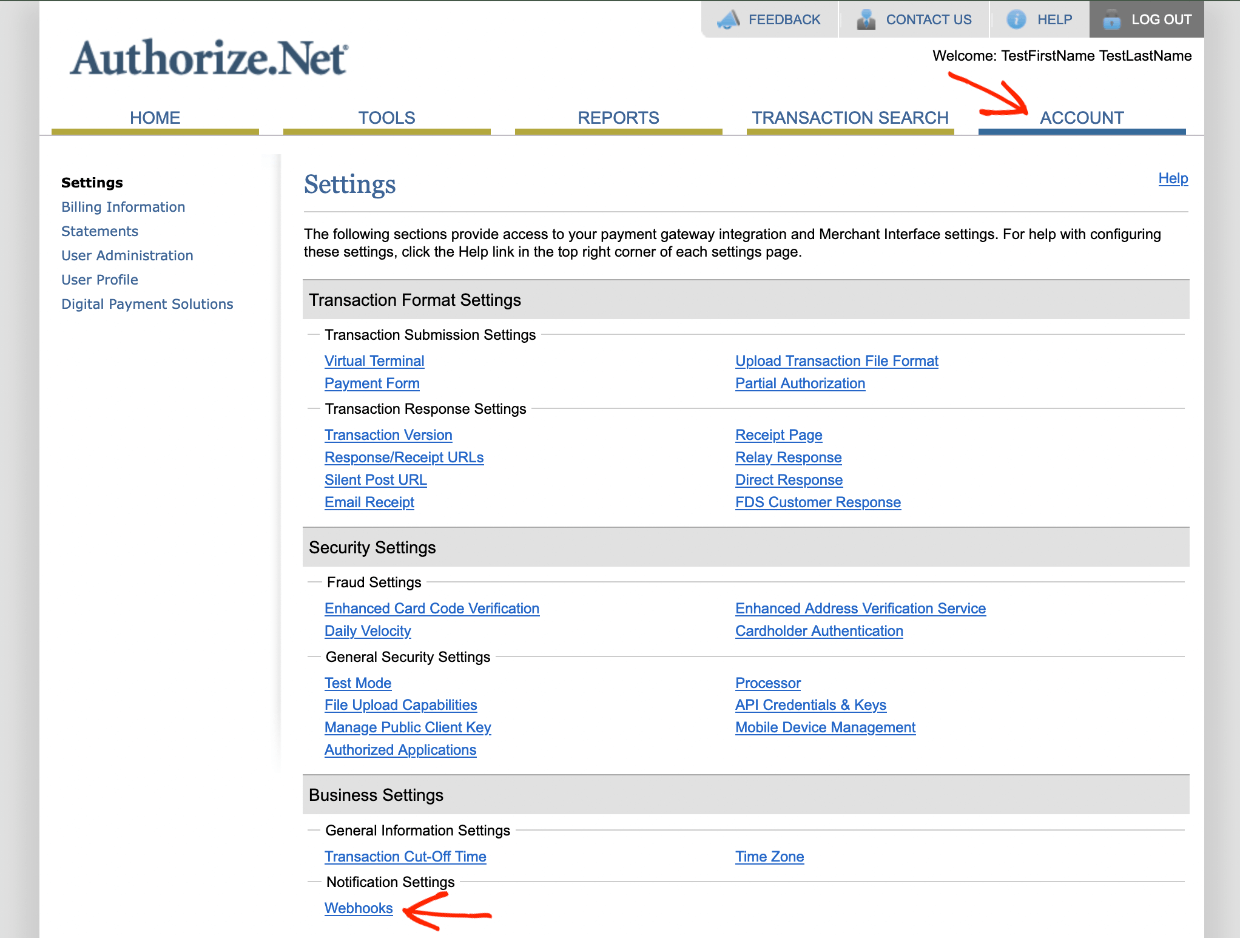
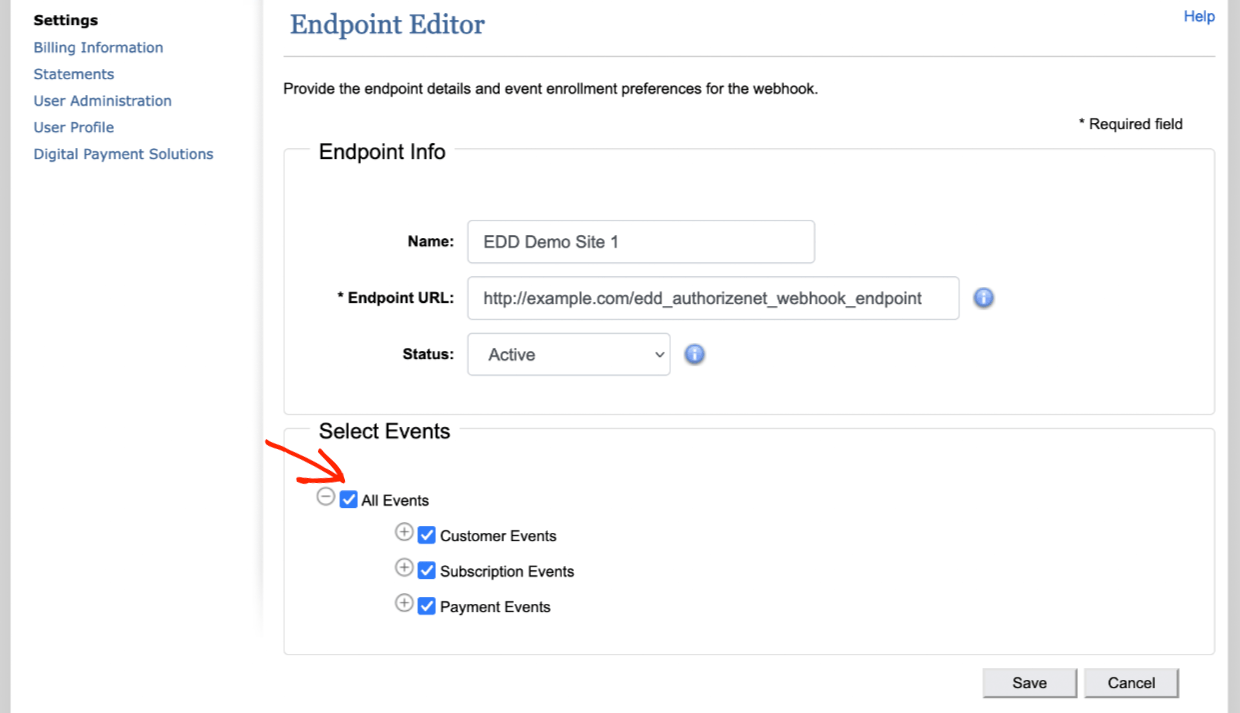
You’ll probably not have any endpoints set up yet. Click the Add Endpoint button. Enter your Endpoint URL.
https://example.com/edd_authorizenet_webhook_endpoint
Be sure to change “https://example.com” to your own website domain name. Then hit Save.
Then, select all the events by clicking All Events.
Great work so far!
Activate Authorize.net
After this, be sure to enable/activate Authorize.net as a payment processor on your website. Go to Downloads » Settings » Payments » General.
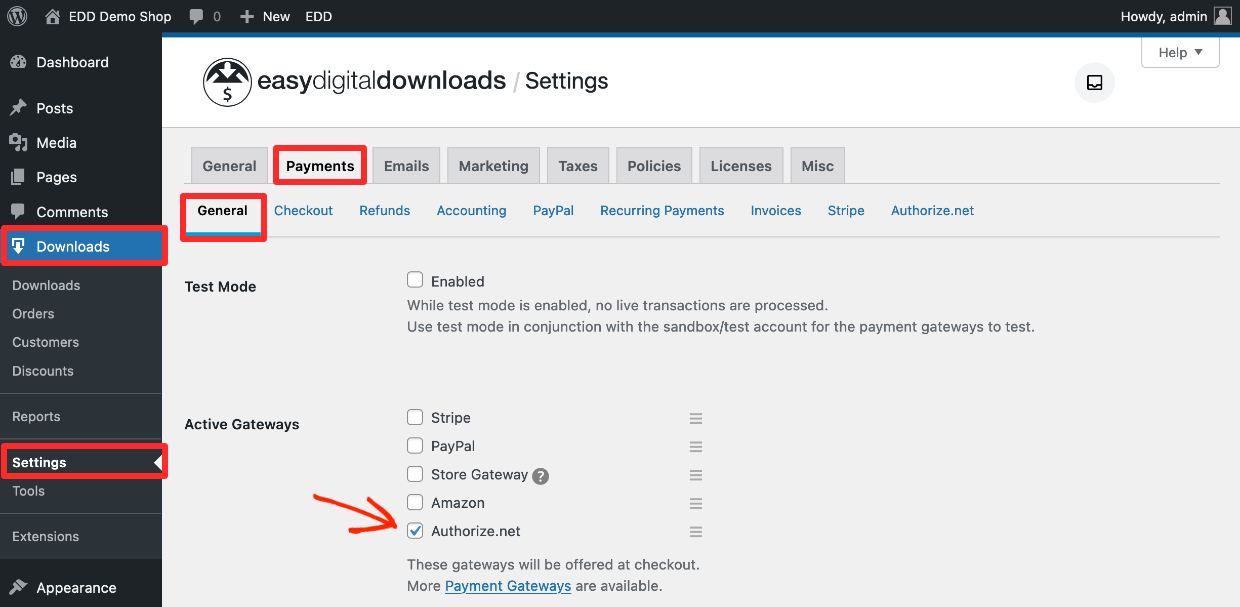
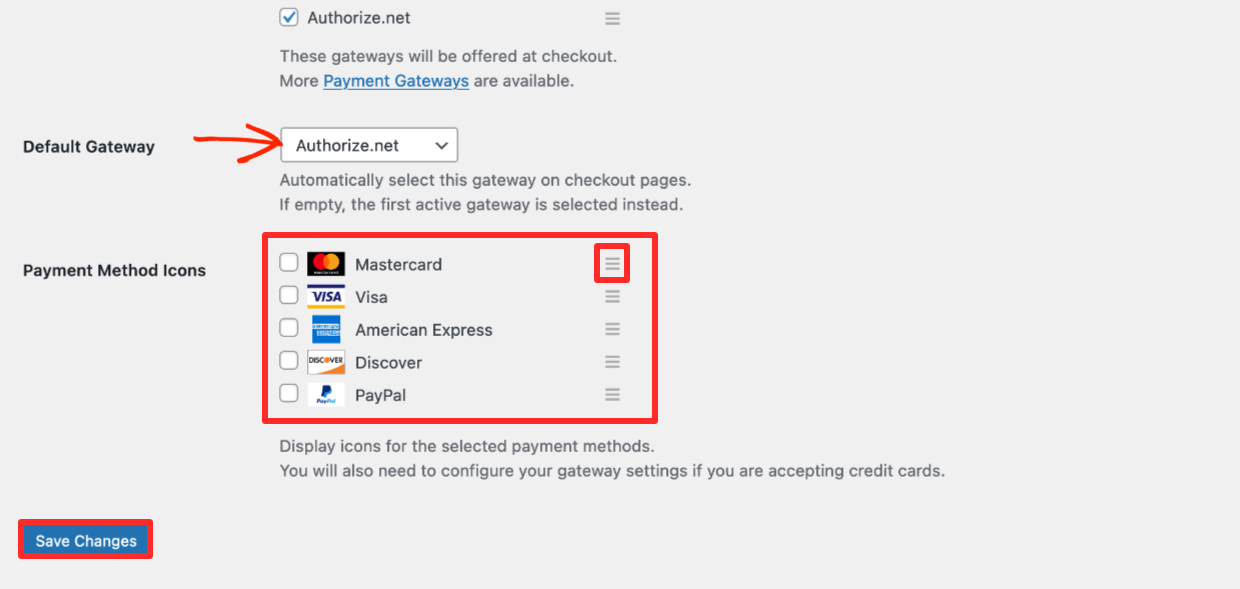
Select Authorize.net under Active Gateways. You can set Authorize.net as the Default Gateway as well, if you want to.
Next, check the boxes for all the credit and debit card brands (Visa, MasterCard, American Express, Discover) you want to accept under Payment Method Icons. You can also rearrange which order they are displayed on the website frontend by dragging the three-line icons.
Click Save Changes when you’re done.
Ok! EDD and Authorize.net are all connected and ready to roll. But what are you selling? If you’ve never set up an item to sell, we’ll show you how real quick. ⬇️
Step 4: Set Up a Download (Product) To Sell
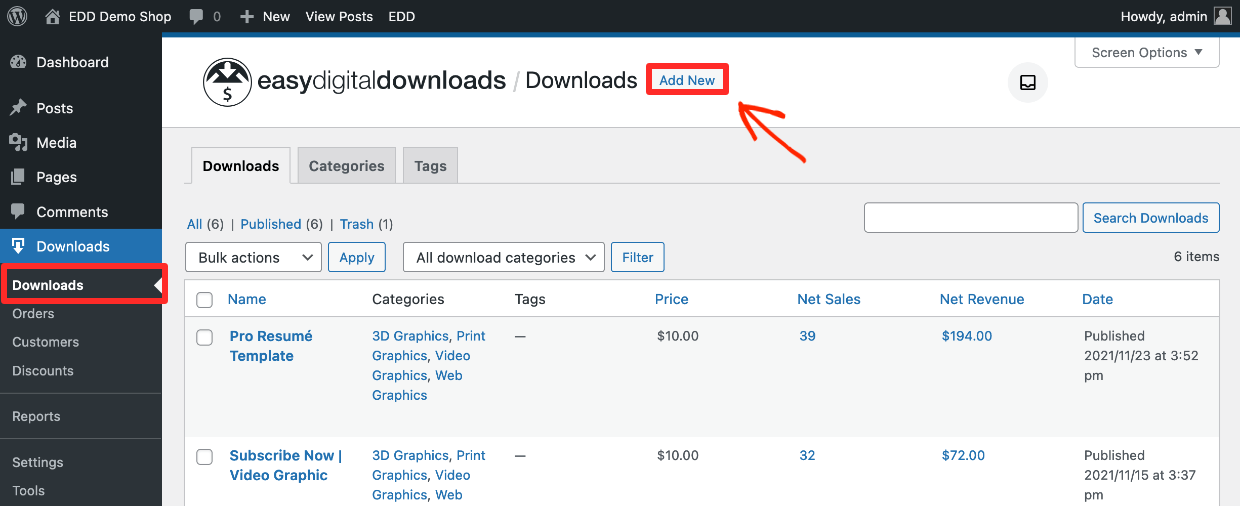
In the world of Easy Digital Downloads, the items/products you sell are called ‘Downloads’.
Click on Downloads and then the Add New to make a new one.
- Give your Download a name and description
- Add a Price
- Then, add a Download Image. Make this image look nice. The Download Image is the product image or preview image that potential customers see while browsing your store.
🌅 Click here for a guide and free templates for making nice images.
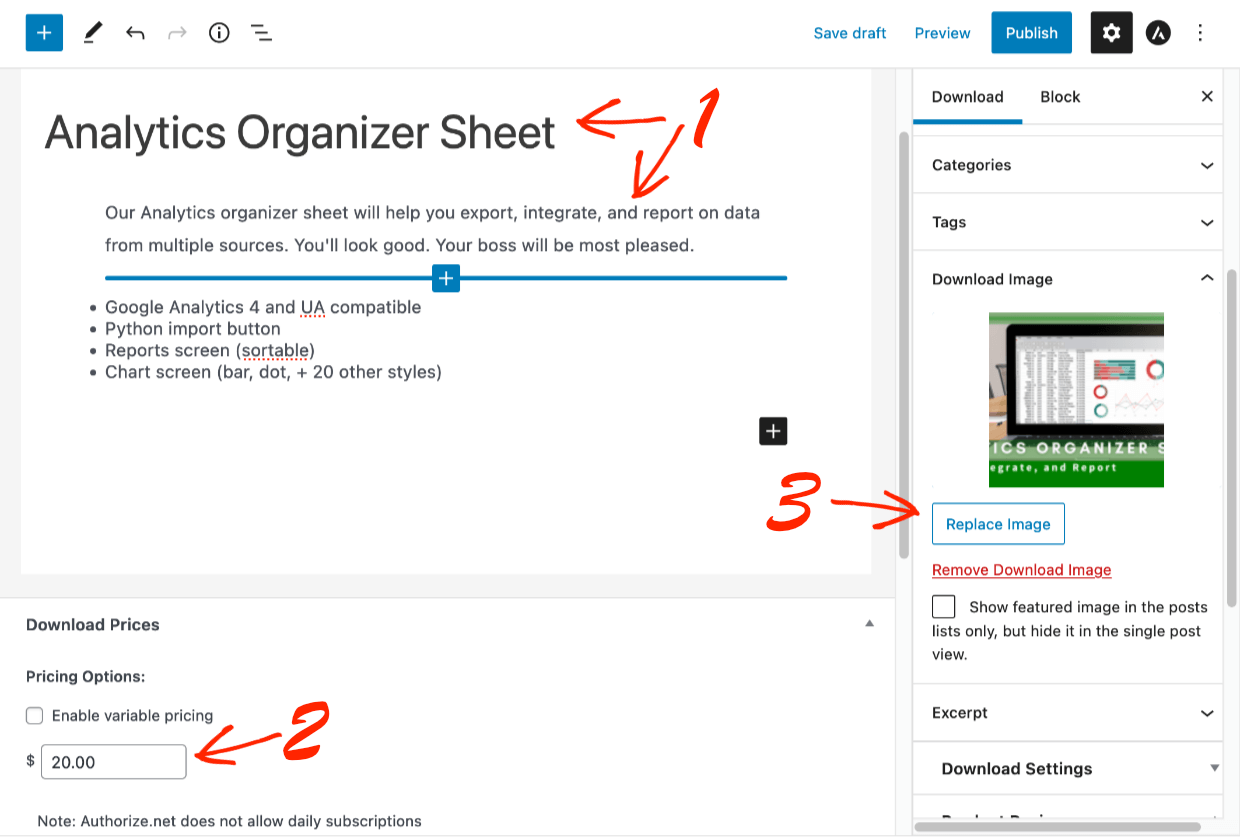
Next, configure the Download Files settings.
- Under File URL click the link icon to upload your file. This is the download file link a customer will get after purchase.
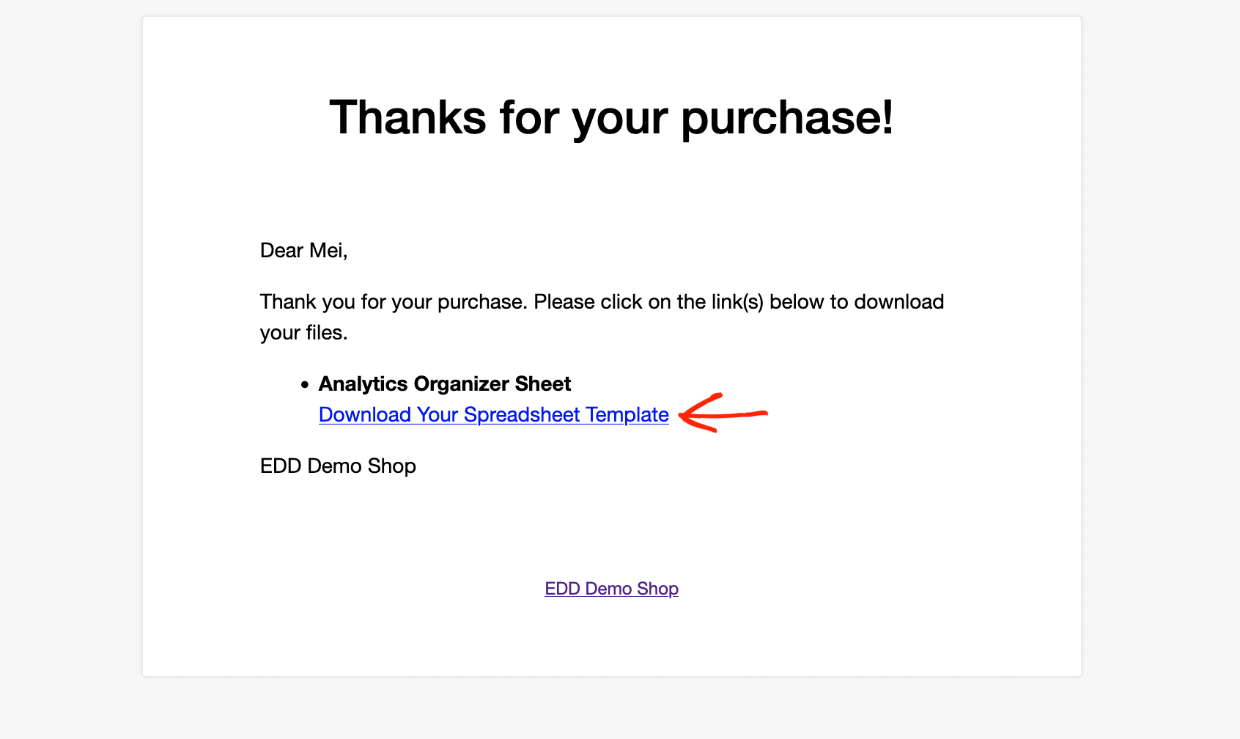
- Once you add a file the File Name will automatically be created, or, give an instruction like ‘Download Your Spreadsheet Template’. This text will be a clickable link on the purchase confirmation page and purchase receipt (more about that below).

Step 5: View the Final Result
Once you’re done click the Publish button. Then click the View Download Button.
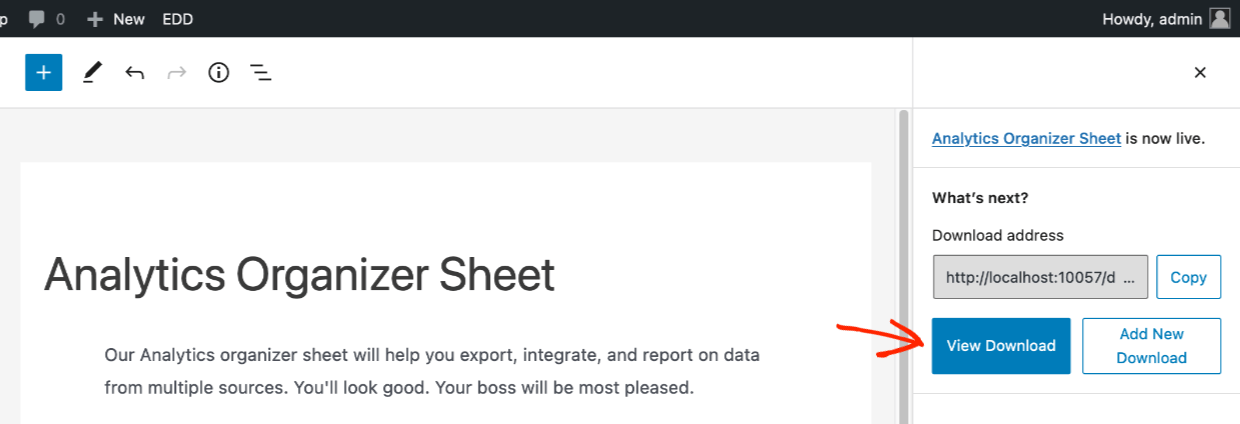
Now you’ll see the Download page or product page as the potential customers will see it. We are using the Astra theme. Your site will look different depending on your theme.
Easy Digital Downloads pages look nice with any theme. We also offer free themes and partner themes optimized for EDD.
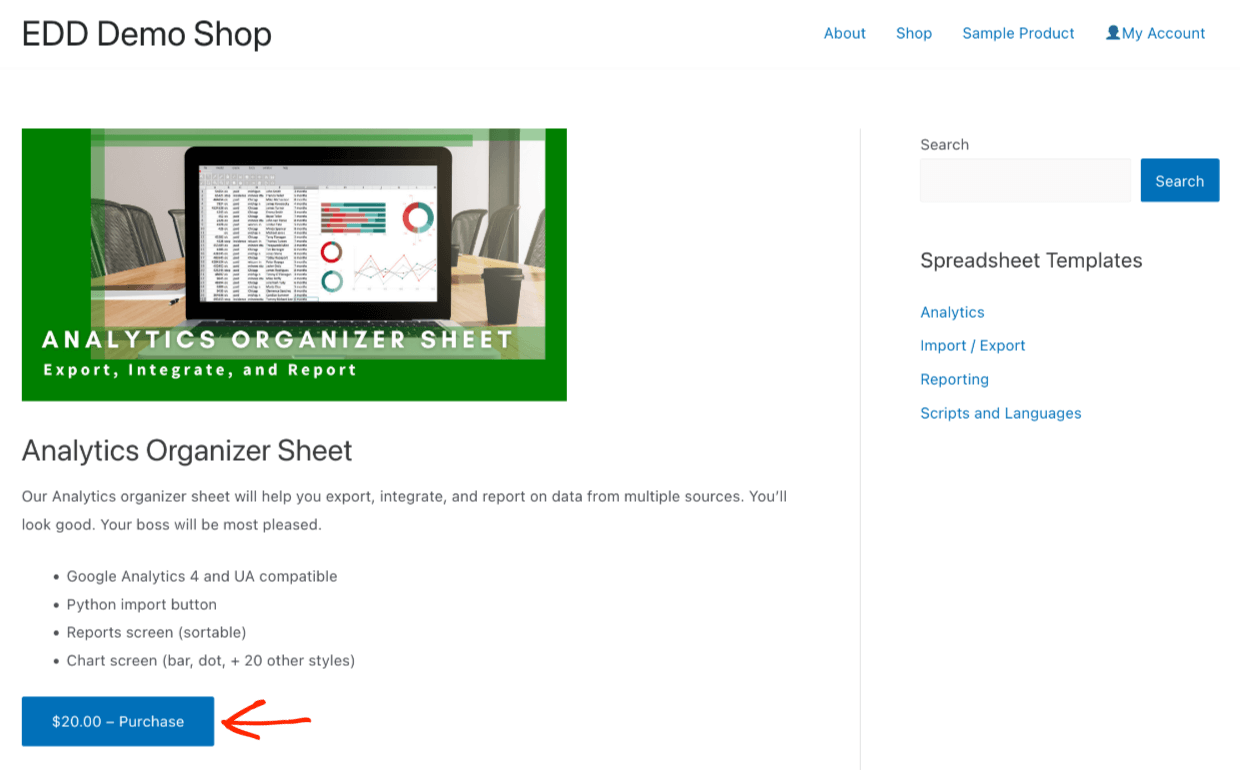
A converting customer will click the Purchase button, add to cart, and add their card details on the checkout page.
Next, they’ll be taken to a purchase confirmation page. This page summarizes the purchase and provides a download link.
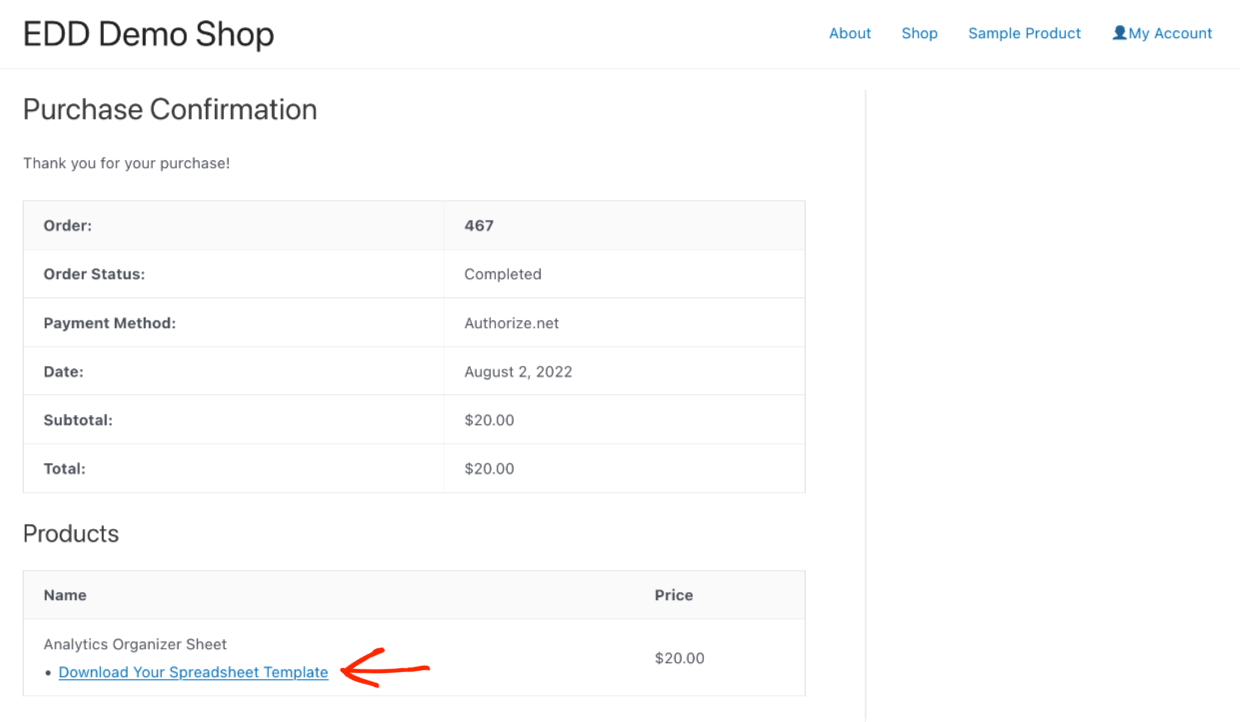
Customers will also get a purchase receipt email. This email also has a download link.
📆 Do Subscriptions with Recurring Payments
With your Extended Pass, you can easily add subscriptions with our Recurring Payments extension. Everything is fully integrated with EDD and Authorize.net. Choose from annual, monthly, or other less common interval options.
Sample Sites
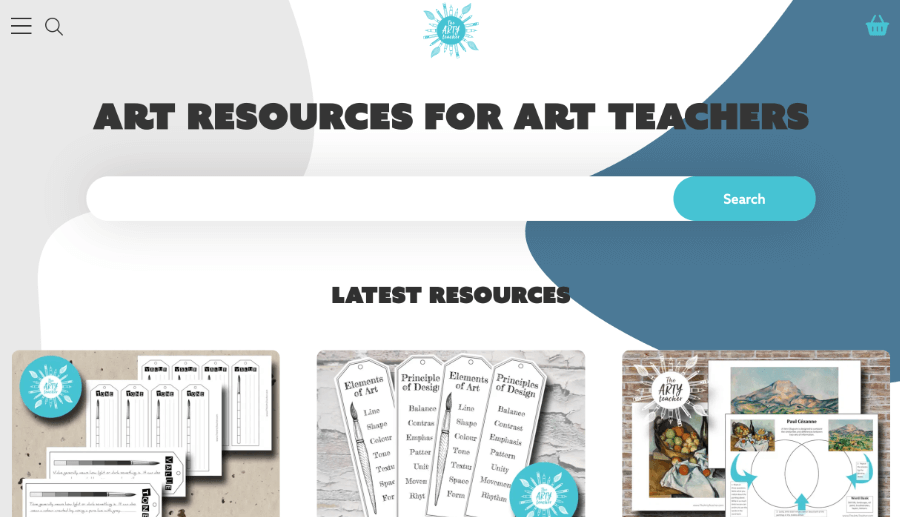
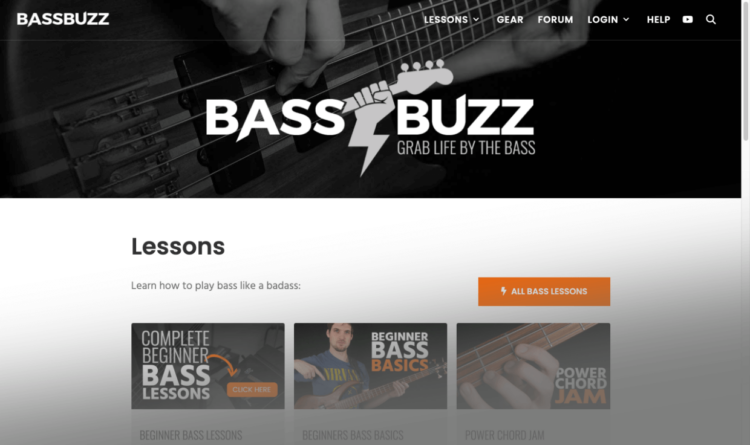
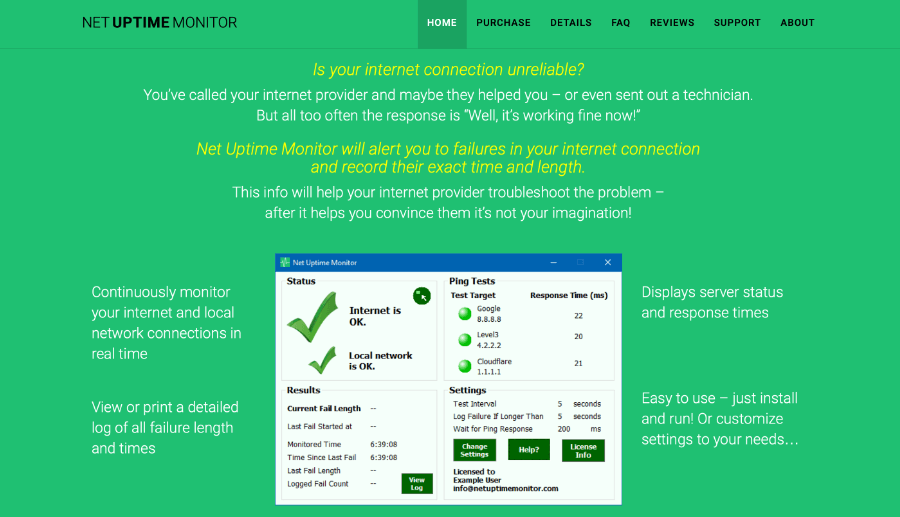
Here are a few sites using EDD to get you inspired and excited about how you can share your digital creations. Check ’em out!
The Arty Teacher
Art/Graphic Templates
Bass Buzz
Music Lessons
Mrs. Mactivity
Educational Resources

Net Uptime Monitor
Desktop Software
Requirements and Alternatives
Here is a list of each item you need to accept Authorize.net payments with WordPress.
- A web host
- A free WordPress.org website (not WordPress.com)
- A theme (check out our suggested free and paid themes for EDD)
- SSL Certificate (most web hosts now include SSL for free)
- An eCommerce plugin/solution (like Easy Digital Downloads)
- Authorize.net payment gateway (payment processing) for your eCommerce plugin/solution
- An Authorize.net account
| SSL / SSL Certificate | Secure Sockets Layer – An encryption system that protects data as its being sent between your computer and a website. It helps prevent someone from stealing personal information. Credit card companies require SSL. Check with your web host to set this up, it’s usually included, or a low-price paid option. |
TIP: What is PCI Compliance?
You may have heard this term or be wondering what it is and how it applies to you. PCI stands for Payment Cards Industry. It’s a set up standards required for those working with credit and debit cards. If your site has SSL, and you use Authorize.net for payments, all PCI compliance is handled by Authorize.net. You aren’t storing any sensitive payment information or card information on your site, it’s on Authorize.net’s servers. Learn more here.
Alternative eCommerce Solutions
What type/s of things are you selling on the internet?
Easy Digital Downloads is the best solution for digital products (aka downloads, downloadable products, or virtual products). EDD is perfect for eBooks, spreadsheets, documents, graphic templates, software, plugins, and just about anything you can imagine.
But if you’re selling other types of products, there are some other great WordPress eCommerce options.
- Selling single products, services, or accepting donations?
- WPForms is a good option. It’s the best WordPress form builder. You site already needs a good form builder for contact form and email opt-in forms. With their Pro or Elite plan you can also accept payments by making payment forms or donation forms. Elite is required for their Authorize.net addon.
- Selling Online Courses or Memberships?
- EDD is great for informal courses. Consider MemberPress if you need more formal learning with quizzes, or structured/ordered courses with prerequisites for a school or certificate program. This is often called an LMS (Learning Management System). It’s also great for news sites or any sort of membership site where content is locked behind a paywall.
- Selling physical products (like pet supplies, coffee or t-shirts)?
- WooCommerce is a powerful eCommerce store plugin for WordPress. The WooCommerce plugin trusted by millions for selling physical goods.
- We suggest BlueHost Premium Managed WooCommerce hosting as a web host, your site will be fast, secure, and they have a good support team for both your website server and WooCommerce store.
- You’ll need a WooCommerce extension to accept Authorize.net payments as well. Click here to select a WooCommerce Authorize.net plugin.
Choosing a Web Host
Read this guide for help choosing a web host. It has discount codes too!
Depending on what you are selling, here are our hosting suggestions. All of them will work with Authorize.net and include SSL.
- For Easy Digital Downloads we recommend SiteGround Managed EDD WordPress Hosting
- For MemberPress or WPForms go with Blue Host.
- For WooCommerce we suggest managed hosting with Blue Host Premium Managed Hosting
Alternative Payment Processors
You might find it easier or more convenient to use one of our other payment options. We recommend Stripe to most of our customers because of its advanced features and ease of use. PayPal is also a good option if Stripe is not available in your region.
😉 All of these payment options are included when you purchase an Extended Pass.
Conclusion
Nicely done. You’ve learned how to accept Authorize.net payments with WordPress. Best of luck with your online business. If you haven’t already, get started today!
We have many resources for digital creators like you. What do you want to learn about next?
- 📈 The Most Popular Digital Products You Can Sell Online
- 😲 The Astonishing Benefits of Selling Digital Products
- Selling Guides:
Be sure to subscribe to our newsletter or follow us on Facebook and Twitter to get our latest resources for digital creators.
Using WordPress and want to get Easy Digital Downloads for free?
Enter the URL to your WordPress website to install.
Disclosure: Our content is reader-supported. This means if you click on some of our links, then we may earn a commission. We only recommend products that we believe will add value to our readers.