Are you selling digital products online? Do you want to increase sales? Of course you do!
One proven way to increase sales is to create discount codes (aka coupon codes or promo codes). Discount codes have a way of nudging potential customers into making a purchase.
In this article we’ll show you how to easily create and manage discount codes with your WordPress site.
🎟 Let’s do it! Skip around if you’d like to:
- Get Started Now
- Do More With Discount Codes
Step 1: Install Easy Digital Downloads
The best way to sell digital products with WordPress is Easy Digital Downloads (EDD).

EDD is purpose-built to make it simple to sell digital products (aka downloads, downloadable products, or virtual downloads). With just a few clicks your WordPress site will become a full-featured eCommerce store.
Most other eCommerce solutions have two major downsides:
- They are not built, first and foremost, for digital products. They have shipping, logistics, and inventory tools you don’t need. And they may lack the file protection you do need (or require addons).
- Marketplace options come with high fees. The more you make, the more they take. And your product is surrounded by competitors, which leads to low pricing pressure.
With EDD you can sell unlimited products, control the user experience, and have all the features needed for selling digital products without slowing your site or workflow down with the features you don’t need.
1️⃣ Choose the Easy Digital Downloads Pass that’s right for you. You can pay for just the features you want now, and add features as you grow, any time you want. You have full control!
2️⃣ Install EDD on your WordPress dashboard under Plugins » Add New.
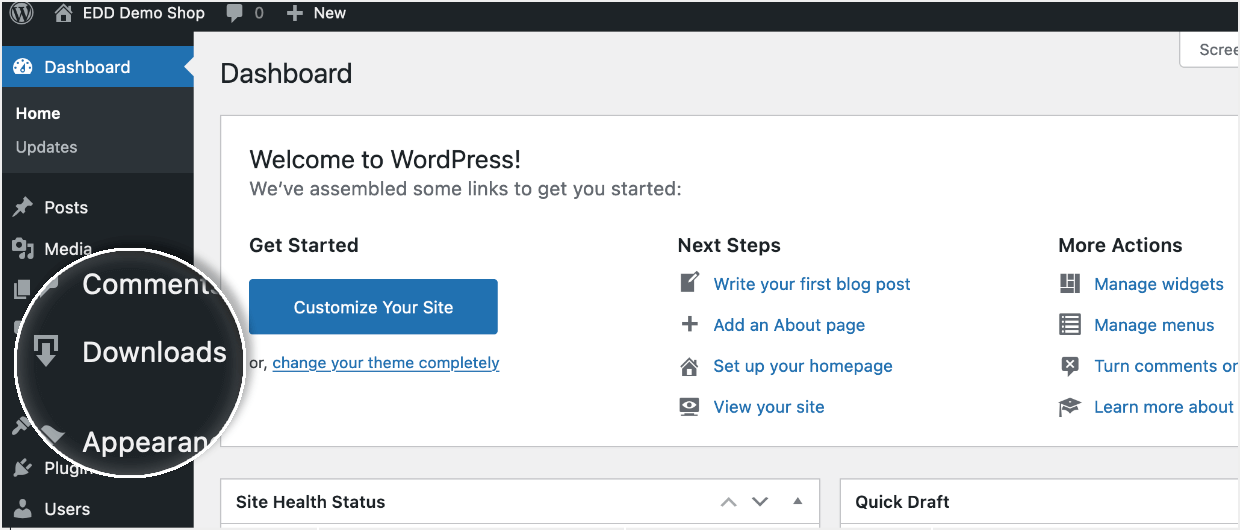
Once you have installed EDD you’ll have a new menu item on the left side of your WordPress dashboard called Downloads. Here you manage your store, add products, and create discount codes.
Step 2: Create A Discount Code
It’s super simple to create and manage discount codes with EDD. You don’t need to leave your WordPress dashboard. There are detailed controls and lots of options if you need them.
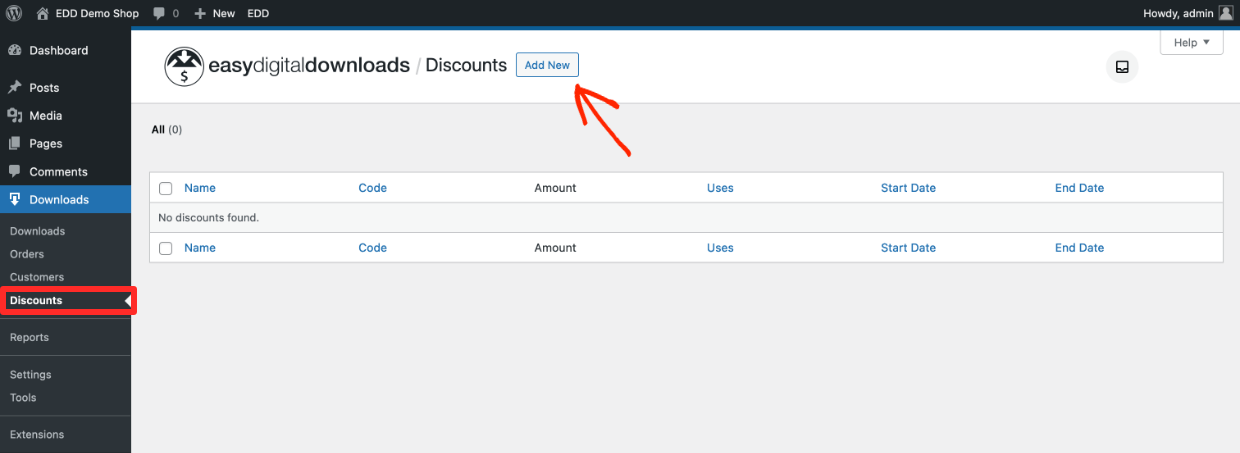
First navigate to Downloads » Discounts, then click Add New.
- Give your Discount a Name
- Create an official alphanumeric Code that has to be provided by the potential customer
- Select an Amount, either flat rate off or a percentage

Once you have those filled in click the Add Discount Code button. That’s it! You have a discount code. It’s ready to go. Visitors to your site can use it an unlimited number of times, on any/all products, forever. Too broad? We have lots of options and controls.
Discount Code Optional Controls
You can customize and limit your discount codes however you want. Use them just how you need them.
- Download Requirements – limit the discount code just to certain products. Simply click and add products from a dropdown. If you leave this blank, all products can have this discount code applied to it.
- Excluded Downloads – add products via a dropdown to exclude them from this discount code.

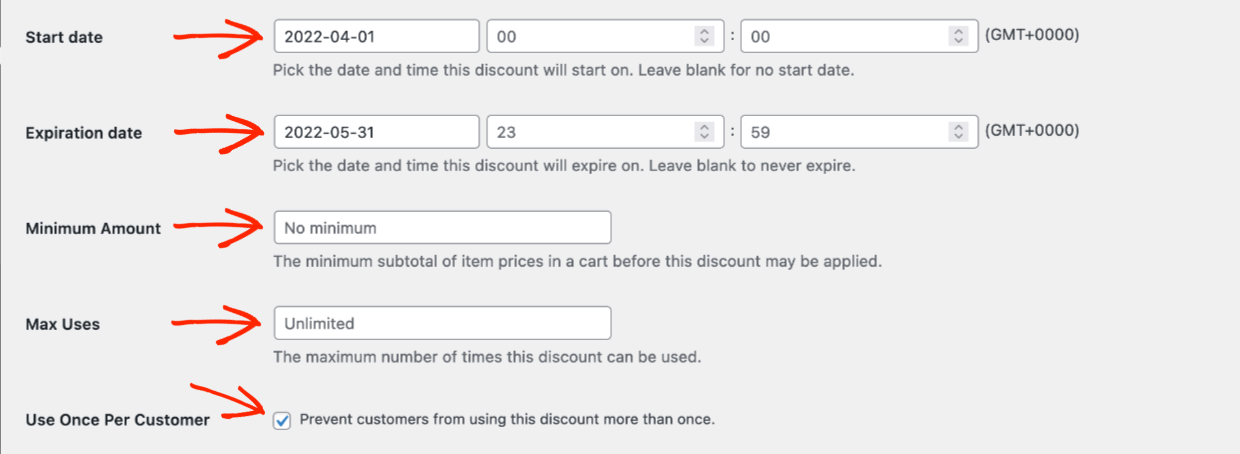
Select a Start Date and Expiration Date with a date selector.
Set a Minimum Amount if you want to require customers to spend a certain amount of money before being eligible to use the discount code.
You can set the Maximum Uses if you want to do a campaign like “the first 15 customers can get 25% off”. This is a site-wide setting, not a per-visitor setting.
Check the Use Once Per Customer box to only allow customers to use the discount code one time. This is a popular option and we recommend using it for most cases. You’ll end up losing too much revenue and not be able to track the source of the customer if anyone can use it multiple times.
Set a discount code as active or inactive at any time on the Status dropdown. You can also do this on the Discounts listing page.
Last, you can add internal Discount Notes for team members to any discount code. You’ll be able to see the date the note was created and who wrote it.
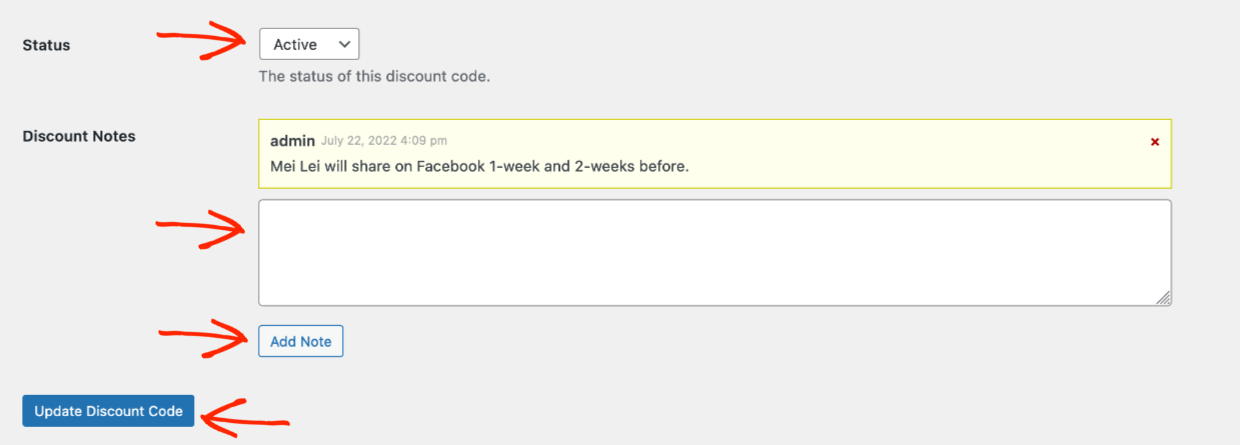
Be sure to save the discount by clicking Add Discount Code (or Update Discount Code, if it was already saved).
EDD’s Discounts features is there to help you get website visitors excited, to ‘get them off the fence’, and covert them to customers.
⬇️ Next, we’ll give you a quick overview on adding items to sell on your store.
Step 3: Create A Download
We call the products you sell on your Easy Digital Downloads store “downloads”. It’s easy to add downloads to sell on your store. Product/Download pages are created automatically when you follow these steps.
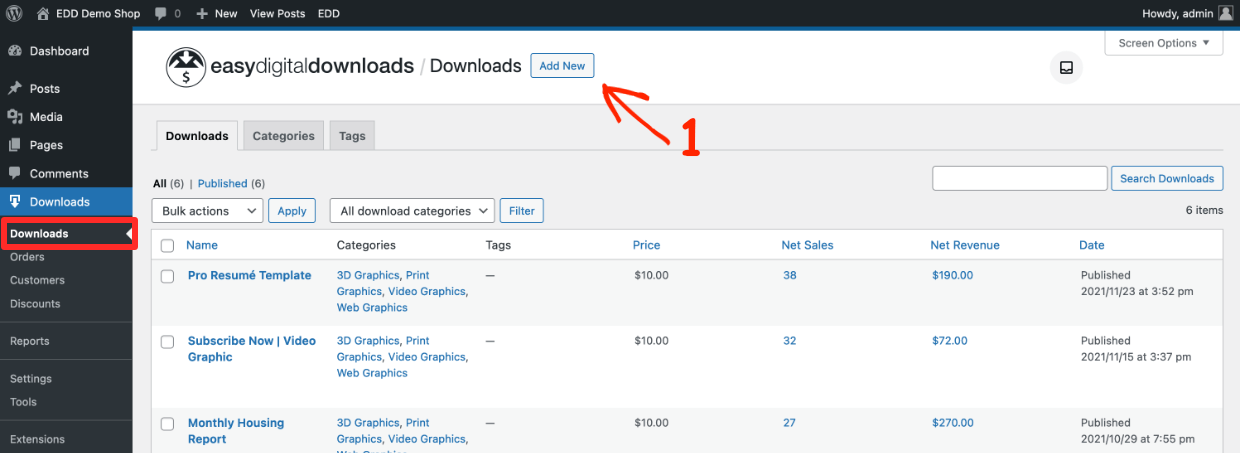
1: Go to Downloads and click Add New
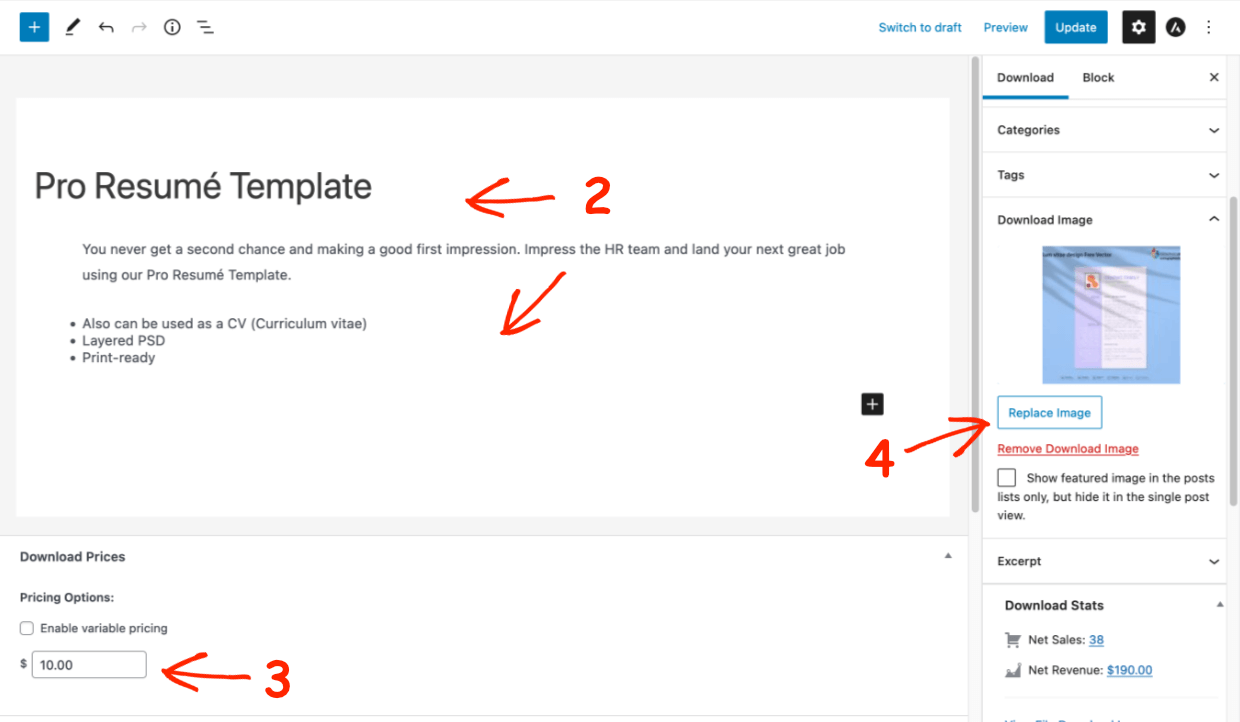
2: Give your new download a name and description
3: Apply a price
4: Add a Download Image. This is the images potential customers see while shopping. Be sure its nice and fancy. Here’s a guide to making images with free templates.
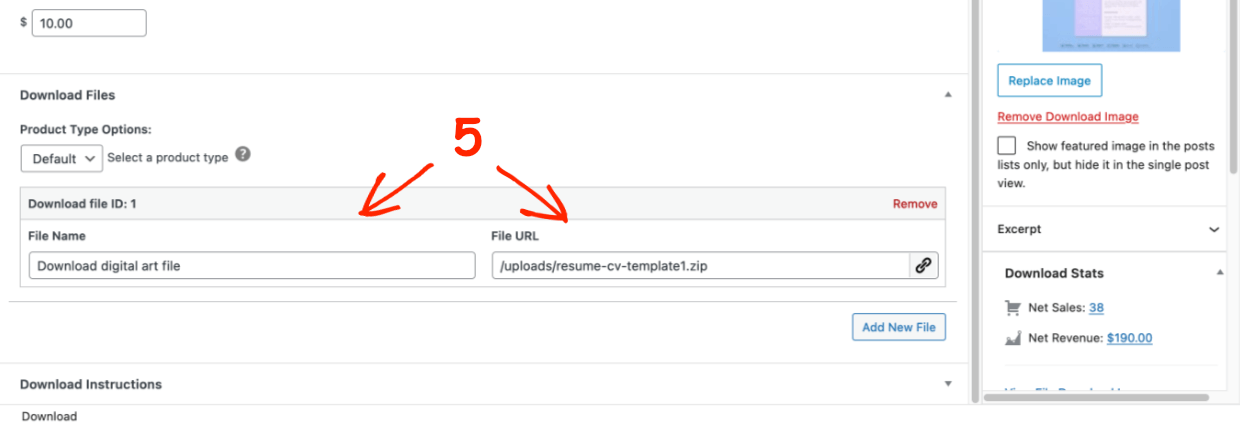
5: Configure the Download Files settings;
- The File Name is the clickable link new customers will get upon purchase
- The File URL is the location of the file. Click the chain-link icon to upload the product file from your computer. We recommend selling files as ZIP files.
When you’re done, be sure to click Publish
🔍 Click here for a more detailed guide on setting up downloads
🔍 Learn how to import lots of products at once with a CSV
Set Up a Payment Method
After you have set up your download/s you need to provide a way to pay online for your customers. We recommend using Stripe. You’ll love using Stripe for its powerful features and ease of use. You don’t have to leave your WordPress dashboard.
If Stripe is not available in your country, PayPal is our next recommendation. We also offer integrations with many other popular payment gateways.
Step 4: View the Results
After publishing your Download click the View Download button on the upper left.

You’ll see the ‘product page’ or what we call, the download page. This is what your potential customers will see.
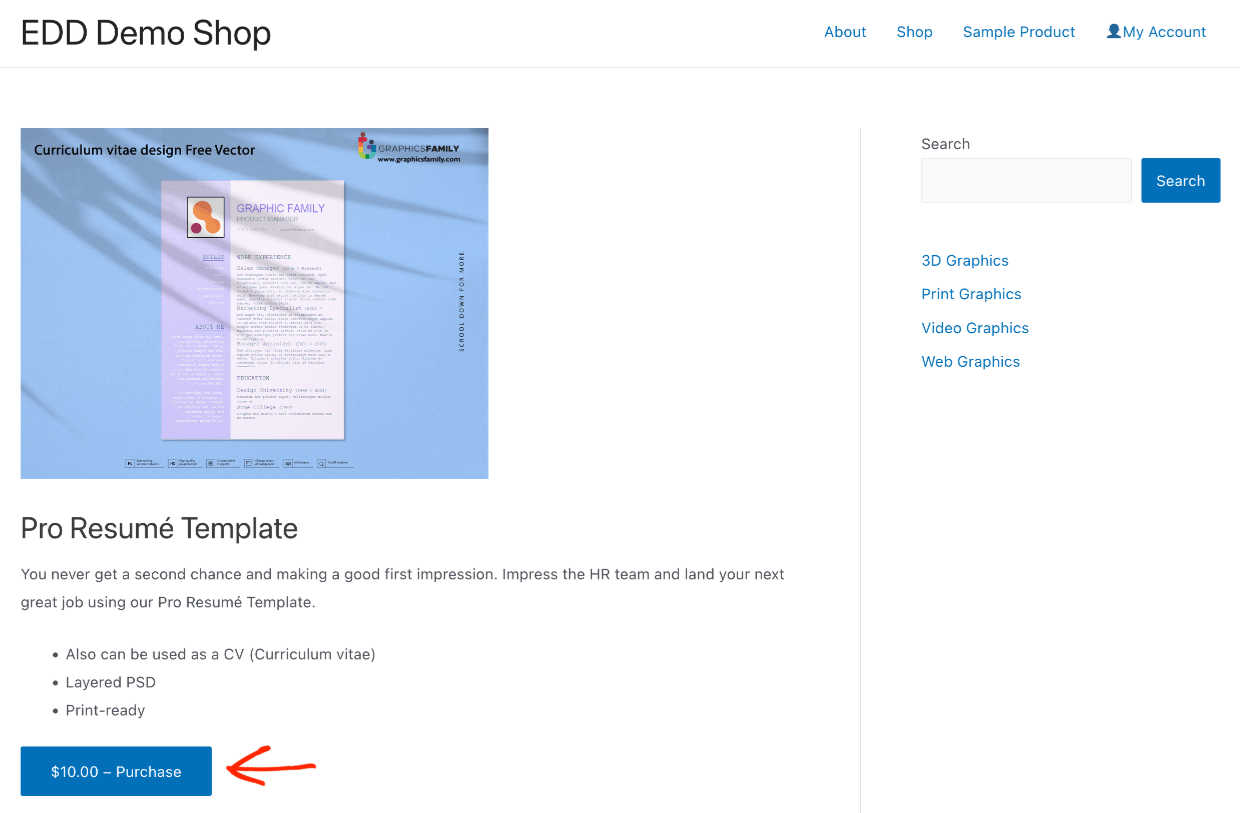
Customers click ‘Purchase‘, add the item to their shopping cart, and complete their purchase.
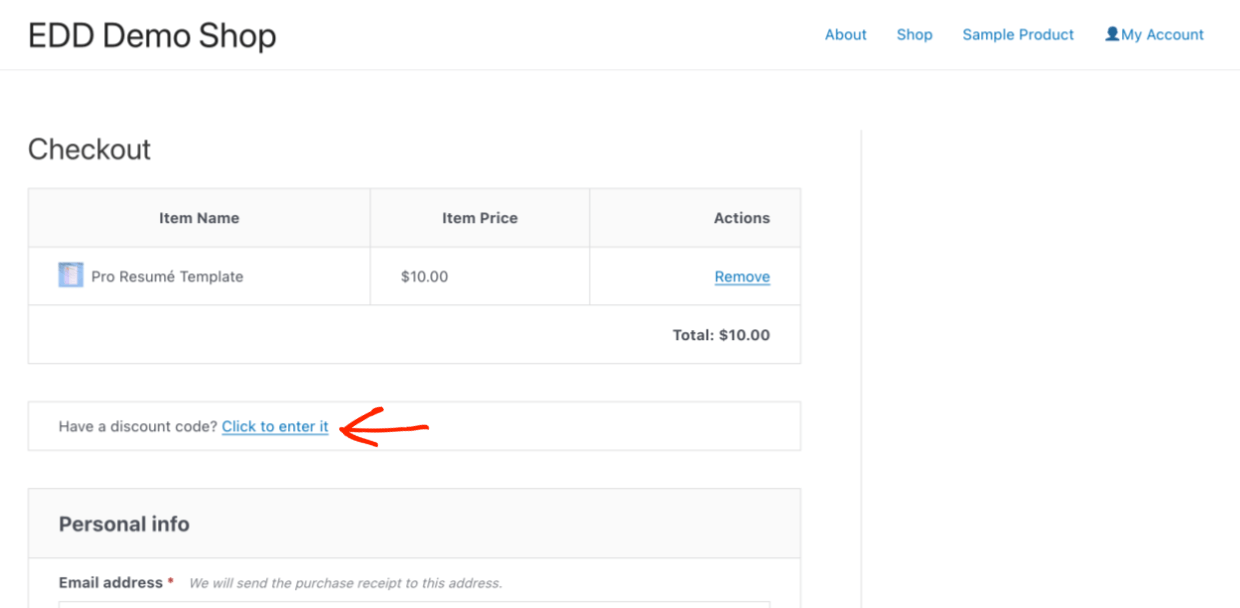
Customers enter their discount code where it says “Have a discount code? Click here to enter it“. Then they hit Apply.
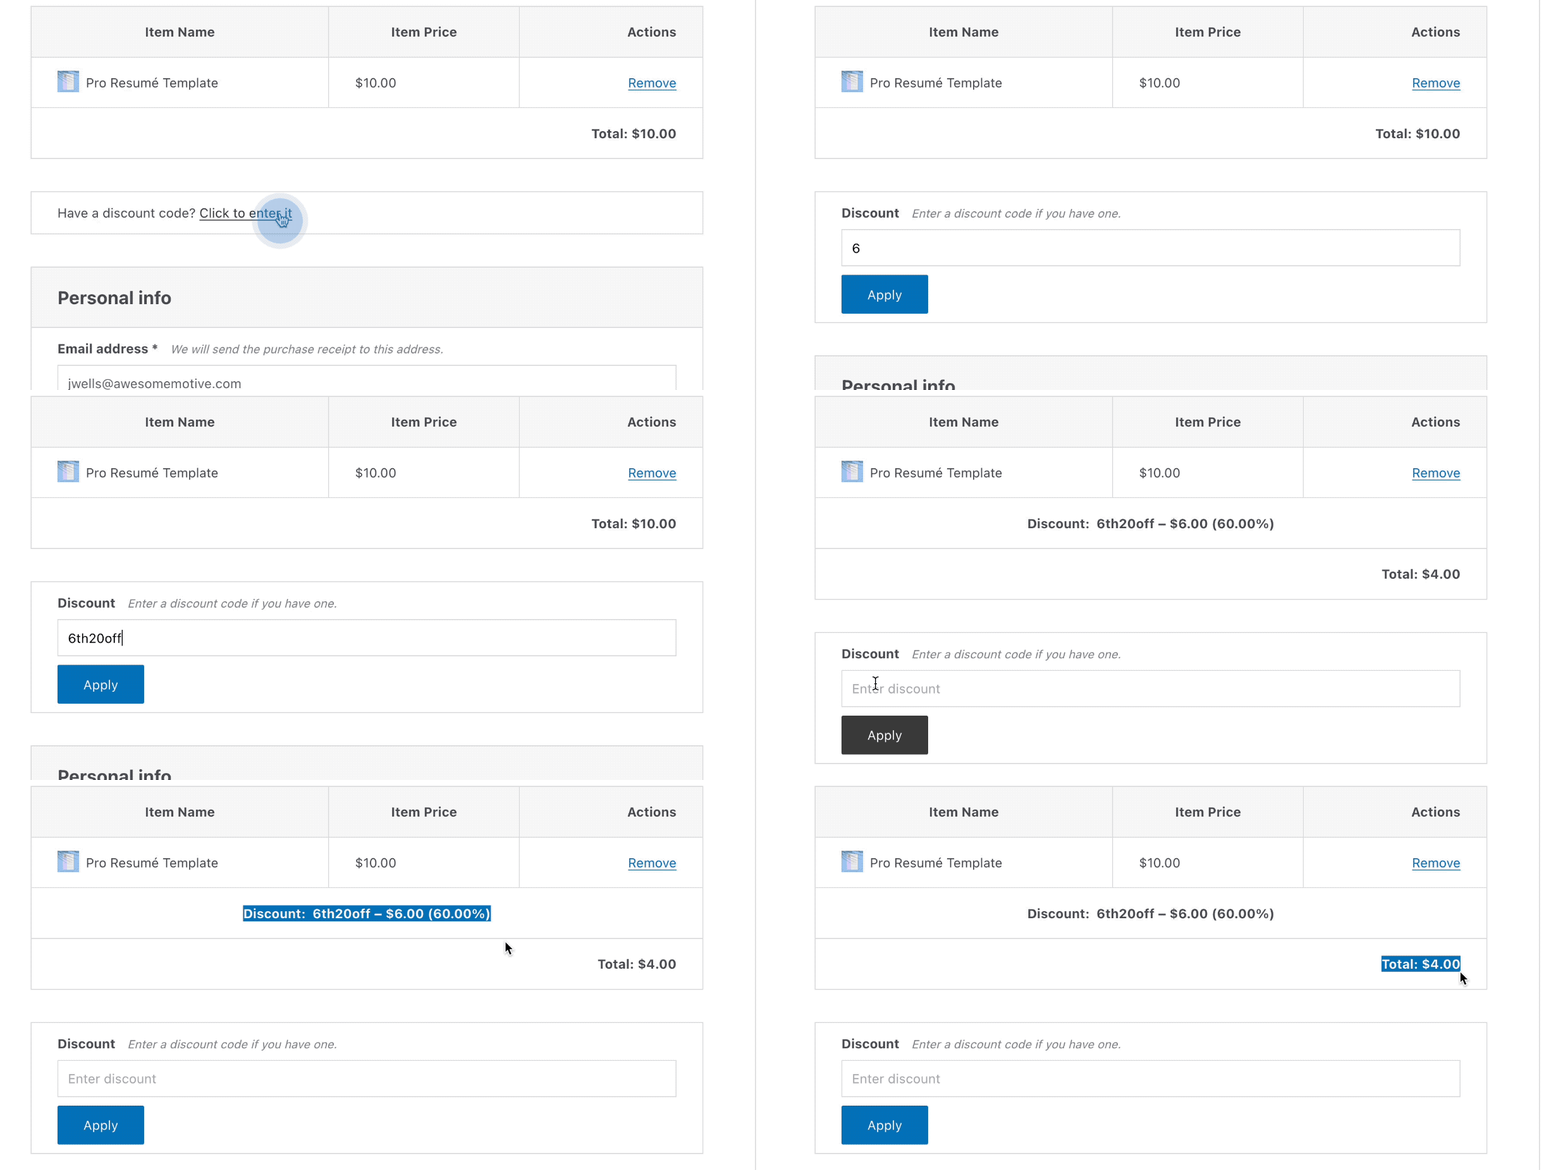
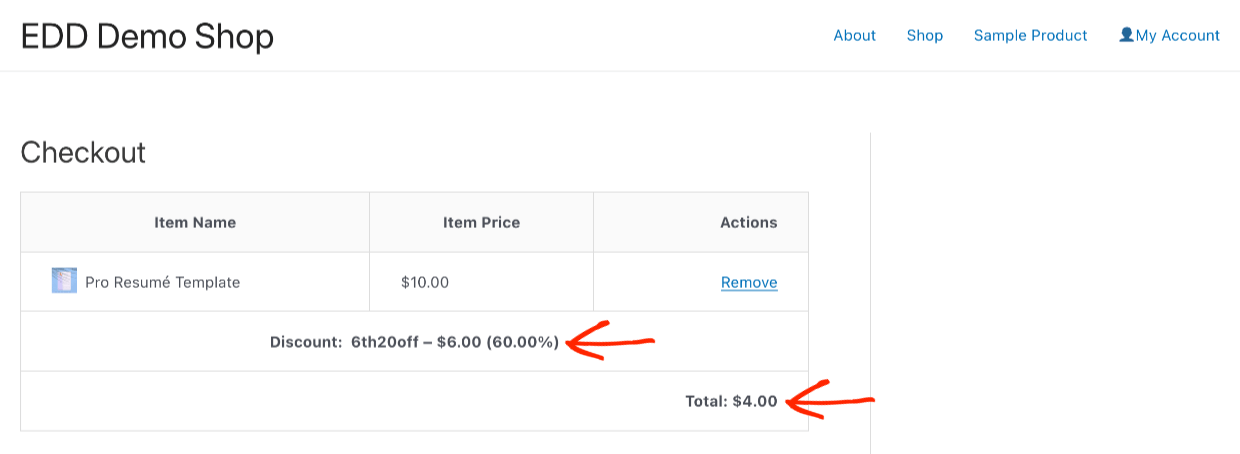
The EDD checkout page automatically calculates the new price and lists the discount code and new total.
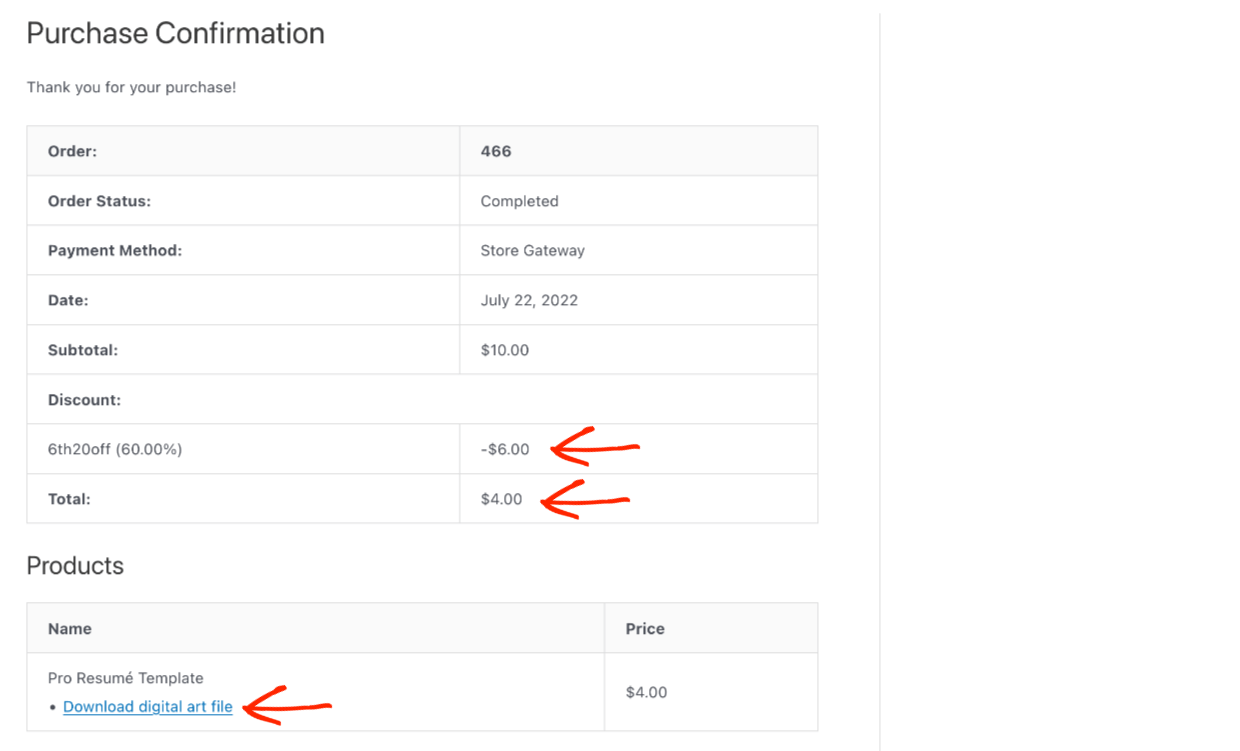
After purchase, customers are taken to their purchase confirmation page. Here they will see information about the discount code used as well as a link to download their new product.
Customers will also get a purchase receipt email. This email with thank them for the purchase and include a link to download the product.
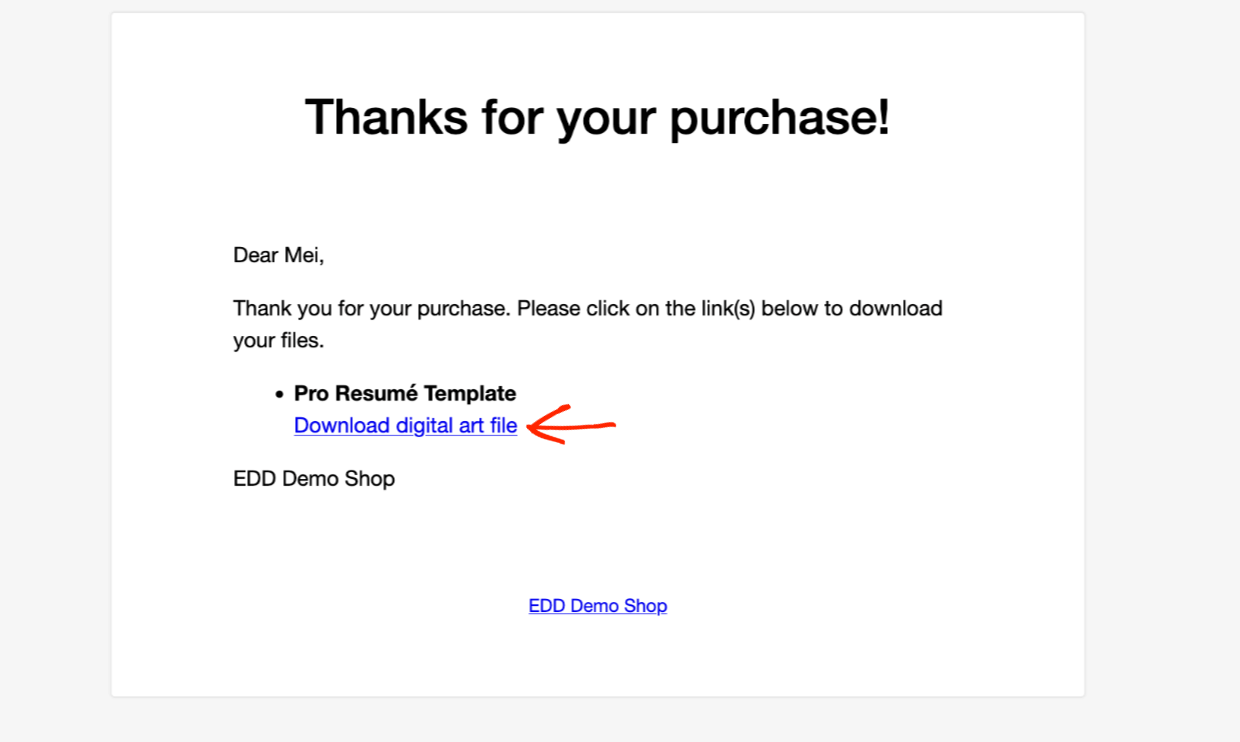
These links are protected from unauthorized downloads. They cannot be found via Google or Bing searches. They automatically expire to prevent piracy.
🔎 Click here to learn more about link expiration and customize the settings
Do More With Discount Codes
Easy Digital Downloads can help you do even more with discount codes with our extensions.
Give special discounts to buyers who share your products on social networks.
Automatic discounts at checkout based on pre-defined conditions
Import coupons via CSV in Easy Digital Downloads.
Allow third-party sites to display your current discounts through a simple widget!
Allows site admins to generate discount codes in bulk and then export them directly to CSV
Grab an All Access Pass to get access to all of our discount extensions and more than 90 other advanced features.
Conclusion
Nicely done. You’ve learned how to create and manage discount codes with WordPress. This can help you make more sales on your website.
We have plenty more resources for digital creators like you. What else do you want to learn about today?
- 📈 The Most Popular Digital Products You Can Sell Online
- 😲 The Astonishing Benefits of Selling Digital Products
- 🚛 How To Bulk Import / Export Digital Products (+ Free CSV Template)
- Selling Guides:
Be sure to subscribe to our newsletter or follow us on Facebook and Twitter to get our latest resources for digital creators.


